Table of Contents
Advertisement
INSTALLATION
MANUAL
Split Duct Air Conditioner
Digital Scroll and DC/AC Inverter Commercial Air-conditioner
The Digital Scroll and DC/AC Inverter share the same indoor units.
Thank you very much for purchasing our air conditioner,
Before using your air conditioner, please read this manual carefully and keep it for future reference.
Advertisement
Table of Contents

Related Manuals for Midea Split Duct Air Conditioner


Summary of Contents for Midea Split Duct Air Conditioner
- Page 1 INSTALLATION MANUAL Split Duct Air Conditioner Digital Scroll and DC/AC Inverter Commercial Air-conditioner The Digital Scroll and DC/AC Inverter share the same indoor units. Thank you very much for purchasing our air conditioner, Before using your air conditioner, please read this manual carefully and keep it for future reference.
-
Page 2: Table Of Contents
CONTENTS PAGE Disconnect the power supply before cleaning and maintenance. INSTALLATION PRECAUTION..............1 INSTALLATION PLACE................1 2. INSTALLATION PLACE ACCESSORIES..................2 INTDOOR UNIT INSTALLATION ..............2 Indoor Unit INSTALLATION SPACE................10 ● Enough room for installation and maintenance. REFRIGERANT PIPE................10 DUCT DESIGN..................11 ● The ceiling is horizontal and it can afford the weight of the indoor INSTALL THE CONNECTING PIPE............13 unit. -
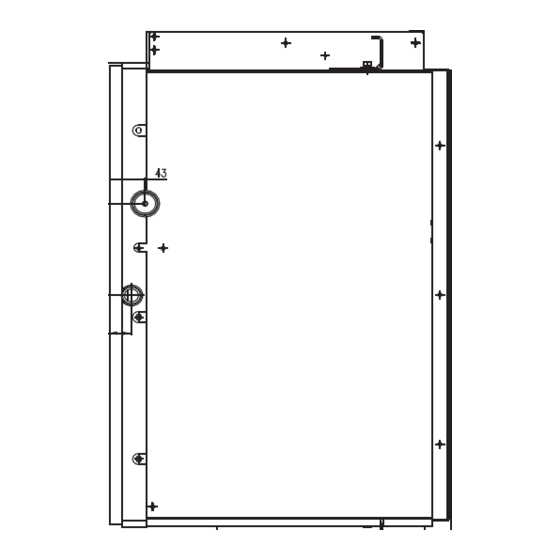
Page 3: Accessories
NOTE Mounting screw Remark per EMC Directive 89/336/EEC For to prevent flicker impressions during the start of the compressor (technical process), following installation condi- tions apply. Remote Remote controller ● The power connection for the air conditioner has to be done controller holder at the main power distribution.The distribution has to be of... - Page 4 For original concrete bricks Use embeding screw bold, crock and stick harmness (refer Fig.4-3) Steel bar Embedding screw bolt (Pipe hanging and embedding screw bolt) Fig.4-3 Steel roof beam structre Install and use directly the supporting angle steel. (refer to Fig.4-6 Fig.4-4) Hanging screw bolt...
- Page 5 The positioning of ceiling hole and indoor unit and hanging screw bolts Unit: mm routine method of installation: the size of installation for indoor unit following the Fig.4--9 and Fig.4-10 7.1~11.2KW/h PLASTIC COVER ELECTRICAL CONTROL AIR INTAKE 4-12*25 OBLONG SUSPENTION BOLT HOLES CONNECTING POINT OF DRAIN PIPE REFRIGERANT-PIPE FLANED...
- Page 6 The method of installation: Adopt following method if the air-conditioning’s size of installationsite is limited and the indoor unit can’t put into the installtionsite. 7.1~11.2KW/h Fig.4-11 Position A Water Tray Position B 11-Screw Safety Drain Tray Fig.4-12 1. The whole unit status show as Fig.4-11 screw 2.
- Page 7 maintenance of motor maintenance of motor: : 4 Bolts For fixing the fan assembly FIiler Fortified panel Motor Asseembly 4 Screw For fixing the reinforced panel Safety Drain Tray 11-Screw For fixing the satety drain tray Fig.4-13 Inside of structure Front view of fan assembly installation state Side view of fan assembly installation state...
- Page 8 14~16kw/h Fig.4-15 Position A Water Tray Position B 12 Screw For fixing the safety drain tray Safety Drain Tray Fig.4-16 1. The whole unit status show as Fig.4-15. screw 2. Remove the all 1 1 from fixed Safety Drain T ra y , and then take o f f the tray as figure showed in Fig.4-16. 3.
- Page 9 maintenance of motor: 4 Bolts Filter For fixing the fan assembly Motor Assembly Safety Drain Tray 12-Screw For fixing the satety drain tray Fig.4-17 Inside of structure Front view of fan assembly installation state Side view of fan assembly installation state Pothook Scroll Move 18mm...
- Page 10 20KW/h 25KW/h 28KW/h 1121 Entrances and exits for communication lines of indoor and outdoor Air outlet 4-12*25 oblong 1443 suspention bolt holes Electrical parts box 4-Φ10 hanging screw Air outlet (configure on spot) duct flange Connecting point Refrigerant-pipe flared of drain pipe connectionΦ9.52(3/8) Air intake duct flange...
-
Page 11: Installation Space
The indoor unit show as Fig.4-20 NOTE Following Fig.4-21 twist-off the screws, along the direction of A During teardown and installation, the scroll was allowed direct get off the cover plate A and cover plate B. support by hand Dismounting bolt A Fan subassembly is more weightiness, please take careful Dismounting bolt C during teardown and installation, and keep from hurt by fan... -
Page 12: Duct Design
7. DUCT DESIGN Cover the pipe before connecting to keep rubbish, dust or other impurities out. (50hz) 7.1/8.0KW/h As there is no dust filter on the indoor unit, other places which are easy to maintaining such as inhalant duct should be installed with dust filter. - Page 13 (50Hz) (60Hz) 14KW/h 14KW/h (60Hz) 16KW/h High speed Midium speed High speed Low speed Midium speed Low speed 1500 2000 2500 3000 3500 4000 4500 5000 5000 1000 4000 4500 5000 Fig.7-11 1000 1500 2000 2500 3000 3500 5500 Fig.7-7 (50Hz) 16KW/h ●...
-
Page 14: Install The Connecting Pipe
NOTE NOTE The signal wire of the remote control receiver must be drawn Connect the remote control receiver with the indoor unit signal out through the canvas air passage. wires and fix it. ● Fix the outside frame and the canvas air passage with screws. ●... -
Page 15: Refrigerant Pipe Connection
Then expose the pipe(cover it with tapes after bending). ● To prevent collapsing of deforming, please bend the pipe at its ● biggest radius. ● Use bender to get a small radius pipes. lean crude burr Use the market brass pipe. Be sure to use the same insulating materials when you buy the brass pipe. -
Page 16: Connect The Drain Pipe
Table.9-2 Manifold valve Tubing size Torque Pressure meter Multi-meter Φ6.4mm 14.4~17.2N.m -76 cmHg 32.7~39.9N.m Φ9.5mm Hi-lever Lo-lever 49.5~60.3N.m Φ12.7mm Charge hose Charge hose Φ15.9mm 61.8~75.4N.m Φ19.1mm 92.7~118.6N.m Fig.9-5 Vacuum pump Lo-lever Fasten the nut ● Put the connecting tubing at the proper position, wrench the nuts with hands then fasten it with a wrench. -
Page 17: Wiring
Put as deep as possible (about 10mm) OUTDOOR UNIT (P、Q、E) INDOOR UNIT INDOOR UNIT INDOOR UNIT INDOOR UNIT ..(X、Y、E) (X、Y、E) Downward declivity VP30 (P、Q、E) lower than 1/100 (X、Y、E) Fig.10-2 CENTRAL CONTROL MONITOR (CCM) Caution: While connecting the drain pipe, please use the drain pipe con- nect to the secondary water holder simultaneously, for avoiding (F 、F... -
Page 18: Control
Network Address Setting INDOOR UNIT YELLOW/GREEN When V4+ outdoor unit set the code to be found address automatically, the new V4+ indoor unit do not need to set the indoor unit address, at this time the V4+ outdoor unit will distribute different addresses for indoor units automatically. -
Page 19: Trouble Shooting
● For 200T1 unit, two mainboards in the electric control should set the code ENC1 to 8; SW 2 Difinition 00 means shutting down the unit ● For 250T1 unit, a mainboard in the electric control should to “stop cold air” at 15℃ set the code ENC1 to 8;... -
Page 20: Install Electric Throttle Part
16. TEST OPERATION Infrared signal receiver Temporary button The test operation must be carried out after the entire installation has been completed. Please confirm the following points before the test operation: ● The indoor unit and outdoor unit are installed properly. Operation lamp Timer indicator Alarm indicator...
Need help?
Do you have a question about the Split Duct Air Conditioner and is the answer not in the manual?
Questions and answers