Table of Contents
Advertisement
Advertisement
Table of Contents

Related Manuals for GAYLORD ELX SERIES


Summary of Contents for GAYLORD ELX SERIES
-
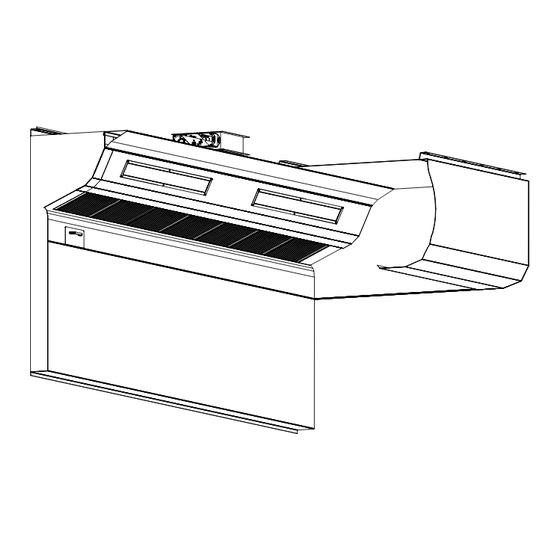
Page 1: Installation Manual
Rev 05 OPERATION, MAINTENANCE & INSTALLATION MANUAL “ELX” And “ELX-UVi” SERIES VENTILATORS GAYLORD INDUSTRIES 10900 S.W. AVERY STREET - TUALATIN, OREGON 97062 U.S.A. email: info@gaylordventilation.com - 800-547-9696 - FAX: 503-692-6048 www.gaylordventilation.com... - Page 2 All rights reserved. No part of this book may be reproduced, stored in a retriev- al system, or transmitted in any form by an electronic, mechanical, photocopy- ing, recording means or otherwise without prior written permission of Gaylord Industries. ©Copyright 2012, Gaylord Industries...
- Page 3 To Our Customers: Congratulations on your recent purchase of a Gaylord Model ELX Series Ventilator. We are proud to be able to provide you with a quality product that exemplifies our long standing dedication to quality engineering and manufacturing.
- Page 4 Page iv This Page Intentionally Left Blank...
-
Page 5: Table Of Contents
Chapter 1 – Introduction Introduction ..……………………………………………………………………………………………………………………. Model Description …………………………………………………………………………………………………………….. Model Number Explanation ………………………………………………………………………………………………. Chapter 2 – Principles of Operation EL and ELX Series Turning on the Exhaust Fan ………..................Turning off the Exhaust Fan ………………….…….…………………………………………………………………… Cleaning the Ventilator ……………………………………………………………………………………………………… Fire Protection ……………………………………………………………………………………………………………………... - Page 6 Page vi Table of Contents – Cont. Chapter 6 - Parts Parts - Ventilator ........................Parts – UV Ventilator …………………………………………………………………………………………………………. Parts – UV Lamp Module …………………………………………………………………………………………………… Parts – UV Ballast Box ……………………………………………………………………………………………………….. Chapter 7 – Wiring Diagrams Wiring Diagrams ……………………………………………………………………………………………………………….. Appendices Installation Requirements ………………………………………………………………………………………………….
-
Page 7: Chapter 1 - Introduction
Operation, Maintenance and Installation Manual for the Gaylord Command Center and Wash Control Cabinet. 2. ELX and ELX-UVi Series Ventilators installed in the United States all include a Gaylord Autostart Control. In some instances Ventilators installed outside the United States will include an Autostart Control. -
Page 8: Model Description
Model Description OVERVIEW The Gaylord Model EL Series Ventilator uses a Listed baffle filter and the ELX uses a Gaylord Model XGS high grease Extractor. The Model ELX-UVi Series includes the additional feature of an Ultraviolet Light System that removes up to 99% of the grease particulate. -
Page 9: Model Number Explanation
Model Number Explanation Model Number Sequence Gaylord Ventilator model numbers are made up of an alphabetic prefix followed by a series of alphabetic and/or numeric suffixes to designate the style of ventilator and various options. Sequence of model numbers is as follows. - Page 10 A …………………….. Hood to have an apron, which will terminate at the bottom lower edge of the canopy. (No interconnecting drains). UW …………………. Gaylord UDS to be incorporated into capture wall. (Mixed Intertek and UL listing required). 6. Front Canopy Profile Option Blank ………………...
-
Page 11: Chapter 2 - Principles Of Operation
Ventilator or it may be mounted on the face of the Ventilator. Note 1: The EL and ELX Series Ventilator may be equipped with a Gaylord Electric Balancing Damper, designated “GEBD” in the Ventilator model number, or a Gaylord combination Fire Damper/Balancing Damper, designated “GFBD”... -
Page 12: Turning Off The Exhaust Fan
To turn off the exhaust fan flip the fan switch to the off position Note 1: If the Ventilator includes a Gaylord Autostart Controller the exhaust fan will stay on if the temperature at the duct collar is above 90°F. Once the temperature drops below 90°F., the fan will continue to run for 60 minutes and then shut off. -
Page 13: Cleaning The Ventilator
Fire Protection Fire Damper The EL and ELX Series Ventilator may be equipped with a combination Gaylord Fire Damper/Balancing Damper, designated “GFBD” in the Ventilator model number. If equipped, a 250°F. thermostat will be mounted at the entrance of the exhaust duct collar (refer to Figure 2-3-1). In the event or a fire and the thermostat reaches 250°F., the following will occur:... - Page 14 If the Fire Extinguishing System is wired to a building management system it will notify of a fire condition. The Fire Extinguishing System should be wired to the Gaylord fan control. If is the following will occur: If the exhaust and supply fan were on the exhaust fan would stay on and the supply fan would shut off.
-
Page 15: Elx-Uvi Series
Caution: Never operate the Ventilator without the XGS extractors in place. Refer to Figure 2-5-2. Operation of the exhaust fan and UV Lamps is controlled by the Gaylord Command Center (refer to Figure 2-6-1). To start the exhaust fan and turn on the UV Lamps push START FAN on the Command Center. The Command Center may be programmed to automatically start the exhaust fan at a specific time. - Page 16 45 seconds for the exhaust air to come up to 100%. Note 4: The ELX-UVi Series Ventilator may be equipped with a Gaylord Autostart Controller that automatically turns on the exhaust fan if the temperature at the exhaust duct collar exceeds 90° F. If the Ventilator does include Autostart, the Ventilator will include one or more sensors mounted in the canopy (Refer to Figure 2-5-2).
- Page 17 UV Status Lights Grease Extraction Grease is removed from the exhaust air by combination of the Gaylord Model XGS Extractors and the UV Lamps (Refer to Figure 2-8-1). The hot contaminate-laden air rising from the cooking surface is drawn through the Extractors where a high percentage of the grease and other particulate are extracted from the airstream.
- Page 18 Turning On the Exhaust Fan and UV System – cont. Balancing Damper Ballast Box Accessible UV Lamps from Underside UV Lamp Module Autostart Sensor Gaylord Model XGS Extractor Grease Gutter Grease Drawer Grease Laden Air Figure 2-8-1 Grease Extraction Static Tap Cover...
-
Page 19: Turning Off The Exhaust Fan And Uv System
At the end of the cooking day, turn off the cooking equipment and allow to cool before turning off the exhaust fan. To stop the exhaust fan and turn off the UV Lamps push STOP FAN on the Gaylord Command Center. -
Page 20: Fire Protection
4. If the Fire Extinguishing System is wired to a building management system it will notify of a fire condition. 5. The Fire Extinguishing System should be wired to the Gaylord Command Center. If it is the following will occur: a) If the exhaust and supply fan were on the exhaust fan would stay on and the supply fan would shut off. - Page 21 Chapter 2 – Principles of Operation, Page 2-11 ELX-UVi Series – Cont. Fire Protection – Cont. Fire Extinguishing Systems – Cont. For Operation and Maintenance of the Fire Extinguishing System, refer to the system manufacturer’s Owner’s Manual. Important: NFPA-96 requires inspection and certification of Fire Extinguishing Systems every 6 months. When a Fire Extinguishing System Discharges, the Balancing Damper remains open.
- Page 22 Balancing Dampers Balancing Dampers Overview The ELXC and ELXC-UVi Series Ventilators, as a standard, come with one of three models of Gaylord Indus- tries Listed Balancing Dampers. Balancing dampers would typically be used when two or more Ventilators are connected to a common exhaust fan. The purpose of the balancing damper is to raise or lower the air- flow of each Ventilator to achieve the desired exhaust rate.
- Page 23 Chapter 2 – Principles of Operation Page 2-13 Balancing Dampers – Cont. Balancing Dampers – Cont. Figure 2-13-1 Typical Model GEBD Other Models Look Similar Except Without the Motor Figure 2-13-2 Figure 2-13-3 Section View of Model GBD. Potentiometer The Dampers and the DSD are the same for all Models 2-13...
- Page 24 Chapter 2 – Principles of Operation, Page 2-14 This Page Intentionally Left Blank 2-14...
-
Page 25: Chapter 3 - Maintenance
Operator Cleaning and Maintenance Overview To maintain the Gaylord Ventilator in good working order, and to keep the system operating at optimum efficiency, preventive maintenance, using the following schedule should be performed. Important Note: Ventilators incorporating UV Lamps require special maintenance as shown on Page 3-4. - Page 26 Gutter daily Clean UV Lamps or as as needed needed Grease Collection XGS Extractor Drawer must be Must be washed emptied daily or as daily or as needed needed Figure 3-2-1 Cleaning Extractor Removal Tool Figure 3-2-2 Gaylord Model XGS Extractor...
- Page 27 Chapter 3 – Maintenance, Page 3-3 Cleaning and Maintenance – Cont. Operator Cleaning and Maintenance – Cont. Code Required Inspection and Cleaning The National Fire Protection Association Standard NFPA-96 (Standard for Ventilation Control and Fire Pro- tection of Commercial Cooking Operations) requires that hoods (Ventilators), ducts and exhaust fans must be inspected by a properly trained, qualified and certified company or person(s) in accordance with the following table.
-
Page 28: Uv System Scheduled Preventive Maintenance
Module Access Doors in place and latched.) a. Turn on the exhaust fan at the Gaylord Command Center. The “UVi SYSTEM ON” green Status Light in each Ventilator Section should be on. In addition to the Status Lights on the Ventilator, the Gaylord... - Page 29 Chapter 3 - Maintenance, Page 3-5 UV System Scheduled Preventive Maintenance - Cont. Testing UV Lamps and Ballasts - Cont. b. If the yellow “UVi LAMP FAILURE” Status Light is on it indicates that one or more of the UV Lamps are not operating.
- Page 30 Lamps decreases dramatically. The Gaylord Command Center has a built-in UV hours of operation clock. Refer to the Operation and Maintenance Manual for the Gaylord Command Center for complete operational instructions. If the Lamps have been in use over 13,000 hours they should...
- Page 31 Cleaning the Gaylord Extractors The Gaylord XGS Extractors may be cleaned by running through a dishwasher or by soaking in a deep well sink. To soak proceed as follows: 1.
-
Page 32: Limited Warranty
2010 Products, Inc. warrants that Formula G-510EF will not cause cleansing agent damage to the rubber and synthet- ic parts of the injection pump (“O” rings, diaphragms, washers, tubing, and other such parts) used with The Gaylord Ventilator, Heat Reclaim Unit, or Pollution Control Equipment so long as used pursuant to its product instructions. -
Page 33: Chapter 4 - Troubleshooting
5-1 Ventilator Nameplate rating. through 5-11. 4 Check and adjust Gaylord Balancing Damper as described pages 2-19 of this manual. 5 Check for open access panel in duct system and close or re-install if open. - Page 34 Gaylord Command Center may have been improperly wired. 1 Refer to the Operation, Maintenance and Installation F. If equipped with a Gaylord Manual for the Gaylord Command Center, the Command Center it may be Troubleshooting section. malfunctioning. 2 When the exhaust fan is A.
- Page 35 Chapter 4 – Troubleshooting, Page 4-3 Troubleshooting – Cont. UV SYSTEM SYMPTOM PROBABLE CAUSE CORRECTIVE ACTION After exhaust fan is started A. XGS Extractor is missing. 1 Find and replace missing XGS Extractor. and the UV Status lights on B. Extractor Access Door open. 1 Close Access Door.
- Page 36 6 Command Center not A. Varies. 1 Refer to Operation, Maintenance and Installation functioning as intended. Manual for the Gaylord Command Center, the Troubleshooting section.
-
Page 37: Chapter 5 - Testing And Repair
A Ventilator operating at an engineered exhaust volume will result in a specific plenum static pressure for each Ventilator section. The ELX Series Ventilator is equipped with a Static Pressure Tap, one for each Ven- tilator section. The tap is located behind a small 4 to 6 screw Static Tap Access Cover Plate near the top center of the Ventilator (refer to Figure 5-5-1). - Page 38 Balancing Damper needs to be closed slightly. Continue either opening or closing the Balancing Damper until the measured static pressure matches the Plenum Static Pressure stamped on the label. Refer to the Gaylord Technical Manual for Balancing Dampers for specific instructions on adjusting the dampers. Static Tap Cover...
- Page 39 A Ventilator operating at an engineered exhaust volume will result in a specific plenum static pressure for each Ventilator section. The ELX Series Ventilator is equipped with a Static Pressure Tap, one for each Ventilator section. The tap is located behind a small 4 to 6 screw Static Tap Access Cover Plate near the top center of the Ventilator (refer to Figure 5-1-1).
- Page 40 Chapter 5 – Testing and Repair, Page 5-4 Measuring Airflow – Cont Measuring Airflow – Static Pressure Method – Multiple Section Ventilators – Cont. 1. Record the engineered Plenum Static Pressure, engineered Exhaust Duct Velocity and the Designed CFM from the Static Pressure Label on each Ventilator Section. 2.
- Page 41 Measuring Airflow – Static Pressure Method – Multiple Section Ventilators – Electric Dampers Balancing Dampers Model GEBD (Gaylord Electric Balancing Damper) and Model GFBD (Gaylord Fire Bal- ancing Damper) are electrically adjusted. Adjustment is made by use of a potentiometer, one for each damper, typically mounted in a junction box located near the Ventilator in the kitchen area (refer to Figure 5-3-2).
- Page 42 Chapter 5 – Testing and Repair Page 5-6 Measuring Airflow – Cont. 1.60 1.40 Duct Velocity (1500 FPM) Duct Velocity (1800 FPM) 1.20 1.00 0.80 0.60 0.40 0.20 0.00 1.00 2.00 3.00 4.00 Damper Set Dimension (in inches) Figure 5-6-1 Damper Set Dimension Graph (%) OPEN DSD (in)
- Page 43 Then divide this total by the number of Extractors. The result is called the Total Average Velocity (TAV). The Gaylord Model XGS Extractors come in two sizes, a nominal 11” H x 16” W, Model XGS-11, and a nominal 18” H x 16” W, Model XGS-18. It is necessary to know the area of an Extractor, in sq. ft., to determine the exhaust volume.
- Page 44 Chapter 5 – Testing and Repair Page 5-8 Measuring Airflow – Cont. Measuring Airflow – Velocity Method – Cont. Example: Assume you have seven 11” x 16” Extractors and the average velocity of each Extractor is: 394+368+392+402+399+379+388 = 2722 divided by 7 = 389 (rounded up). This is your TAV (Total Average Velocity).
- Page 45 Chapter 5 – Testing and Repair Page 5-9 Measuring Airflow – Cont. Figure 5-9-1 Sensing Head Placement Figure 5-9-2 Anemometer...
- Page 46 Measuring Airflow – Cont. ITEM NO. PLENUM STATIC PRESSURE TOTAL DESIGN CFM (THIS SECTION) DUCT DESIGN VELOCITY (FPM) STATIC PRESSURE TAP BEHIND THIS COVER CONSULT GAYLORD TECHNICAL MANUAL FOR XGS EXTRACTOR VELOCITY METHOD. FOR THIS SECTION IS 0.54 20222 FACTOR Figure 5-10-1...
-
Page 47: Make-Up Air Guidelines
Make-Up Air Guidelines Capture Performance All Gaylord Ventilators are factory engineered to operate at a specific exhaust volume, CFM (Cubic Feet per Minute), based on, primarily, the type of cooking appliance, and the exact model of the Ventilator. Capture performance is based on two primary functions, 1) the ventilator is exhausting the engineered CFM and 2) the make-up air is being introduced correctly. - Page 48 Make-Up Air Guidelines – Cont. Following these guidelines will result in proper cap- ture and containment at the Ventilator and enact the Gaylord Capture Performance Guarantee. If jobsite conditions cannot accommodate these guidelines, consult Gaylord Industries for alternative design. Figure 5-12-1...
-
Page 49: Replacing Uv Lamps
DANGER: Replacing UV Lamps as outlined on this page MUST be performed by a Gaylord Certified DANGER: Replacing UV Lamps as outlined on this page MUST be performed by a Gaylord Certified Ser- Service Agent. For a list of Gaylord Certified Service Agencies (CSA’s) visit www.gaylordusa.com... - Page 50 Instructions for Replacing UV Lamps To replace UV lamps carefully use the following step by step instructions. 1. Turn off all power to the Gaylord Command Center. 2. Turn off all circuits that supply power to the UV Lamps. 3. Open the UV Module Access Door (Refer to Figure 5-16-1).
- Page 51 Chapter 5 – Testing and Repair Page 5-15 Replacing UV Lamps - Cont. UV Status Lights AutoStart Sensor Static Tap Opening UV Lamp Module UV Lamps Extractor Access to Ballast Box UV Module Access Door Extractor Access Door Figure 5-15-1 Lamp #1 Lamp #2 Lamp #3...
-
Page 52: Replacing Uv Lamp Sockets
DANGER: Replacing UV Lamp Sockets as outlined on the following pages MUST be performed by a Gay- lord Certified Service Agent. For a list of Gaylord Certified Service Agencies (CSA’s) visit www.gaylord- ventilation.com and go to “Service Agencies” or call Gaylord Industries at 503-691-2010. - Page 53 Do not pull the UV Lamp Long Wire at this time. It is needed to pull the new Lamp Socket through the conduit. 2. Using a Pin Removal Tool, Gaylord Part Number 20415, push the associated pin out of the base of the Pined Receptacle.
- Page 54 Instructions for Replacing UV Lamp Sockets – Wiring Harness Method DANGER: Replacing UV Lamp Sockets as outlined on this page MUST be performed by a Gaylord Certified Service Agent. For a list of Gaylord Certified Service Agencies (CSA’s) visit www.gaylordventilation.com and go to “Service Agencies”...
- Page 55 11. Close the UV Module Access Door. 12. Turn on all circuits that supply power to the UV Lamps. 13. Turn on power to the Gaylord Command Center. 14. Check for proper operation of the UV Lamps and Pressure Switches following the Test Lamps and Ballasts instructions on page 3-3.
- Page 56 Chapter 5 – Testing and Repair Page 5-20 UV Ballast Box Overview There is one UV Ballast Box for each Ventilator section. The UV Ballast Box contains the Ballasts and other electrical components necessary to operate the UV System (Refer to Figure 5-25-1). A list of all the components and their part numbers are shown on Page 6-7 and 6-8.
- Page 57 Caution: Turn off all power to the Command Center and to the UV Ballast Box. There is a risk of shock, injury, and /or death from contact with live electrical components. 1. Turn off all power to the Gaylord Command Center. 2. Turn off all circuits that supply power to the UV Lamps.
- Page 58 Caution: Turn off all power to the Command Center and to the UV Ballast Box. There is a risk of shock, injury, and /or death from live electrical components. 1. Turn off all power to the Gaylord Command Center. 2. Turn off all circuits that supply power to the UV Lamps.
- Page 59 Pressure Switches proceed as follows (Refer to Figure 5-25-1): Caution: Testing the Pressure Switches must be performed by Gaylord Certified Service Agent. For a list of Gaylord Certified Service Agencies (CSA’s) visit www.gaylordusa.com and go to “Service Agencies”.
- Page 60 Chapter 5 – Testing and Repair Page 5-24 UV Ballast Box - Cont. Setting the Pressure Switches - Cont. 6. With gloves on and Ventilator running at 100%, turn the Adjustment Dial, as shown in Figure 5-25-1 on Pressure Switch “A”, COUNTER CLOCKWISE until you hear a click, and the corresponding green LED lights illuminate on the Ventilation Control Board, shown in Figure 5-28-1.
- Page 61 Chapter 5 – Testing and Repair Page 5-25 UV Ballast Box - Cont. ADJUSTMENT DIALS Figure 5-25-1 SPADE CONNECTOR Pressure Switches CAUTION: VERIFY SPADE CONNECTOR IS IN PLACE PRIOR TO ADJUSTMENT. COVER SCREW IF IT IS NOT, FOLLOW “SPADE CONNECTOR NOT IN PLACE”...
- Page 62 High Temperature Shutdown Controller will shut off the UV system, turn on the Blue UVi System Standby status light mounted on the Ventilator, and the Gaylord Command Center will display text indicating a similar message as the status light. The exhaust fan will remain on. The High Temperature Shutdown Controller will typically activate for the following reasons: 1.
- Page 63 Chapter 5 – Testing and Repair Page 5-27 UV Ballast Box - Cont. Figure 5-27-1 High Temperature Shutdown Controller HIGH TEMPERATURE SHUTDOWN CONTROLLER Figure 5-27-2 MESH FILTER UV Ballast Box VENTILATION FAN VENTILATION BALLAST BOARD CONTROL BOARD PRESSURE SWITCHES 5-27...
- Page 64 Chapter 5 – Testing and Repair Page 5-28 UV Ballast Box - Cont. Figure 5-28-1 Ballast Board Figure 5-28-2 Ventilation Control Board Figure 5-28-3 Safety Interlock Pressure Switch 5-28...
-
Page 65: Chapter 6 - Parts
Chapter 6 – Parts, Page 6-1 Ventilator Parts Parts - Ventilator Gaylord Description Illustration Part No. Extractor - Model XGS - Size 11" H x 16" L 76044 Extractor - Model XG-SPA (Spark Arrester) Size 76045 11" H x 16" L Extractor - Model XGS-18-Size 18"... - Page 66 Chapter 6 – Parts, Page 6-2 Ventilator Parts - Cont. Table T-6-2-1 Parts - Ventilator - Cont. Gaylord Description Illustration Part No. Ventilator Exhaust Duct Collar Thermostat. 12" Long, NC Contacts, Factory set at 250 18465 degrees F. Ventilator Exhaust Duct Collar Thermostat.
- Page 67 Chapter 6 – Parts, Page 6-3 Ventilator Parts - Cont. Table T-6-3-1 Parts - Ventilator - Cont. Gaylord Description Illustration Part No. Autostart Sensor (new style) 20319 Autostart Sensor (old style) 76004 Autostart Controller complete with box 20317 Autostart Controller only...
- Page 68 Chapter 6 – Parts, Page 6-4 UV Ventilator Parts Table T-6-4-1 Parts - UV Ventilator Gaylord Description Illustration Part No. UV Module - 3'-0", 6 Lamps (Includes Lamps) 76057 UV Module - 5'-0", 6 Lamps (Includes Lamps) 76058 3'-0" Lamp (single lamp) 20269 5'-0"...
-
Page 69: Parts - Uv Ventilator
Chapter 6 – Parts, Page 6-5 UV Lamp Module Parts Table T-6-5-1 Parts - UV Lamp Module Qty. per Gaylord Description Illustration pter 6 - Parts Module Part No. 1/2-13 x 1-1/2 Round Head Slot Screw 20289 ELX UV Lamp Cover Washer... - Page 70 Chapter 6 – Parts, Page 6-6 UV Lamp Module Parts - Cont. Table T-6-6-1 Parts - UV Lamp Module - cont. Gaylord Description Illustration Part No. Pin Extractor Tool for Pinned Receptical 20415 Pin Insertion Tool for Pinned Receptical 20414...
-
Page 71: Parts - Uv Ballast Box
Chapter 6 – Parts, Page 6-7 UV Ballast Box Parts Table T-6-7-1 Parts - UV Ballast Box Gaylord Description Illustration Part No. Ventilation Fan 19430 UV Ballast Board (complete) For 3'-0" 6 Lamp Module 76063 For 5'-0" 6 Lamp Module... - Page 72 Chapter 6 – Parts, Page 6-8 UV Ballast Box Parts - Cont. Table T-6-8 Parts - UV Ballast Box - Cont. Gaylord Description Illustration Part No. Relay 30833 UV Pressure Switch 20146 Pressure Switch Pressure Release Tube 20174 NOT ILLUSTRATED Gasket for UV Ballast Box Access Cover 11-1/2"...
- Page 73 Chapter 7 – Wiring Diagrams, Page 7-1 The Wiring Diagrams on the following pages are typical for various applications and may not represent your installation. Always refer to the Gaylord submittal drawings for the actual Wiring Diagrams for your installation.
- Page 74 Chapter 7 – Wiring Diagrams, Page 7-2 GFBD & GEBD INTERNAL WIRING / SINGLE SECTION GFBD INTERNAL WIRING / SINGLE SECTION Figure 7-2-1 Wiring Diagram with GFBD Figure 7-2-2 Wiring Diagram FIGURE 16 with GEBD GFBD/GEBD Internal Wiring Diagram...
- Page 75 Chapter 7 – Wiring Diagrams, Page 7-3 GFBD EXTERNAL WIRING / MULTIPLE SECTION GFBD External Wiring / Multiple Section Figure 7-3-1 FIGURE 16B GFBD External Wiring Diagram GFBD External Wiring Diagram...
- Page 76 Chapter 7 – Wiring Diagrams, Page 7-4 ELX GBD OR ND / NO UV WIRING DIAGRAM ELX GBD or ND / No UV Figure 7-4-1...
- Page 77 Chapter 7 – Wiring Diagrams, Page 7-5 ELX GFBD / NO UV WIRING DIAGRAM ELX GFBD / No UV Figure 7-5-1...
- Page 78 Chapter 7 – Wiring Diagrams, Page 7-6 ELX-UV GBD / ND WIRING DIAGRAM ELX-UV-GBD-ND Figure 7-6-1...
- Page 79 Chapter 7 – Wiring Diagrams, Page 7-7 ELX-UV GFBD WIRING DIAGRAM ELX-UV-GFBD Figure 7-7-1...
- Page 80 Chapter 7 – Wiring Diagrams, Page 7-8 This Page Intentionally Left Blank...
-
Page 81: Installation Requirements
Ventilator Listing The Gaylord Model ELX and ELX-UVi Series Ventilators are listed to UL 710 and Recognized by ETL. Any modification made to the Ventilator at the jobsite will void the listing. Hanging the Ventilator Use the following guidelines for hanging the Gaylord Ventilator: 1. - Page 82 Appendix A, Page A-2 Installation Requirements – Cont. 1. Caution: When installing Ventilators incorporating a UV system, ELX-UVi Series, do not cover the UV Ballast Box, mounted on top of the Ventilator, with building insulation. Covering the Ballast Box inlet and outlet ventilation openings will cause the box to overheat which could result in failure of electrical components.
- Page 83 120 volts, 2 h.p. at 220 volts, 16 amps max. 2. If the Ventilator is provided with a Gaylord Command Center, provide a 120 volt 20 amp service to the control. Optional voltage, when specified, 220 volt 50/60 Hz.
- Page 84 NFPA-96 requires a Fire Extinguishing System in all Ventilators that cover grease producing cooking equipment. In many cases the Fire Extinguishing System is pre-piped by Gaylord Industries in the factory with completion of the system by a local Fire System contractor. If not pre-piped then the entire system would be installed by a local Fire System contractor.
-
Page 85: Ventilator Start-Up Inspection And Tests
Ventilator Start-Up Inspection and Tests Overview As one of the benefits of purchasing a Gaylord ELX or ELX-UVi Series Ventilator is a complete Start-Up Inspection is performed by a Gaylord Authorized Representative or a Gaylord Authorized Service Agency. These tests must be conducted prior to use by the operator. Typically at the time the Start-Up Inspection is performed, the operation and general operator maintenance of the Gaylord equipment is demonstrated and described to the operating personnel. - Page 86 ____ The Gaylord XGS Extractors are installed in the Ventilator. For ELX-UVi Series Ventilators ____ All required electrical connections between the Gaylord Command Center and the Ventilator, Building Management Systems, Remote Monitoring Systems, and Fire Extinguishing Systems are complete. ____ There is a 200 VAC, 10 Amp power circuit going to each individual Ventilator section.
- Page 87 Velocity Method as detailed in the ELX Series Operation, Maintenance and Installation Man- ual. Record all readings in the chart below. Record the Design CFM from the Gaylord Drawings or the Ventilator Nameplate. If the installation includes a Plenum Box make up air system, take velocity readings and record on the chart.
- Page 88 2) The make-up air should be off. …………………………………………………… ____ Off ____ On 3) If Ventilator includes UV, it should have shut off. ………….……………. ____ Off ____ On 4) If there is a Gaylord Command Center the display should read Fire In Hood. ………… ………………………………………………………………………………………….….…… ____ Yes ____ No b) With the exhaust fan off, open remove the Extractor under the exhaust duct.
- Page 89 2. Provided one copy of the Gaylord Installation, Operation, and Maintenance Manual. ____ (Rep Initial) 3. If Installation includes a Gaylord Command Center, provide a copy of the Gaylord Command Center Technical Manual. _____ (Rep initial) Note to Operator: You may obtain a free copy of the Gaylord Installation, Operation, and Maintenance Manual and the Gaylord Command Center Technical Manual by visiting www.gaylordventilation.com.
- Page 90 Status light should come on. ………………………………………………………….……………….. ____ On ____ Off If the system fails to come on refer to the UV System Troubleshooting section of the Gaylord Installa- tion, Operation, and Maintenance Manual for ELX and ELX-UVi Series Ventilators.
- Page 91 Blue UVi System Standby light should come on. ……… ____ On ____ Off If it does not come on refer to the UV System Troubleshooting section of the Gaylord Installation, Operation, and Maintenance Manual for ELX and ELX-UVi Series Ventilators.
- Page 92 Appendix B, Page B-8 Notes _______________________________________________________________ _______________________________________________________________ _______________________________________________________________ _______________________________________________________________ _______________________________________________________________ _______________________________________________________________ _______________________________________________________________ _______________________________________________________________ _______________________________________________________________ _______________________________________________________________ _______________________________________________________________ _______________________________________________________________ _______________________________________________________________ _______________________________________________________________ _______________________________________________________________ _______________________________________________________________ _______________________________________________________________ _______________________________________________________________ _______________________________________________________________ _______________________________________________________________ _______________________________________________________________ _______________________________________________________________ _______________________________________________________________ _______________________________________________________________ _______________________________________________________________ _______________________________________________________________ _______________________________________________________________ _______________________________________________________________ _______________________________________________________________ _______________________________________________________________ _______________________________________________________________...
- Page 93 The Manufacturer’s obligation under this warranty and any warranties implied by law shall be limited to repairing or replacing at its option any part of said equipment when either Gaylord Industries, or the Licensed Gaylord Manufacturer’s examination shall disclose to its satisfaction to be thus defec-...
- Page 94 10900 SW AVERY STREET TUALATIN, OREGON 97062 U.S.A Phone: 503-691-2010 1-800-547-9696 Fax: 503-692-6048 email: info@gaylordventilation.com LOCAL SERVICE AGENCY FORM NO. © COPYRIGHT 2013, GAYLORD INDUSTRIES LITHO IN U.S.A. © Copyright 2012 Gaylord Industries Form Number TM-ELX/ELX-UV-Rev 05-1114/30925 Litho in U.S.A...
Need help?
Do you have a question about the ELX SERIES and is the answer not in the manual?
Questions and answers