Table of Contents
Advertisement
Advertisement
Table of Contents

Related Manuals for GME TX4600


Summary of Contents for GME TX4600
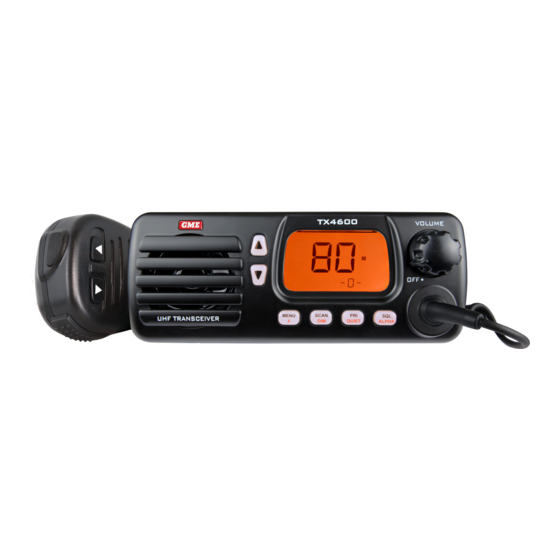
- Page 1 TX4600 COMPACT & WATERPROOF UHF CB RADIO I N S T R U C T I O N M A N U A L...
-
Page 2: Table Of Contents
WARNING: SAFETY INFORMATION Note: The TX4600 supports key disabling. This The TX4600 is a radio transmitting device. feature allows individual keys to be disabled to make • W hen transmitting, keep the antenna more operation simpler where circumstances may not require access to some features. than 25 mm from any part of the head or body. Key disabling can only be done by your Dealer. If your • D o not transmit near electrical blasting application requires this feature, please contact your equipment or in explosive atmospheres. local Dealer for details. • D o not allow children to operate a radio transmitter unsupervised. FEATURES • economical Waterproof Design (Ip55). • a ll surface Mount Technology. -
Page 3: Controls
CONTROLS FRONT pANEL (Dim) (Bright) c hannel channel LcD Volume On/Off Down Display TX4600 Speaker Microphone Socket Menu Scan priority Squelch fUNCTION qUIET ALPhA LCD DISpLAY channel number channel in Memory Indicator Transmit Indicator QuIeT Mode Busy Indicator QuIeT Tag Scan Indicator cTcSS Indicator Duplex indicator Selcall call Mode alpha numeric Display MICROphONE call / Skip channel Down... -
Page 4: General Operation
The Squelch can be opened or closed with the SQL key. GENERAL OpERATION When the Squelch is open, the receiver’s background noise FUNCTION KEY can be heard and ‘BuSy’ is displayed. When the Squelch is closed, the receiver remains quiet when there are no signals The four keys beneath the TX4600’s display have both present but an incoming signal will override the squelch and primary and secondary functions. Their primary functions are be heard in the speaker. printed in Black while their secondary functions are printed To open the squelch in red. To access the primary functions Briefly press the SQL key. a low beep will be heard. If there are no signals present you will hear the receiver’s Simply press the required key. background noise. e.g. To control the Squelch, briefly press the SQL key. To close the Squelch, To access the secondary functions Briefly press the SQL key again. a high beep will be heard press the F key followed immediately by the required key. and the receiver will become quiet. -
Page 5: Ctcss
Duplex operation is only available on channels 1 – 8. When duplex is selected on these channels, the radio receives on SELECTING ThE TONE SET that channel but actually transmits 30 channels higher. There are two standard tones sets available, one comprising e.g. 50 tones and the other comprising 38 tones. Both tone sets are included in the TX4600 to provide compatibility with Channel Selected other GMe radio systems. Receive Channel SELECTING ThE REQUIRED CTCSS TONE Transmit Channel To pre-select the cTcSS tone on your radio, please refer to * emergency channel Only the Menu settings on page 16. The TX4600 allows you to pre-select Duplex operation ENAbLING CTCSS ON A ChANNEL individually on each channel. If a cTcSS tone has been selected, it can be enabled on To enable or disable Duplex on a channel, please refer to individual channels. -
Page 6: Scanning
To add or remove channels from either SCANNING scan memory: OVERVIEW 1. e nsure that the radio is not already scanning. If it is, The TX4600 has a Scan function that allows groups of user briefly press the SCAN key to cancel the scan function. programmable channels to be scanned for signals. channels 2. e nsure you have the required scan group pre-selected can be scanned at 20 channels per second. When a signal (See MENU settings on page 16). is found, scanning will pause on that channel to allow the signal to be heard, then resume scanning when the channel 3. Select the required channel using the or keys. is clear again. • I f ‘M’ is visible to the right of the channel number, SCAN GROUpS the selected channel is already in the scan memory. It can be removed by holding the SCAN key in for a The TX4600 features two scan groups - Open Scan and few seconds until a low beep is heard. ‘M’ will then Group Scan. disappear indicating the channel is no longer Open Scan in memory. -
Page 7: Open Scan Mode
• I f your radio is scanning and you need to use your channel in the usual way. Once there has been no priority channel (for an urgent call or an emergency), activity for 5 seconds, the radio will resume scanning briefly press the pRI key. The Scan mode will be the other channels. cancelled and the radio will jump straight to the priority channel. • I f a signal appears on one of the other channels, scanning will pause on that channel and will remain there while Note: In the Open Scan mode your TX4600 will not allow the channel is busy, as long as there are no signals on you to transmit while it is scanning. If the pTT button is the priority channel. During this time the receiver will pressed while scanning, the radio will give a low beep and continue to check the priority channel for signals every will ignore the command. your radio will only transmit while 2 seconds, resulting in a series of small ‘breaks’ in the it is paused on a busy channel. reception of the paused channel. Once there has been no activity on any channel for 5 seconds, the radio will GROUp SCAN MODE resume scanning. Group Scan allows you to transmit and receive normally on • I f your radio pauses on a busy channel and you don’t your priority (working) channel, while continuing to scan wish to listen to that conversation, briefly press the several other channels. The receiver will scan the other... -
Page 8: Selective Calling
• T o transmit on a scanned channel, press the pTT button SELECTIVE CALLING while the radio is paused on that channel, then talk in the OVERVIEW usual way. The radio will resume scanning when you have finished your conversation and there has been no further your TX4600 has a Selective calling system known activity on the channel for 5 seconds. as Selcall that operates like a telephone. your radio is • T o transmit on the priority (working) channel aT any pre-programmed with its own unique Selcall Identification TIMe, simply press the pTT button while the radio is number. If this number is called by another radio, your scanning. The radio will switch straight to the priority TX4600 will beep to alert you. If you do not want to hear channel. When you have finished your conversation and any other activity while waiting on a channel, you can select there has been no further activity on the priority channel the QuIeT mode. This will force the radio to remain quiet to for 5 seconds, the radio will resume scanning the other all incoming signals until your Selcall number is called. channels. your TX4600 will allow you to store up to ten of your • T o go directly to the priority channel, briefly press the most frequently called Selcall numbers in memory and pRI key. The radio will exit the Scan mode. each number can be labelled with a 5-letter name for easy identification. USING TWO GROUp SCAN OR TWO OpEN... -
Page 9: Using Selcall
ThE QUIET MODE (Q) ( c) B riefly press the F key again to select the next digit position. your TX4600 can be set to monitor signals on a busy (d) r epeat steps (b) and (c) to enter all 5 digits as channel but remain QuIeT unless it receives its own Selcall required. The Selcall number is now ready to send. Ident. In this way, you won’t be disturbed unless someone calls you. When a signal containing your Selcall Ident is received, the QuIeT mode is deactivated and an alarm sounds to alert you to the call. you can then converse normally on the channel. To use the QuIeT mode, refer to the QuIeT Mode section further below. Note: The QuIeT mode overrides the normal Squelch system to ensure that the radio remains quiet even when the channel is busy. When QUIET is set, you may see the ‘BuSy’ icon appear on the display indicating the channel is being used. However, unless someone transmits your Selcall SENDING A SELCALL Ident, nothing will be heard in the speaker. With the Selcall number displayed, press and hold the CALL you can activate the QuIeT mode on individual channels i.e. button for 2 seconds. a long beep will be heard and the some channels can be set to remain Quiet while others can radio will transmit the Selcall Ident. remain open to all incoming signals. Note: If the call is not sent within 10 seconds of entering TIp: Setting the QuIeT mode is not mandatory. you can still... - Page 10 0 1 2 3 4 5 6 7 8 9 2. p ress the or keys to select the required Ident memory in locations ‘c0’ to ‘c9’. Tip: Holding the channel selector key for a few seconds will cause the radio to step quickly through the available 3. W hen the required Selcall Memory is displayed, press characters. and hold the CALL button to send the Ident. NAMING YOUR SELCALL IDENTS (b) B riefly press the F key again to select the next character position. The TX4600 allows you to name each Selcall Ident using a (c) r epeat steps (b) and (c) to enter all 5 characters 5 character aLpHa name. The name is stored in memory as required. along with the Ident making it easier to identify whose Ident you are recalling from the memory. If an incoming (d) n ow press and hold the F key. The entire aLpHa Selcall matches one of those in your radio’s memory, the name will flash for a few seconds then the radio will name can be displayed instead of the Selcall Ident. beep as the name is stored. DISpLAYING ALphA NAMES To display the Selcall’s aLpHa name, you must have the...
- Page 11 QUIET MODE not matching those in the memory will display -neW-. To display the Selcall Ident of that caller, briefly press the F The QuIeT mode mutes the TX4600’s receiver to prevent key followed by the ALphA key to return to the nuMerIc any incoming signals from being heard in the speaker until display mode your Selcall Ident is received. In this way you can monitor a busy channel for personal calls without being disturbed by RECEIVING SELCALLS unwanted signals. When your TX4600 receives its Selcall Ident, an alarm will If your Selcall Ident is received, the QuIeT mode is then sound to alert you to the call. Initially the alarm will beep cancelled and all incoming signals are heard in the speaker. urgently at 2 beeps per second for around 10 seconds then slow to around 1 beep every 3 seconds if the call is not SETTING Up ThE QUIET MODE answered. It will then continue to beep indefinitely until you To setup the QuIeT mode you must first ‘tag’ the channels cancel it (the way your TX4600 handles the Selcall alert can that you want to stay Quiet, then activate the QuIeT mode. be altered by your Dealer). Once the QuIeT mode is activated, the channels you have In addition to the alarm, the words ‘caLL FrOM’ will appear tagged will remain Quiet to all incoming signals unless your on the display along with the callers Selcall Ident or aLpHa Selcall Ident is received. channels not tagged will remain name to inform you of the identity of the person calling. open to all signals and will operate normally. To switch between the Selcall Ident and the aLpHa name To Tag individual channels for QUIET operation: briefly press the F key followed by the ALphA key.
-
Page 12: Group Calling
TIp: To ensure reliable Selcall detection when scanning in the Quiet mode, it is recommended that you restrict the If you wish to respond to the calling radio using Selcall, number of channels in the Scan group to 4 or less. press and hold the call button for 1.5 seconds until the radio beeps. The callers Ident will be transmitted back to them causing the alarm in their radio to be activated. GROUp CALLING To cancel the alarm on your radio The TX4600’s Selcall system includes a Group call function which allows you to call up to 1000 radios simultaneously. Briefly press the pTT. This can be useful in an emergency situation where you may To return your radio to the QUIET mode need to transmit a message to a large number of radios in your group. Briefly press the F (Function) key followed by the QUIET By default, your radio is factory-set to allow up to 10 radios key. ‘QuIeT’ will re-appear on the display. to be called at once. If your application requires more, SCANNING IN ThE QUIET MODE you can arrange for your Dealer to re-program this option to allow 100 or 1000 radios to be called. The following... -
Page 13: Listening Channels
1. Switch the radio OFF. 2. H old the key while switching the radio On. 3. 1 2.5k or 25.0k will be displayed indicating the select frequency step is 12.5 kHz or 25.0 kHz. ACTIVATING LISTENING ChANNELS Once the Ident has been entered you have 10 seconds to By default, the receive–Only channels are disabled and send it otherwise the caLL TO mode will be cancelled and only the standard 40 uHF cB channels can be accessed. the Ident you entered will be lost. To make use of the extra channels you must activate the programming mode and program frequencies into the Note: Where your TX4600 allows it, programming group channels you wish to use. Those channels will then calls for 100 radios is identical except that you will need become available. to select ‘a’ for the last two digits (e.g. 123aa). For 1000 To activate the programming mode: radios you will need to select ‘a’ for last three digits (e.g. 12aaa). 1. Switch the radio off. e.g. 2. H old the MENU key while switching the radio On again. 100 radios Ident Sent: 123aa Idents called: 12300 -> 12399 using the or keys you will now be able to select additional channels between 41 and 80. -
Page 14: Seek Mode
SETTING ALphA LAbELS FOR YOUR Once you have enabled and programmed your additional LISTENING ChANNELS. Listening channels, switch the radio off to end the programming mode. When you switch it on again, normal your extra listening channels can be set to display either the operation will be restored and any Listening channels you channel Frequency or a meaningful label that you choose. have enabled will now be available above channel 40. please refer to the Frequency/aLpHa adjustment function in pROGRAMMING ThE FREQUENCIES the Menu settings on page 16. Before programming channel frequencies, make sure the SEEK MODE radio is in the nuMerIc mode. If it is in the aLpHa mode press F (Function) followed by ALphA . ‘nuMer’ will The Seek mode is a unique feature that allows you to be displayed. continuously scan a band of frequencies between 403 MHz To program a frequency into a channel and 520 MHz for activity. Once the radio has reached the upper limit of 520 MHz it will resume scanning from 403 1. a ctivate the programming mode (hold MENU then MHz again. If you find an active frequency you can assign it switch ON). - Page 15 To store active frequencies into other Listening channels between the limits. repeat steps 1 – 6 above. SETTING SEEK MODE FREQUENCY LIMITS When in Seek mode, the default frequency range is the entire Listening band of 403 - 520 MHz. However, in many Lower Upper cases you may only be interested in a searching for signals Limit Limit within a small section of the available frequency band. If upper Limit is greater than Lower Limit, radio will scan To make searching easier the TX4600 allows you to set InSIDe the limit range. upper and lower frequency limits. The Seek function will then search only within those limits. This limits the scan to the area you are most interested in, thereby increasing the chance of finding an active frequency within that band. To Scan within Frequency limits Upper Lower Limit Limit 1. S elect the required Listening channel (41 – 80). The frequency currently selected for that channel will If upper Limit is less than Lower Limit, radio will scan be displayed.
-
Page 16: Menu Settings
Squelch Settings • • • while still keeping the radio quiet between transmissions. Open / Group Scan • • • In city locations, a higher setting might be needed to ensure Duplex / Simplex the squelch remains closed when subjected to the higher • mode interference levels often encountered in high density areas. cTcSS Tones • • • The TX4600 has ten (10) preset Squelch sensitivity settings (labelled SQL-0 to SQL-9) that can be selected using the Lamp colour • • • Menu function. The minimum Squelch setting (SQL-0) will Battery / S-Meter • • open the Squelch allowing all signals to be heard. SQL-9 is Selection the maximum setting, requiring very strong signals to open Battery / S-Meter the squelch. The factory default is SQL-3 which generally • aLpHa Selection provides reliable squelch operation for most applications. LcD contrast •... - Page 17 4. p ress the or key to select the required Duplex setting. 5. p ress and hold the MENU key until the radio beeps, to store the setting. CTCSS TONES cTcSS (continuous Tone coded Squelch System) is a squelch quieting system that allows several groups of users to share the same channel without disturbing each other. It uses one of a set of sub-audible (very low frequency) tones to open and close the squelch on your radio. There are two standard tones sets, one comprising 50 tones and the other comprising 38 tones. Both tone sets are included in the TX4600 to provide compatibility with other Note: If two Open Scan or two Group Scan groups are radio system. available, the radio will display ‘Scan1’ for the original To toggle the required tone set: Open Scan and ‘Scan2’ for the original Group Scan. 1. S witch the radio OFF. SELECTING DUpLEX 2. p ress and hold the SQL key while switching the radio Duplex operation allows the radio to transmit on a different on again. frequency to that which is receives. This allows operation 3. ‘...
- Page 18 3. p ress the or keys to cycle through the available 1. Select a channel from 41 – 80. colours of Orange, red or Green. 2. press and hold the MENU key until the radio beeps. 4. p ress and hold the MENU key until the radio beeps, 3. B riefly press the MENU key repeatedly until ‘S-MeT’ to store the setting (S Meter), ‘baTT’ (Battery) or ‘aLpHa’ is displayed. bATTERY / S-METER / ALphA SELECTION 4. p ress the or keys to select your preferred choice of The TX4600 has the option of displaying either the battery S-MeT (S Meter), baTT (Battery) or aLpHa. voltage or the incoming signal strength (S-meter) in the area 5. p ress and hold the MENU key until the radio beeps, to beneath the channel display. In addition, when ‘Listening’ store the setting. channels (41 – 80) are selected, the radio provides an extra option of displaying the frequency of the selected user LCD CONTRAST channel or a custom aLpHa label (when aLpHa mode use this setting to adjust the LcD display contrast.
-
Page 19: Installation
If required, an extension speaker may be installed to It is advisable to spend a little time selecting the best improve sound levels in noisy environments or in locations location for your TX4600. The mounting bracket can be further away from the steering or driving position. For rotated above, below or behind the radio enabling the radio locations exposed to water we recommend the SpK45. to be mounted in a wide range of locations. In addition, For dry installations the SpK04 or SpK09 are suitable an optional flush mounting kit allows the radio to be flush extension speakers. mounted in a panel or dashboard. Note: The internal speaker continues to operate when the Keep the following points in mind when choosing a location: extension speaker is plugged in. • T he TX4600 is designed to meet Ip55 specifications which allows for direct water spray, however we recommended you select a location that will minimize excessive exposure to continuous rain or spray. TX 46 00 IN STRUC TI ON M A NUA L PAGE 19... -
Page 20: Antenna Installation
NOISE SUppRESSION extension Speaker antenna The inherent design of FM transceivers results in a high level (optional) of resistance to ignition and electrical interference. However in some installations it may be necessary to take additional steps to help reduce or eliminate noise interference. During installation, try to route the Dc battery leads, the antenna lead or any accessory wires away from the engine compartment, ignition or alternator wiring. If the noise TX4600 continues, it may be necessary to fit a suppression kit in which case we recommend you consult an auto electrician for advice specific to your installation. Higher frequency electrical interference cause by electric TX4600 motors can be suppressed directly at the motor terminals. DISCONNECTING ThE MICROphONE It is recommended that the microphone be left permanently Radio remains on when Ignition Switch is OFF connected to the TX4600, but if it must be disconnected, Fuse proceed as follows: To TX4600 1. I nsert a small screwdriver between the rubber boot and the lip of the raised area on the front panel. BLACK 2. e ase the rubber boot out of the cable entry hole and... -
Page 21: Uhf Cb Operating Frequencies
UhF Cb OpERATING FREQUENCIES Channel Frequency (Mhz) Channel Frequency (Mhz) 476.425 ~ 476.925 476.450 ~ 476.950 476.475 ~ 476.975 476.500 ~ 477.000 476.525 ~ 477.025 476.550 ~ 477.050 476.575 ~ 477.075 476.600 ~ 477.100 476.625 477.125 476.650 477.150 476.675 477.175 ~ 476.700 477.200 ~ 476.725 477.225 ~ 476.750 477.250 ~ 476.775 477.275 ~ 476.800 477.300 ~ 476.825... -
Page 22: Ctcss Table
CTCSS 50 Tone 38 Tone Frequency 50 Tone 38 Tone Frequency 50 Tone 38 Tone Frequency Set. 67.0 118.8 183.5 69.4 123.0 186.2 71.9 127.3 189.9 74.4 131.8 192.8 77.0 136.5 196.6 79.7 141.3 199.5 82.5 146.2 203.5 85.4 151.4 206.5 88.5 156.7... -
Page 23: Specifications
SpECIFICATIONS ENVIRONMENTAL Out of Band Emission: - 70 dBc Current Consumption: 1 .7 amps with 50 Ohm Temperature Range: -10°c to +60°c termination Immersion: IP55 Receiver ELECTRICAL Circuit Type: D ouble conversion General Superheterodyne Compliant Specification: a S/nZS 4365 Intermediate Frequencies: 1st - 21.4 MHz 2nd - 450 kHz Frequency Range TX: 476.425 - 477.4 MHz Current Consumption: <... -
Page 24: Warranty
GMe warrant the TX4600 to be free from defects unit along with suitable proof of purchase date in material and workmanship for a period of twelve (i.e. receipt, docket, credit card slip etc.) and a full (12) months from the date of purchase from their description of the defect to the Dealer from whom authorised Dealer. the unit was purchased. all freight charges incurred for transportation by the Dealer or GMe are the Should the product require servicing during this purchaser’s responsibility. period, all labour and parts used to effect repairs will be supplied free of charge. GMe reserve the right to GME AfTER SALES SERvICE determine whether damage has been occasioned by accident, misuse or improper installation whereby your transceiver is especially designed for the the warranty would be void, including equipment environment encountered in land and marine which has been damaged due to: installations. The use of all solid state circuitry, careful design and rigorous testing, result in high reliability. (a) I ncorrect or reverse polarity connection to Should failure occur however, GMe maintain a fully a battery or power supply or to an incorrect equipped service facility and spare parts stock to supply voltage. meet the customer’s requirements long after expiry of the warranty period. (b) O peration without an antenna or by...
Need help?
Do you have a question about the TX4600 and is the answer not in the manual?
Questions and answers