BIXOLON SLP-TX420 Driver Manual
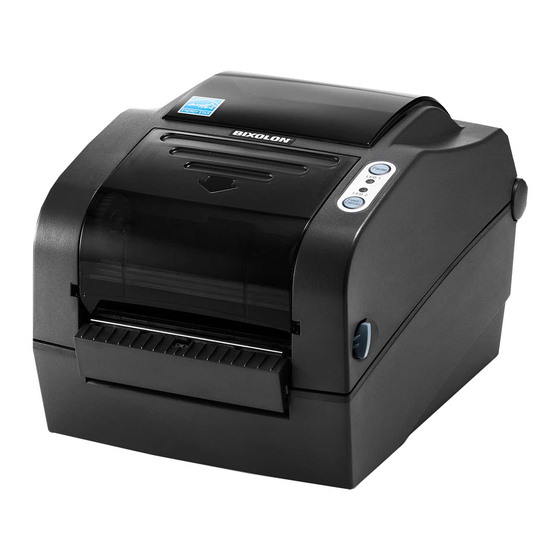
Label printer
Hide thumbs
Also See for SLP-TX420:
- User manual (37 pages) ,
- Manual (33 pages) ,
- Reference manual (64 pages)

Related Manuals for BIXOLON SLP-TX420


Summary of Contents for BIXOLON SLP-TX420
- Page 1 Windows Driver Manual Label Printer SLP-TX420 / TX420E Rev. 1.00 SLP-TX423 / TX423E http://www.bixolon.com...
-
Page 2: Table Of Contents
SLP-TX420x/TX423x ■ Table of Contents 1. Manual Information ......................3 2. Operating System (OS) Environment ................3 3. Windows Driver Preparation ..................3 4. Windows Driver Installation ..................4 4-1 Installing on Windows XP/Server 2003 ............... 4 4-1-1 Via Serial or Parallel Port..................4 4-1-2 Via USB Port ...................... -
Page 3: Manual Information
Windows Driver according to PC operating system (OS). We at BIXOLON maintain ongoing efforts to enhance and upgrade the functions and quality of all our products. In following, product specifications and/or user manual content may be changed without prior notice. -
Page 4: Windows Driver Installation
SLP-TX420x/TX423x 4. Windows Driver Installation 4-1 Installing on Windows XP/Server 2003 4-1-1 Via Serial or Parallel Port 1) Double-click the Windows Driver installation file. 2) Click the “Next” button. Rev. 1.00 - 4 -... - Page 5 SLP-TX420x/TX423x 3) Select the COM or LPT (Which one you want to use) port to be used and click the “Next” button. 4) When the following message box appears, click the “Continue Anyway” button. Rev. 1.00 - 5 -...
- Page 6 SLP-TX420x/TX423x 5) Clicking the ”Yes” button will reboot the PC. 6) Open the printer properties window in the Windows OS. 7) Click the “Port Settings” button in the ”Ports” tab. Rev. 1.00 - 6 -...
- Page 7 SLP-TX420x/TX423x 8) Match the communication settings to those of the printer. (The communication settings of the printer can be performed by conducting a self-test.) 9) Click the “Print Test Page” button and check printing status. 10) Proper installation of the driver is indicated if the test page is printed normally. Rev.
-
Page 8: Via Usb Port
SLP-TX420x/TX423x 4-1-2 Via USB Port 1) Double-click the Windows Driver installation file. 2) Click the “Next” button. Rev. 1.00 - 8 -... - Page 9 SLP-TX420x/TX423x 3) Select USB and click the ”Next” button. 4) When the following message box appears, click the “Continue Anyway” button. 5) Click the ”OK” button. 6) Turn on the printer. Rev. 1.00 - 9 -...
- Page 10 SLP-TX420x/TX423x 7) When the New Hardware Wizard appears for the installation of the Windows Driver, select the option as shown below and click the “Next” button. 8) Click the “Next” button. Rev. 1.00 - 10 -...
- Page 11 SLP-TX420x/TX423x 9) Click the “Next” button. 10) Click the “Continue Anyway” button. Rev. 1.00 - 11 -...
- Page 12 SLP-TX420x/TX423x 11) Click the “Finish” button. 12) The USB Port setting can be confirmed in the Windows Driver properties. Rev. 1.00 - 12 -...
- Page 13 SLP-TX420x/TX423x 13) Click the “Print Test Page” button and check printing status. 14) Proper installation of the driver is indicated if the test page is printed normally. Rev. 1.00 - 13 -...
-
Page 14: Via Network Port
SLP-TX420x/TX423x 4-1-3 Via Network Port 1) Double-click the Windows Driver installation file. 2) Click the “Next” button. Rev. 1.00 - 14 -... - Page 15 SLP-TX420x/TX423x 3) Select Network port. 4) Type IP address and port number and then click “Next” button. 5) When the following message box appears, click the “Continue Anyway” button. 6) Clicking the ”Yes” button will reboot the PC. 7) Open the printer properties window in the Windows OS. Rev.
- Page 16 SLP-TX420x/TX423x 8) Click the “Port Settings” button in the ”Ports” tab. 9) Match the communication settings to those of the printer. Rev. 1.00 - 16 -...
- Page 17 SLP-TX420x/TX423x 10) Click the “Print Test Page” button and check printing status. 11) Proper installation of the driver is indicated if the test page is printed normally. Rev. 1.00 - 17 -...
-
Page 18: Installing Windows Vista/Server 2008/7/8/Server 2012
SLP-TX420x/TX423x 4-2 Installing Windows VISTA/Server 2008/7/8/Server 2012 4-2-1 Via Serial or Parallel Port 1) Double-click the Windows Driver installation file. 2) Click the “Yes” button. 3) Click the “Next” button. Rev. 1.00 - 18 -... - Page 19 SLP-TX420x/TX423x 4) Select the COM or LPT (Which one you want to use) port to be used and click the “Next” button. 5) When the following message box appears, click the “Install” button. Rev. 1.00 - 19 -...
- Page 20 SLP-TX420x/TX423x 6) Clicking the ”Yes” button will reboot the PC. 7) Open the printer properties window in the Windows OS. 8) Click the “Port Settings” button in the ”Ports” tab. Rev. 1.00 - 20 -...
- Page 21 SLP-TX420x/TX423x 9) Match the communication settings to those of the printer. (The communication settings of the printer can be performed by conducting a self-test.) 10) Click the “Print Test Page” button and check printing status. 11) Proper installation of the driver is indicated if the test page is printed normally. Rev.
-
Page 22: Via Usb Port
SLP-TX420x/TX423x 4-2-2 Via USB Port 1) Double-click the Windows Driver installation file. 2) Click the “Yes” button 3) Click the “Next” button. Rev. 1.00 - 22 -... - Page 23 SLP-TX420x/TX423x 4) Select USB and click the ”Next” button. 5) When the following message box appears, click the “Install” button. 6) Click the “OK” button. Rev. 1.00 - 23 -...
- Page 24 SLP-TX420x/TX423x 7) Turn on the printer. 8) The USB Port setting can be confirmed in the Windows Driver properties. Rev. 1.00 - 24 -...
- Page 25 SLP-TX420x/TX423x 9) Click the “Print Test Page” button and check printing status. 10) Proper installation of the driver is indicated if the test page is printed normally. Rev. 1.00 - 25 -...
-
Page 26: Via Network Port
SLP-TX420x/TX423x 4-2-3 Via Network Port 1) Double-click the Windows Driver installation file. 2) Click the “Yes” button. 3) Click the “Next” button. Rev. 1.00 - 26 -... - Page 27 SLP-TX420x/TX423x 4) Select Network port. 5) Type IP address and port number and then click “Next” button. 6) When the following message box appears, click the “Install” button. Rev. 1.00 - 27 -...
- Page 28 SLP-TX420x/TX423x 7) Clicking the ”Yes” button will reboot the PC. 8) Open the printer properties window in the Windows OS. 9) Click the “Port Settings” button in the ”Ports” tab. Rev. 1.00 - 28 -...
- Page 29 SLP-TX420x/TX423x 10) Match the communication settings to those of the printer. 11) Click the “Print Test Page” button and check printing status. 12) Proper installation of the driver is indicated if the test page is printed normally. Rev. 1.00 - 29 -...
-
Page 30: Detailed Windows Driver Settings
SLP-TX420x/TX423x 5. Detailed Windows Driver Settings 5-1 Printing Preferences No. Of Copies The number of copies Speed Set the printing speed Darkness The darkness level of printouts. Portrait The printer prints in portrait orientation. Landscape The printer prints in landscape orientation. Rotate 180 The option of rotation 180 degree. -
Page 31: Adding New Paper Size
SLP-TX420x/TX423x 5-2 Adding new paper size 1) Click the “Preferences…” button Rev. 1.00 - 31 -... - Page 32 SLP-TX420x/TX423x 2) Click the “New” button. 3) Set a value you want and then click “OK” button. Rev. 1.00 - 32 -...
-
Page 33: Specifications
SLP-TX420x/TX423x 6. Specifications 6-1 Resolution BIXOLON SLP-TX420 : 203 203 dpi BIXOLON SLP-TX423 : 300 300 dpi 6-2 Paper Size 1.5 x 1.0 inch (38.1 x 25.4 mm) 4.0 x 2.0 inch (101.6 x 50.8 mm) 1.5 x 1.5 inch (38.1 x 38.1 mm) 4.0 x 3.0 inch (101.6 x 76.2 mm)
Need help?
Do you have a question about the SLP-TX420 and is the answer not in the manual?
Questions and answers