Panasonic S-22MF2E5 Installation Instructions Manual
Vrf system air conditioner for refrigerant r410a
Hide thumbs
Also See for S-22MF2E5:
- Service manual (178 pages) ,
- Technical data manual (37 pages) ,
- Operating instructions manual (25 pages)
Table of Contents
Advertisement
Quick Links
INSTALLATION INSTRUCTIONS
– VRF System Air Conditioner –
for Refrigerant R410A
■ R410A Models
Model No.
Indoor Units
Indoor Units
Type
Type
Low Silhouette
F2
Ducted
Indoor Units
Type
Type
Low Silhouette
F2
Ducted
Type Outdoor Units
LE1 mini
ME1 2WAY
MF1 3WAY
ENGLISH
Read through the Installation Instructions before you proceed with the installation.
In particular, you will need to read under the "IMPORTANT!" section at the top of the page.
FRANÇAIS
Lisez les instructions d'installation avant de commencer l'installation.
En particulier, vous devez lire la section "IMPORTANT!" en haut de la plage.
ESPAÑOL
Lea las Instrucciones de instalación antes de proceder con la instalación del equipo.
En concreto, deberá leer detenidamente la sección "¡IMPORTANTE!" situada al principio de la página.
DEUTSCH
Lesen Sie die Einbauanleitung, bevor Sie mit der Installation beginnen.
Insbesondere die Hinweise im Abschnitt "WICHTIG!" oben auf der Seite müssen unbedingt gelesen werden.
ITALIANO
Leggere le Istruzioni di installazione prima di procedere con l'installazione.
Prestare particolare attenzione alla sezione "IMPORTANTE!" all'inizio della pagina.
NEDERLANDS
Lees de installatie-instructies zorgvuldig door voor u begint met de installatie.
U moet vooral het gedeelte waar "BELANGRIJK!" boven staat heel goed lezen.
PORTUGUÊS
Leia cuidadosamente as instruções de instalação antes de prosseguir com a instalação.
Em particular, é necessário ler as informações na secção "IMPORTANTE!" na parte superior da página.
ΕΛΛΗΝΙΚΆ
Διαβάστε τις Οδηγίες εγκατάστασης πριν συνεχίσετε με την εγκατάσταση.
Συγκεκριμένα, θα χρειαστεί να διαβάσετε την ενότητα «ΣΗΜΑΝΤΙΚΟ!» στο πάνω μέρος της σελίδας.
БЪЛГАРСКИ
Прочетете инструкциите за инсталиране преди да продължите с инсталирането.
В частност, ще трябва да прочетете раздела „ВАЖНО!" в горната част на страницата.
РУССКИЙ
Перед выполнением установки прочтите инструкцию по установке.
В частности, вам следует прочесть раздел «ВАЖНО!» вверху страницы.
УКРАЇНСЬКА
Перш ніж продовжити встановлення, прочитайте вказівки зі встановлення.
Зокрема, обов'язково прочитайте розділ «ВАЖЛИВО!» вгорі сторінки.
B.INDONESIA
Bacalah seluruh Petunjuk Pemasangan sebelum Anda melakukan pemasangan.
Secara khusus, Anda perlu membaca bagian "PENTING!" di bagian atas halaman.
22
28
S-22MF2E5 S-28MF2E5 S-36MF2E5 S-45MF2E5 S-56MF2E5 S-60MF2E5 S-73MF2E5 S-90MF2E5
106
140
S-106MF2E5 S-140MF2E5 S-160MF2E5
U-4LE1E5, U-5LE1E5, U-6LE1E5, U-4LE1E8, U-5LE1E8, U-6LE1E8
U-8ME1E81, U-10ME1E81, U-12ME1E81, U-14ME1E81, U-16ME1E81, U-18ME1E81, U-20ME1E81
U-8ME1E8(E), U-10ME1E8(E), U-12ME1E8(E), U-14ME1E8(E), U-16ME1E8(E),U-18ME1E8(E), U-20ME1E8(E)
U-8MF1E8, U-10MF1E8, U-12MF1E8, U-14MF1E8, U-16MF1E8
36
45
160
56
60
73
90
F615253
Advertisement
Table of Contents

Related Manuals for Panasonic S-22MF2E5


Summary of Contents for Panasonic S-22MF2E5
-
Page 1: Installation Instructions
– VRF System Air Conditioner – for Refrigerant R410A ■ R410A Models Model No. Indoor Units Indoor Units Type Type Low Silhouette S-22MF2E5 S-28MF2E5 S-36MF2E5 S-45MF2E5 S-56MF2E5 S-60MF2E5 S-73MF2E5 S-90MF2E5 Ducted Indoor Units Type Type Low Silhouette S-106MF2E5 S-140MF2E5 S-160MF2E5 Ducted Type Outdoor Units... -
Page 2: Important
IMPORTANT! When Transporting Please Read Before Starting Be careful when picking up and moving the indoor and outdoor units. Get a partner to help, and bend your knees This air conditioner must be installed by the sales dealer when lifting to reduce strain on your back. Sharp edges or installer. - Page 3 • Do not leak refrigerant while piping work for an installation or re-installation, and while repairing refrigeration parts. Handle liquid refrigerant carefully as it may cause frostbite. When Servicing • Turn the power OFF at the main power box (mains) before opening the unit to check or repair electrical parts and wiring.
-
Page 4: Table Of Contents
CONTENTS Page Page IMPORTANT ........2 7. -
Page 5: General
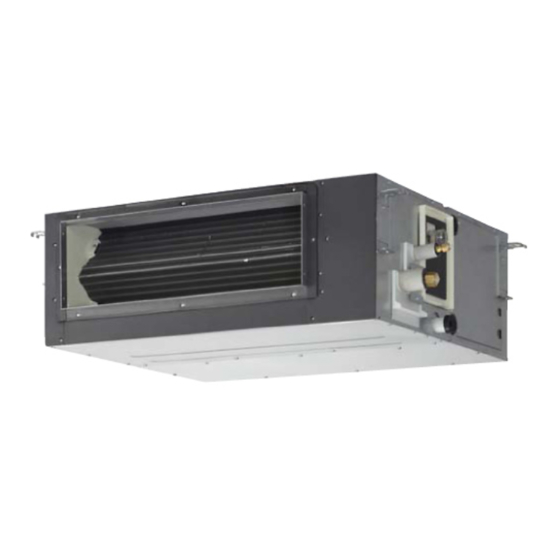
1. GENERAL Table 1-1 (Low Silhouette Ducted) Part Name Figure Q’ty Remarks This booklet briefly outlines where and how to install the air conditioning system. Please read over the entire set of For suspending indoor Washer instructions for the indoor and outdoor units and make sure all unit from ceiling accessory parts listed are with the system before beginning. -
Page 6: Selecting The Installation Site
2. SELECTING THE INSTALLATION SITE 2-1. Indoor Unit AVOID: ● areas where leakage of flammable gas may be expected. ● places where large amounts of oil mist exist. ● direct sunlight. ● locations near heat sources which may affect the performance of the unit. -
Page 7: How To Install The Indoor Unit
3. HOW TO INSTALL THE INDOOR UNIT ■ Low Silhouette Ducted Type (F2 Type) Unit: mm 3-1. Required Minimum Space for Installation and Service A (Suspension bolt pitch) ● This air conditioner is usually installed above the ceiling so Electrical that the indoor unit and ducts are not visible. -
Page 8: Suspending The Indoor Unit
3-2. Suspending the Indoor Unit Suspension bolt Depending on the ceiling type: • Insert suspension bolts (Fig. 3-3) Nuts and washers (use for upper and lower) • Use existing ceiling supports or construct a suitable support (Fig. 3-4). Suspension lug Hole-in-anchor Concrete Insert... -
Page 9: Installing The Drain Pipe
3-3. Installing the Drain Pipe 300 mm or less (1) Prepare standard hard PVC pipe (O.D. 32 mm) for the 500 mm or less drain and use the supplied hose band to prevent water Good leaks. The PVC pipe must be purchased separately. The transparent drain part on the unit allows you to check drainage. -
Page 10: Connecting Duct To Air Intake Port Side
3-5. Connecting Duct to Air Intake Port Side Bracket (1) First pull out a filter in the direction of the electrical equipment box in the unit. (Fig. 3-15) The pre-installed filter will not be used any more. (2) Then remove the seal packing, bracket and filter attached to the side of the air intake port. -
Page 11: External Static Pressure Setting
3-6. External Static Pressure Setting Choose one of the following methods from “a”, “b”, “c” or “d” as shown in the flow chart (within the dotted lines) and then make the setting accordingly. a. No setting modification............: Use-as-is at shipment (there are cases in which the setting may differ from the shipment setting when reset after once setting the external static pressure.) b. - Page 12 (3) Refer to Table 3-4 and Fig. 3-18 for details on the relationship between the value of item code “b0” and the external static pressure. (4) When set in group control (connecting multiple indoor units with one wired remote controller), set each indoor unit to item code “b0”. When amending the setting after selecting [ b.
- Page 13 3-6-2. Operating the Timer Remote Controller (CZ-RTC2) Table 3-4 Setting the external static pressure 3-6-2-1. Setting Item Code “ ” Indoor unit Item code 22, 28, 36, 45, 56, 106, 140, 160 Press and hold down the buttons 60, 73, 90 simultaneously for 4 or more seconds.
- Page 14 Indoor Fan Performance 90 type Item code “ ” PQ diagram M M M M M M M L L L L 1 -3 1 -2 L L L L L L L L 1 -2 Airflow Volume (m /minute) 1 -3 106 type 22, 28, 36, 45 types...
-
Page 15: Electrical Wiring
4. ELECTRICAL WIRING 4-1. General Precautions on Wiring (1) Before wiring, confirm the rated voltage of the unit as shown on its nameplate, then carry out the wiring closely following the wiring diagram. (2) Circuit breaker must be incorporated in the fixed wiring in accordance with the wiring regulations. -
Page 16: Wiring System Diagrams
4-3. Wiring System Diagrams Indoor unit (No. 1) Power supply Outdoor unit 220 – 240V ~ 50 Hz INV unit Ground Power supply Remote 380 – 415V, 3 N~, 50 Hz controller Ground Ground Ground Indoor unit Ground (No. 2) Inter-outdoor-unit control wiring Power supply Ground... - Page 17 CAUTION (1) When linking the outdoor units in a network, disconnect the terminal extended from the short plug from all outdoor units except any one of the outdoor units. (When shipping: In shorted condition.) For a system without link (no wiring connection between outdoor units), do not remove the short plug. (2) Do not install the inter-unit control wiring in a way that forms a loop.
- Page 18 How to connect wiring to the terminal ■ For stranded wiring (1) Cut the wire end with cutting pliers, Stranded wire Special Screw then strip the insulation to expose washer the stranded wiring about 10 mm and Ring pressure tightly twist the wire ends. (Fig. 4-7) Ring pressure terminal Screw and...
-
Page 19: How To Process Tubing
5. HOW TO PROCESS TUBING Caution Before Connecting Tubes Tightly (1) Apply a sealing cap or water-proof tape to prevent dust or The liquid tubing side is connected by a fl are nut, and the gas water from entering the tubes before they are used. tubing side is connected by brazing. -
Page 20: Insulating The Refrigerant Tubing
● Flare insulator (supplied) For the flare nuts at tubing connections, be sure to use the flare nuts that were supplied with the unit, or else flare nuts Insulation tape (white) Flare union for R410A (type 2). The refrigerant tubing that is used must (supplied) be of the correct wall thickness as shown in the table below. -
Page 21: Finishing The Installation
5-5. Finishing the Installation After finishing insulating and taping over the tubing, use sealing putty to seal off the hole in the wall to prevent rain and draft from entering. (Fig. 5-10) Apply putty here Tubing Fig. 5-10 6. HOW TO INSTALL THE TIMER REMOTE CONTROLLER (OPTIONAL PART) NOTE... -
Page 22: Appendix
<How to clean the filter> 8. APPENDIX Use a vacuum cleaner to remove light dust. If there is sticky ■ Care and Cleaning dust on the filter, wash the filter in lukewarm, soapy water, rinse it in clean water, and dry it. WARNING ●... - Page 23 ■ Troubleshooting If your air conditioner does not work properly, first check the following points before requesting service. If it still does not work properly, contact your dealer or a service center. ● Indoor unit Symptom Cause ● Noise Sound like streaming water during Sound of refrigerant liquid flowing inside unit ●...
-
Page 24: Tips For Energy Saving
● Check Before Requiring Services Symptom Cause Remedy Air conditioner does not run Power failure or after power failure Press ON/OFF operation button on remote control at all although power is turned unit again. ● Operation button is turned off. Switch on power if breaker is turned off. - Page 25 ENGLISH Compliance with regulation 842/EC/2006 Article 7(1) requirements DO NOT VENT R410A INTO THE ATMOSPHERE: R410A IS A FLUORINATED GREENHOUSE GAS, COVERED BY THE KYOTO PROTOCOL, WITH A GLOBAL WARMING POTENTIAL (GWP) = 1975. FRANÇAIS Conformité aux exigences de l’article 7 (1) de la réglementation 842/EC/2006 NE PAS METTRE LE R410A À...
Need help?
Do you have a question about the S-22MF2E5 and is the answer not in the manual?
Questions and answers