
Subscribe to Our Youtube Channel
Related Manuals for Windchaser WGCF1RP


Summary of Contents for Windchaser WGCF1RP
- Page 1 PLEASE READ BEFORE USE AND SAVE Oscillating Column with Remote Control INSTRUCTION MANUAL MODEL WGCF1RP Innovative Products For Living...
-
Page 2: Limited Warranty
Read the instruction manual before attempting to with Remote Control use this product. WindChaser Products, Inc. is not liable for incidental or consequential damages of any nature. Any implied warranty of Before Initial Use... -
Page 3: Before Initial Use
BEFORE INITIAL USE CLEANING AND STORAGE 1. Turn the control to OFF and unplug the unit before cleaning. Read this Entire Instruction Manual Before Use. 2. Use only a soft, damp cloth to clean the exterior of the unit. 3. Do not immerse the unit in water and never allow water to drip inside. 4. -
Page 4: For Your Safety
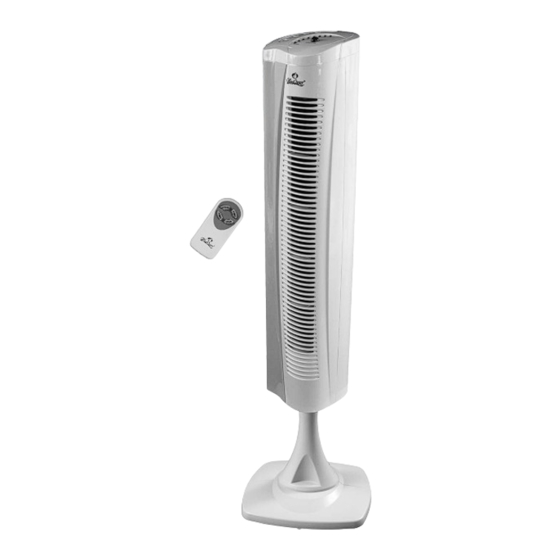
FOR YOUR SAFETY OPERATING INSTRUCTIONS IMPORTANT INSTRUCTIONS Control Panel Read and save these important safety instructions before using this fan. When Remote Control using electrical appliances, basic safety precautions should always be followed including the following: 1) Use this fan only as described in this manual. Other uses not recommended may cause fire or electric shock. - Page 5 PARTS ASSEMBLY INSTRUCTIONS 1. Timer Button 2. Oscillation Button 3. Speed Button 4. Power ON/OFF Button 5. Fan Speed Indicator Lights 6. Timer Indicator Lights 7. Remote Sensor 8. Power Indicator Light 9. Fan Body 10. Rear Grill 11. Front Grill 12.
-
Page 6: Assembly Instructions
ASSEMBLY INSTRUCTIONS 1. Pass the power cord through the center notch of the rear base. 2. Connect the rear base to the front base by sliding it downward. Snap the two parts of the Pedestal (13 & 14) together (the back being the side with the holes) and secure with the two screws using a Phillips (cross-head) screwdriver.
Need help?
Do you have a question about the WGCF1RP and is the answer not in the manual?
Questions and answers