Enttec DMX USB PRO Mk2 User Manual
Hide thumbs
Also See for DMX USB PRO Mk2:
- Quick start manual (7 pages) ,
- User manual (12 pages) ,
- User manual (10 pages)
Table of Contents
Advertisement
Advertisement
Table of Contents

Related Manuals for Enttec DMX USB PRO Mk2


Summary of Contents for Enttec DMX USB PRO Mk2
-
Page 2: Package Contents
Package Contents Your DMX USB PRO Mk2 package contains these items: DMX USB PRO Mk2 (Part No. 70314) • Driver for Windows™ software on the Enttec CD-ROM (Part No. 79106) • Micro USB Cable (Part No. 50282) • Breakout cable 0.1M - DB15 to 3DMX (Part No. 79146) •... -
Page 3: Table Of Contents
DMX USB PRO Mk2 User Manual v1.1 Table of Contents Accessories (sold separately) ..................5 Warranty ........................7 Contacting ENTTEC ...................... 8 Getting Support ......................8 Typographic conventions used in this manual .............. 9 Getting to know your PRO Mk2 ..................9 Features ........................ - Page 4 Selecting a COM port ................... 19 Device Manager ....................19 ENTTEC DMX-PRO Manager ..................21 Test and Update PRO Mk2 ..................21 Firmware Update ....................23 Standalone Mode ..................... 24 Appendix 1 - DMX Connector Pin-outs ..............27 DMX OUT ........................ 27 DMX IN ........................
-
Page 5: Accessories (Sold Separately)
Accessories (sold separately) 79147 PRO Mk2 3DMX + 2MIDI breakout Cable (0.1m) 2 x DMX Output (DMX 1 and DMX 2) 1 x DMX Input (DMX1) 1 x MIDI IN 1 x MIDI OUT 70317 PRO MK2 Zip Case Allows you to safely transport PRO Mk2 with the breakout cable and the usb cable all in one case 70029 3P FEMALE TO 5P MALE Converter... - Page 6 3P MALE TO 5P FEMALE Converter 70030 70023 5P MALE TO MALE Converter 79149 5W USB Power Supply Useful to support standalone mode Comes with US,UK,EU and AU plug adaptors...
-
Page 7: Warranty
Warranty ENTTEC warrants that the product that it manufactures will be free from defects in materials and workmanship for a period of one year from the date of shipment from an authorised ENTTEC wholesaler. If the device proves defective within the warranty period, ENTTEC will repair or replace at its sole discretion, the defective hardware. -
Page 8: Contacting Enttec
Australia Getting Support If you require support for the PRO Mk2 or the Driver software, please visit the Support area of our website at www.enttec.com/support. There you can fill out a support request ticket for prompt assistance with your enquiry. -
Page 9: Typographic Conventions Used In This Manual
Eg. The name of the "Delay" entry box is printed as Delay. Getting to know your PRO Mk2 Thank you for purchasing the PRO Mk2. At ENTTEC we are proud of our products and we hope you will enjoy using them as much as we enjoy designing and building them. -
Page 10: Layout
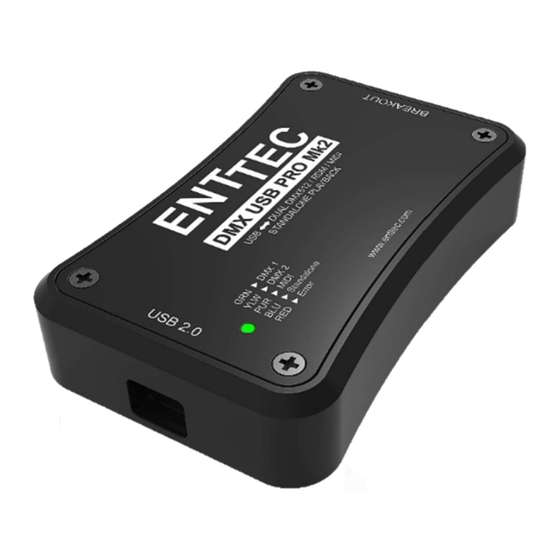
Dual 512 channel universes of input or output (one per DMX port) • Full RDM capability on both ports • Standalone mode: playback a single recorded DMX show on powerup • Midi input & output ports (DMX + Midi cable sold separately) •... - Page 11 ENTTEC DMX PRO Mk2 interface...
- Page 12 Micro USB connector for connection to computer. DMX Breakout DB15 connector To connect the DB15 DMX breakout cable. Compatible with both DMX only and DMX + MIDI breakout cables. Only ENTTEC supplied or sold cables should be used for DMX or MIDI Breakout.
-
Page 13: Fast Track Guide To The Pro Mk2
Fast track guide to the PRO Mk2 Install and configure the Driver software on your Windows™, Linux™or Mac™ computer. (see Installing Driver on page 12) Connect the PRO Mk2 to your computer and the DMX512 control network. (see Connecting the PRO Mk2 on page 15) Load the control software of your choice onto the computer ... -
Page 14: Installing Pro Mk2
To do this, you need the driver setup file, which is available from : the CD which came in the package, or • download the latest driver direct from the ENTTEC website • (www.enttec.com/promk2) for latest drivers and OS support, please check ftdi website •... - Page 15 The illustration above shows the opening splash screen menu of the ENTTEC Products & Documents CD, from which you will want to choose Drivers. That will take you to the next screen.
- Page 16 It is recommended that you choose the first option to download the “Driver Auto Installer”. The manual zip is provided for advanced users, who know how to install the driver manually. A dialogue box will open asking if you want to run, save or cancel this file.
-
Page 17: Connecting The Pro Mk2
(usually a few seconds later in Windows) saying your computer has detected new hardware. It will be correctly identified as ENTTEC USB PRO Mk2 by your computer. Power supply The PRO Mk2 draws its power from the USB connection. -
Page 18: Dmx Out (Dmx 1 And Dmx 2)
DMX Out (DMX 1 and DMX 2) The DMX Out socket(s) should be connected to the network of DMX512 devices that are to be controlled by the PRO Mk2. Both ports can be used to output at the same time (allowing 2 universe of DMX together). -
Page 19: Setting Up Pro Mk2
Setting up PRO Mk2 Selecting a COM port In most cases the USB port you plug the PRO Mk2 into will automatically fall into an acceptable range with respect to the other elements of your computer’s communications ports, but if you are having problems or conflicts between the ports, here is what you can do to change the COM port. - Page 20 Under “Port Settings”, click on “Advanced”, and you can then change the COM Port No. under this screen:...
-
Page 21: Enttec Dmx-Pro Manager
ENTTEC DMX-PRO Manager ENTTEC provides a free cross-platform app to configure, test and update the PRO Mk2. It also allows the user to record a DMX show into the memory and setup the standalone mode on the PRO Mk2. The App is available for Windows on the CD or you can download the latest version for Windows or Mac from the ENTTEC website (www.enttec.com/promk2). -
Page 23: Firmware Update
Firmware Update Use the firmware file meant for PRO Mk2 (available on the website; www.enttec.com/promk2), and upload it using the upload button (“Choose File” - as per Chrome browser). After selecting the correct file, click on the Update Firmware button and let the update proceed. -
Page 24: Standalone Mode
Standalone Mode Standalone mode allows you to record and playback a DMX sequence or show via DMX input onto PRO Mk2 Memory. The duration of the recording depends on the Standalone configuration done before the recording. The recorder is smart enough to only record the changing frames, so as to accommodate as many frames as possible. - Page 25 Once the configuration is set, you can select the input port and click on “Record DMX” to start DMX recording. The recording is saved onto a file, and is only transferred to the PRO Mk2 memory when recording is stopped using the “Stop Recording” button. The recording can now be transferred to memory using “Write to Memory”...
- Page 26 Once the show is uploaded to memory successfully, the page is automatically refreshed to allow Show Control on the recorded show. You can now play or stop the show using the controls on this page. These controls will only be available, if there is a show written to memory. You can also export the recorded show from the PRO Mk2 to a binary file using “Export Show to File”, and this file can then be imported back to the PRO Mk2 memory using “Import Show”...
-
Page 27: Appendix 1 - Dmx Connector Pin-Outs
Appendix 1 - DMX Connector Pin-outs DMX OUT Pin 1 Ground Pin 2 Data - Pin 3 Data + Pin 4 Pin 5 DMX IN Pin 1 Ground Pin 2 Data - Pin 3 Data + Pin 4 Pin 5... -
Page 28: Appendix 2 - Midi Connector Pin-Outs
Appendix 2 - MIDI Connector Pin-outs MIDI OUT Pin 1 Pin 2 Ground Pin 3 Pin 4 Data + Pin 5 Data - MIDI IN Pin 1 Pin 2 Pin 3 Pin 4 Data + Pin 5 Data -...
Need help?
Do you have a question about the DMX USB PRO Mk2 and is the answer not in the manual?
Questions and answers