Table of Contents
Advertisement
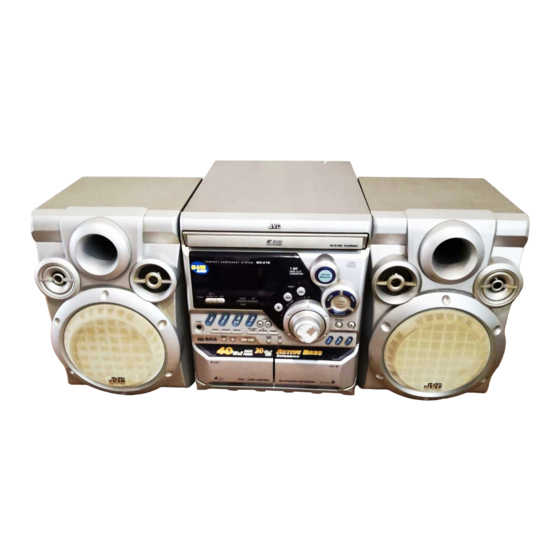
COMPACT COMPONENT SYSTEM
CA-MXK1R/CA-MXK3R
RM-SMXK1A REMOTE CONTROL
COMPACT COMPONENT SYSTEM
1
2
3
STANDBY/ON
4
4
5
6
SLEEP
7
7
8
9
AUX
10
10
+10
FM /AM
FM MODE
STANDBY
CD
1
1
2
3
CD
CD
CD
CD
PROGRAM
/RANDOM
PROGRAM
/RANDOM REPEAT TAPE A/B
TAPE
1
1
PHONES
DISPLAY
1
MODE
PTY/EON
1
1
1
SELECT
SOUND
SOUND
MODE
1
MODE
ACTIVE
ACTIVE
FADE
BASS EX.
VOLUME
BASS EX.
MUTING
3-CD
PLAY & EXCHANGE
CD-R/RW PLAYBACK
MX-K1R
1 BIT
DUAL D/A
ACTIVE
CONVERTER
BASS EX.
PRESET
STANDBY/ON
SOUND
CANCEL
SET
MODE
/ DEMO
DISC SKIP
TUNNIG
CD CONTROL
REC START
CD
REPEAT
PROGRAM
RANDOM
/STOP
REC START DUBBING
CLOCK
TAPE
DISPLAY
/TIMER
A/B
MODE
PTY / EON
SELECT
EJECT
EJECT
A
B
PLAY
FULL - LOGIC CONTROL
CD SYNCHRO RECORDING
REC/PLAY
CA-MXK1R
INSTRUCTIONS
3-CD
PLAY & EXCHANGE
RM-SMXK3A REMOTE CONTROL
MX-K3R
COMPACT COMPONENT SYSTEM
1
2
3
STANDBY/ON
4
5
6
SLEEP
7
8
9
AUX
10
+10
FM /AM
FM MODE
STANDBY/ON
STANDBY
CANCEL
SET
1
2
3
CD
CD
CD
CD
/ DEMO
PROGRAM
/RANDOM REPEAT TAPE A/B
TAPE
1
1
TUNNIG
PHONES
DISPLAY
1
MODE
PTY/EON
REC START
CD
REPEAT
PROGRAM
RANDOM
/STOP
REC START DUBBING
CLOCK
1
1
SELECT
DISPLAY
/TIMER
MODE
PTY / EON
SELECT
SOUND
1
MODE
ACTIVE
FADE
VOLUME
BASS EX.
MUTING
EJECT
A
PLAY
FULL - LOGIC CONTROL
CA-MXK3R
For Customer Use:
Enter below the Model No. and Serial
No. which are located either on the
rear, bottom or side of the cabinet.
Retain this information for future refer-
ence.
Model No.
Serial No.
CD-R/RW PLAYBACK
1 BIT
DUAL D/A
ACTIVE
CONVERTER
BASS EX.
PRESET
SOUND
MODE
DISC SKIP
CD CONTROL
TAPE
A/B
EJECT
B
CD SYNCHRO RECORDING
REC/PLAY
LVT0686-009B
[B]
Advertisement
Table of Contents

Subscribe to Our Youtube Channel
Related Manuals for JVC Compact Component System CA-MXK1R


Summary of Contents for JVC Compact Component System CA-MXK1R
- Page 1 COMPACT COMPONENT SYSTEM CA-MXK1R/CA-MXK3R PLAY & EXCHANGE RM-SMXK1A REMOTE CONTROL MX-K1R COMPACT COMPONENT SYSTEM STANDBY/ON SLEEP FM /AM FM MODE STANDBY/ON STANDBY CANCEL / DEMO PROGRAM PROGRAM /RANDOM /RANDOM REPEAT TAPE A/B TAPE TUNNIG PHONES DISPLAY MODE PTY/EON REC START REPEAT PROGRAM RANDOM...
-
Page 2: Proper Ventilation
IMPORTANT for the U.K. DO NOT cut off the mains plug from this equipment. If the plug fit- ted is not suitable for the power points in your home or the cable is too short to reach a power point, then obtain an appropriate safety approved extension lead or consult your dealer. - Page 3 “SOME DOS AND DON’TS ON THE SAFE USE OF EQUIPMENT” This equipment has been disigned and manufactured to meet international safety standards but, like any electrical equipment, care must be taken if you are to obtain the best results and safety is to be assured. Do read the operating instructions before you attempt to use the equipment.
-
Page 4: Introduction
The controls and operations have been redesigned to make them very easy to use, freeing you to just enjoy the music. • With JVC’s COMPU PLAY you can turn on the System and automatically start the Radio, Cassette Deck, or CD Player with a single touch. -
Page 5: Table Of Contents
Table of Contents Introduction ...1 Features... 1 How This Manual Is Organized... 1 IMPORTANT CAUTIONS... 1 Table of Contents ...2 Getting Started ...3 Accessories ... 3 How To Put Batteries In the Remote Control... 3 Using the Remote Control ... 3 Connecting the FM Antenna... -
Page 6: Getting Started
Getting Started Accessories Make sure that you have all of the following items, which are supplied with the System. AM (MW/LW) Loop Antenna (1) Remote Control (1) Batteries (2) FM Wire Antenna (1) If any of these items are missing, contact your dealer immediately. How To Put Batteries In the Remote Control Match the polarity (+ and –) on the batteries with the + and –... -
Page 7: Connecting The Fm Antenna
CAUTION: • Make all connections before plugging the System into an AC power outlet. Connecting the FM Antenna Using the Supplied Wire Antenna AUX IN ANTENNA CAUTION: LEFT FM75 SPEAKER IMPEDANCE 6 16 OHMS. COAXIAL SPEAKERS LOOP RIGHT LEFT RIGHT Using the Coaxial Type Connector (Not supplied) A 75-ohm antenna with coaxial type connector (IEC or DIN45 325) should be connected to the FM 75-ohm COAXIAL terminal. -
Page 8: Connecting The Am (Mw/Lw) Antenna
Getting Started Connecting the AM (MW/LW) Antenna Rear Panel of the Unit AUX IN ANTENNA CAUTION: LEFT FM75 SPEAKER IMPEDANCE 6 16 OHMS. COAXIAL SPEAKERS LOOP RIGHT LEFT RIGHT • Even when connecting an outside AM (MW/LW) antenna, keep the indoor AM (MW/LW) loop connected. CAUTION: •... -
Page 9: Connecting External Equipment
COMPU Play JVC’s COMPU PLAY feature lets you control the most frequently used System functions with a single touch. With One Touch Operation you can play a CD, a tape, turn on the radio, or listen to an external equipment with a single press of the play button for that function. -
Page 10: Basic Operations
Basic Operations REMOTE CONTROL STANDBY/ON SLEEP Numeric keys FM /AM FM MODE PROGRAM TAPE /RANDOM REPEAT TAPE A/B DISPLAY MODE PTY/EON SELECT SOUND SOUND MODE MODE ACTIVE FADE VOLUME BASS EX. MUTING ACTIVE FADE MUTING BASS EX. * When the System is in use, the display shows other items as well. For simplicity, we show here only the items described in this section. -
Page 11: Fade-Out Muting (Fade Muting)
For private listening Connect a pair of headphones to the PHONES jack. No sound comes out of the speakers. Be sure to turn down the volume before connecting or putting on headphones. Fade-out Muting (FADE MUT- ING) You can mute the output with one touch operation. To mute the output, press the FADE MUTING button on the Remote Control. -
Page 12: Using The Tuner
Using the Tuner REMOTE CONTROL STANDBY/ON Numeric SLEEP keys FM /AM FM/AM FM MODE FM MODE PROGRAM TAPE /RANDOM REPEAT TAPE A/B DISPLY MODE DISPLAY MODE PTY/EON PTY/EON SELECT SELECT +, – SOUND MODE ACTIVE FADE VOLUME BASS EX. MUTING * When the System is in use, the display shows other items as well. -
Page 13: Presetting Stations
• In AM (MW/LW) broadcast, reception sensitivity will be changed by turning the AM loop antenna. Turn the AM (MW/LW) loop antenna for best reception. Presetting Stations You can preset up to 30 FM stations and up to 15 AM (MW/LW) stations. -
Page 14: Receiving Fm Stations With Rds
Using the Tuner Receiving FM Stations with You can use the RDS (Radio Data System) by using the buttons on the Unit or the Remote Control. RDS allows FM stations to send additional signals with their reg- ular program signals. For example, the stations send their station names, and information about what type of program they broad- cast, such as sports or music, etc. - Page 15 To search for a program by PTY codes One of the advantages of the RDS service is that you can locate a particular kind of program by specifying the PTY codes. To search for a program using PTY codes: On the Unit PTY / EON SELECT PTY / EON...
- Page 16 Using the Tuner To temporarily switch to a broadcast program of your choice EON (Enhanced Other Networks) is another convenient RDS serv- ice that allows this unit to switch temporarily to a broadcast pro- gram of your choice (NEWS, TA or INFO) from the currently selected station, except if you are listening to a non-RDS station (all AM (MW/LW) stations or some FM stations).
-
Page 17: Using The Cd Player
Using the CD Player REMOTE CONTROL STANDBY/ON Numeric SLEEP keys FM /AM FM MODE CD1-CD3 PROGRAM PROGRAM TAPE /RANDOM REPEAT TAPE A/B /RANDOM DISPLAY MODE PTY/EON SELECT SOUND MODE ACTIVE FADE VOLUME BASS EX. MUTING * When the System is in use, the display shows other items as well. For simplicity, we show here only the items described in this section. -
Page 18: One Touch Play
Using the CD Player Example of indication: When CD door has ejected once and then CD-1 is pressed. (DISC1 is selected) Shows that this disc number is selected. Shows that the disc is rotating. One Touch Play The power comes on, and operations are done automatically. By pressing the CD 6 button, the System will come on, and if a CD is loaded for the disc number that was lastly selected, it will start playing from the first track. -
Page 19: Basics Of Using The Cd Player-Normal Play
Basics of Using the CD Player- Normal Play To Play CDs Load CDs. Press one of the Disc button (CD1-CD3) you want to play. The selected disc number (e.g. “CD-1” ) appears on the dis- play. The first track of the selected CD begins playing. When the first CD finishes playing, the next and the third CDs are con- tinuously played back. -
Page 20: Programming The Playing Order Of The Tracks
Using the CD Player Programming the Playing Order of the Tracks You can program the playing order of the tracks on all the CDs. Note that you can only make a program when the CD Player is stopped. You can program up to 32 tracks in any desired order including the same tracks. -
Page 21: Random Play
Random Play The tracks of all the CDs will play in no special order when you use this mode. • To use Repeat Play for Random Play, press the REPEAT but- ton to select “ALL” or “1” before starting playback. For details, see “Repeating Tracks”mentioned below. -
Page 22: Using The Cassette Deck (Listening To A Tape)
Using the Cassette Deck (Listening to a Tape) REMOTE CONTROL STANDBY/ON SLEEP FM /AM FM MODE PROGRAM TAPE /RANDOM REPEAT TAPE A/B ¢ DISPLAY MODE PTY/EON SELECT SOUND MODE ACTIVE FADE VOLUME BASS EX. MUTING * When the System is in use, the display shows other items as well. For simplicity, we show here only the items described in this section. -
Page 23: Using The Cassette Deck (Recording)
Using the Cassette Deck (Recording) REMOTE CONTROL STANDBY/ON SLEEP FM /AM FM MODE PROGRAM TAPE TAPE 3 /RANDOM REPEAT TAPE A/B ¢ TAPE A/B DISPLAY MODE PTY/EON SELECT SOUND MODE ACTIVE VOLUME FADE BASS EX. MUTING * When the System is in use, the display shows other items as well. For simplicity, we show here only the items described in this section. -
Page 24: Standard Recording
Using the Cassette Deck (Recording) Standard Recording This is the basic method for recording any source. The System also has special ways for recording CD to tape, and tape to tape, which save you time and effort, as well as give you some special effects. However, when you need to add a selection to a tape you have made, or are combining selections from several sources on one tape, use the method described below;... -
Page 25: Using An External Equipment
Using an External Equipment REMOTE CONTROL STANDBY/ON SLEEP FM /AM FM MODE PROGRAM TAPE /RANDOM REPEAT TAPE A/B DISPLAY MODE PTY/EON SELECT SOUND MODE ACTIVE VOLUME FADE BASS EX. MUTING Listening to the External Equipment You can listen to the external equipment such as MD recorder, cas- sette deck, or other auxiliary. -
Page 26: Using The Timers
Using the Timers REMOTE CONTROL STANDBY/ON SLEEP SLEEP FM /AM FM MODE PROGRAM TAPE /RANDOM REPEAT TAPE A/B DISPLAY MODE PTY/EON SELECT SOUND MODE ACTIVE FADE VOLUME BASS EX. MUTING * When the System is in use, the display shows other items as well. For simplicity, we show here only the items described in this section. -
Page 27: Setting The Daily Timer
Setting the Daily Timer Once you have set the Daily Timer, the timer will be activated at the same time every day. The Timer indicator ( ) on the display shows that the Daily Tim- er you have set is in effect. You can set the Daily Timer whether the System is turned on or off. -
Page 28: Setting The Rec (Recording) Timer
Using the Timers Preparation for each music source: Perform the following operation according to the music source you have selected. Then, the System enters Volume Setting mode. When selecting TUNER FM or TUNER AM: Press the ¢ or 4 button to select the preset station number, then press the SET button. - Page 29 Using the Unit You can set the time in the same way as for setting the Daily Tim- Insert a blank or erasable tape into the Deck B and wind past the tape leader. Press the CLOCK/TIMER button until “ON TIME”...
-
Page 30: Setting The Sleep Timer
Using the Timers Setting the SLEEP Timer Use the Sleep Timer to turn the System off after a certain number of minutes when it is playing. By setting the Sleep Timer, you can fall asleep to music and know that your System will turn off by it- self rather than play all night. -
Page 31: Care And Maintenance
Care And Maintenance Handle your CDs and tapes carefully, and they will last a long time. Compact Discs • Only CDs bearing this mark can be used with this System. However, continued use of irregular shape CDs (heart-shape, octagonal, etc.) can damage the System. •... -
Page 32: Troubleshooting
Troubleshooting • If you are having a problem with your System, check this list for a possible solution before calling for service. • If you cannot solve the problem from the hints given here, or the System has been physically damaged, call a qualified person, such as your dealer, for service.
Need help?
Do you have a question about the Compact Component System CA-MXK1R and is the answer not in the manual?
Questions and answers