
Related Manuals for Panasonic PT-L720E


Summary of Contents for Panasonic PT-L720E
-
Page 1: Operating Instructions
LCD Projector Commercial Use Operating Instructions PT-L720E Model No. PT-L520E Before operating this product, please read the instructions carefully and save this manual for future use. TQBJ 0105-3... -
Page 2: Dear Panasonic Customer
We hope it will help you to get the most performance out of your new product, and that you will be pleased with your Panasonic LCD This appliance is supplied with a moulded three pin mains plug for your projector. -
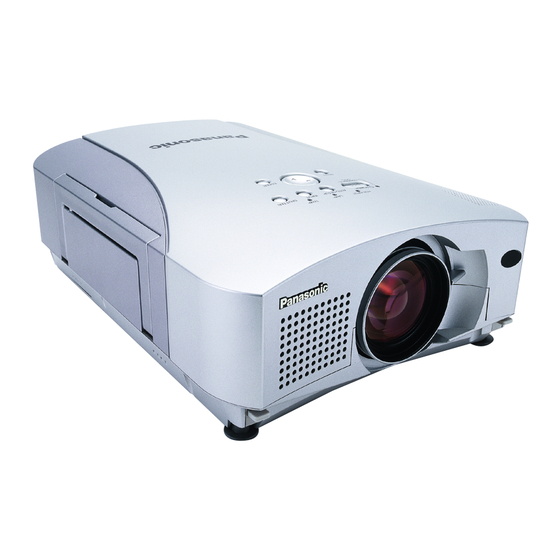
Page 3: Table Of Contents
Contents Precautions with regard to safety Preparation CONTRAST........35 WARNING SHARPNESS .........35 IMPORTANT SAFETY NOTICE..2 If a problem occurs (such as no image or no sound) or if you notice Noise Reduction(NR)......35 Precautions with regard to safety ..5 TV SYSTEM ........35 smoke or a strange smell coming from the projector, turn off the power STILL MODE ........35 Accessories........9... - Page 4 Do not do anything that might damage the power cord or the power Do not look into the lens while the projector is being used. B Strong light is emitted from the projector’s lens. If you look directly into this cord plug.
-
Page 5: Accessories
Use only the specified batteries. Accessories B If incorrect batteries are used, they may explode or leak, and fire, injury or Check that all of the accessories shown below have been included with your contamination of the battery compartment and surrounding area may projector. -
Page 6: Precautions On Handling
Precautions on handling About the screen If the screen you are using is dirty, damaged or discoloured, attractive projections cannot be obtained. Do not apply any volatile substances to the Cautions regarding transportation screen, and do not let it become dirty or damaged. Be sure to attach the lens cover before transporting the projector. -
Page 7: Location And Function Of Each Part
Location and function of each part Projector <Back and bottom> Projector <Top, right and front> & & & the air flow out of the outlet port, # Remote control signal receptor make sure that the MAIN (page 20) POWER is “OFF” and the $ Security lock # Projector control panel - Connector panel... -
Page 8: Remote Control Unit
+ MENU button to point to something on the screen. Remote control unit (pages 28 and 30) 4 FREEZE button (page 31) This button is used to display the menu This button is used to momentarily freeze screens. When a menu screen is being projection so that a still picture is displayed. -
Page 9: About The Rgb Input Indicator
About the RGB INPUT indicator <Connector panel> The RGB INPUT indicator can be used to check whether an RGB/YP signal is being input. Refer to the table below for details. & Power supply status RGB INPUT indicator status Standby On (projecting) A signal is being input to A signal is being input to the connector selected... -
Page 10: Using The Remote Control Unit
Using the remote control unit Wireless mouse By connecting the optional wireless mouse receiver (ET-RMRC1) to a personal computer, it is possible to operate a personal computer, using Laser beam pointer the remote control unit. The laser beam emitted from the remote control can be used as a pointer by Connect the optional wireless receiver to a personal computer in the same pointing forward to the screen. -
Page 11: Inserting The Batteries
Inserting the batteries Connections Notes on connections # Open the cover. B Read the instruction manual for each system component carefully before connecting it. B Turn off the power supply for all components before making any connections. B If the cables necessary for connecting a component to the system are not included with the component or available as an option, you may need to fashion a cable to suit the component concerned. -
Page 12: Example Of Connecting To Computer
Example of connecting with video equipments Example of connecting to computer Computer D-sub 15 (male) - BNC5 (female) Monitor Computer for adapter cable (sold separately) control use Red (connect to P signal connector) Blue (connect to P signal connector) Green (connect to Y signal connector) Digital broadcast tuner or DVD player Computer for... -
Page 13: Setting-Up
Setting-up Projection distances Projection methods Screen size (4:3) Projection distance (L) Height In way of installing projector, any one of the following four projection methods position are used. Select whichever projection method matches the setting-up Diagonal Height Width Wide Telephoto (H1) method. -
Page 14: Starting To Use
Starting to use *Turn the focus ring and the zoom Focus knob to adjust the projected image focus and size. Turning on the power Please ensure that all preparations have been completed before turning on Zoom the power. (Refer to pages 21 – 25.) # Remove the lens cover. -
Page 15: Menu Screens
O P T I O N 1 B Noise Reduction (NR) is is being input O P T I O N 2 (page 42) only for PT-L720E. P I C T U R E SELECT E N T E R B STILL MODE is only for P I C T U R E M O D E S T A N D A R D PT-L520E. -
Page 16: Using The Freeze Function
Menu operation guide & Press the F F or G G buttons to Returning a setting to B When an individual adjustment select an item, and then press screen is being displayed the factory default # Press the MENU button. the I I or H H buttons to change The MAIN MENU screen will be If you press the STD (standard) -
Page 17: Using The D.zoom (Digital Zoom) Function
Using the D.ZOOM (digital zoom) Correcting keystone distortion Keystone distortion is corrected automatically when the projector’s automatic function setup function is used, but this correction will not apply if the screen itself is tilted. In such cases, you can correct the keystone distortion manually with This function lets you enlarge the &... -
Page 18: Adjusting The Picture
H I G H Noise Reduction (NR) S E L E C T A D J E S C (Only for PT-L520E, when S- (Only for PT-L720E, when S- VIDEO/VIDEO signals are being L O W VIDEO/VIDEO/YP signals are input) -
Page 19: White Balance R/G/B
WHITE BALANCE R/G/B Adjusting the position (RGB only) This is used to adjust the white areas of the VERTICAL POSITION When the input signal is RGB, first picture if they appear colourised. Press the I Press the I button to move the press the AUTO SETUP button to button to make the selected colour lighter. -
Page 20: Aspect
ASPECT S4:3 NOTE: RESIZING B This projector is equipped with an The size of the input signal is This should normally be set to “ON”. This setting is only for an S-VIDEO/ compressed to 75% and projected. aspect ratio selection function. (This setting is only for signals VIDEO signal and a YP signal in... -
Page 21: Option Settings
Option settings SXGA MODE the projector from the ceiling using the ceiling bracket which is sold S X G A M O D E S X G A separately. Use the F and G buttons on the to be carried out during automatic S X G A + projector or remote control unit to setup, such as when the screen... -
Page 22: Func 1
FUNC 1 CONTROL KEY Using the INDEX WINDOW function F U N C 1 I N D E X C O N T R O L K E Y This function lets you store a picture which is being projected into memory, so that you can display a still picture and a moving picture on the screen. -
Page 23: Using The Serial Connector
Using the SERIAL connector Control commands The commands which the personal computer can use to control the projector The serial connector which is on the side connector panel of the projector are shown in the following table. conforms to the RS-232C interface specification, so that the projector can be Control controlled by a personal computer which is connected to this connector. -
Page 24: Indicators
Indicators LAMP indicator There are two indicators on the control panel of the projector which give Indicator Illuminated (red) Flashing (red) information about the operating condition of the projector. These indicators display illuminate or flash to warn you about problems that have occurred inside the It is nearly time to An abnormality has been detected in the lamp projector, so if you notice that one of the indicators is on, turn off the power... -
Page 25: Cleaning And Replacing The Air Filter
Cleaning and replacing the air filter Replacing the lamp unit If the air filter becomes clogged with dust, the internal temperature of the Warning Lamp unit replacement projector will rise, the TEMP indicator will flash and the projector power will period When replacing the lamp, allow it turn off. -
Page 26: Lamp Unit Replacement Procedure
' Install the lamp unit cover, and + Press the ENTER button to On-screen display Lamp indicator warning then use a Phillips screwdriver display the OPTION2 screen, light and then use the F and G to securely tighten the lamp unit cover fixing screws. -
Page 27: Before Calling For Service
Before calling for service Problem Possible cause The remote control B The batteries may be weak. Before calling for service, check the following points. unit does not B The batteries may not be inserted correctly. (Refer Problem Possible cause operate. to page 20.) B The remote control signal receptor on the projector Power does not... -
Page 28: Specifications
TTL high impedance, automatic plus/minus polarity compatible Drive method: Active matrix method Pixels: TTL high impedance, automatic PT-L720E: 786 432 (1024 x 768) x 3 panels plus/minus polarity compatible AUDIO IN (for RGB): Single-line 0.5 V [rms] M3 jack (Stereo PT-L520E:... -
Page 29: List Of Compatible Signals
List of compatible signals Dimensions <Units: mm (inch)> Scanning Picture Resizing* Display Dot clock frequency quality* Mode resolution frequency Format (dots)* (MHz) L720 L520 L720 L520 (kHz) (Hz) NTSC/NTSC4.43/ 720 x 480i 15.734 59.940 OK OK Video/S-Video PAL-M/PAL60 PAL/PAL-N/SECAM 720 x 576i 15.625 50.000 OK OK Video/S-Video... -
Page 30: Trademark Acknowledgements
Trademark acknowledgements B VGA and XGA are trademarks of International Business Machines Corporation. B Macintosh is a registered trademark of Apple Computer, Inc. B S-VGA is a registered trademark of the Video Electronics Standards Association. B Windows is a registered trademark of Microsoft Corporation. All other trademarks are the property of the various trademark owners.
Need help?
Do you have a question about the PT-L720E and is the answer not in the manual?
Questions and answers