
Related Manuals for Controll-A-Door P Diamond


Summary of Contents for Controll-A-Door P Diamond
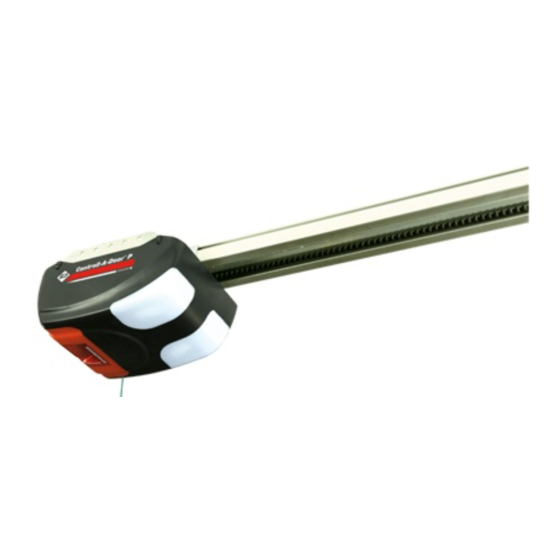
- Page 1 ® Controll-A-Door P Diamond and Whisper Quiet Sectional Door Opener Instruction Manual N1854 B&D Doors is a division of B&D Australia Pty Ltd Manufacturer’s Part # 79075 (Manual) ABN 25 010 473 971 www.bnd.com.au...
-
Page 2: Table Of Contents
Controll-A-Door ® P Diamond Instruction Manual Controll-A-Door ® P Diamond Sectional Door Opener Safety Rules How To Use Your Opener Default Settings & Specifications Transmitter About Your Opener Transmitter Battery Operating Controls Locking Kit Contents Manual Release Installation Power Failure... -
Page 3: Safety Rules
Controll-A-Door ® P Diamond Instruction Manual Safety Rules Please read these important safety rules These safety alert symbols indicate a personal safety or property damage instruction exists. ReAD THeSe InSTRUCTIOnS CAReFULLY. This automatic garage door opener is designed and tested to offer safe service provided it is installed and operated in strict accordance with the following safety rules. -
Page 4: Default Settings & Specifications
Controll-A-Door ® P Diamond Instruction Manual Default Settings & Specifications Factory default settings Default Step Minimum Maximum Maximum opener run time 30 seconds Courtesy light time 4 minutes (approx.) Obstruction force margin Auto-Close time 30 seconds Technical specifications Rated temperature +5°... -
Page 5: About Your Opener
Instruction Manual About Your B&D Opener Memory Retention Thank you for choosing a Controll-A-Door® P Diamond automatic garage door opener, designed and developed in In case of a power failure the opener does not lose the Australia by B&D Doors. -
Page 6: Operating Controls
Controll-A-Door ® P Diamond Instruction Manual Operating Controls 10 Amp fuse to protect the electronic circuit board. Terminal is used to connect Va.c. power to the control board. SBY-3 Battery Charger connection to attach a Battery Back Up kit. 24Vd.c. Motor Connection. - Page 7 Controll-A-Door ® P Diamond Instruction Manual Fig. 01 © Copyright 2007 B&D Doors Diamond PD Power Drive : Instruction Manual...
-
Page 8: Kit Contents
P Diamond Instruction Manual Kit Contents Powerhead Unit (Fig. 02) 1 x Controll-A-Door P Diamond powerhead ® 1 x Transmitter pack (Pack includes two keyring transmitters and batteries) 1 x Wall mount transmitter with battery 2 x Door attachment arms Fig. - Page 9 Controll-A-Door ® P Diamond Instruction Manual Kit Contents Multi Piece Knockdown C-Rail with Pre-Assembled Chain (Fig. 05) IMPORTANT NOTE: If a modification to the length of the track is required, the adjustment must be made from the powerhead end only.
-
Page 10: Installation
Controll-A-Door ® P Diamond Instruction Manual Knockdown C-Rail Assembly Step 1 - Assemble the C-Rail (Knockdown C-Rail units only) Unpack and assemble the C-Rail using the steps outlined below in (Fig. 07). Fig. 07 TENSION 13mm HEX BOLT 13mm HEX BOLT TO TENSION CHAIN OR TIMING BELT... - Page 11 Controll-A-Door ® P Diamond Instruction Manual C-Rail Assembly Step 2 - Attach C-Rail to Powerhead Locate and insert the powerhead’s shaft into the C-Rail’s Shaft (Fig. 08). sprocket as shown in Fig. 08 Locate shaft into sprocket Step 3 - Secure C-Rail to Powerhead Hex flange screw taptite ‘S’...
-
Page 12: Determine The Door Type
Controll-A-Door ® P Diamond Instruction Manual Determine the Door Type Step 4 - Determine the Door Type Proceed from Step 5 Determine which type of garage door you have as illustrated (Fig. 10) (Fig. 12). (Fig. 10) For a sectional (panel) door on tracks proceed with the installation from Step 5. -
Page 13: Mounting On A Track Type Door
Controll-A-Door ® P Diamond Instruction Manual Mounting on a Track Type Door Step 5 - Determine Bracket Position Open the door and find the highest point of travel of Level the top door panel. Level Using a level, transfer this height to the wall above the Track (Fig. -
Page 14: Mounting - Non-Track Type Door
Controll-A-Door ® P Diamond Instruction Manual Mounting on a non-Track Type Door Centre of door WARnInG: Make sure concrete, brick wall or timber lintels are solid and sound so as to form a secure mounting platform. Fig. 17 Step 9 - Determine the Door’s Centre Find the centre of the door and mark this location both above the door and on top of the door. -
Page 15: Mounting Door Bracket & Arms
Controll-A-Door ® P Diamond Instruction Manual Mounting Door Bracket and Arms Step 12.1 - Alternative Mounting Option Drill hole at centre of track The opener can be fastened to the roof by driving a bolt (recommended bolt size through the C-Rail into a structural timber support. The bolt M6 or M8) head’s height must not exceed 6mm... -
Page 16: Programming The Opener
Controll-A-Door ® P Diamond Instruction Manual Setting Travel Limits IMPORTAnT nOTe: The OPERATE button will not function until the open and close limit positions are set. nOTe: The door and shuttle must be engaged into the chain index. The door should be open Fig. -
Page 17: Testing Safety Obstruction Force
Controll-A-Door ® P Diamond Instruction Manual Testing Safety Obstruction Force CAUTIOn: Take care when testing the safety obstruction force. Failure to follow this warning can result in serious personal injury and/or property damage. 16.1 Test the Close Cycle Press the OPERATE button to open the door (Fig. -
Page 18: Coding Transmitters
Controll-A-Door ® P Diamond Instruction Manual Coding Transmitters Step 17.1 - Storing the Transmitter Code The opener can only operate from transmitters that have been programmed into its receiver. The receiver needs to learn the codes of any transmitter that will be used with the operator. -
Page 19: Vacation Mode
Controll-A-Door ® P Diamond Instruction Manual Coding Transmitters Step 17.3 - Setting the Transmitter to Operate Vacation Mode The opener can be programmed into a “Vacation Mode” where the opener will not respond to any transmitter except one preprogrammed unit. -
Page 20: Pet (Pedestrian) Mode
Controll-A-Door ® P Diamond Instruction Manual Coding Transmitters Step 17.5 - Setting the Transmitter to Operate Pet (Pedestrian) Mode The opener can be programmed into a “Pet Mode” where the door opens partially to allow pets to enter/exit the garage:... -
Page 21: Accessories
Controll-A-Door ® P Diamond Instruction Manual Accessories Terminal Block A variety of wired accessory items can be connected to the terminal block such as Safety Infra-red Beams, electric key switch, door status indicators and more (Fig. 37). 30V PWR The terminal block also features and auxiliary output for controlling other devices from your transmitter. -
Page 22: Safety Infra-Red Beam
Controll-A-Door ® P Diamond Instruction Manual Accessories Safety Infra-red Beam (Part no 062734) ADDITIOnAL PROTeCTIOn STROnGLY B&D Doors recommend the fitting of a Safety Infra-red Beam. In most countries Safety Infra-red Beams are mandatory on all garage doors fitted with automatic openers. For a small additional outlay, B&D recommends that Safety Infra-red Beams be... -
Page 23: Battery Back Up Installation
Controll-A-Door ® P Diamond Instruction Manual Battery Back Up Installation Fig. 40 Battery Back Up (optional) Testing Battery Back Up The opener has provision for a Battery Back Up kit that Press either the OPERATE button or transmitter allows continued operation of the door in the absence of to activate the opener. -
Page 24: How To Use Your Opener
Controll-A-Door ® P Diamond Instruction Manual How to use your opener For maximum efficiency of your opener, your garage door must be in good operating condition. An annual service of your garage door by an Approved Dealer is recommended. CAUTIOn - Activate the opener only when the door is in full view, free of obstructions Fig. -
Page 25: Transmitter Battery
Controll-A-Door ® P Diamond Instruction Manual How To Use Your Opener Removing the Battery From the Transmitter (Battery Type: 3V Lithium Battery CR2032). Use a non-metallic object (e.g. pen) to remove the battery. (Fig. 42) Inbuilt Locking Facility DO nOT lock your door when your opener is engaged as it Fig. -
Page 26: Safety Infra-Red Beam
Controll-A-Door ® P Diamond Instruction Manual How To Use Your Opener Safety Infra-red Beam Vacation Mode A Safety Infra-red Beam Kit (Part No 062734) may be The radio receiver of the garage door opener can be turned fitted to this opener. -
Page 27: Maintenance
Controll-A-Door ® P Diamond Instruction Manual Maintenance Maintenance CAUTIOn: Frequently examine door, The SERVICE LED will indicate the requirement for a service particularly cables, springs and and/or adjustment. To reset the SERVICE LED when the mountings for signs of wear, damage door is serviced, reprogram the Door Travel Limits and the or imbalance. -
Page 28: Troubleshooting Guide
Controll-A-Door ® P Diamond Instruction Manual Troubleshooting Guide Symptom Possible cause Remedy The opener does not work from the Garage door in poor condition e.g. Check the door’s operation - see transmitter springs may be broken monthly maintenance (Page 27) The opener does not have power Plug a device e.g. -
Page 29: Parameters
Controll-A-Door ® P Diamond Instruction Manual Parameters Door status indicators Door opener state OPen LeD (green) CLOSe LeD (red) Beeper Open Close Opening Flashing Closing Flashing Door travel stopped Flashing Flashing Door obstructed when opening Flashing Door obstructed when closing... -
Page 30: Parts List
Controll-A-Door ® P Diamond Instruction Manual Spare Parts List... - Page 31 Controll-A-Door ® P Diamond Instruction Manual © Copyright 2007 B&D Doors Diamond PD Power Drive : Instruction Manual...
-
Page 32: Warranty
Controll-A-Door ® P Diamond Instruction Manual Warranty 1. Definitions ‘B&D’ means (a) in Australia - B&D Doors of 17 Oasis Court, Clontarf, Queensland, 4019, a division of B&D Australia Pty Ltd (ABN 25 010 473 971), or (b) in New Zealand - B&D Doors NZ Ltd of 70 Allens Road East Tamaki Auckland, which is a subsidiary of B&D Australia Pty Ltd. - Page 33 Controll-A-Door ® P Diamond Instruction Manual Warranty 9. Subject to paragraph 12 hereof; (i) the obligations of B&D under this warranty are limited to those contained herein and such warranties are expressly in lieu of all other warranties, express or implied, including any implied warranty of merchantability or fitness for a particular purpose and notwithstanding any course of dealing between the parties or custom and usage in the trade to the contrary.
-
Page 34: Optional Accessories
Controll-A-Door ® P Diamond Instruction Manual Optional Accessories There is a range of additional accessories for your added convenience and security. • Safety Infra-red Beams - Part No 062734. Gives additional protection if the door is closing onto your property or person. - Page 35 Controll-A-Door ® P Diamond Instruction Manual © Copyright 2007 B&D Doors Diamond PD Power Drive : Instruction Manual...
- Page 36 QLD Office: 17 Oasis Court, Clontarf 4019. Ph: (07) 3883 0200 NSW Office: 34-36 Marigold St, Revesby 2212. Ph: (02) 9722 5555 VIC/TAS Office: 147-153 Canterbury Road, Kilsyth 3137. Ph: (03) 9237 7766 SA Office: 23 Frederick Road, Royal Park 5014. Ph: (08) 8440 4747 WA Office: 96 Mulgul Drive, Malaga 6062.
Need help?
Do you have a question about the P Diamond and is the answer not in the manual?
Questions and answers