Advertisement
ORDERING REPLACEMENT PARTS
To order replacement parts, contact the ICON Health & Fitness Ltd. office, or write:
ICON Health & Fitness, Ltd.
Customer Service Department
Unit 4, Revie Road Industrial Estate
Revie Road
Beeston
Leeds, LS118JG
UK
Tel:
08457 089 009
Outside the UK: 0 (444) 113 387 7133
Fax: 0 (444) 113 387 7125
To help us assist you, please be prepared to give the following information:
• The MODEL NUMBER of the product (WEEVSY59430)
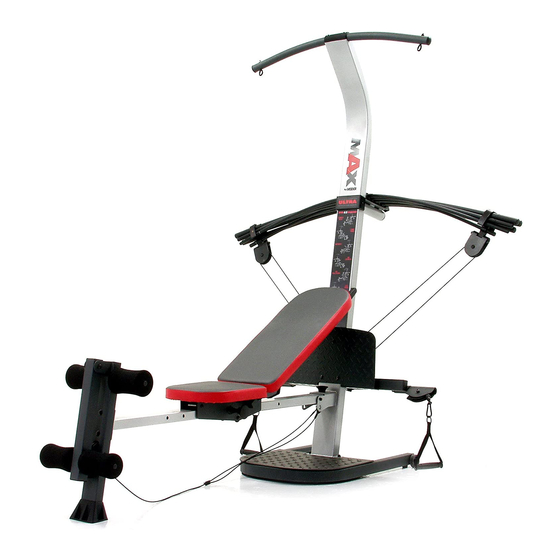
• The NAME of the product (CrossBow by WEIDER
• The SERIAL NUMBER of the product (see the front cover of this manual)
• The KEY NUMBER and DESCRIPTION of the part(s) (see the PART LIST and EXPLODED DRAWING in the
centre of this manual)
Part No. 200573 R0903A
™
LEGEND resistance system)
Printed in China © 2003 ICON Health & Fitness, Inc.
Model No. WEEVSY59430
Serial No.
Write the serial number in the
space above for future reference.
Serial Number Decal (under seat)
QUESTIONS?
As a manufacturer, we are com-
mitted to providing complete
customer satisfaction. If you
have questions, or if there are
missing or damaged parts,
please call:
08457 089 009
Or write:
ICON Health & Fitness, Ltd.
Unit 4
Revie Road Industrial Estate
Revie Road, Beeston
Leeds, LS11 8JG
UK
email: csuk@iconeurope.com
Class HC Fitness Product
CAUTION
Read all precautions and instruc-
tions in this manual before
using this equipment. Save this
manual for future reference.
USER'S MANUAL
Advertisement
Table of Contents

Related Manuals for Weider CrossBow


Summary of Contents for Weider CrossBow
-
Page 1: Ordering Replacement Parts
• The MODEL NUMBER of the product (WEEVSY59430) please call: • The NAME of the product (CrossBow by WEIDER ™ LEGEND resistance system) 08457 089 009 • The SERIAL NUMBER of the product (see the front cover of this manual) Or write: •... - Page 2 Keep hands and fingers clear of this area. THURSDAY AEROBIC EXERCISE Date: EXERCISE RESISTANCE SETS REPS FRIDAY Date: CrossBow by WEIDER is a trademark of ICON Health & Fitness, Inc. Make photocopies of this page for scheduling and recording your workouts.
-
Page 3: Important Precautions
F. Hip Flexors (upper thigh) tem. Replace any worn parts immediately. G. Abductor (outer thigh) 15. Always adjust the crossbow assembly to the H. Quadriceps (front of thigh) 6. Keep children under 12 and pets away from horizontal position and make sure the ful- Sartorius (front of thigh) the resistance system at all times. -
Page 4: Before You Begin
BEFORE YOU BEGIN EXERCISE GUIDELINES Thank you for selecting the innovative CrossBow by after reading this manual, please call our Customer THE FOUR BASIC TYPES OF WORKOUTS PERSONALISING YOUR EXERCISE PROGRAM WEIDER ™ LEGEND resistance system. The resistance Service Department at 08457 089 009. To help us... -
Page 5: Cable Diagram
To remove a • Tighten all parts as you assemble them, unless Crossbow, pull it out of the Crossbow Spacer (35). Make Things Easier for Yourself instructed to do otherwise. - Page 6 Slot Make sure that the crossbow assembly is in the horizontal position and that the Storage Knob (30) is in place and fully tightened each time the resistance system is used.
- Page 7 7. Attach the Bench Rail (5) to the Upright (3) with “U”-Channel of a crossbow under it. Repeat with the other end of an M10 x 132mm Bolt (66), a 19mm Spacer (17), the crossbow. If more resistance is needed, add one a 22mm Spacer (106), and an M10 Nylon crossbow at a time.
- Page 8 Crossbow Caps (100) to the two 80-pound Crossbows (95), and the two 40-pound Crossbow Caps (79) to the 40-pound Crossbow (96). 11. Locate the Crossbow Fulcrum (18) on the Lat ADJUSTING THE SEAT Tower (4) (see the inset drawing). Slide the...
- Page 9 23. Locate the two Short Cables (33). Wrap one of 12. Press two 25mm Square Inner Caps (54) into the indicated end of the Backrest Frame (15). the Cables around a 90mm Pulley (28). Attach the Pulley and a pair of Pulley Covers (29) to a High Pulley Housing (21) with an M10 x 47mm Attach a Plastic Foot (53) to the Backrest Frame (15) with an M4 x 16mm Screw (62).
- Page 10 Nylon Locknut (65). Eyebolt 20. Attach a Pulley Housing (94) to the indicated “U”- channel on the 10-pound centre Crossbow (44) 16. Locate the Long Cable (80). Insert one end of with an M10 x 102mm Bolt (24), two Pivot the Cable through the welded tube on the Cross Bushings (74), and an M10 Nylon Locknut (76).
-
Page 11: Part Identification Chart
PART IDENTIFICATION CHART M6 x 45mm Screw (58) M6 Black Nylon Locknut (69) Refer to the drawings below to identify small parts used in assembly. The number in parentheses below each M10 Nut (47) drawing is the key number of the part, from the PART LIST on the reverse side of this page. Note: Some small parts may have been pre-attached. - Page 12 Pivot Bushing 19mm Spacer M10 Washer Crossbow Fulcrum M10 Nylon Locknut Leg Developer M6 Shoulder Bolt 10-pound Short Crossbow Cap 19mm Round Inner Cap High Pulley Housing 40-pound Crossbow Cap Swivel Arm Long Cable Foot Plate M10 x 108mm Bolt...
Need help?
Do you have a question about the CrossBow and is the answer not in the manual?
Questions and answers