
Related Manuals for Tecnomac EasyChill E5


Summary of Contents for Tecnomac EasyChill E5
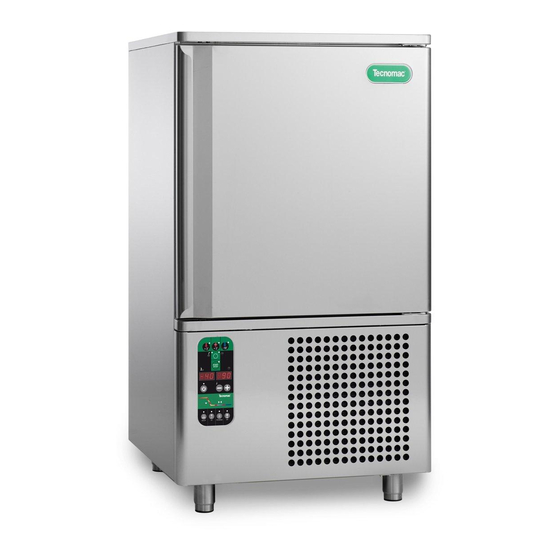
- Page 1 EasyChill Blast Chillers ChillRapid Instruction manual SurRapid E5 E10 E15 E15.2 E20 T20 T24 T30 T40 T50...
- Page 2 Gentile Cliente, Sehr geehrter Kunde! La ringraziamo per aver preferito uno dei Wir danken Ihnen für Ihre Wahl eines nostri prodotti, frutto di lunga esperienza unserer Produkte, welches das Ergebnis e di una continua ricerca per un prodotto einer langen Erfahrung und stetiger superiore in termini di affidabilità, Forschungsarbeit ist.
- Page 3 PUSH-BUTTONS CONTROL PANEL on /off (STAnD BY) Soft blast chilling cycle (+3 °C) HARD hard blast chilling cycle (+3°C) ° ° ° Blast freezing cycle (-18°C) End cycle by time / probe (temperature) START STOP ° Probe chilling indicator led Timed chilling indicator led Cycle start / stop Increase value...
- Page 4 PREFACE CAUTION • This manual is an integral part of the pro- • Any contractual and extra-contractual lia- duct, providing all the information requi- bility of the manufacturer is excluded due red to ensure correct installation, to damage caused by errors during instal- THE FOLLOWING OPERATIONS AND THOSE HIGHLIGHTED operation and maintenance of the ma-...
-
Page 5: Table Of Contents
INDEX Description Pag. Description Pag. GENERAL DOCUMENTATION APPLIANCE FUNCTIONS General information ......2 Date anD time settinGs ......9 installation . -
Page 6: General Documentation
1. GENERAL DOCUMENTATION 1.1 GENERAL INFORMATION • this manual is an integral part of the product, providing all the information required to ensure correct installation, ope- ration and maintenance of the machine. • read the manual carefully, making reference to it for machine operation. -
Page 7: Installation
2. INSTALLATION Avoid THESE OPERATIONS MUST BE • direct exposure to sunlight; PERFORMED BY A CERTIFIED • closed sites with high temperatures and poor air circulation; • installing the machine near sources of heat. INSTALLATION TECHNICIAN ONLY 2.1 DATA PLATE INFORMATION •... -
Page 8: Refrigeration Component Connections
2.6 REFRIGERATION COMPONENT CONNECTIONS 2.9 SAFETY AND CONTROL SYSTEMS REMOTE ASSEMBLIES • Door microswitch: appliance power lines are sized for installation distances of shuts down fan operation in the cell when the door is ope- up to 10 metres. for greater distances, seek advice from. ned. -
Page 9: Advice To Ensure Efficient Appliance Operation
3. ADVICE TO ENSURE EFFICIENT APPLIANCE OPERATION 3.1 SHUT DOWN PROCEDURES d) Position the core probe at the centre of the largest product in the event of emergency, shut down the appliance by swit- or food item; make sure that the tip of the probe does not ching off... -
Page 10: Programming And Operating Instructions
4. PROGRAMMING AND OPERATING INSTRUCTIONS • Hard blast chilling (+3°c) IN THE EVENT OF MALFUNCTION, this process is designed to cool food products with a thick- SEEK THE ASSISTANCE OF A ness greater than 2-3 cm. Variable air temperatures are used to accelerate penetration of cold into the product. -
Page 11: Soft Timed Blast Chilling
• if at the end of the maximum blast chilling interval the core 4.5 HARD BLAST CHILLING FEATURES probe continues to display a temperature higher than the when the harD function is used, chilling takes place in two value for the end of blast chilling, the displays will indicate stages: an alarm for excessively long chilling (all 14) alternating with •... -
Page 12: Hard Timed Blast Chilling
HARD blast chilling affords a considerable reduction in 4.8 BLAST FREEZING BY TEMPERATURE working time, and is particularly suited to foodstuffs with a • to select this cycle, press push-button (relative leD lights high fat content, for large pieces or for packaged products. up), then press push-button to select the temperature mode (leD... -
Page 13: Appliance Functions
5. APPLIANCE FUNCTIONS 5.1 DATE AND TIME SETTINGS RECALLING A STORED PROGRAM • set the machine to ON • when the appliance is ON , press push-button briefly; • Press and hold down push-button 5 for more than five display will show program P1. -
Page 14: Automatic Defrost Cycles
5.9 AUTOMATIC DEFROST CYCLES 5.11 USER ENTRY TO PROGRAMMING DATA (not available for MOD. • access for programming configuration parameters is only • the appliance automatically performs defrost cycles during permitted when the appliance is ON and there is no data storage. -
Page 15: Printer (Optional)
5.12 PRINTER (OPTIONAL) • if you have to turn the instrument on/off press • if you have to feed the paper by hand press • if you have to change the roll of paper: - turn the instrument off - Press for opening the panel at the front of the instru- ment - slip the roll of paper into the lower side of the roller... -
Page 16: Alarm Management, Buzzer
6 ALARM MANAGEMENT, BUZZER 6.1 STORAGE OF DATA/ERRORS Beeper: activated (3 seconds, then a pause of 30 seconds) the appliance electronic controller is equipped with a system until the mute button is pressed. of acoustic and visual signals to indicate the intervention of safety devices. - Page 17 ALL 07 Input SW4 alarm (ALL 07) ALL 10 Input Ht2 alarm (Automatic reset min. idrostat pressure switch (Input in voltage 2 ... fuses only for MOD. for all water cooled models) in the water-cooled c.U. version, if the hydrostat (Automatic reset min.
-
Page 18: Information On Alarms
ALL 15 Keyboard/membrane alarm 6.2.1 Information on alarms: • During alarms, the beeper is activated and the display shows Cause: a pressed push-button has been detected when the message “all xx”. panel is switched on. • the alarm message is alternated on the display even when the beeper has been silenced, until the alarm has been clea- Effect: all keys are disabled. -
Page 19: Maintenance And Cleaning
7 MAINTENANCE AND CLEANING The condenser has sharp edges. Always THESE OPERATIONS MUST BE wear protective gloves, goggles and masks PERFORMED BY A CERTIFIED when carrying out the above operations. INSTALLATION TECHNICIAN ONLY 7.3 CLEANING THE CELL the information and instructions given in this section ad- •... -
Page 20: Defrost Water Drainage
How to access the evaporator for cleaning 7.5 DEFROST WATER DRAINAGE • it is possible to gain access to the inside part of the evapo- • the system is prearranged for automatic and manual defro- rator, to perform the cleaning of the same: sting, as necessary. - Page 22 Via del Lavoro, 9 - C.P. 172 - 31033 Castelfranco Veneto (TV) - ITALY - EU Tel. +39 0423 738451 - Fax +39 0423 722811 - tecnomac@castelmac.it - www.tecnomac.eu...
Need help?
Do you have a question about the EasyChill E5 and is the answer not in the manual?
Questions and answers