
Related Manuals for nord Electro 3


Summary of Contents for nord Electro 3
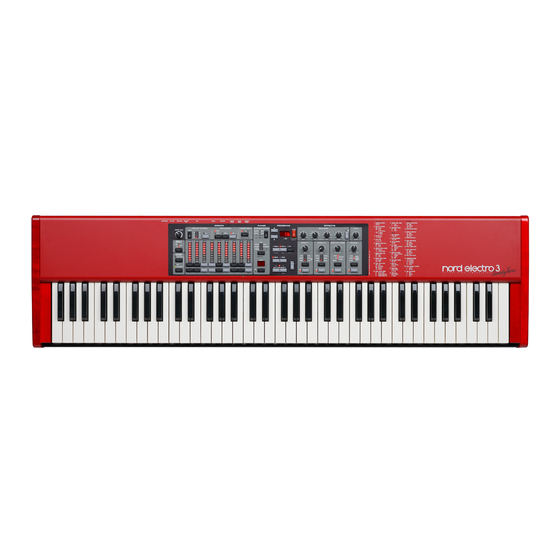
- Page 1 User Manual Nord Electro 3 OS Version 1.x Part No. 50316 Copyright Clavia DMI AB 2009 Print Edition 1.1...
-
Page 2: Important Safety Instructions
Trademarks: The Nord logo is a registred trademark of Clavia DMI AB. All other trade- marks mentioned in this publication are the properties of their respective holders. -
Page 3: Table Of Contents
Instrument Menu . . . . . . . . . . . . . . . . . 33 Upload from the Nord Electro 3 . . . . . 22 Settings Menu . -
Page 4: Os Upgrades
. We will try to cover all included Nord DVD . the essential aspects on how to use the Electro 3 in the very first few pages of this manual . After that follows the reference section where all the functions are explained in detail . -
Page 5: Knobs
2ovErviEwaNdcoNNEctioNs | 5 2 Overview and Connections The front panel of the Nord Electro 3 has four main areas, Organ, Selector buttons Piano, Program and Effects . We’ll familiarize ourselves briefly with Selector buttons are used to activate one setting the panel here and describe the functions in detail in the following in an array . -
Page 6: Monitor In
Nord DVD, or at the www.nordkeyboards.com website. The left and right line level outputs from the Nord Electro 3 are unbal- anced . Use ¼" connectors to connect the Nord Electro 3 to an amplifier or recording equipment . - Page 7 P-wah and the ring modulator (RM) . The Nord Electro 3 has three pedal inputs; one for a sustain pedal, one When connecting an expression pedal to the Control Pedal input, you for a rotor speed control pedal and one for a control pedal (an expres- should use a stereo cable with a Tip-Ring-Sleeve connector .
- Page 8 Getting Started Let’s take a few minutes to get familiar with the Electro 3 . The user interface is designed to be as intuitive as possible, and to perform as well as you do in a live situation . We hope that you soon will feel confident in using it, and by following this short chapter, we will go through most of the functions .
-
Page 9: Adding Effects
Use the Model selector to select one tor is pressed . of the samples that are included in the Electro 3 from the factory . Some of the effects have three options that indicate the depth of the effect . Flang 1 is... - Page 10 This finishes our little tour; we hope that you now have the initial knowledge on how to operate most of the functions on the panel. The following chapter is the reference section, with the chapter on the Nord Electro Manager application after that, on page 20.
- Page 11 The labels used for the VX model drawbars are printed on the row directly above the drawbar led’s . For basic drawbar operation, please refer to “The Drawbars” on page 13 . The drawbars on the Electro 3’s VX emulation control the level of each available partial, in the same fashion as on a dual manual original Continental .
- Page 12 . effect and 9th drawbar simultaneously. However with the Nord Electro 3 you have a choice. You can use the percussion and 9th A connected pedal can be set to change the speeds only when it is...
-
Page 13: Organ Presets
Adjust the drawbars for the lower, external keyboard when the 1/Lo or one of the preset buttons) on the panel . LED is lit and for the Electro 3’s keyboard when the 2/Up LED is lit . Organ presets can be managed using the Nord Electro Manager, read more about this on page 20. - Page 14 When none of the Attack LEDs are lit, the sample playback is not The Up/Down buttons affected by any additional attack from the Electro 3 and it does not to the left of the display respond to keyboard velocity .
-
Page 15: Octave Shift
Octave Shift LED at the right or left position indicates +/- 2 frequency ranges can be boosted/attenuated with +/- 15 dB . octaves note shift . Each instrument in Nord Electro 3 has a finite note range: Effect 1 •... - Page 16 Ring Modulation (RM) is a an effect that multiplies two signals with speaker cabinets . The amount of drive is controlled by the Speaker/ each other . In the Electro 3, these are the instrument audio signal and a Comp knob .
-
Page 17: System Menu
Up/Down buttons and change the setting by pressing and holding Shift and the Up or Down button . Exit the menus by pressing a second time on the Prog A, B or Live button . The only exception to this is the MIDI Local On/Off setting which always reverts to Local On every time the Electro 3 is powered up. Sustain Pedal Configuration System Menu If you’re using a single sustain pedal connected to the Sustain Pedal... -
Page 18: Program Change Mode
Range: 1-16, OF - off (default = 1) the Electro 3 . Press the Store button to perform the dump . In the MIDI chapter, on page 42 is a description on how the Electro 3 Lower Channel receives a Sys Ex dump . - Page 19 6thEMENUs | 19 Bass Rotor Speed Perc. Soft Level Sets the speed setting (in the fast and slow speed modes) of the rotary Sets the level of the percussion effect in its soft setting . speaker simulation’s bass rotor . Range: H - High, n - Normal (default), L –...
-
Page 20: System Requirements
Nord Electro 3 Manager The Nord Electro 3 Manager is the application that allows you to organize the various memory areas, the partitions in the Nord Electro 3 . It is also used to download pianos, samples or programs to the Nord Electro 3 or to upload any of these items - called sounds - from the Nord Electro 3 memory to the computer hard drive . -
Page 21: Rename
Make sure that the Electro Manager window and the folder are • .neb - This is the extension used for the Nord Electro 3 backup files . visible on the screen . Just as any other computer file on your hard drive, these files may be... -
Page 22: View
Pianos: When you click on Download a dialogue appears to inform you that the content of the destination bank in the Nord Electro 3 will be replaced with that of the source file. If you select All in the destination bank drop down, you can replace all the sounds in a partition with those on a folder structure on the hard drive . -
Page 23: Rename
Presets and Menu settings (System, MIDI & Sound menus) in the Nord Sound Down Electro 3 . The file that is created on the hard drive will have the exten- sion .neb . Backing up the entire memory content in this manner will Use this function to download one or several sounds from the com- take some time, depending on the sizes of the samples . - Page 24 . When this option is checked, the lists will show all the available loca- Backing up from the Nord Electro 3 Manager is done in an incre- tions in the selected partition/bank and not only the occupied ones .
-
Page 25: Footer Area
If you right-click on a sound or an empty loca- tion, a context menu will appear . The right part will indicate of a Nord Electro 3 is connected to the com- puter and in communication with the Nord Electro 3 Manager . The OS version of the connected Electro 3 will also be displayed here . -
Page 26: Getting Started
Editor can be applied to a sample in real time . If the sample is playing the Nord Electro 3 . If you edit any audio file that is used by the Nord back through the computer audio card, you can e .g . listen to how the... - Page 27 . the Nord Electro 3 . The real estate of the Flash memory has a fixed capacity and to keep track on how much room you have left, there is...
- Page 28 Nord Electro 3 . place in the Manager tab . If a Nord Electro 3 is not connected, you can still work on a Project Open the Manager tab . with sample editing, mapping and other functions . When the Editor finds a Nord Electro 3, this will be indicated at the lower, right corner of Right-click on a sample and select Upload .
- Page 29 Open a new Project, select the Audio Files/Assign tab and click the Add button . The Nord Electro 3 can use stereo or mono audio files as sample sources, with up to 44.1 kHz sample rate, 24 bits resolution. Navigate to a folder that contain the audio files you wish to use, select the files and click Open to add them to the Project .
- Page 30 This is where you can adjust the starting point of the sample . This is useful if you have audio files that contain unwanted material before the actual sound begins . The Nord Sample Editor will automatically place a starting point when a sample is assigned to a zone .
- Page 31 If you can find a smooth short loop early in a sample, the envelope load a Sample Instrument to the Nord Electro 3 . generators in the Nord Electro 3 can be used to emulate a natural decay, and you can save lots of space in the Flash memory.
-
Page 32: File Menu
. The added audio files will appear in the Audio File/Assign tab, in the Audio Files list . The Nord Sample Editor can use audio files in the .wav format, up to a 24 bit, 44 .1 kHz resolution . -
Page 33: Edit Menu
The Keyboard Grid represents the total keyboard range that the Zones can cover - from F0 to C8 . The middle C on the Nord Electro 3 - when Sound Download the Octave Shift is set to 0 - is the C4 key, MIDI Note Number 60 . - Page 34 Nord Electro 3 This will also remove any samples from the Project that are associated In the lower right corner is an indication that tells you if a Nord Electro 3 with this audio file . is connected to the computer, or not .
- Page 35 . The middle C, C4 on the Nord Electro 3 keyboard - when the the mouse . Octave Shift on the Nord Electro 3 is set to 0 - is key number 60 . Select one or several audio files in the Audio File list and click on Assign to assign the samples to Zones .
- Page 36 Any audio data after the loop end point will be automatically Clicking on this button will permanently de-assign the mapping of the discarded by the Nord Sample Editor when you create the Sample focused sample, and also all the other samples that originates from the Instrument from the Project.
- Page 37 8NordsaMplEEditor | 37 A crossfades first section is indicated with the light blue area that is Right-clicking in the graph will position the loop end marker, which before the loop start, to the left of the blue area . The crossfades end together with the position of the loop start marker sets the loop length .
- Page 38 . of the sample . As soon as a sample is assigned by the Nord Sample The zones can be changed by clicking and dragging on the zone Editor, a Start point will be automatically set .
- Page 39 C1, C2, C3 etc . Use the buttons to transpose the entire Sample Instrument in semi C4 represents the middle C on the Nord Electro 3, when the Octave tone steps . Shift control is set to 0 . Set the value expressed in dB:s in the value...
-
Page 40: Play Mode
This is where you find the function of the Nord Sample Editor to man- age the content of the Sample Instrument memory . If no Nord Electro 3 is connected to the computer, the memory locations will be grayed out . - Page 41 . Use this file type to share Sampled Instruments with other Nord Electro 3 users . The .nsmp file can not be opened or edited; it can If you want to rearrange the order of the Sample Instruments, only be down- or uploaded to and from a Nord Sample compatible unit .
-
Page 42: Program Change
Note On and Note Off messages are transmitted and received . Controllers Connect the MIDI Out on the Nord Electro 3 to the MIDI In on your sequencer . In the MIDI Menu (see page 18), you can select if the Nord Electro 3 should transmit and/or receive Control Change messages . -
Page 43: Dump All
Drawbar 3 Drawbar 4 Drawbar 5 Sending program dumps Drawbar 6 Connect the MIDI OUT on the Nord Electro 3 to the MIDI In on the Drawbar 7 receiving device . Drawbar 8 Drawbar 9 Set up the receiving device to accept MIDI SysEx and MIDI Con- Drawbars - Preset 1/Lower troller data . -
Page 44: Midi Implementation Chart
True Voice Mode 1: Omni On, Poly - Mode 2: Omni O, Mono - Mode 3: Omni Off, Poly - Mode 4: Omni Off, Mono - O = Yes - X = No Model: Nord Electro 3 OS v1.x Date: 2008-12-15... -
Page 45: Organ Presets
Range Begin 36 Up/Down 14 2/Up 12 Effects 9 Map 39 Range End 36 Upload 22 Electro 3 Manager 20 Master level 11 Reference 32 Upper Manual 12 Enabled box 34 Memory Indicator 41 Rel 14 Upper Progress bar 34... - Page 46 Part No. 50316 Copyright Clavia DMI AB 2009 Print Edition 1.0...
Need help?
Do you have a question about the Electro 3 and is the answer not in the manual?
Questions and answers