Table of Contents
Advertisement
For more information, visit www.desatech.com
For more information, visit www.desatech.com
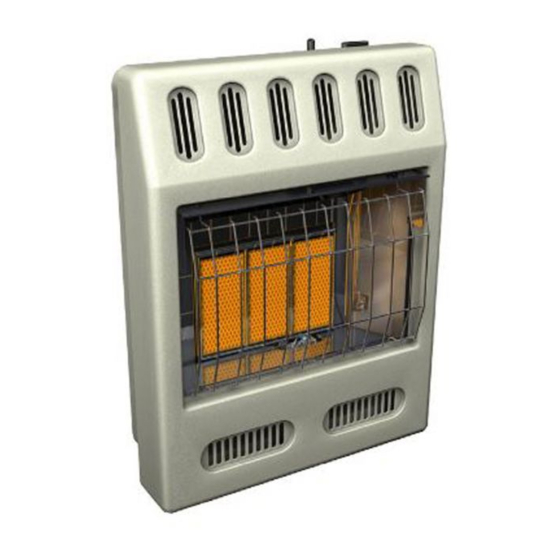
GWRP16, GWRN18
GWRP26, GWRN30
GWRP16T, GWRN18T
GWRP26T, GWRN30T
WARNING: If the information in this manual is not
followed exactly, a fire or explosion may result caus-
ing property damage, personal injury, or loss of life.
— Do not store or use gasoline or other flammable
vapors and liquids in the vicinity of this or any
other appliance.
— WHAT TO DO IF YOU SMELL GAS
• Do not try to light any appliance.
• Do not touch any electrical switch; do not use any
phone in your building.
• Immediately call your gas supplier from a
neighbor's phone. Follow the gas supplier's in-
structions.
• If you cannot reach your gas supplier, call the fire
department.
— Installation and service must be performed by a
qualified installer, service agency, or the gas
supplier.
This appliance may be installed in an aftermarket*, permanently located, manufactured
(mobile) home, where not prohibited by local codes.
This appliance is only for use with the type of gas indicated on the rating plate. This
appliance is not convertible for use with other gases.
*Aftermarket: Completion of sale, not for purpose of resale, from the manufacturer
Save this manual for future reference.
Save this manual for future reference.
UNVENTED (VENT-FREE)
INFRARED GAS HEATER
TM
SAFETY INFORMATION AND INSTALLATION MANUAL
WARNING: Improper installation,
adjustment, alteration, service, or
maintenance can cause injury or
property damage. Refer to this
manual for correct installation and
operational procedures. For as-
sistance or additional information
consult a qualified installer, ser-
vice agency, or the gas supplier.
WARNING: This is an unvented
gas-fired heater. It uses air (oxy-
gen) from the room in which it is
installed. Provisions for ad-
equate combustion and ventila-
tion air must be provided. Refer
to Air for Combustion and Venti-
lation section on page 4 of this
manual.
Advertisement
Table of Contents

Related Manuals for Desa GWRP16


Summary of Contents for Desa GWRP16
- Page 1 UNVENTED (VENT-FREE) INFRARED GAS HEATER SAFETY INFORMATION AND INSTALLATION MANUAL For more information, visit www.desatech.com For more information, visit www.desatech.com GWRP16, GWRN18 GWRP26, GWRN30 GWRP16T, GWRN18T GWRP26T, GWRN30T WARNING: Improper installation, WARNING: If the information in this manual is not...
-
Page 2: Table Of Contents
TABLE OF CONTENTS SAFETY INFORMATION TABLE OF CONTENTS SAFETY INFORMATION ............2 TROUBLESHOOTING .............. 19 LOCAL CODES ................3 ILLUSTRATED PARTS BREAKDOWN AND PARTS LIST ..22 PRODUCT IDENTIFICATION ............. 3 REPLACEMENT PARTS ............26 UNPACKING ................3 SERVICE HINTS ............... 26 PRODUCT FEATURES .............. -
Page 3: Local Codes
SAFETY INFORMATION LOCAL CODES PRODUCT IDENTIFICATION UNPACKING PRODUCT FEATURES SAFETY INFORMATION PRODUCT IDENTIFICATION Continued Control Knob Ignitor Button If you smell gas • Shut off gas supply • Do not try to light any appliance • Do not touch any electrical switch; do not use any phone in your building •... -
Page 4: Air For Combustion And Ventilation
AIR FOR COMBUSTION AND VENTILATION Providing Adequate Ventilation AIR FOR COMBUSTION AND VENTILATION Unusually tight construction is defined as construction WARNING: This heater shall not be installed in a where: confined space or unusually tight construction un- a. walls and ceilings exposed to the outside atmosphere less provisions are provided for adequate combustion have a continuous water vapor retarder with a rating and ventilation air. - Page 5 AIR FOR COMBUSTION AND VENTILATION Determining Fresh-Air Flow For Heater Location AIR FOR COMBUSTION AND VENTILATION Continued DETERMINING FRESH-AIR FLOW FOR Compare the maximum Btu/Hr the space can support with the actual amount of Btu/Hr used. HEATER LOCATION __________________ Btu/Hr (maximum the space can support) Determining if You Have a Confined or __________________ Btu/Hr (actual amount of Btu/Hr used) Unconfined Space...
-
Page 6: Ventilation Air
AIR FOR COMBUSTION AND VENTILATION Ventilation Air AIR FOR COMBUSTION AND VENTILATION Continued VENTILATION AIR 12" Ventilation Air From Inside Building This fresh air would come from an adjoining unconfined space. When ventilating to an adjoining unconfined space, you must provide two permanent openings: one within 12"... -
Page 7: Installation
INSTALLATION Check Gas Type Installation Items Locating Heater INSTALLATION NOTICE: This heater is intended for use as supple- WARNING: Never install the heater mental heat. Use this heater along with your primary • in a bedroom or bathroom heating system. Do not install this heater as your •... - Page 8 INSTALLATION Thermostat Sensing Bulb Installing Heater To Wall INSTALLATION Continued THERMOSTAT SENSING BULB Removing Front Panel Of Heater (Thermostat Models Only) 1. Remove the four painted screws, two on each side of front panel. The thermostat sensing bulb has been placed inside the heater for 2.
- Page 9 INSTALLATION Installing Heater To Wall (Cont.) INSTALLATION Continued Mark screw locations on wall (see Figure 8). Attaching To Wall Anchor Method Note: Only mark last hole on each end of mounting bracket. For attaching mounting bracket to hollow walls (wall areas between Insert mounting screws through these holes only.
-
Page 10: Connecting To Gas Supply
INSTALLATION Installing Heater To Wall (Cont.) Connecting To Gas Supply INSTALLATION Continued Installing Bottom Mounting Screws CONNECTING TO GAS SUPPLY Locate two bottom mounting holes. These holes are near bot- tom on back panel of heater (see Figure 12). WARNING: This appliance requires a 3/8" NPT (National Pipe Thread) inlet connection to the pres- Mark screw locations on wall. -
Page 11: Checking Gas Connections
INSTALLATION Continued Typical Inlet Pipe Diameters CHECKING GAS CONNECTIONS GWRP16(T), GWRN18(T) - 3/8" or greater GWRP26(T), GWRN30(T) - 1/2" or greater WARNING: Test all gas piping and connections Installation must include equipment shutoff valve, union, and for leaks after installing or servicing. Correct all leaks plugged 1/8"... - Page 12 INSTALLATION Checking Gas Connections (Cont.) INSTALLATION Continued Test Pressures Equal To or Less Than 1/2 PSIG (3.5 kPa) Open POSIT Equipment Close equipment shutoff valve (see Figure 15). Shutoff Pressurize supply piping system by either opening propane/LP Valve supply tank valve for propane/LP gas or opening main gas valve located on or near gas meter for natural gas, or using com- pressed air.
-
Page 13: Operating Heater
OPERATING HEATER (NON-THERMOSTAT MODELS) For Your Safety Read Before Lighting Lighting Instructions OPERATING HEATER 5. Turn control knob to PILOT/IGN and press in. NON-THERMOSTAT MODELS Note: You may be running this heater for the first time after hooking up to gas supply. If so, you may need to press FOR YOUR SAFETY READ in control knob for 30 seconds or more. -
Page 14: To Turn Off Gas To Appliance
Control knob will lock at the desired position. Control GWRN18 GWRN30 FOR YOUR SAFETY READ Knob GWRP16 GWRP26 BEFORE LIGHTING WARNING: If you do not follow these instructions exactly, a fire or explosion may result causing prop- erty damage, personal injury or loss of life. - Page 15 OPERATING HEATER (THERMOSTAT MODELS) Lighting Instructions OPERATING HEATER Continued LIGHTING Ignitor Control Button INSTRUCTIONS Knob STOP! Read the safety information, column 2 page 14. IGNITOR Make sure equipment shutoff valve is fully open. Figure 21 - Control Knob In The OFF Position Turn thermostat control knob clockwise to the OFF Clockwise...
-
Page 16: Inspecting Heater
OPERATING HEATER (THERMOSTAT MODELS) To Turn Off Gas To Appliance Thermostat Operation Manual Lighting Procedure INSPECTING HEATER Pilot Flame Pattern Burner Flame Pattern INSPECTING HEATER OPERATING HEATER Continued Check pilot flame pattern and burner flame pattern often. PILOT FLAME PATTERN TO TURN OFF GAS Figure 24 shows a correct pilot flame pattern. -
Page 17: Cleaning And Maintenance
CLEANING AND MAINTENANCE ODS/Pilot and Burner Cleaning Burner Pilot Air Inlet Cabinet CLEANING AND MAINTENANCE Pilot Assembly WARNING: Turn off heater and let cool before cleaning. CAUTION: You must keep control areas, burner, and circulating air passageways of heater clean. In- spect these areas of heater before each use. -
Page 18: Specifications
28 x 10 Weight (pounds) Heater Shipping Note : Dimensions listed are outer most points on the heater (includes control knobs and grill). * For purposes of input adjustment. GWRP16 GWRP26 GWRP16T GWRP26T Btu (Variable) 6,000/11,000/16,000 6,000/16,000/26,000 Type Gas... -
Page 19: Troubleshooting
TROUBLESHOOTING TROUBLESHOOTING CAUTION: Never use a wire, WARNING: Turn off and un- needle, or similar object to clean plug heater and let cool before Note: For additional help, visit DESA ODS/pilot. This can damage ODS/ servicing. Only a qualified ser- International’s technical service web site pilot unit. - Page 20 TROUBLESHOOTING TROUBLESHOOTING Continued OBSERVED PROBLEM POSSIBLE CAUSE REMEDY ODS/pilot lights but flame goes out when 1. Control knob not fully pressed in 1. Press in control knob fully 2. Control knob not pressed in long enough control knob is released 2.
- Page 21 TROUBLESHOOTING TROUBLESHOOTING Continued WARNING: If you smell gas • Shut off gas supply. • Do not try to light any appliance. • Do not touch any electrical switch; do not use any phone in your building. • Immediately call your gas supplier from a neighbor’s phone. Follow the gas supplier’s instructions.
-
Page 22: Illustrated Parts Breakdown And Parts List
ILLUSTRATED PARTS BREAKDOWN Cabinet Body Models GWRP16, GWRN18 GWRP26, GWRN30 GWRP16T, GWRN18T GWRP26T, GWRN30T ILLUSTRATED PARTS BREAKDOWN CABINET BODY GWRP16, GWRN18 GWRP26, GWRN30 GWRP16T, GWRN18T GWRP26T, GWRN30T See Pages 24 and 25 For more information, visit www.desatech.com For more information, visit www.desatech.com... -
Page 23: Parts List
PARTS LIST Cabinet Body Models GWRP16, GWRN18 GWRP26, GWRN30 GWRP16T, GWRN18T GWRP26T, GWRN30T PARTS LIST This list contains replaceable parts used in your heater. When ordering parts, follow the instructions listed under Replacement Parts on page 26 of this manual. - Page 24 GWRP16T, GWRN18T GWRP26T, GWRN30T ILLUSTRATED PARTS BREAKDOWN BURNER ASSEMBLY GWRP16, GWRN18 GWRP26, GWRN30 GWRP16T, GWRN18T GWRP26T, GWRN30T ODS/PILOT BURNER ASSEMBLY GWRP16, GWRN18 BURNER ASSEMBLY GWRP26, GWRN30 BURNER ASSEMBLY GWRP16T,GWRN18T For more information, visit www.desatech.com For more information, visit www.desatech.com 107885-01D...
- Page 25 PARTS LIST Burner Assembly Models GWRP16, GWRN18 GWRP26, GWRN30 GWRP16T, GWRN18T GWRP26T, GWRN30T PARTS LIST This list contains replaceable parts used in your heater. When ordering parts, follow the instructions listed under Replacement Parts on page 26 of this manual.
-
Page 26: Replacement Parts
REPLACEMENT PARTS SERVICE HINTS TECHNICAL SERVICE SERVICE PUBLICATIONS ACCESSORIES REPLACEMENT PARTS ACCESSORIES Note: Use only original replacement parts. This will protect your Purchase these heater accessories from your local dealer. If they can warranty coverage for parts replaced under warranty. not supply these accessories, either contact your nearest Parts Central (see page 29) or call DESA International at 1-866-672-6040 PARTS UNDER WARRANTY... -
Page 27: Owner's Registration Form
OWNER'S REGISTRATION FORM In order to provide better customer service for this and future purchases, we recommend that you register your product with us. You can register online at www.desatech.com. If access to our website is not available to you, please complete this Owner’s Registration Form and mail to the address on the back of this owner’s manual. - Page 28 Postage Required 2701 Industrial Drive P.O. Box 90004 Bowling Green, KY 42102-9004 For more information, visit www.desatech.com For more information, visit www.desatech.com 107885-01D TAPE...
-
Page 29: Parts Centrals
PARTS CENTRAL PARTS CENTRALS These Parts Centrals are privately owned businesses. They have agreed to support our customer’s needs by providing original replacement parts and accessories. Baltimore Electric Master Parts Dist. Dayton Hardware 1348 Dixwell Avenue 1251 Mound Ave. NW P.O. -
Page 30: Warranty Information
WARRANTY INFORMATION KEEP THIS WARRANTY Model Serial No. Date Purchased Always specify model and serial numbers when communicating with the factory. We reserve the right to amend these specifications at any time without notice. The only warranty applicable is our standard written warranty. We make no other warranty, expressed or implied.
Need help?
Do you have a question about the GWRP16 and is the answer not in the manual?
Questions and answers