Table of Contents
Advertisement
Available languages
Available languages
SAFETY INFORMATION AND INSTALLATION MANUAL
GWN6, GWP6, GWN10, GWP10, GWN10T, GWP10T, GWRN10,
GWRP10, MN10T, MP10T, VN1000BTA, VP1000BTA, VN10A,
VP10A, VN10TA, VP10TA, VN6D, VP5D, WMN10, WMP10
WARNING: If the information in this manual is not
followed exactly, a fire or explosion may result causing
property damage, personal injury or loss of life.
— Do not store or use gasoline or other flammable
vapors and liquids in the vicinity of this or any other
appliance.
— WHAT TO DO IF YOU SMELL GAS
• Do not try to light any appliance.
• Do not touch any electrical switch; do not use any
phone in your building.
• Immediately call your gas supplier from a neighbor's
phone. Follow the gas supplier's instructions.
• If you cannot reach your gas supplier, call the fire
department.
— Installation and service must be performed by a quali-
fied installer, service agency or the gas supplier.
INSTALLER: Leave this manual with the appliance.
CONSUMER: Retain this manual for future reference.
For more information, visit www.desatech.com
VENT-FREE GAS HEATER
Advertisement
Chapters
Table of Contents

Related Manuals for Desa MP10T


Summary of Contents for Desa MP10T
- Page 1 VENT-FREE GAS HEATER SAFETY INFORMATION AND INSTALLATION MANUAL GWN6, GWP6, GWN10, GWP10, GWN10T, GWP10T, GWRN10, GWRP10, MN10T, MP10T, VN1000BTA, VP1000BTA, VN10A, VP10A, VN10TA, VP10TA, VN6D, VP5D, WMN10, WMP10 WARNING: If the information in this manual is not followed exactly, a fire or explosion may result causing property damage, personal injury or loss of life.
-
Page 2: Table Of Contents
Safety ... 2 Local Codes... 4 Unpacking... 4 Product Identification ... 4 Product Features ... 5 Air for Ventilation and Combustion ... 5 Installation ... 7 Operation ... 13 Inspecting Burner ... 15 Cleaning ... 17 WARNING: Improper installation, adjustment, alteration, service or main- tenance can cause injury or property damage. -
Page 3: Safety
Natural and Propane/LP Gas: Natural and propane/LP gases are fuel gases. Fuel gases are odorless. An odor-making agent is added to fuel gases. The odor helps you detect a fuel gas leak. However, the odor added to fuel gas can fade. Fuel gas may be present even though no odor exists. -
Page 4: Local Codes
Vent-free gas products are prohibited for bedroom and bathroom installation in the Commonwealth of Massachusetts. UNPACkING 3. Check heater for any shipping damage. If heater is damaged call DESA Heating, LLC at 1-866-672-6040 for replacement parts before returning to dealer. Ignitor Button Grill... -
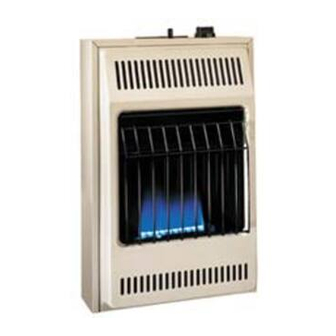
Page 5: Product Features
SAFETY DEVICE This heater has a pilot with an Oxygen Deple- tion Sensing (ODS) safety shutoff system. The ODS/pilot is a required feature for vent-free room heaters. The ODS/pilot shuts off the heater if there is not enough fresh air. PIEzO IGNITION SYSTEM This heater has a piezo ignitor. -
Page 6: Air For Combustion And Ventilation
3. Add the Btu/Hr of all fuel burning appliances in the space. Vent-free heater Gas water heater* Gas furnace Vented gas heater Gas fireplace logs Other gas appliances* + _________Btu/Hr Total * Do not include direct-vent gas appliances. Direct-vent draws combustion air from the outdoors and vents to the outdoors. -
Page 7: Check Gas Type
AIR FOR COMBUSTION AND VENTILATION Ventilation Grills into Adjoining Remove Room, Door into Option 1 Adjoining Room, Option 3 12" Figure 2 - Ventilation Air from Inside Building Ventilation Air From Outdoors Provide extra fresh air by using ventilation grills or ducts. You must provide two perma- nent openings: one within 12"... -
Page 8: Locating Heater
LOCATING HEATER This heater is designed to be mounted on a wall. WARNING: Maintain the minimum clearances shown in Figure 4. If you can, provide greater clearances from floor, ceiling and joining wall. WARNING: Never install the heater • in a bathroom (10,000 Btu/hr only. - Page 9 INSTALLING HEATER TO WALL Marking Screw Locations 1. Determine where you will locate heater. WARNING: Maintain mini- mum clearances shown in Figure 5. If you can, provide greater clearances from floor and join- ing wall. 2. Mark two mounting screw locations on wall (see Figure 5).
-
Page 10: Connecting To Gas Supply
INSTALLATION Continued Removing Front Panel Of Heater 1. Remove two screws near bottom corners of front panel. 2. Lift straight up on grill guard until it stops. Grill guard will slide up about 1/4". 3. Pull bottom of front panel forward, then down. - Page 11 INSTALLATION Continued Installation must include equipment shutoff valve, union and plugged 1/8" NPT tap. Locate NPT tap within reach for test gauge hook up. NPT tap must be upstream from heater (see Figure 13). IMPORTANT: Install an equipment shutoff valve in an accessible location. The equip- ment shutoff valve is for turning on or shutting off the gas to the appliance.
-
Page 12: Checking Gas Connections
CHECKING GAS CONNECTIONS WARNING: Test all gas piping and connections, internal and external to unit, for leaks after installing or servicing. Correct all leaks at once. WARNING: Never use an open flame to check for a leak. Apply a noncorrosive leak detec- tion fluid to all joints. -
Page 13: For Your Safety Read Before Lighting
PRESSURE TESTING HEATER GAS CONNECTIONS 1. Open equipment shutoff valve (see Figure 14, page 12). 2. For natural gas open main gas valve locat- ed on or near gas meter. For propane/LP gas open propane/LP supply tank valve. 3. Make sure control knob of heater is in the OFF position. -
Page 14: To Turn Off Gas To Appliance
8. Keep control knob pressed in for 30 sec- onds after lighting pilot. After 30 seconds, release control knob. • If control knob does not pop up when released, contact a qualified service person or gas supplier for repairs. Note: If pilot goes out, repeat steps 4 thru 7. -
Page 15: To Select Heating Level
MANUAL CONTROL INFRARED MODELS ONLY TO SELECT HEATING LEVEL WARNING: When running heater, set control knob at LOW or HIGH locked positions for double burner heater or ON po- sition for single burner heater. Never set control knob between locked positions. Poor combus- tion and higher levels of carbon monoxide may result. - Page 16 WARNING: If yellow tipping occurs, your heater could pro- duce increased levels of carbon monoxide. If burner flame pattern shows yellow tipping, proceed with the following instructions. NOTICE: Do not mistake orange flames with yellow tipping. Dust or other fine particles enter the heater and burn causing brief patches of orange flame.
-
Page 17: Cleaning
If so, con- tact DESA Heating, LLC at 1-866-672-6040. When calling please have your model and serial numbers of your heater ready. You can also visit DESA Heating, LLC’s web site at www.desatech.com. 123995-01C CLEANING dirt, lint and pet hair. To clean these parts we recommend using compressed air no greater than 30 PSI. -
Page 18: Troubleshooting
WARNING: Turn off heater and let cool before servicing. Only a qualified service person should service and repair heater. CAUTION: Never use a wire, needle or similar object to clean ODS/pilot. This can damage ODS/pilot unit. Note: All troubleshooting items are listed in order of operation. OBSERVED PROBLEM When ignitor button is pressed, there is no spark at... - Page 19 OBSERVED PROBLEM ODS/pilot lights but flame goes out when control knob is released Burner does not light after ODS/pilot is lit Delayed ignition of burner Burner backfiring during combustion Burner plaque(s) does not glow (Infrared models only) Yellow flame during burner combustion 123995-01C TROUBLESHOOTING...
- Page 20 OBSERVED PROBLEM Heater shuts off in use (ODS operates) Slight smoke or odor during initial operation Heater produces a whistling noise when burner is lit Heater produces a clicking/ ticking noise just after burner is lit or shut off White powder residue forming within burner box or on adja- cent walls or furniture Moisture/condensation no-...
-
Page 21: Replacement Parts
Contact authorized dealers of this product. If they can’t supply original replacement part(s), either contact your nearest Parts Central (see page 27) or call DESA Heating, LLC at 1-866-672-6040 for referral informa- tion. A list of authorized dealers can be found by visiting www.desatech.com. -
Page 22: Parts
MODELS GWP6, GWN6, GWP10, GWN10, GWP10T, GWN10T, MN10T, MP10T, VN1000BTA, VP1000BTA, WMN10, WMP10 PARTS www.desatech.com Pilot 11-1 11-2 123995-01C... -
Page 23: Parts List
This list contains replaceable parts used in your heater. When ordering parts, follow the instructions listed under Replacement Parts on page 21 of this manual. NO. PART NO. 098304-01 099467-03 099467-07 099318-04 101108-01 102017-02 098260-11 099319-02BR Top Glass Retainer 099317-02 098271-03 098249-01 120630-01*... - Page 24 MODELS GWRP10, GWRN10, VP5D, VN6D, VP10A, VN10A, VP10TA, VN10TA Pilot PARTS * Manual Control Models Only ** Thermostat Control Models Only 8 (VP5D and VN6D Models Only 23** 25** 24** 11-1 11-2 www.desatech.com 123995-01C...
- Page 25 This list contains replaceable parts used in your heater. When ordering parts, follow the instructions listed under Replacement Parts on page 21 of this manual. PART NO. DESCRIPTION 098304-01 Screw, #10 x 3/8" 099467-03 Front Panel Assembly 099467-07 Front Panel Assembly 099318-03 Grill Guard 101108-01...
-
Page 26: Specifications
• Pressure Regulator Setting: 8" W.C. • Inlet Gas Pressure (inches of water): Maximum - 14" W.C., Minimum - 11" W.C. SPECIFICATIONS BLUE FLAME MODELS GWP10, GWP10T, MP10T, VP1000BTA, WMP10 • 5,000/10,000 Btu/hr (variable) • Propane/LP Gas • Piezo Ignition •... -
Page 27: Accessory
Purchase these accessories from your local dealer. If they can not supply these accessories, either contact your nearest Parts Central or call DESA Heating, LLC at 1-866-672-6040 for information. You can also write to the address listed on the back page of this manual. - Page 28 DESA Heating, LLC 2701 Industrial Drive Bowling Green, KY 42101 www.desatech.com 1-866-672-6040 123995-01 Rev. C 09/08...
-
Page 29: Calentador De Gas No Ventilado (Sin Ventilas) Información De Seguridad Y Manual De Instalación
CALENTADOR DE GAS NO VENTILADO (SIN VENTILAS) INFORMACIÓN DE SEGURIDAD Y MANUAL DE INSTALACIÓN GWN6, GWP6, GWN10, GWP10, GWN10T, GWP10T, GWRN10, GWRP10, MN10T, MP10T, VN1000BTA, VP1000BTA, VN10A, VP10A, VN10TA, VP10TA, VN6D, VP5D, WMN10, WMP10 ADVERTENCIA: si la información contenida en este manual no se sigue al pie de la letra, se puede producir un incendio o una explosión que podría ocasionar daños a la... - Page 30 Seguridad ... 2 Desempaque ... 4 Identificación del producto ... 4 Características del producto ... 4 Códigos locales ... 5 Aire para combustión y ventilación ... 5 Instalación ... 8 Funcionamiento ... 14 Inspección del calentador ... 16 Limpieza ... 17 SEGURIDAD ADVERTENCIA: la ins- talación, ajuste, alteración,...
-
Page 31: Seguridad
SEGURIDAD Continuación PELIGRO: ¡la intoxicación con monóxido de carbono puede resultar en la muerte! Intoxicación con monóxido de carbono: los síntomas iniciales de la intoxicación con monóxido de carbono son semejantes a los de la gripe, con dolores de cabeza, mareos y/o náusea. -
Page 32: Desempaque
3. Revise el calentador para ver si hay algún daño debido al transporte. Si el calentador está dañado, llame a DESA Heating, LLC al 1-866-672-6040 para obtener piezas de re- puesto antes de devolverlo al distribuidor. -
Page 33: Códigos Locales
CÓDIGOS LOCALES Instale y use el calentador cuidadosamente. Siga todos los códigos locales. A falta de códigos loca- les, utilice la última edición del Código nacional de gas combustible, ANSI Z223.1/NFPA 54*. *Lo puede obtener de: American National Standards Institute. Inc. 1430 Broadway New York, NY 10018, EE.UU. - Page 34 AIRE PARA COMBUSTIÓN Y VENTILACIÓN Si su casa no cumple con los tres criterios anteriores, vaya a Determinación del flujo de aire fresco para la ubicar el calentador. Espacio confinado y no confinado El Código nacional de gas combustible, ANSI Z223.1/NFPA 54 define el espacio confinado como aquel cuyo volumen es menor de 4.8 m por kW (50 pies cúbicos por cada 1,000 BTU/h) de clasificación de entrada agregada de todos...
- Page 35 AIRE PARA COMBUSTIÓN Y VENTILACIÓN ADVERTENCIA: si el área en la que se va a operar el calenta- dor no cumple los requisitos de volumen de aire de combustión para interiores, se debe pro- porcionar aire de combustión y para ventilación mediante uno de los métodos descritos en el Código nacional de gas combustible, ANSI Z223.1/NFPA...
-
Page 36: Instalación
INSTALACIÓN AVISO: este calentador está diseñado para utilizarse como calefacción adicional. Use este calentador junto con su sistema de calefacción principal. No ins- tale este calentador como fuente de calefacción principal. Si tiene un sistema de calefacción cen- tral, puede activar el ventilador de circulación del sistema mientras utiliza el calentador. Esto ayudará... - Page 37 INSTALACIÓN Continuación ADVERTENCIA: nunca ins- tale el calentador, • en un cuarto de baño (sólo mode- los de 10,000 Btu/h. Los modelos de 6,000 Btu/h sí se pueden insta- lar en cuartos de baño. Consulte los códigos locales). • En un vehículo recreativo • donde cortinas, muebles, ropa u otros objetos inflamables estén a menos de 91.5 cm (36") de las partes anterior, superior o laterales del calentador, • como aditamento de una chi- menea,...
- Page 38 INSTALACIÓN Continuación Método de fijación a viga de pared Para fijar el tornillo de montaje a la viga de pared 1. Perfore el orificio en el lugar marcado utili- zando una broca de 9/64". 2. Introduzca el tornillo de montaje en la viga de la pared. 3.
-
Page 39: Conexión Al Suministro De Gas
INSTALACIÓN Continuación 3. Separe el calentador de la pared. 4. Si va a instalar el tornillo de montaje infe- rior en una pared hueca o sólida, instale el anclaje de pared. Siga los pasos 1 a 5 del Método de fijación al anclaje de la pared, en la página 10. - Page 40 INSTALACIÓN Continuación La instalación debe incluir la válvula de cierre del equipo, la unión y la rosca tipo NPT con tapón de 1/8". Sitúe el conector con rosca NPT a su alcance para realizar la conexión del medidor de prueba. El conector tipo NPT se debe conectar en dirección del suministro desde el calentador (consulte la figura 13).
- Page 41 INSTALACIÓN Continuación PRUEBAS DE PRESIÓN DEL SISTEMA DE TUBERÍA DE SUMINISTRO DE GAS Presiones de prueba que excedan 3.5 kPa (1/2 PSI) 1. Desconecte el aparato del sistema de tubería de suministro de gas por medio de la válvula principal de gas del aparato (válvula de control) y de la válvula de cierre del equipo.
-
Page 42: Funcionamiento
FUNCIONAMIENTO POR SU SEGURIDAD, LEA ESTO ANTES DE ENCENDER EL CALENTADOR ADVERTENCIA: si no sigue estas instrucciones al pie de la letra, puede provocar un incen- dio o una explosión que causen daños a la propiedad, lesiones personales o la muerte. A. - Page 43 FUNCIONAMIENTO Continuación Nota: si el piloto se apaga, repita los pasos 4 al 7. Espere un (1) minuto antes de encender el piloto nuevamente. 9. Gire la perilla de control en sentido con- trario al de las manecillas del reloj hasta la temperatura deseada.
-
Page 44: Inspección Del Calentador
FUNCIONAMIENTO Continuación SÓLO MODELOS CON CONTROL MANUAL DE INFRARROjO PARA SELECCIONAR EL NIVEL DE CALEFACCIÓN ADVERTENCIA: cuando haga funcionar el calentador, ajuste la perilla de control en las posiciones de Bajo o Alto fijas para calentadores de dos que- madores, o bien, en la posición de encendido en los calentado- res de un quemador. -
Page 45: Limpieza
INSPECCIÓN DEL CALENTADOR Continuación AVISO: no confunda las llamas anaranjadas con el color amari- llo en las puntas. El polvo y otras partículas pequeñas se introdu- cen al calentador y al quemarse producen breves manchas de llamas anaranjadas. PATRÓN DE LA LLAMA DEL CALENTADOR DE MODELOS LLAMA AzUL En la figura 23 se muestra el patrón correcto... -
Page 46: Servicio Técnico
DESA Heating, LLC al 1-866-672-6040. Al llamar tenga a la mano los números de modelo y serie de su calentador. También puede visitar el sitio web de DESA Heating, LLC en www.desatech.com. CONSEjOS PARA SERVICIO Cuando la presión del gas de entrada sea muy baja: •... -
Page 47: Solución De Problemas
SOLUCIÓN DE PROBLEMAS ADVERTENCIA: apague y desconecte el calentador y deje que se enfríe antes de darle servicio. Sólo una persona de servicio capacitada debe reparar el calentador o darle servicio. PRECAUCIÓN: nunca utilice un alambre, aguja u objetos parecidos para limpiar el piloto/ODS. - Page 48 SOLUCIÓN DE PROBLEMAS PROBLEMA OBSERVADO El piloto con ODS se encien- de pero la llama se extingue cuando se suelta la perilla de control El quemador no se enciende después de que el piloto con ODS está encendido El quemador se tarda en encender El quemador muestra lla- mas de retorno durante la...
- Page 49 SOLUCIÓN DE PROBLEMAS PROBLEMA OBSERVADO Las placas del quemador no están al rojo vivo Llamas amarillas durante la combustión en el quemador El calentador se apaga mien- tras se está usando (el ODS funciona) Un poco de humo u olor durante el funcionamiento inicial El calentador produce un...
- Page 50 SOLUCIÓN DE PROBLEMAS ADVERTENCIA: si percibe olor a gas, • Cierre el suministro de gas. • No intente encender ningún aparato. • No toque ningún interruptor eléctrico; no use ningún teléfono en el edificio. • Llame inmediatamente a su proveedor de gas desde el teléfono de algún vecino. Siga las instrucciones del proveedor de gas. • Si no puede localizar al proveedor de gas, llame al departamento de bomberos. IMPORTANTE: si hace funcionar el calentador donde existen impurezas en el aire se pueden producir olores. Los productos de limpieza, pintura, solventes de pintura, humo de cigarro, cementos y pegamentos, alfombras o textiles nuevos, etc., producen gases.
-
Page 51: Especificaciones
• Presión del gas de entrada* (pulg. de agua): Máximo 14" de c.a., Mínimo 11" de c.a. 123995-01C ESPECIFICACIONES MODELOS DE LLAMA AzUL GWP10, GWP10T, MP10T, VP1000BTA, WMP10 • 5,000/10,000 Btu/h (variable) • Propano o gas LP • Encendido piezoeléctrico • Ajuste del regulador de presión - 8" de c.a. -
Page 52: Piezas
MODELOS GWP6, GWN6, GWP10, GWN10, GWP10T, GWN10T, MN10T, MP10T, VN1000BTA, VP1000BTA, WMN10, WMP10 PIEzAS www.desatech.com Piloto 11-1 11-2 123995-01C... - Page 53 Esta lista contiene las piezas reemplazables utilizadas en el calentador. Al hacer un pedido de pie- zas, siga las instrucciones enumeradas en Piezas de repuesto en la página 28 de este manual. N° N° DE PARTE DESCRIPCIÓN 098304-01 Tornillo, #10 x 3/8" 099467-03 Conjunto de panel anterior 099467-07...
- Page 54 MODELOS GWRP10, GWRN10, VP5D, VN6D, VP10A, VN10A, VP10TA, VN10TA Piloto PIEzAS * Sólo para modelos de control manual * Manual Control Models Only ** Sólo para modelos de termostato ** Thermostat Control Models Only (Sólo modelos 8 (VP5D and VN6D VP5D y VN6D) Models Only 23** 25** 24** www.desatech.com 123995-01C...
- Page 55 Esta lista contiene las piezas reemplazables utilizadas en el calentador. Al hacer un pedido de piezas, siga las instrucciones enumeradas en Piezas de repuesto en la página 28 de este manual. N° N° DE PARTE DESCRIPCIÓN 098304-01 Tornillo, #10 x 3/8" 099467-03 Conjunto de panel anterior 099467-07...
-
Page 56: Piezas De Repuesto
Adquiera estos accesorios con su distribuidor local. Si no pueden proporcionarle estos accesorios, comuníquese con la Central de piezas más cercana o llame a DESA Hea- ting, LLC al 1-866-672-6040 para obtener información. También puede escribir a la dirección que aparece en la última página de este manual. -
Page 57: Central De Piezas
Estas Centrales de piezas son empresas privadas. Han aceptado dar asistencia a las nece- sidades de nuestros clientes ofreciendo piezas de repuesto y accesorios originales. Those Heater Guys 255 E. Stowell Street Upland, CA 91786, EE.UU. 909-982-3011 Tool & Equipment Co. 5 Manila Ave Hamden, CT 06514, EE.UU. - Page 58 _____________________________________________________ ______________________________________________________ ______________________________________________________ ______________________________________________________ ______________________________________________________ ______________________________________________________ ______________________________________________________ ______________________________________________________ ______________________________________________________ ______________________________________________________ ______________________________________________________ ______________________________________________________ ______________________________________________________ _____________________________________________________ ______________________________________________________ ______________________________________________________ ______________________________________________________ ______________________________________________________ ______________________________________________________ ______________________________________________________ ______________________________________________________ ______________________________________________________ ______________________________________________________ ______________________________________________________ ______________________________________________________ ______________________________________________________ _____________________________________________________ ______________________________________________________ ______________________________________________________ ______________________________________________________ ______________________________________________________ ______________________________________________________ ______________________________________________________ ______________________________________________________ ______________________________________________________ NOTES www.desatech.com 123995-01C...
- Page 59 _____________________________________________________ ______________________________________________________ ______________________________________________________ ______________________________________________________ ______________________________________________________ ______________________________________________________ ______________________________________________________ ______________________________________________________ ______________________________________________________ ______________________________________________________ ______________________________________________________ ______________________________________________________ ______________________________________________________ _____________________________________________________ ______________________________________________________ ______________________________________________________ ______________________________________________________ ______________________________________________________ ______________________________________________________ ______________________________________________________ ______________________________________________________ ______________________________________________________ ______________________________________________________ ______________________________________________________ ______________________________________________________ ______________________________________________________ _____________________________________________________ ______________________________________________________ ______________________________________________________ ______________________________________________________ ______________________________________________________ ______________________________________________________ ______________________________________________________ ______________________________________________________ ______________________________________________________ 123995-01C NOTES www.desatech.com...
- Page 60 DESA Heating, LLC 2701 Industrial Drive Bowling Green, KY 42101 www.desatech.com 1-866-672-6040 123995 01 NOT A UPC 123995-01 Rev. C 09/08...
Need help?
Do you have a question about the MP10T and is the answer not in the manual?
Questions and answers