Table of Contents
Advertisement
Advertisement
Table of Contents
Troubleshooting

Summary of Contents for Smartbox X-431
- Page 1 X-431 Getting Started Guide X-431 Scanner With Open Diagnostic Platform...
- Page 2 © 2 0 0 5 X - 4 3 1 U S A . A l l r i g ht s r e s e r v e d . T h i s m a n u a l , a s w e l l a s t h e c o n t e n t d e s c r i b e d i n i t , i s f u r n i s h e d u n d e r l i c e n s e a n d m a y b e u s e d o r c o p i e d o n l y i n a c c o r d a n c e w i t h the te rm s of s u ch lice n se .
-
Page 3: Table Of Contents
LAUNCH TECH CO., LTD ............... 1-1 About ........................1-1 X-431 USA ..................1-1 About ........................1-1 INTRODUCING THE X-431............. 1-2 Chapter 2: The X-431 Scanner ........2-1 Components ..................2-1 Main Console ..................... 2-2 Smartbox ..................... 2-2 Main Unit ....................2-2 Mini-Printer .................... - Page 4 Downloading to the CF Card Reader..............4-14 Updating the CF Card................. 4-15 Ejecting the CF Card ..................4-18 Formatting the CF Card ..................4-19 Chapter 5: Using the X-431.......... 5-1 To Get Started ..................5-1 Turning Off the X-431..................5-8 Connecting to a Vehicle ..............5-9 Your Comments Matter..............
-
Page 5: Chapter 1: Introduction
This guide will help you quickly start using your X-431. It will introduce you to the components of the X-431 and how to properly care for it. It will then guide you step by step through the registration process, downloading updates from the Internet, and transferring those updates to the X-431 CF Card. -
Page 6: Introducing The X-431
Chapter 1 • Introduction INTRODUCING THE X-431 INTRODUCING THE X-431 The X-431 is a newly developed, automobile diagnostic computer, based on the technology of the open diagnostic platform, the most advanced automobile diagnostic technology brought forward by Launch. The open diagnostic platform represents the highest level of automobile diagnostic technology today and is the developing trend for the future of this field. - Page 7 • 1 full year of software updates are included along with a 1 year warranty • Open-platform Diagnosis • With the help of the SMARTBOX platform and various onboard diagnostic sockets, the scanner can perform standard flash code, data stream, and OBD-II tests on automotive Engines, Transmission, ABS, and Airbags •...
- Page 8 Chapter 1 • Introduction INTRODUCING THE X-431 1 - 4 ©X-431USA...
-
Page 9: Chapter 2: The X-431 Scanner
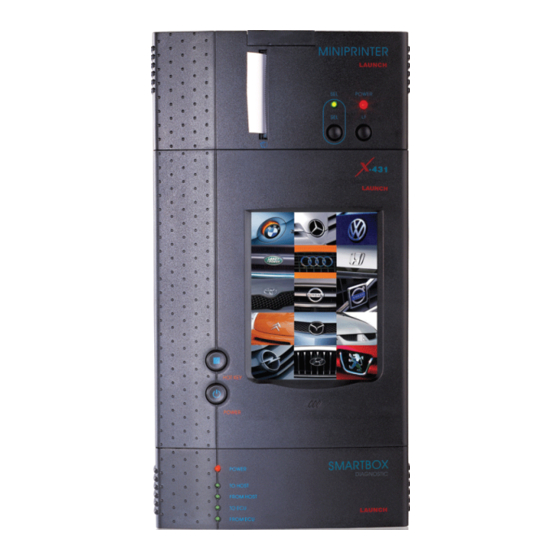
2 • The X-431 Scanner Components The main console of the X-431 is composed of three separate pieces: the Main Unit, the Mini-Printer, and the Smartbox. The following diagram displays the main console and many of the connectors. • X-431 Main Unit •... -
Page 10: Main Console
Main Unit The Main Unit houses the LCD display, the on/off button, and the Hot key. The Mini-Printer plugs into the top of the Main Unit and the Smartbox plugs into the bottom. Mini-Printer The Mini-Printer uses 57mm, heat sensitive paper to provide you with convenient print-outs of real-time data. -
Page 11: Cables
Cables Main Cable The Main Cable has one end attached to the Smartbox and the other end attached to a connector, which is then attached to the vehicle. A power adapter cord is attached to one end of the cable to allow you to power the unit from a standard wall outlet, the car battery, or cigarette lighter. -
Page 12: Connectors
Chapter 2 • The X-431 Scanner Components Connectors There are several connectors that are included with the X-431. Many of them are designed for specific vehicle lines, such as the 38-pin connector for Mercedes-Benz or the 20-pin connector for BMW. -
Page 13: Cf Card And Reader
This software is then transferred to the Smartbox to diagnose the vehicle. A CF Card Reader and USB cable is included with the X-431. The Reader connects directly to your PC as a removable disk drive. Any compact flash card and reader can be used by the X-431. -
Page 14: User's Manual
X-431. Be Careful The X-431 is durably constructed, but a level of care should be taken with its use. Be especially careful with the connectors and cables. The pins on these objects are delicate and can bend or break. Never force a connector or a cable into a port. - Page 15 Turn the feed knob clockwise until the paper comes out of the outlet. 5. Push down the pressing rod, mount the side plate, attach the paper lid and re-attach the MiniPrinter to the X-431 Main unit. © X - 4 3 1 U S A...
- Page 16 Chapter 2 • The X-431 Scanner Printer Operation - Replacing Paper 2 - 8 © X - 4 3 1 U S A...
-
Page 17: Chapter 3: Registration
3 • Registration Your X-431 Scanner is ready to use right out of the box. The CF Card included with your X-431was pre-loaded with the software available at the time of production. Keep in mind that this software could be outdated by the time the unit gets to you, so you should update your machine before using it. -
Page 18: Internet Connection
Chapter 3 • Registration Technical Requirements 4. Type D:\setup.exe, where D represents your CD-ROM drive. Press NTER 5. The InstallShield Wizard will appear. When the Welcome screen appears, click Next. Follow the steps the Wizard provides. 6. Reboot your PC. 7. -
Page 19: Registering Your X-431 Smartbox
X431USA.COM Registration Area WARNING • If your PC is running pop-up blocker software, you will need to disable it in order to download successfully. Registering Your X-431 Smartbox 1. Connect to the Internet. 2. Go to www.x431usa.com, click Update/Register and select the “Register a New Tool”... - Page 20 X431USA.COM Registration Area 4. The Product info window appears. Included in the X-431 documentation envelope is a slip of paper (see page 2-5) that has your 12-digit Smartbox serial number printed on it. Type that number in the Serial No. of SMARTBOX field.
- Page 21 IMPORTANT • You will need this Username and Password every time you log into the X-431 Registration & Updates area. Write it down and be sure that you do not lose it.
- Page 22 Click OK to return to the main screen. Now that you have registered your X-431 Smartbox, you are ready to start downloading updates. See the next section to begin. 3 - 6...
-
Page 23: Chapter 4: Downloading
4 • Downloading Downloading New Updates Your X-431 comes preloaded with the software that was available at the time of the unit’s production. This software may be several versions behind what is currently available on the Internet, so you should take the time now to update your X-431. - Page 24 Chapter 4 • Downloading Downloading New Updates 3. You are now on the entrance page of the X-431 Updating area. If you look to the lower left, you will see the Login/Registration area. 4. In the Username field type your username.
-
Page 25: The Download Center
8. You are now in the Download Center. The Download Center You should consider the Download Center as your primary source of information for all X-431 software updates. The Download Center consists of a table with the following 7 columns. Column 1 Lists the software letter or number. - Page 26 Compact Flash Card which we discuss shortly. The DISPLAY PROGRAM and SYSTEM DATA downloads provide program information for the X-431. These downloads are necessary for the X-431 to function correctly. Both of these downloads have multiple versions, so be sure to check them once in a while to make sure you have the most current version.
- Page 27 Chapter 4 • Downloading Downloading New Updates The first download is the X431 Update Tools. This file can either be downloaded from this page, as noted below, or from the ‘Update/Register’ page at www.x431usa.com. You will not save this file, you will select RUN after clicking ‘DOWN’...
- Page 28 Chapter 4 • Downloading Downloading New Updates 9. The File Download window appears. Be sure that File name is the file that you just selected. Click Run. 10. The following window shows the download progress. 4 - 6 © X - 4 3 1 U S A...
- Page 29 Chapter 4 • Downloading Downloading New Updates 11. When the download completes, you will be shown the following dialog box. Select Run. 12. The X431 UPDATE TOOLS install wizard appears, with the Welcome window displayed. Click Next. © X - 4 3 1 U S A...
- Page 30 Chapter 4 • Downloading Downloading New Updates 13. The Choose Destination Location window appears. Click Next to accept the default destination or click Browse to choose a different folder. 4 - 8 © X - 4 3 1 U S A...
- Page 31 Chapter 4 • Downloading Downloading New Updates The Setup Complete window appears. Click Finish. Once you click Finish, you will be returned to the Download Center. © X - 4 3 1 U S A...
- Page 32 Chapter 4 • Downloading Downloading New Updates NOTE • If you click ‘Download’ and nothing happens, it may be because you have pop-up blocker software enabled. Try holding the C key at the same time as you click ‘Download’. Keep the CTRL key depressed until the download begins.
- Page 33 Chapter 4 • Downloading Downloading New Updates 15. The File Download window appears after clicking ‘Down’. Click Save. Next, the Save As window appears. Here you will need to select the folder where you will store all of your downloads. We recommend that you create a folder on your local drive called X431 Downloads, so that you will always know where to find all of your updates.
- Page 34 Chapter 4 • Downloading Downloading New Updates 17. The folders contained in your local drive are displayed in the main window. Click the Create New Folder icon (as shown circled below). A New Folder will appear in the main window underneath the other folders.
- Page 35 Chapter 4 • Downloading Downloading New Updates 19. A new Save As window will appear. It should resemble the following window. Click Save. The download will now begin. © X - 4 3 1 U S A 4-13...
- Page 36 Chapter 4 • Downloading Downloading New Updates a. The following window will appear notifying you of your download’s progress. Click the checkbox that reads, “Close this dialog box when download completes” if you want to return directly to the previous window once the download is finished.
-
Page 37: Downloading To The Cf Card Reader
Chapter 4 • Downloading Downloading New Updates NOTE • You may not need to download every car line. In the United States, it is unlikely that you will work on Opel or Fiat. Keep in mind that you can always come back and download anything else you might need later. - Page 38 You can check these off one by one to select the lines that you want to make available to the X-431. Or at the bottom of the list you can check off the Select all checkbox to select all of the lines in the list.
- Page 39 Chapter 4 • Downloading Downloading New Updates a. Select the correct folder, and click OK. (C: -> X431 Downloads) b. If you need to change the Target folder, click the binoculars, select the correct drive, and click OK. You only want the outermost file in the target drive selected. For example, if the removable drive is E:, and it has two subfolders, DATA &...
- Page 40 Chapter 4 • Downloading Downloading New Updates NOTE • The correct drive is a Removable Disk drive. If you are not sure which is the right drive, the way to check is when the CF Card is inserted in the Reader, the correct drive will have two folders in it: DATA and GAG (as shown in the previous screenshot).
-
Page 41: Ejecting The Cf Card
Chapter 4 • Downloading Downloading New Updates Ejecting the CF Card If you pull out the CF Card without ejecting it, you can lose data. Always follow these steps to eject the CF Card. 1. Open My Computer from your Desktop or the Start menu. 2. - Page 42 Chapter 4 • Downloading Downloading New Updates 2. Right-click Removable Disk. A pop-up menu appears.Click Format. The CF Card is now formatted. NOTE • You may want to format your CF Card if you do not plan to use all of the car lines. Format your card first and then update it. Deleting Old Software Versions from CF Card You can delete old versions of software from your CF card using the same X431 Update software on your desktop.
- Page 43 Chapter 4 • Downloading Downloading New Updates 4. Click the trashcan icon (See Figure 4-1) 5. Select ‘Delete’ when the program asks you to confirm the delete Figure 4-1: Software Deletion from CF Card using X431 Update software © X - 4 3 1 U S A 4-21...
- Page 44 Chapter 4 • Downloading Downloading New Updates 4 - 2 2 © X - 4 3 1 U S A...
-
Page 45: Chapter 5: Using The X-431
1. Begin by connecting the main cable and inserting the CF Card (the label on the CF Card that reads “Up Side” should face up). 2. Connect the X-431 Power Adapter to the main cable’s power adapter cord and plug the other end into a wall outlet. - Page 46 X-431 Desktop, which allows you to begin diagnosing a vehicle. If this is the first time you are using your X-431 or if you are having trouble with your LCD Display, then you should press the Hot Key to initialize the quadrants.
- Page 47 Chapter 5 • Using the X-431 To Get Started The Keyboard appears on the bottom of the screen. The Keyboard emulates a standard PCs keyboard. Three of the four function buttons are used for writing Chinese with the stylus. The last function button moves the Keyboard from the bottom of the screen to the top of the screen (this is useful because some screens do not have a scrolling feature).
- Page 48 • Offers access to five systems: app, power, Panel clock, contrast, and language. Turn off • Turns off the X-431 (it takes 4 seconds to power down). Information • Grants access to the User Information screen and the About screen. The About screen displays...
- Page 49 Chapter 5 • Using the X-431 To Get Started 8. Select Control Panel. The following screen appears: a. Select clock. The Date/Time screen appears. © X - 4 3 1 U S A...
- Page 50 Chapter 5 • Using the X-431 To Get Started b. You must set the time zone first. Select Set time zone. c. Select your time zone and click OK. The top of the screen will read, “Updating configuration, please wait...” When it is finished, you will be returned to the Date/Time screen.
- Page 51 Chapter 5 • Using the X-431 To Get Started f. Open the Keyboard. Select AM or PM. g. Tap the Hours field to establish your cursor there and then use the Keyboard to input the correct hour. h. Repeat this procedure for Minutes and Seconds.
-
Page 52: Turning Off The X-431
If possible, you should always follow this procedure to turn off the unit. • This method should only be used if the X-431 gets hung or is unresponsive. Hold down the On/Off button until the screen turns off. -
Page 53: Connecting To A Vehicle
Connecting to a Vehicle There are a few things to keep in mind when using the X-431. • Always use the OEM connector that comes with the X-431, even if the vehicle has an OBDII socket. • If the unit is cold, the monitor may not function properly. Allow it to warm up before using. - Page 54 4. Touch START. A screen resembling the following will be displayed. 5. Select the car line to which you are connected (we have selected Volkswagen). From this point on, the X-431 mirrors the OEM factory tool. 5 - 1 0...
- Page 55 Chapter 5 • Using the X-431 Connecting to a Vehicle 6. Choose the software version that you would like to use to scan the vehicle (keep in mind that you may have only one version because that is all you have downloaded so far. If you would like multiple versions, go back to www.x431.com and download previous versions).
- Page 56 Chapter 5 • Using the X-431 Connecting to a Vehicle 7. The Smartbox will now be initiliazed (that is, the software stored on the CF Card will be uploaded to the Smartbox), as shown below. When initialization is finished, press OK.
-
Page 57: Your Comments Matter
Chapter 5 • Using the X-431 Your Comments Matter At this point, the X-431 becomes highly intuitive and is really very user friendly. Choose from the systems displayed to find out which systems have codes. Your Comments Matter Launch has more than 150 engineers dedicated to perfecting the software for the X-431. - Page 58 Chapter 5 • Using the X-431 Your Comments Matter 5 - 1 4 © X - 4 3 1 U S A...
-
Page 59: Appendix A: Connector Usage/Chassis Id
A • Connector Usage/Chassis Identification Connector Usage • Due to the complexity of models and years, this is compiled as a guide only. You should refer to the manufacturer’s service infomation for complete connector usage information. • If the car has an OEM-style connector in conjunction with an OBD-II style connector, the OEM style will provide the most capabilities for the OEM software. -
Page 60: Connector Usage
Chapter A • Connector Usage/Chassis Identification Connector Usage Connector Usage Guide as of June 2006 Manufacturer Year Range Connector Audi Up to 1995 Audi/VW 4 1996 Onward OBD II -16C 2004 Onward (Audi A8) CAN Connector OBD II 1996 Onward OBD II -16C UP to 2002 BMW 20... - Page 61 Chapter A • Connector Usage/Chassis Identification Connector Usage Manufacturer Year Range Connector Mazda UP to 2004 Mazda -17 2004 Onward OBD II -16C OBD II 1996 Onward OBD II -16C Mitsubishi Up to 2004 Mitsubishi/Hyundai -12+ 16 OBD II 1996 Onwards Mitsubishi/Hyundai -12+ 16 Mercedes Benz Up to 1993...
-
Page 62: Mercedes Benz 16Pin & 8Pin Diagnostic Socket
Chapter A • Connector Usage/Chassis Identification Connector Usage Mercedes Benz 16PIN & 8pin Diagnostic Socket NIVERSAL ONNECTOR Some Mercedes-Benz models up to 1996 may have an 8 or 16 pin diagnostic connector. The diagnosis program for these models is performed through the “Flash Fault Code” option, which is at the bottom of the Mercedes-Benz chassis number selection menu. - Page 63 Chapter A • Connector Usage/Chassis Identification NCVECS Hard to Find Locator Guide NCVECS Hard to Find Locator Guide The image above represents the actual location codes used in this Guide Figure A-1 Manufacturer Year Model Location Comments Acura 1996-98 Integra, CL, RL, NSX 7/open behind console, passenger side Acura...
- Page 64 Chapter A • Connector Usage/Chassis Identification NCVECS Hard to Find Locator Guide Figure A-1 Manufacturer Year Model Location Comments Honda 1996-98 Odyssey 7/cover behind console, passenger side, rubber cover Honda 1996-99 Del Sol 7/open under passenger dash Honda 1996 Prelude 8/open above shifter, below cup holder Honda...
- Page 65 Chapter A • Connector Usage/Chassis Identification NCVECS Hard to Find Locator Guide Figure A-1 Manufacturer Year Model Location Comments Toyota 2000-01 Celica 2/cover Toyota 2000-01 Echo 2/cover Toyota 2002 Highlander 2/cover Toyota 1996-2001 Land Cruiser 2/cover behind fuse cover Toyota 1996 Use engine bay connector Toyota...
-
Page 66: Can Bus Guide
2. Must use CAN-Bus connector when testing certain CAN-Bus systems of BENZ, VW, RENAULT, and MAZDA. CAN-Bus function table (each vehicle) Available models and systems tested by X-431 at present are as following: A - 8 © X - 4 3 1 U S A... - Page 67 Chapter A • Connector Usage/Chassis Identification CAN BUS GUIDE 1. Mercedes-Benz Table A-1 Chassis Model System Version Read Codes Clear Codes Data Stream Actuation MERCEDES- 1988 1989 1990 1991 1992 1993 1994 1995 1996 1997 1998 1999 2000 2001 2002 2003 2004 2005...
- Page 68 Chapter A • Connector Usage/Chassis Identification CAN BUS GUIDE 2. Renault Table A-2 MERCEDES- 1988 1989 1990 1991 1992 1993 1994 1995 1996 1997 1998 1999 2000 2001 2002 2003 2004 2005 Model System Version Read Codes Clear Codes Read Data Actuation BENZ C240 SEDAN...
-
Page 69: Other Can-Bus Systems
Chapter A • Connector Usage/Chassis Identification CAN BUS GUIDE 5. OBD-CAN OBD-CAN can test engine systems according OBD-II and EOBD2 ISO15765-4(CAN) Standard, and the MERCEDES- functions are: read trouble code, clear trouble code, read dynamic data stream, read freezing frame and 1988 1989 1990 1991 1992 1993 1994 1995 1996 1997 1998 1999... -
Page 70: Bmw Chassis Chart 1988-2005
Chapter A • Connector Usage/Chassis Identification CAN BUS GUIDE BMW Chassis Chart 1988-2005 1988 1989 1990 1991 1992 1993 1994 1995 1996 1997 1998 1999 2000 2001 2002 2003 2004 2005 318i 318i Conv. 318is 318ti E36/5 E36/5 E36/5 E36/5 E36/5 323Ci 323Ci Conv 323i... - Page 71 Chapter A • Connector Usage/Chassis Identification CAN BUS GUIDE 1988 1989 1990 1991 1992 1993 1994 1995 1996 1997 1998 1999 2000 2001 2002 2003 2004 2005 530i 530i sedan 530i touring wagon E34/3 E34/3 535i 535is 540i 540i sedan 540i sport wagon 540I 635csi...
- Page 72 Chapter A • Connector Usage/Chassis Identification CAN BUS GUIDE A - 1 6 © X - 4 3 1 U S A...
-
Page 73: Appendix B: Troubleshooting/F.a.q
B • Troubleshooting/F.A.Q. General Information Why is my screen blank after I power on the machine? Remove the CF card and restart the machine to see if there is a normal display. If the dis- play is normal when the CF card is taken out, the CF card should be replaced. If the screen is still blank, contact your local dealer for assistance. -
Page 74: Entering Information
Entering Information Why can’t I input data using the Soft Keyboard (on-screen keyboard)? Either the position where the cursor lies cannot be edited, or you haven’t activated the cursor on the input position. Use the stylus to select the field you wish to edit. When the cursor blinks, you can input the data. - Page 75 Where is my Smartbox number listed? Your smartbox number is listed on your CF card and on the shipping carton you received the unit in. It is also listed on the back of the smartbox (the bottom section of the scan tool).
- Page 76 What is my dealer code? Your local dealer will provide you with this code. This code is necessary for registration. Can I make my Username and Password anything I want? Your Username can be anything you’d like as long as it’s between 3-16 characters. There is no restrictions on your Password.
- Page 77 This software utility is downloaded from the “Download Center” accessible after logging into www.X431.com. When the ‘Save As’ dialog box opens, select ‘Open’ and follow the on-screen instructions to install. After successful installation, you will notice a new icon on your desktop called X431 Update.
- Page 78 Comprehensive, in-depth instructions detailing this and the entire update process are available for download in the ‘Getting Started Guide’ located at http://x431usa.com/down- loads.htm. How do I select a ‘source’ & ’target’ folder in the X431 Update software? You will notice a small icon of binoculars next to both the ‘source’ folder and ‘target’ folder. Clicking this icon allows you to select the appropriate folder where your updates have been downloaded to.
-
Page 79: Vehicle Coverage
CF card to the X431? The X431 has authentication built-in and will not allow software to run if smartbox num- bers on the software and the hardware don’t match. There are a few reasons why you may receive this message: 1. - Page 80 The tool provides coverage for the most popular German vehicles and the most popular Asian vehicles: Mercedes, BMW, VW/Audi, Toyota, Honda, Nissan, Mitsubishi. Launch X431 also provides coverage for the following manufacturers: Chrysler, Daewoo, Fiat, Ford (USA), GM, Hyundai, Kia, Land Rover, Lexus, Mazda, Peugeot, Porsche, Renault, Subaru, and Volvo.
-
Page 81: Troubleshooting
How do I replace the printer paper? The below steps are also outlined with pictures in the X431’s User Manual, pages 7-8. 1. Open the paper lid on the back of the printer. 2. Take out the spindle and mount the paper scroll onto the spindle. 3. - Page 82 1. The CF card is not inserted 2. The CF card is inserted incorrectly. 3. A CF card from another X431 unit may be inserted 4. The CF card may also be damaged. If you insert the CF card correctly and you still cannot access the diagnostic programs, contact your local dealer for assistance.
-
Page 83: Customer Service
Customer Service If you have any questions on the operation of the unit, please contact us and have your smartbox number available for verification: Tel: 1.877.GET.X431 Fax: 631.357.3304 Email: contact@x431usa.com...
Need help?
Do you have a question about the X-431 and is the answer not in the manual?
Questions and answers