Table of Contents
Advertisement
Quick Links
Advertisement
Table of Contents

Related Manuals for Impassa SCW9055-433


Summary of Contents for Impassa SCW9055-433
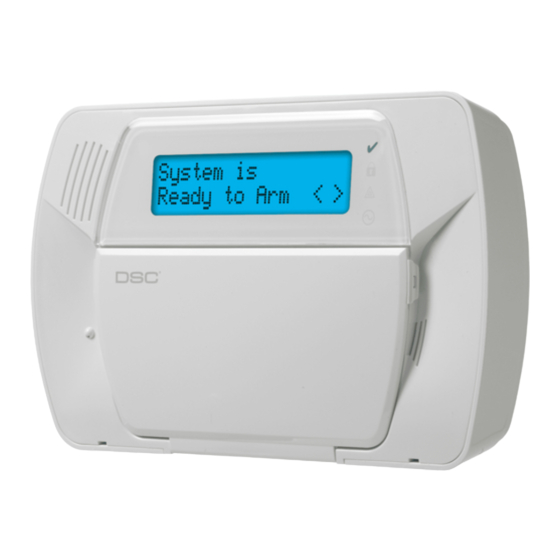
- Page 1 Self-Contained Wireless Alarm System v1.1 User Manual WARNING: This manual contains information on limitations regarding product use and function and information on the limitations as to liability of the manufacturer. The entire manual should be carefully read...
-
Page 3: Table Of Contents
Table of Contents 1. About Your Security System 1.1 Fire Detection (must be enabled by Installer) ....... . . 1 1.2 Carbon Monoxide Detection (must be enabled by Installer). - Page 4 Always ensure you obtain the latest version of the User Guide. Updated versions of this User Guide are available by contacting your distributor. IMPORTANT SAFETY INSTRUCTIONS To reduce the risk of fire, electric shock and/or injury, observe the following: • Do not spill any type of liquid on the equipment. •...
-
Page 5: About Your Security System
1. About Your Security System Read this manual carefully and have your installer instruct you on your system's operation and on which features have been implemented in your system. All users of this system should be fully instructed in its use. Fill out the “System Information” page with all of your zone information and access codes, and store this manual in a safe place for future reference. -
Page 6: Keypad Controls & Indicators
2. Keypad Controls & Indicators < > indicates user can scroll through options LED Indicators 2x16 LCD Ready Armed Trouble System is Power Ready to Arm <> Scroll Keys Function Keys: Stay Emergency Keys: Away Fire Chime Auxiliary Bypass Zones Panic Quick Exit Select Option... -
Page 7: Night Arming
4.2 Night Arming To night arm the system when it has been armed in Stay mode, press [ ][1] at the keypad. All inte- rior zones will now be armed except for devices programmed as Night zones. NOTE: Your installer can also program a function key on the keypad that enables you to arm the system in Night mode by holding down the function key for 2 seconds. -
Page 8: Remote Arming And Disarming
Disarming Error If your code is invalid, the system will not disarm and a 2-second error tone will sound. If this hap- pens, press [#] and try again. 4.8 Remote Arming and Disarming The system can be armed and/or disarmed, if programmed by the installer, using a remote control device (wireless key). -
Page 9: Time & Date Programming And Temperature Display
8. Time & Date Programming and Temperature Display Press [ ][6] then enter your master access code to enter User HH:MM MM/DD/YY Functions. Use the [<][>] buttons to view available menu options, then press [ ] to select. Enter the time in 24-hr. format 09:06 01/31/11 (HH:MM), followed by the date (MM:DD:YY). -
Page 10: Trouble Conditions
NOTE: If an access code is required to enter bypassing, only the master code and codes with Supervisory enabled can set the Bypass Group. To select a Bypass Group when arming the system: 1. Press [ ][1], then your access code. 2. -
Page 11: Access Code Programming
13. Access Code Programming In addition to the master code, you can program up to 16 additional user access codes. To program User Access Codes: 1. Disarm your system, if it is armed. 2. Press [ ][5][Master Access Code (i.e., 4- or 6-digit code)]; the armed ( ) indicator will turn on. 3. -
Page 12: Zone Bypassing Attribute
Next, scroll [<][>] to the attribute you want to program and press [ ] (or enter the attribute #) to enable/disable the attribute. # Attribute Attribute 1 Supervisor Code 5-6 For Future Use 2 Duress Code Bell/Siren Squawk upon Away Arming/Disarming 3 Zone Bypassing Enabled One-Time Use Code 4 Phone Access... -
Page 13: User Function Commands
Proximity Tag Operation 6. Place the prox tag near the tag reader at the left side of the display to arm/disarm your sys- tem. When arming the system, the following message will be displayed: Exit Delay in Progress 7. When disarming the system, the following message will be displayed: System Disarmed 8. -
Page 14: Changing The Buzzer Level
15.2 Changing the Buzzer Level When this option is selected, the keypad will allow you to scroll through 21 different buzzer levels. A level of 00 disables the buzzer. 1. Press [ ][6] [Master Code]. 2. Use the [<][>] buttons to scroll to Buzzer Control, then press [ ] to select. -
Page 15: Sms (Short Message Service) Notification
[9] Late-to-Open Enable/Disable The Late to Open feature enables or disables the Late to Open time programmed in [0]. It is typically used to track children after school. For example, if the parents get home from work at 5pm, and a child gets home at 4 p.m. The programmable timer could be set for 4:15 p.m. If the sys- tem is not disarmed at this time an alert would be sent to the monitoring station. -
Page 16: On-Board Lcd Display Sms Messages
2. Compose an SMS message that consists of the function text, a space, and your 4-digit or 6-digit access code (e.g., Stay Arm 2234) then send it to your panel’s cellular phone number. 3. The panel matches the incoming phone number to one of the phone numbers in its SMS Phone number list. -
Page 17: Buzzer
19.3 Buzzer Provides an audible confirmation of a pressed button or that a command to the panel has been executed. 19.4 Keylock Mode Ensures that the system is not accidently armed or disarmed by the wireless key. To lock the keys: 1. -
Page 18: Walk Test
20.2 Walk Test Walk Test mode allows you to test the operation of each detector in the system. While in Walk Test mode, the Ready, Armed, and Trouble LED's will flash to indicate that the Walk Test is active. The Walk Test can be terminated at anytime by re-entering [ ][6] [Master Code][8] on the keypad. -
Page 19: Access Codes
21.1 Access Codes Master Code [40]: ______________________ Proximity Tag: Wireless Prox Wireless Prox Code Access Code Code Access Code 21.2 Sensor / Zone Information Sensor Protected Area Sensor Type Sensor Protected Area Sensor Type... -
Page 20: Sms Telephone Numbers
21.3 SMS Telephone Numbers Phone Number Phone Number Site Identification Message: ___________________________________ Panel’s Cellular Phone Number: ___________________________________ 22. Keypad Quick Guide The following table summarizes the keys, indicators, and most often used commands of the keypad. Keypad Keys, Indicators, and Commands Status Lights Ready - Must be on to arm system. -
Page 21: User Commands
Keypad Keys, Indicators, and Commands (Continued) User Commands Press to select. Press [<][>] to scroll. Press [#] to exit. PRESS... To ... Bypass Zones Press [0][0] Clear Bypass Press [9][9] Bypass Recall Press [9][5] Save Bypass Press [9][1] Recall Save View System Troubles Scroll to view all troubles View Alarms in Memory... -
Page 22: Guidelines For Locating Smoke & Co Detectors
23. Guidelines for Locating Smoke & CO Detectors The following information is for general guidance only and it is recommended that local fire codes and regulations be consulted when locating and installing smoke alarms and CO Alarms: Smoke Detectors Research has shown that all hostile fires in homes generate smoke to a greater or lesser extent. Experiments with typical fires in homes indicate that detectable quantities of smoke precede detect- able levels of heat in most cases. -
Page 23: Household Fire Safety Audit
Carbon Monoxide Detectors Carbon monoxide is colorless, odorless, tasteless, and very toxic. Carbon monoxide gas moves freely in the air. The human body is most vulnerable to the effects of CO gas during sleeping hours. For maximum protection, a CO alarm should be located outside primary sleeping areas or on each level of your home. Figure 5 indicates the suggested locations in the home. - Page 24 IMPORTANT - READ CAREFULLY: DSC Software purchased with or without Products and Components is copyrighted and is purchased under the following license terms: • This End-User License Agreement (“EULA”) is a legal agreement (g) Trademarks - This EULA does not grant You any rights in connection with any between You (the company, individual or entity who acquired the Soft- trademarks or service marks of DSC or its suppliers.
-
Page 25: Warning Please Read Carefully
WARNING Please Read Carefully N o t e t o I nst a lle rs • Motion Detectors This warning contains vital information. As the only individual in con- Motion detectors can only detect motion within the designated areas as tact with system users, it is your responsibility to bring each item in this shown in their respective installation instructions. -
Page 26: Fcc Compliance Statement
• WT4911 The 868 MHz models are not UL/ULC listed. Only these models shall be used with UL/ULC listed systems: SCW9055-433, SCW9057-433, SCW9055G- 433, SCW9057G-433, WT5500-433, WT5500P-433, WT4901, WT4911, WT4989 and PT4. Only certain mod- els of SCW9055/57 include the SMS features, check with your installer. - Page 28 PTC 211/12/003 Reverse Numbering (decadic signalling) Decadic signalling should not be used as it is being progressively phased out of the network. DTMF dial- This DSC SCW9055-433 ling is 100% available and it should always be used. Security System may be connected to the Telecom Network.
Need help?
Do you have a question about the SCW9055-433 and is the answer not in the manual?
Questions and answers