Table of Contents
Advertisement
Quick Links
EN1223S/EN1223S-60 EchoStream
Button Water-Resistant Pendant Transmitter
Installation and Operation Manual
1 Overview
The Inovonics single-button water-resistant pendant transmitter is our smallest,
lightest, and most versatile pendant.
Note: For UL 2560 installations, refer to the EN6080 Area Control Gateway
Installation Instructions.
1.1 Inovonics Wireless Contact Information
If you have any problems with this procedure, contact Inovonics Wireless technical
services:
• E-mail: support@inovonics.com
• Phone: 1.800.782.2709, option 2
1.2 Maximum Number of Repeaters for a UL 2560
Installation
To achieve the 99.99% alarm message reliability required for UL 2560 compliance,
system installations must operate within the following limits for end device and
repeater counts.
End Devices
Maximum
Repeaters
150
397
250
386
350
375
500
360
1000
313
2000
238
3000
184
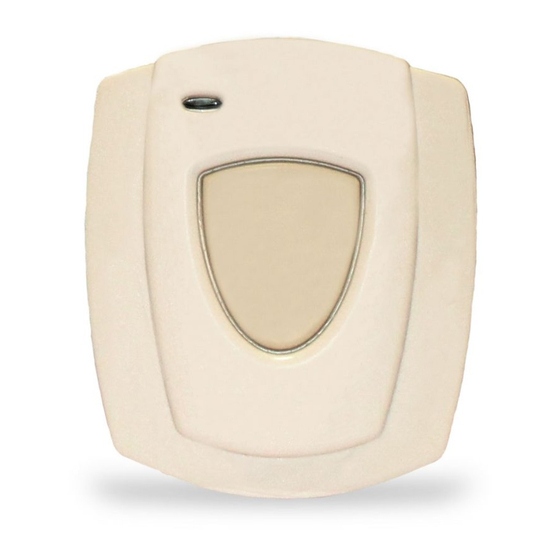
1.3 Transmitter External Components
A
B
Figure 1 Transmitter external components
A Transmit LED
B Activation button
1.4 Transmitter Internal Components
A
Figure 2 Transmitter internal components
A Frequency band selection pins
1.5 What's In The Carton
Individually-packaged products include the following items:
• One EchoStream single-button water-resistant pendant transmitter
• One breakaway neck cord
• One beltclip attachment
• Three housing screws
• One frequency band selection jumper
• One CR2450 coin cell battery
Note: Bulk-packaged products are shipped with multiples of the above items, with the
exception of batteries.
1/23/14 05582F © Inovonics, 2014 - www.inovonics.com
®
Single-
C
C Reset button
C
B
B Battery
C Reset button plunger
assembly
2 Installation and Startup
2.1 Installation Notes
• These products are designed to be maintained by professional security
technicians
• Products are intended for indoor use
• All products should be manually tested weekly (see "Test the Transmitter" on
page 2)
2.2 Battery Installation
1. Remove the rear housing cover to expose the side of the board that holds the
battery.
Caution: Carefully separate the rear housing cover, ensuring the reset button plunger
assembly does not fall out of the housing (Figure 2).
2. Slide the battery under the battery holder, ensuring that it is fully inserted and that
the positive terminal (+) faces up (Figure 2).
2.3 Select the Frequency Band
EchoStream products are able to use a range of radio frequencies, and must be
configured for your geographic area. This product ships with a default frequency range
of 902-928 MHz for use in North America. If you are using the product in North
America, skip to step 6; if you are using the product in Australia or New Zealand, you
will need to configure the transmitter.
To configure the transmitter:
3. Turn the board over to access the side with the frequency band selection pins
(Figure 2).
4. Place the frequency band selection jumper on the appropriate frequency band
selection pins.
• Place the jumper on the left two pins, marked AU, to set the frequency range to
915-928 MHz for Australia.
• Place the jumper on the right two pins, marked NZ, to set the frequency range to
921-928 MHz for New Zealand.
5. Seat the board in the housing with the battery side facing the rear housing cover.
6. Replace the front housing cover.
7. Insert the three housing screws, tightening them to 1.25 inch-pounds torque.
Note: If you do not have a torque driver, tighten to a snug fit, being careful not to
overtighten.
Note: Tighten the housing screws evenly to help ensure a good seal and maintain
water-resistance.
Caution: Over-tightening the housing screws can result in microcracks in the plastic,
gaps in the gasket material, and/or stripping of the bushing. Any of these conditions
can compromise the water-resistance of the device.
2.4 Register the Transmitter
The transmitter must be registered and supervised. When supervised, the transmitter
will send check-in message to the receiver or gateway as follows:
• EN1223S: every three minutes.
• EN1223S-60: every 60 minutes.
Note: In UL 2560 installations, transmitters send a check-in message every 60
minutes.
Each transmitter has a unique factory-programmed identification number. Refer to the
receiver or gateway's installation instructions for details on registering and setting up
supervision.
8. When prompted by the receiver or gateway to reset transmitter, press the reset
button (Figure 1).
Caution: The transmitter should be tested after registration to ensure operation. See
"Test the Transmitter" on page 2.
3 Operate the Transmitter
To send an alarm, press the activation button for at least one second. Alarm signals
are transmitted multiple times and are indicated by the blinking transmission LED.
When the button is released, the transmitter sends an alarm restoral signal as
indicated by another short series of blinking transmission LED lights.
3.1 Wear the Transmitter
The pendant transmitter can be worn in three ways:
• Around the neck with neck chain attachment (included)
• On a belt with the beltclip attachment (included)
• On the arm with optional wristband accessory (ACC623S or ACC623L, sold
separately)
Caution: The neck chain included with the pendant transmitter is designed with a
breakaway feature for user safety. Substitution of a stronger cord or chain may result
in injury to the wearer.
Advertisement
Table of Contents

Related Manuals for Inovonics EN1223S EchoStream


Summary of Contents for Inovonics EN1223S EchoStream
-
Page 1: Installation And Startup
1.1 Inovonics Wireless Contact Information 2. Slide the battery under the battery holder, ensuring that it is fully inserted and that If you have any problems with this procedure, contact Inovonics Wireless technical the positive terminal (+) faces up (Figure 2). - Page 2 Within the warranty period, Inovonics will repair or replace, at its 4 Test the Transmitter option, all or any part of the warranted Product. Inovonics will not be responsible for The transmitter should be tested weekly and after registration to ensure operation.
Need help?
Do you have a question about the EN1223S EchoStream and is the answer not in the manual?
Questions and answers