
Related Manuals for Solutronic SolPlus 25


Summary of Contents for Solutronic SolPlus 25
- Page 1 SOLPLUS 25 – 55 User Manual SOLPLUS 25 – 55 User Manual Firmware: 2.64 MV/ 2012-11 Version: B8, Subject to change without prior notice...
- Page 2 SP25-55_User Manual_B8_EN_2012-11-06 2/32...
-
Page 3: Table Of Contents
Introduction ........................... 10 General communication features....................10 Operating states..........................13 Display navigation SOLPLUS 25 - 55................... 14 Communication with the Inverter Via the RS232 Port ..............15 Communication With the Inverter Via the Ethernet Port and Webbrowser ........15 Communication with Several Inverters by means of Master-Slave Data Communication ... 15 SOLPLUS+ Communication Software .................. -
Page 4: Notes About The User Manual
The following documents and software are provided on the accompanying CD and in the download area of www.solutronic.de and can be used as a reference guide on how to operate your new inverter: The CD contains the following documents and software: •... -
Page 5: Symbols Used In This Document
Notes About The User Manual SOLPLUS+ Read-out and monitoring software for use with all Solutronic inverters Direct current (direct voltage): electrical value on the input side of the inverter Alternating current (alternating voltage): electrical value on the output side of the inverter... -
Page 6: Safety
Safety 2 Safety 2.1 Safety in general Please read the following safety information and instructions before you put the SOLPLUS inverter into operation for the first time, in order to avoid personal injuries and/or property damage. These instructions must be complied with at all times. Do to attempt to install or put the SOLPLUS inverter into service until you have read through all the documentation supplied thoroughly. -
Page 7: Non-Observance Of This User Manual
Safety 2.4 Non-observance of this User Manual Solutronic AG shall accept no liability for damages resulting from non-observance of the warnings given in this User Manual. Read the operating, maintenance and safety instructions before you put the device into operation for the first time. -
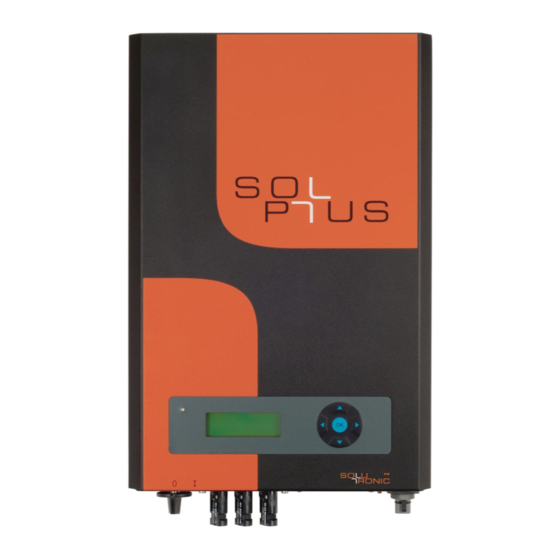
Page 8: Nameplate
You can identify the model of your inverter by looking at the nameplate. The nameplate, which carries the precise type designation of the inverter, is located on the right-hand side of the housing. The example is valid for SOLPLUS 25 – 55. Nameplate of a SP 35... - Page 9 Waste Electrical and Electronic Equipment (WEEE) Solar inverters must not be disposed of with household waste. Please return the device to Solutronic after it has reached the end of its useful life. Attention! The inverter may still carry voltage even after it has been disconnected from the PV installation and grid.
-
Page 10: Introduction
For security purposes, different password levels are incorporated. 4 General communication features SOLPLUS 25 - 55 Ethernet X7 RS232 X1... - Page 11 Value Meaning ASCII protocol (for using the inverter with HyperTerminal) Solutronic protocol (for using the inverter with SOLPLUS+). N.B.: Leave parameter 265 set to the value 0; 0 = ASCII protocol is automatically switched internally to 1 = Solutronic protocol Debug function.
- Page 12 Value Meaning ASCII protocol (for using the inverter with HyperTerminal) Solutronic protocol (for using the inverter with SOLPLUS+). N.B.: Leave parameter 266 set to the value 0; 0 = ASCII protocol is automatically switched internally to 1 = Solutronic protocol Debug function.
-
Page 13: Operating States
Operating states 5 Operating states The operating states of the SOLPLUS 25 - 55 inverters are indicated by means of a light-emitting diode (LED) and on the display. The LED has two colours and indicates the instantaneous operating state of the inverter. The actual operating state is indicated on the display. -
Page 14: Display Navigation Solplus 25 - 55
Display navigation SOLPLUS 25 - 55 6 Display navigation SOLPLUS 25 - 55 Base window: by pressing a button the display turns on and the main screen appears. The basic menu is accessed by pressing the down arrow key on the display. In the basic menu, the yield values can be read. By pressing the arrow key left, you return to the base window. -
Page 15: Communication With The Inverter Via The Rs232 Port
With the help of a PC, you can use the Ethernet link to control the inverter via a web browser or Solutronic's communication software SOLPLUS+. Provided that your converter is connected to a network and has been configured correctly, you can call up and read out data from your inverter via any PC connected to the network. -
Page 16: Files Of The Inverter
If you are interested in using SOLPLUS+ to monitor your inverter, please load the program and the installation and user manuals of SOLPLUS+ from the CD supplied or download them from www.solutronic.de. 11 Files of the inverter The inverter generates various "files", which can be read out via one of its communication ports and communication modes. -
Page 17: Communication With Solarlog
If you interested in connecting sensors, please load the corresponding instructions on connecting sensors from the CD supplied or download them from www.solutronic.de. You will also find additional information there. SP25-55_User Manual_B8_EN_2012-11-06... -
Page 18: Yield Monitoring
Yield Monitoring 14 Yield Monitoring 14.1 Integrated energy meter The inverter is equipped with an integrated energy meter that calculates and adds up the energy fed into the mains power supply (accuracy: approx. 1.5%). N.B.: The energy meter of the inverter deliberately indicates a value approx 1.5% lower than that actually fed into the grid. - Page 19 This parameter can be used to display the power of a "neighbouring installation" or "external installation" in an installation equipped with Solutronic inverters (e.g. for a large external display).
-
Page 20: Operating Hours Meter
This displays the "day yield", i.e. the yield on a particular 'today', measured by the external (S0) power meter. This parameter can be used to display the day yield of a "neighbouring installation" or "external installation" in an installation equipped with Solutronic inverters (e.g. for a large external display). Parameter 225:... -
Page 21: Integrated Installation Monitoring
Integrated Installation Monitoring 15 Integrated Installation Monitoring Each inverter is equipped with an integrated installation monitoring function. This means it regularly performs a number of checks and warns the installation's owner in the event of a critical condition arising or variations in yield occurring. If the inverter detects a critical condition or yield variation, it continues to function –... - Page 22 Integrated Installation Monitoring 50 Hz is higher than the alarm threshold for this for variation frequency variation for longer than 5 minutes. from rated frequency of 50 Frequent faults. This text is displayed if, during Number of the past 2 hours, the same fault has occurred the fault (fault more than 3 times in succession or if more than code)
-
Page 23: Horn
Data Logger 15.2 Horn Parameter 45: Function signaller Menu: Options/Basic settings Unit: Resolution: Default setting: Password level: Possible settings: Value = 0 The signal generator generates an intermittent tone when an alarm is given. Value = 1 The signal generator generates an intermittent tone as long as the inverter is suffering from a fault and is deactivated. -
Page 24: Functions Of The Relays And Analogue And Digital Inputs And Outputs
Functions of the Relays and Analogue and Digital Inputs and Outputs In the case of a 5-minute clock pulse and e.g. 14 hours of sunshine, approx. 168 entries are generated every day. After roughly 29 days, the data logger is full and begins overwriting the first data entries stored: these entries should therefore be read out before they are overwritten. -
Page 25: Function Of Relay 2
Functions of the Relays and Analogue and Digital Inputs and Outputs 17.2 Function of relay 2 Parameter 47: Relays 2 function Menu: Output control Unit: Resolution: Default setting: Password level: Relay 2 has just one N.O. contact. The relay can be used to forward messages to external units. This relay can also be used to implement alarm (warning) and fault alarm functions. -
Page 26: Analogue Inputs
Functions of the Relays and Analogue and Digital Inputs and Outputs Value = 10 Relay 1 or 2 is energised if the inverter temperature (parameter 16) is higher than 65° C. If the inverter temperature falls below 63°C, the relay in question is deenergised. Value = 11 Relay function is reserved for the de-icing option. -
Page 27: Digital Inputs
Functions of the Relays and Analogue and Digital Inputs and Outputs Parameter 299: Function of analogue output 2 Menu: Output control Unit: Resolution: Default setting: Password level: Possible settings for analogue outputs 1 and 2: Value = 0 Set output to 0 V Value = 1 Set output to DC voltage (UDC). -
Page 28: Digital Outputs
Functions of the Relays and Analogue and Digital Inputs and Outputs Parameter 36: Digital input 2 Menu: Istwerte/Sensorik Unit: Resolution: The connector pin assignments are as follows: (Pin 1 is on the left) X5, pin 6 Digital input 1 X5, pin 7 Digital input 2 X5, pin 8 Ground reference for digital inputs 1 and 2... -
Page 29: Password Protection
If, however, you do happen to forget or lose these numbers, the inverter can only be re-enabled again by the manufacturer. In this case, Solutronic will provide you with a special code that will enable you to reset the access code. 19 Resetting to Default Settings... -
Page 30: Other Parameters
Default setting: Password level: The following inverter models are currently available: Value Description Nominal inverter output SOLPLUS 25 IP 21 with display 2500 W SOLPLUS 25 IP 54 with display 2500 W SOLPLUS 35 IP 21 with display 3500 W... - Page 31 S0 pulse input are saved to the annual sensor energy logger instead of the "sensor yields". This function enables the yields of an "external installation" to be saved to the installation with Solutronic inverters. See also parameters 127, 128, 151, 222, 224 and 225.
-
Page 32: Large External Display
If you would like more information on this, please contact Solutronic directly. 22 Analogue or GSM Modem Solutronic inverters can be equipped with analogue or GSM modems for monitoring purposes. Option cards are available for both possibilities (analogue or GSM), which you can order from us through your dealer.
Need help?
Do you have a question about the SolPlus 25 and is the answer not in the manual?
Questions and answers