
Related Manuals for Reiner jetStamp 790 MSL


Summary of Contents for Reiner jetStamp 790 MSL
-
Page 1: Operating Instructions
Operating Instructions jetStamp 790 MSL Mobile electronic hand stamp with flexible impression selection... - Page 2 © 2006 Ernst Reiner GmbH & Co. KG All rights reserved. Translations, reprints, or any other form of reproduction of this manual, even in part and regardless of form, require prior written permission. This manual is subject to change without prior notice.
-
Page 3: Table Of Contents
Table of contents Content Page Control elements ..................Commissioning ..................... Display zones and button functions ............Setting time and date ................... Select a Stamp picture ................. Descriptions of the Stamp pictures ............... Time on Label....................Changing text blocks ................... Stamping ..................... Changing the ink cartridge ................ -
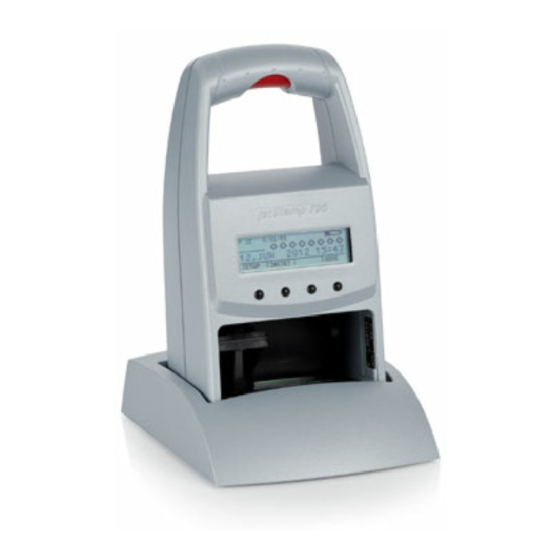
Page 4: Control Elements
Control elements Base station with mains unit Socket for power supply Green charge-indicator lamp Trigger Display Buttons Locking rail Ink cartridge Notch... -
Page 5: Commissioning
Unpack the stamp, connect the mains unit to the charging station, plug in the mains unit, and switch on the power supply. Note: Use only original REINER components! Place jetStamp in the charging station, take care of the following points: •... -
Page 6: Display Zones And Button Functions
Display zones and button functions The display is divided into three zones: The top line is the status line. On the left is the number of the impression selected (P:26 ... P:29) . To the right of that, the Moisture Sensivity Level is displayed (MSL: 1, 2, 2A, 3, 4, 5, 5A, 6) At the right of the top line is the battery symbol, showing the state of charge of the battery. -
Page 7: Setting Time And Date
Setting time and date First select an impression that contains the date, or date and time as appropriate Press [ MODE ] if necessary repeatedly, until the menu item “CLOCK” is displayed Press [ CLOCK ] to select the required menu item The display shows “INPUT - TIME 1”... -
Page 8: Select A Stamp Picture
Select a stamp picture • A total of four different stamp pictures are stored. These contain the individual printing fields 'Date' 'Time’ . Note • The stamp pictures are numbered 'P:26' to 'P:29'. The number of the stamp picture currently selected is shown at the top left of the display •... -
Page 9: Descriptions Of The Stamp Pictures
Descriptions of the Stamp pictures P : 26 MSL: 2A OPEN 12. 07. 06 13:23 USED 09. 08. 06 13:23 CLOCK NEXT MODE • Each Stamp picture includes two lines with respective 20 possible input characters Note • All Stamp pictures are assigned with the fields Date 1 , Date 2 , Time 1 and Time 2 . -
Page 10: Time On Label
Time on Label Special function MSL: 06 By pressing [ INC ] the timing can be add up by one hour within of 23 hours. The alternation of days will be taken into account. Display example: P : 26 MSL: 06 OPEN 01. -
Page 11: Changing Text Blocks
Changing text blocks Entry of characters: Select the desired stamp picture (P:26 ... P:29) Press [ NO / INC ] : The upper line of the display shows ‘ INPUT - MODI TEXT 01 ’ INPUT - MODI TEXT 01 = Text block of the upper line: This is only an indication, printed is the set Hinweis... -
Page 12: Stamping
Stamping Stamping will be triggered by pressing the red trigger, which is located in the grip. Depending on the impression selected, the impression will have one or two lines. The position of the two lines, relative to the base of the stamp, can be seen in the illustration below. -
Page 14: Changing The Ink Cartridge
• Replacement ink cartridges are available with the order number 801 307 - 000 on REINER stock The ink in the ink cartridge is harmful. Never swallow it! Always keep the ink cartridge out of the reach of children! - Page 15 Dirt and dried up ink at the holder of the ink cartridge can be removed with a soft cleaning cloth moistened in spirit (see figure 2) Insert the new ink cartridge: Take the ink cartridge from the packaging and remove the coloured protection film from the ink cartridge (see figure 3) Residual ink on the silver plate...
-
Page 16: Setup Module
Setup module The Setup module contains the following two main menus: SETTINGS: Enables comprehensive, extensive changes to settings to be carried out, which, among other things, influence the impression and the handling of the stamp. UPDATE: In combination with the optional PC - Set, the program in jetStamp can be updated. -
Page 17: Description Of The Setup Module
Description of the Setup module Press, repeatedly if necessary MODE (Enter password if required) SETUP SETTINGS UPDATE NEXT CALL CALL FIRMWARE ALL START Update firmware, NEXT standard impressi- See next page ons and standard pre-texts. FIRMWARE PART START Update Firmware NEXT without impressions and without pre-... -
Page 18: Ms Level, Stamp Picture, Set Stamp Picture
SETTINGS UPDATE NEXT CALL MS LEVEL activation of a MS - Level VARY (MS = Moisture Sensivity) NEXT = Unlimited = 1 year 2A = 4 weeks = 7 days = 3 days = 2 days 5A = 1 day = Time on Label Notice : Preset MS - Level will be displayed in the... -
Page 19: Language, Split Hour, Summertime, Change Line, Pre Character
LANGUAGE Language (0 ... 9) setting VARY 0 = German 1 = French 2 = English NEXT 3 = Italian 4 = Spanish 5 = Portuguese 6 = Flemish 7 = Norwegian 8 = Swedish 9 = Danish SPLIT HOUR 60M Hour divisions (ON / OFF) setting VARY... -
Page 20: Numberer 1 And 2, Print Cartridge
Mode setting for numbering device 1 MODE NUM 1 VARY 1 = increase to a maximum value NEXT 2 = decrease to a minimum value Step setting for numbering device 1 SKIP NUM 1 VARY Step can be set between 0 and 99 NEXT Mode setting for numbering device 2 MODE NUM 2... -
Page 21: Block Imprint, Passwords
BLOCK IMPRINT Adjustment of Block imprint VARY 0 = Imprint not blocked NEXT 1 = Imprint blocked after 60 seconds 2 = Imprint blocked after 30 seconds 3 = Imprint blocked after 15 seconds PASSW SETUP Password for Setup VARY NEXT PASSW CLOCK Password for time setting... -
Page 22: Troubleshooting
Troubleshooting Display Cause Recommendation IMPRINT Time allowed by ‘Block Imprint’ Press [ QUIT ] : BLOCKED has expired, disappears trigger jetStamp is then ready has been pressed for use again WRONG Wrong base station, Press [ QUIT ] : STATION jetStamp needs an intelligent Error message base station... -
Page 23: Technical Data
Humidity for transport and storage 10% ... 90% relative humidity Power supply by REINER AC adapter model A30950G, Protection class II Manufacturer Ontop European Div. of SAC Group Mains voltage 230 V ~ / 50 HZ / 65 mA AC... - Page 24 ERNST REINER GMBH & CO. KG Postfach 1351 D - 78115 FURTWANGEN Telephone + 49 7723 6570 + 49 7723 657200 E-Mail reiner@reiner.de Internet www.reiner.de 790 103 - 007 a 11 / 2006...
Need help?
Do you have a question about the jetStamp 790 MSL and is the answer not in the manual?
Questions and answers