
Related Manuals for Glow-worm Envirosorb 8


Summary of Contents for Glow-worm Envirosorb 8
-
Page 1: Installation Instructions
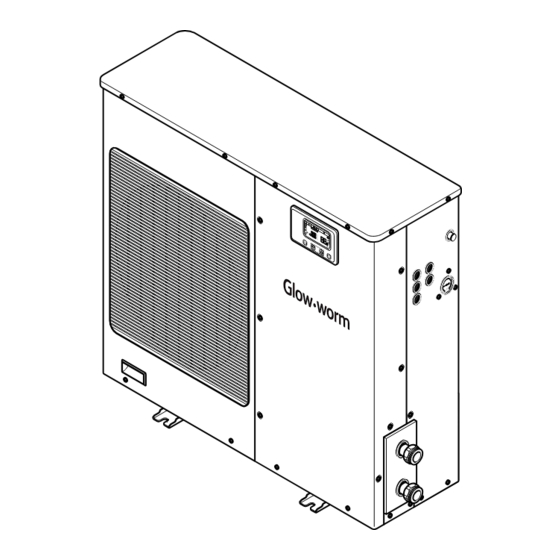
Envirosorb Air / Water Heat Pump Installation Instructions Envirosorb 8 Envirosorb 10 Envirosorb 14 www.glow-worm.co.uk... -
Page 2: Customer Service
Guarantee Registration Thank you for installing a new Glow-worm appliance in your home. Glow-worm appliances are manufactured to the very highest standard so we are pleased to offer our customers a Comprehensive Guarantee. This product is guaranteed for 24 months from the date of installation or 30 months from the date of manufacture, whichever is the shorter, for parts and labour. -
Page 3: Table Of Contents
The instructions are an integral part of the appliance and must be handed to the user on completion of the installation. CONTENTS DESCRIPTION SECTION PAGE Warnings Important Information Statutory Requirements INTRODUCTION Safety Regulations and Provisions Safety Devices Servicing, Maintenance and Spare Parts Data Plate Heat pump explained Technical data... -
Page 4: Warnings
- Be physically capable The warranty activation application must be sent to - Use safety clothing where appropriate, e.g. gloves, safety Glow-worm by the Installer or the Authorised heat pump footwear. Technician accompanied by the completed commissioning Ensure safe lifting techniques are used report sheet. -
Page 5: Statutory Requirements
(handling refrigerants, live electrical work etc.) or On installing and commissioning the appliance you must the Glow-worm Post-Sales Service. adhere to the technical rules, standards and provisions in effect at the time. -
Page 6: Safety Devices
In areas where freezing of the drain is a regular possibility your Installation/Servicing company or Glow-worm service. propriety drain heater elements can be purchased and fitted by your heat pump installer. -
Page 7: Servicing, Maintenance And Spare Parts
Do not use reconditioned or copy parts that have not been clearly authorised by Glow-worm. If a part is required contact your Glow-worm supplier or Glow- worm’s own service organisation. Please quote the name and serial number of the appliance, this information will be on the data plate on the side of the appliance. -
Page 8: Heat Pump Operation
1 Heat pump operation 1.1 How a heat pump works Occasionally, particularly in low ambient operating conditions there can be a build up of frost on the external heat exchanger. This causes a fall off in efficiency and has to be removed. This is achieved by the control operating the change over valve(1) causing it to move to the defrost position. -
Page 9: Technical Data
2 Technical Data 2.1 Single phase heat pump Description Unit Envirosorb 8 Envirosorb 10 Envirosorb 14 Performance with underfloor heating (Water flow 35°C, return 30°C, wet temperature: 6°C) Heating output 8.00 9.30 13.74 Power input 2.33 2.70 3.51 Coefficient of performance COP 3.43... - Page 10 2 Technical data - Dimensions Envirosorb 14 3 5 2 1 1 0 Envirosorb 8 & 10 3 5 2 1 1 0 1 3 0 2 4 0 9 0 0 2 4 0 1 0 8 1 0 8...
- Page 11 3 Refrigerant Systems Envirsorb 8 & 10 - refrigeration circuit (heating mode) Exterior protection grille (K4) high temperature safety thermostat (NTC 1) exterior ambient sensor (R2) drip tray anti-freeze heater element Heat pump casing Scroll Compressor (NTC 2) air/refrigerant thermistor Refrigerant expansion vessel (V4V) 4-way valve Refrigerant/water plate exchanger...
- Page 12 3 Refrigerant Systems Envirosorb 14 - refrigerant circuit (heating mode) Exterior protection grille (R2) drip tray anti-freeze heater element (NTC 1) Exterior ambient sensor Refrigerant/water plate exchanger Heat pump casing Water circuit circulation pump (NTC 2) air/refrigerant thermistor (NTC 5) water return sensor (V4V) 4-way valve (R1) plate exchanger / water anti-freeze heater element Expansion vessel (hydraulic system)
-
Page 13: Installation
Insulation and protection for the external pipework. Suitable and sufficient glycol mix to ensure frost protection in low temperatures. Heat pump Instructions and warranty documents pack Filter Drain plug Drainage elbow Batteries for controller Envirosorb 8 & 10 Diagram 4.1... - Page 14 4 Installation 4.3 Unpacking the appliance Remove the packaging carefully ensuring that you don’t damage the appliance. Dispose of the packaging responsibly. Remove the fastening screw (2) from the pallet (3) in the front and the rear of the appliance, see diagram 4.3. IMPORTANT: With regards to the Manual Handling Operations, 1992 Regulations, the following lift operation exceeds the recommended weight for a one man lift.
- Page 15 Glow-worm accessory. You can also use these blocks on flat solid ground or a concrete base in order to raise the appliance and facilitate...
-
Page 16: Positioning The Heat Pump
4 Installation HEAT PUMP 5 0 0 5 0 0 i n . 1 5 0 1 5 0 i n . 1 0 0 CONCRETE BASE Fall to drain required up to a max of 2 Diagram 4.5 Diagram 4.6 4.7 Positioning the heat pump 4.8 Correct support This heat pump is designed for external use only. -
Page 17: Hydraulic Schematic
This then gives access to the config menu where the following settings can be altered as required. L‘ NOTE: For heating schewmes other than those shown in this manual contact Glow-worm Technical Support for guidance Electrical connections Diagram 5.2... -
Page 18: Hydraulic Schematics
5 Hydraulic Schematics CONFIG menu setting table Menu Name System Range Factory Notes Parameter setting setting System Configuration DHW control by HP sensor (accessory) If DHW sensor fitted this must be set to 1 Legionella Protection (only active if Allows activation of DHW legionella parameter 2 set to 1) protection using DHW sensor accessory Auto adaptive regulation selection... -
Page 19: Dip Switch Setting
5 Hydraulic Schematics 5.2 Operation When the heat pump stops by the flow temperature setting (parameter 26) the software registers the return temperature. The setting of parameter 31 dictates the differential temperature for the compressor re-start e.g. Heating mode - parameter 26 set at 35ºC and parameter 31 set at 2. - Page 20 This then gives access to the config menu where the following settings can be altered as required, see table over. NOTE: For heating schemes other than those shown in this manual contact Glow-worm Technical Support for guidance. 5.4 Operation When the heat pump stops by the flow temperature setting (parameter 26) the software registers the return temperature.
- Page 21 5 Hydraulic Schematics CONFIG menu setting table Menu Name System Range Factory Notes Parameter setting setting System Configuration DHW control by HP sensor (accessory) If DHW sensor fitted this must be set to 1 Legionella Protection (only active if Allows activation of DHW legionella parameter 2 set to 1) protection using DHW sensor accessory Auto adaptive regulation selection...
- Page 22 The appliance is fitted with an expansion vessel. If it is necessary to compensate for the water expansion, fit an additional expansion vessel (available as a Glow-worm accessory) in the appliance heating circuit. The diameter of the safety valve drainage pipe must match...
-
Page 23: Wiring
Any fault arising from incorrect wiring cannot be put right under the terms of the Glow-worm guarantee. All system com- ponents must be of an approved type. Electrical components have been tested to meet the equiva- lent requirements of BSEN 7671 and the BEAB regulations. - Page 24 Connect the card to the heat pump with a dual wire cable requirements of BS7671 (not supplied). Heat pump Minimum wire cross section ENVIROSORB 8 2.5 mm² ENVIROSORB 10 4 mm² ENVIROSORB 14 4 mm²...
- Page 25 7 Wiring Envirosorb 8 & 10 Black Green Gray White White & black Black White & blue Blue Black White Green Blue White & blue White & blue White Brown Pink Black Yellow Compressor crankcase heater Compressor contact High-pressure refrigerant circuit sensor...
- Page 26 7 Wiring Envirosorb 14 Black Green Gray White White & black Black White & blue Blue Black White Green Blue White & blue White & blue White Brown Pink Black Yellow Compressor contact Switch High-pressure refrigerant circuit sensor Compressor 4-way valve (changeover valve) Water flow detector Start-up current limiter Compressor circuit breaker 40 A...
-
Page 27: Filling The Heating Circuit
(1). In order to bleed the heating circuit when filling, use a filler WARNING Do not exceed 3 bars. pump (1). Available as a Glow-worm accessory Close valve (3). Stop the filler pump (1). Check that valve (4) is closed. -
Page 28: Configuration
9 Configuration WARNING Do not start the heat pump without the control mode OFF panel cover in place. Risk of electric shock. ▲ ▲ ▲ ▼ ▲ ▼ ▲ ▲ ▲ ▼ ▲ ▼ ▲ ▲ ▼ ▼ 9.1 Pre-commissioning instructions Check that the heating system is complete and that the correct amount of expansion and buffer vessels have been Unit in off mode... - Page 29 9 Configuration Parameter name Possible Meaning Default value value Envirosorb DHW tank sensor fitted (accessory) System without immersion heater or immersion heater controlled by other control System with immersion heater controlled by Envirosorb controller Legionella Protection (only active if parameter Allows activation of DHW legionella protection 2 set to 1) using DHW sensor accessory...
- Page 30 9 Configuration NOTE: The maximum water temperature setting is 55 (settings 26) - this is the flow temperature. However the HP will stop if the return temperature reaches 47 flow T (°C) T. max 4,3 = Slope (parameter42) Outside temperature (°C) Diagram 9.1...
-
Page 31: Settings
10 Settings 10.3 Visual display page 1 10.1 Visual display screens The Envirosorb control has a number of information and Page 1 displays the refrigeration system operating conditions fault display facilities, to access the visual information read out the machine must be switched to ‘ON’ and the installer code has to be entered. - Page 32 10 Settings 10.5 Visual display page 3 Page 3 displays measured temperatures 4 Heating demand 5 Back-up heating demand 6 Immersion heater demand Screen page 7 3-way valve signal for DHW number VISUAL Plate heat exchanger Water return Water flow temperature temperature temperature...
-
Page 33: Operational Safety Procedures
The glycol concentration can be tested using the Glow-worm Change the control panel Failure of the user interface anti-freeze test kit accessory available from your Glow-worm... - Page 34 11 Operational Safety Procedures 11.2 Appliance maintenance Warnings Code Description Actions This flashes at around 2000 operational hours of the pump Clean the filter then rest the to indicate that it is necessary counter to zero. to clean the filter. In heating mode, at an outside The compressor service temperature of 7ºC, the...
- Page 35 11 Operational Safety Procedures 11.4 Fault logs 11.3 Resetting the counters to zero This menu allows you to display the log for the last 8 recorded This menu enables you to see the filter, compressor and faults. Only ‘F’ faults are recorded. backup (boiler and electrical back-up heater) operating times.
-
Page 36: User Information
In order to guarantee the life span of all the appliance components and to keep the appliance in a good state of repair, only Glow-worm replacement parts should used when carrying out repair and maintenance works. Only use Glow-worm replacements parts. -
Page 37: Servicing
14 Servicing IMPORTANT Any work carried out on the appliance circuit must be conducted by a competent person. 14.1 Annual maintenance/service Check that the safety components are working properly. Check the heating circuit pressure. Check the watertightness of the heating circuit, repair any leaks as necessary. -
Page 38: Main Circuit Board
15 Main circuit board Alarm indicator (Heat pump locked out) (red) Backup immersion heater demand (red) External control operating (yellow) Anti-freeze heater at the bottom of tank operational (red) Heating mode indicator (yellow) Back-up heating demand (red) On/Off indicator (yellow) Fan coil unit operational (red) Dip switches Heating mode activated (red) - Page 39 15 Main circuit board 15.4 Configuration of the service switches. 1 Configuration of the heating mode 2 Internal On/Off switch. These switches (K1 and K2) are used when servicing the appliance. K1 DOES NOT SWITCH THE UNIT OFF - it is used to stop the compressor from running when servicing is taking place K2 - reverses the control of the heat pump.
- Page 40 Glow-worm, Nottingham Road, Belper, Derbyshire. DE56 1JT Because of our constant endeavour for improvement, details may vary slightly from those shown in these instructions.
Need help?
Do you have a question about the Envirosorb 8 and is the answer not in the manual?
Questions and answers