
Related Manuals for Smarthome ApplianceLinc V2


Summary of Contents for Smarthome ApplianceLinc V2
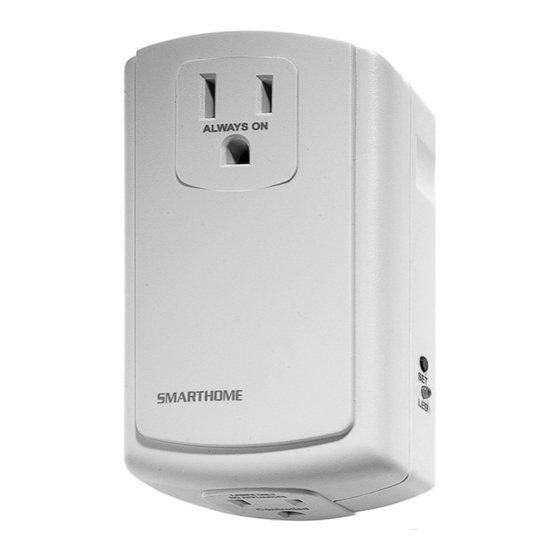
- Page 1 ™ INSTEON ™ ApplianceLinc V2 INSTEON Appliance Module For model: #2456S3 ApplianceLinc V2 with ground pin...
-
Page 2: Table Of Contents
Remotely Removing an X10 Scene Address ..................11 ABOUT INSTEON ............................12 Understanding Why an INSTEON Network Is Reliable................12 Further Enhancing Reliability ........................12 Using Smarthome’s SignaLinc RF to Upgrade Your INSTEON Network ..........12 About INSTEON and X10........................13 TROUBLESHOOTING..........................14 SPECIFICATIONS ............................16 ApplianceLinc Specifications........................ -
Page 3: About Insteon Appliancelinc
INSTEON is a simple, reliable, and affordable breakthrough in home control. Simple, because Plug-n- Tap™ setup is a breeze, and there are no wires to add – INSTEON uses existing powerline wiring as well as radio-frequency for communication. Reliable, because every INSTEON device is a two-way repeater. -
Page 4: How To Install Appliancelinc
120V 60Hz, single phase. Attempting to use ApplianceLinc on non-approved powerlines may have hazardous consequences. Proper installation of at least two SignaLinc™ RF Signal Enhancers is required prior to installing and using other INSTEON devices. pplianceLinc Installation Tips •... -
Page 5: Installing Appliancelinc
INSTEON ApplianceLinc V2 User’s Guide Installing ApplianceLinc 1. For best INSTEON Network performance, be sure you have properly installed at least two SignaLinc RF Signal Enhancers. 2. Plug ApplianceLinc into an unswitched wall receptacle. The white Status LED on the side will illuminate steadily. -
Page 6: How To Set Up Appliancelinc
HOW TO SET UP APPLIANCELINC Linking ApplianceLinc to an INSTEON Controller 1. Select your INSTEON Controller from the list below and follow the method shown to put it into Linking Mode. A. SwitchLinc™ V2 – Press and hold SwitchLinc V2 ’s Paddle Top for 10 seconds, then release. -
Page 7: Unlinking Appliancelinc From An Insteon Controller
Unlinking ApplianceLinc from an INSTEON Controller If you are no longer going to use an ApplianceLinc that has previously been linked to an INSTEON Controller, it is very important that you unlink it, otherwise the controller will retry any commands intended for the unused module, thus slowing down your system. -
Page 8: Creating An Insteon Scene
INSTEON Scenes let you activate dramatic lighting moods with the press of just one button. INSTEON Scenes are very easy to set up – just link more than one INSTEON module to an ON/OFF Button Pair on an INSTEON Controller. Then, when you press either the ON or the OFF Button on the INSTEON Controller, all of the INSTEON modules linked in the scene will respond as a group. -
Page 9: Advanced Features Of Appliancelinc
This procedure will clear the unit of all INSTEON Links, and any programmed X10 Primary Address, or X10 Scene Addresses. 1. Before resetting an ApplianceLinc that has been linked to an INSTEON Controller, be sure to unlink it from the Controller first. See Unlinking ApplianceLinc from an INSTEON Controller, above. -
Page 10: X10 Programming Options
ApplianceLinc by using the switch on the device itself, without sending a command from an X10 or INSTEON Controller. By default, Local Control is enabled. You can disable Local Control by setting the X10 Primary Address using an X10 OFF command in Step 2 above. Remember that if the switch on the device itself is turned off, ApplianceLinc will not be able to control the device. -
Page 11: Advanced X10 Programming Options
INSTEON ApplianceLinc V2 User’s Guide ADVANCED X10 PROGRAMMING OPTIONS You can remotely set up X10 Scene Addresses using an X10 Controller capable of sending an X10 address (house code and unit code) without sending X10 ON or OFF commands. The following procedures will not work with a transmitter that sends the X10 address and an X10 command together. -
Page 12: About Insteon
INSTEON device helps to support the overall network. To further ensure reliability, every INSTEON device confirms that it has received a command. If an INSTEON Controller does not receive this confirmation, it will automatically retransmit the command up to five times. -
Page 13: About Insteon And X10
INSTEON’s Effect on X10 If your existing X10 devices seem to be working less reliably after installing INSTEON devices, remember that INSTEON devices can absorb X10 signals just as X10 devices do, and that INSTEON devices do not repeat X10 signals. -
Page 14: Troubleshooting
Other modules are loading Move ApplianceLinc, the other modules, or the down the signal. Controller to another outlet. Add new INSTEON devices or move around existing INSTEON devices. All INSTEON devices act as INSTEON Network repeaters. My ApplianceLinc is not... - Page 15 INSTEON ApplianceLinc V2 User’s Guide Problem Possible Cause Solution on the powerline may have If the above doesn’t work, perform a Factory Reset. glitched it. If you have tried these solutions, reviewed this User’s Guide, and still cannot resolve an issue you’re having with ApplianceLinc, please: •...
-
Page 16: Specifications
INSTEON ApplianceLinc V2 User’s Guide SPECIFICATIONS ApplianceLinc Specifications General Smarthome Product Number 2456S3, INSTEON ApplianceLinc V2 On/Off Module Warranty 2 years Operation Status LED White Local Control Load sensing (can be disabled) Setup Memory Non-volatile EEPROM INSTEON Features INSTEON Addresses... -
Page 17: Certification
INSTEON ApplianceLinc V2 User’s Guide Certification ApplianceLinc V2 has been thoroughly tested by ITS ETL SEMKO, a nationally recognized independent third-party testing laboratory. The North American ETL Listed mark signifies that the product has been tested to and has met the requirements of a widely recognized consensus of U.S and Canadian product safety standards, that the...
Need help?
Do you have a question about the ApplianceLinc V2 and is the answer not in the manual?
Questions and answers