Table of Contents
Advertisement
Advertisement
Table of Contents

Related Manuals for Power-all PS-SP Series


Summary of Contents for Power-all PS-SP Series
-
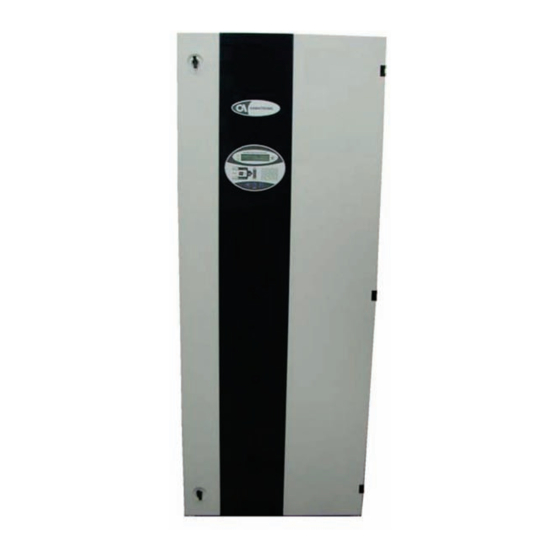
Page 2: Gamatronic Electronic Industries Ltd
μPS-SP Series 3:3 Phase, 10 – 60 kVA, 3 X 208 Vac, 60 Hz, 192 Vdc Gamatronic Electronic Industries Ltd. Har Hotzvim Industrial Park 14 Hartom St. PO Box 45029 Jerusalem 91450 Israel Tel: +972-2-588-8222 Fax: +972-2-582-8875 Email: info@gamatronic.co.il Website: www.gamatronic.com This UPS has been designed for commercial/industrial use only, and is not for use in any life support application. -
Page 3: Table Of Contents
μPS-SP Series 3:3 Phase, 10 – 60 kVA, 3 X 208 Vac, 60 Hz, 192 Vdc TABLE OF CONTENTS 1. SAFETY PRECAUTIONS ..................1 Do’s ......................1 Don’ts......................1 2. GENERAL FEATURES ..................2 Parallel Operation ..................3 2.1.1 Advantages of Parallel Operation ............. 3 Major Subsystems .................. - Page 4 μPS-SP Series 3:3 Phase, 10 – 60 kVA, 3 X 208 Vac, 60 Hz, 192 Vdc 6. COMMUNICATIONS.................... 34 RS232 Interface..................34 The Alarm Interface .................. 35 Remote Monitor Box (Optional)............... 36 6.3.1 Connecting the Monitor Box to the UPS......... 37 7.
- Page 5 μPS-SP Series 3:3 Phase, 10 – 60 kVA, 3 X 208 Vac, 60 Hz, 192 Vdc LIST OF TABLES Table 1: Log Variables ......................23 Table 2: LED Indicators......................28 Table 3: RS232 Connector Pin Assignment ............... 34 Table 4: LED Indicators on Remote Monitor Panel............36 Table 5: Control Buttons on Remote Monitor Panel............
- Page 6 μPS-SP Series 3:3 Phase, 10 – 60 kVA, 3 X 208 Vac, 60 Hz, 192 Vdc This page left blank deliberately.
-
Page 7: Safety Precautions
Gamatronic Electronic Industries Ltd. User Guide 1. SAFETY PRECAUTIONS Do’s • Read this manual carefully before operating the UPS. • Review the safety precautions described below to avoid damaging users or equipment. • Install the UPS in a clean and well-ventilated location. •... -
Page 8: General Features
User Guide Gamatronic Electronic Industries Ltd. 2. GENERAL FEATURES The μ PS Series 3/3 Phase Uninterruptible Power Supply (UPS) employs Pulse Width Modulation (PWM) and is controlled by a high performance RISC micro-controller, to provide reliable, sophisticated protection for every type of line fluctuation, including interruption of the AC input . -
Page 9: Parallel Operation
Gamatronic Electronic Industries Ltd. User Guide • Electronic Cabinet that contains all electronic components: charger, inverter, static switch, microprocessor board, panel, etc. • Battery Cabinets that contain batteries and circuit breaker. The unit can operate in parallel with similar Gamatronic UPS units. In this case, the load is shared between the units. -
Page 10: Batteries
User Guide Gamatronic Electronic Industries Ltd. 2.2.2 Batteries The batteries are always connected to the rectifier output and they supply voltage to the inverter during power failures. During normal operation, the batteries are in standby mode. The batteries for all models are housed in separate battery cabinets. 2.2.3 Inverter The inverter receives a DC voltage from the charger or batteries and supplies a... -
Page 11: Control Panel
Gamatronic Electronic Industries Ltd. User Guide • Communicates with devices via the RS232 interface. The control system includes the PC801 control board, PC075/PC085 panel board, PC873 power supply, current, and temperature sensors. Measured voltages and currents are connected to the control board via the PC800 interface board. Control Panel The UPS is equipped with an LCD display and touch pad control panel that enables the user to effectively manage the UPS. -
Page 12: Power-On Self Tests
User Guide Gamatronic Electronic Industries Ltd. Power-on Self Tests The UPS automatically performs the following series of diagnostic tests when initially powered on: • LED test. All LEDs are lit individually for the operator to monitor. • Real-time clock • EEPROM. Memory (setup, calibration and events log) is tested. Measurement The user can receive real time information regarding the unit’s operation and condition simply by pressing the appropriate status button. -
Page 13: Service Mode
Gamatronic Electronic Industries Ltd. User Guide 2.11 Service Mode The UPS has a technician’s SERVICE MODE that is password protected. Access to the service mode is only permitted after the technician successfully enters an assigned password. 2.12 Emergency Power-Off (EPO) The system includes a pair of wires linking two Emergency Power-Off terminals, located together with the other terminals. -
Page 14: Parallel Operation (Option)
User Guide Gamatronic Electronic Industries Ltd. 3. PARALLEL OPERATION (OPTION) Each UPS can optionally operate in parallel with similar units as part of a modular UPS system. Up to ten units can be connected in parallel. Special technical solutions are used to synchronize all the units of the system, to prevent circulation of energy between the UPS units and to isolate the faulty unit from the common power bus. -
Page 15: Figure 4: Decentralized Parallel Μps - Cable Connections
Gamatronic Electronic Industries Ltd. User Guide Special Cable for Parallel Operation Gamatronic provides a special cable for connecting the μ PS SP units in parallel. It is a 15-pin cable that includes • Master/Slave logic path • A path for the phase and frequency syncronization pulses •... -
Page 16: Figure 5: Centralized Parallel Μps - Cable Connections
User Guide Gamatronic Electronic Industries Ltd. Bypass AC Input Static Switch UPS 1 AC Output Output To Load Output DC link Contactor AC Input Battery Bypass Reference Control AC Output Power Bus Parallel Comm. Bus UPS 2 Output Contactor DC link Output AC Input Battery... -
Page 17: Control Panel & Indicators
Gamatronic Electronic Industries Ltd. User Guide 4. CONTROL PANEL & INDICATORS The control panel serves as an interface between the UPS and the user. Real time information is displayed visually and audibly. Textual information is presented on the LCD display. These messages are often reinforced with audible alerts to alert the user of extraordinary circumstances. -
Page 18: Function Buttons On The Standard Cabinet
User Guide Gamatronic Electronic Industries Ltd. 4.1.1 Function Buttons on the Standard Cabinet BUTTON DESCRIPTION UPS OFF Pressing the UPS OFF button turns off the UPS. Confirmation of this action is required. Wait 2 seconds, and confirm it by pressing UPS OFF again. UPS ON Pressing the UPS ON button turns on the UPS and sequentially displays the results of the start-up diagnostic tests... - Page 19 Gamatronic Electronic Industries Ltd. User Guide Where appropriate, the LCD display provides information for the R, S, and T phases and for voltage and current. Sample LCD displays are presented below. IN (Input) Press the IN button to display the unit’s Input Voltage. NOTE: Input current current display is available as an option.
- Page 20 User Guide Gamatronic Electronic Industries Ltd. OUT (Output) Press the OUT button to display the unit’s Output Voltage and OUT. 230 230 230 Current. FREQ (Frequency) Press the FREQ button to display the unit’s Bypass and BYP.FREQ. 49.9Hz Inverter Frequency. INV.FREQ.
- Page 21 Gamatronic Electronic Industries Ltd. User Guide TIME Press the TIME button to display the unit’s current UPS OK day/month (DD/MM), and 18/12 12:35:40 current time (HH:MM:SS). To set the proper time or date use the SET button, described on page 23. STAT (Status) Press the STAT button to display the unit’s status and...
-
Page 22: The Control Panel On The Larger Cabinet
User Guide Gamatronic Electronic Industries Ltd. The Control Panel on the Larger Cabinet The control panel has 6 function buttons for controlling the unit and 12 information buttons for reporting the status of the UPS. Figure 7: Control panel on the larger cabinet (optional for 40–60KVA models) µPS-SP 3:3, 3x220 in, 3x208 60 Hz out Control Panel &... -
Page 23: Function Buttons On The Larger Cabinet
Gamatronic Electronic Industries Ltd. User Guide 4.2.1 Function Buttons on the Larger Cabinet BUTTON DESCRIPTION UPS ON/OFF When the UPS is OFF, pressing the UPS ON/OFF button turns on the UPS and sequentially displays the results of the start-up diagnostic tests When the UPS is ON, pressing the UPS ON/OFF button turns off the UPS. - Page 24 User Guide Gamatronic Electronic Industries Ltd. Sample LCD displays are presented below. IN (Input) Press the IN button to display the unit’s Input Voltage. IN. 230 230 231 NOTE: Input current current display is available as an option. B/P (Bypass) Press the B/P button to display the unit’s Bypass Voltage and BYP.
- Page 25 Gamatronic Electronic Industries Ltd. User Guide OUT (Output) Press the OUT button to display the unit’s Output Voltage and OUT. 230 230 231 Current. FREQ (Frequency) Press the FREQ button to display the unit’s Bypass and BYP.FREQ. 49.9Hz Inverter Frequency. INV.
- Page 26 User Guide Gamatronic Electronic Industries Ltd. TIME Press the TIME button to display the unit’s current UPS OK day/month (DD/MM), and 0 01/11 14:23:01 current time (HH:MM:SS). To set the proper time or date use the SET button, described on page 23. STAT (Status) Press the STAT button to display the unit’s status and...
-
Page 27: The Log, Set, And Help Buttons For All Models
Gamatronic Electronic Industries Ltd. User Guide The LOG, SET, and HELP Buttons for All Models This section describes use of the LOG, SET TIME, and HELP information buttons, which operate identically on all models of the UPS, from 10KVA to 60KVA. Figure 8: LOG Messages Structure Pressing the LOG button displays the unit’s event log, which contains a history of the last 256 important events... -
Page 28: Figure 10: Accessing The Log On The Large Cabinet
User Guide Gamatronic Electronic Industries Ltd. BATTERY LOW 0 01/11 14:23:01 Figure 10: Accessing the Log on the large cabinet Each log entry requires 2 screens that can be navigated using the up and down arrows. The first screen provides a description of the event with date and time. The second screen shows the log number, variable values and fault results. -
Page 29: Table 1: Log Variables
Gamatronic Electronic Industries Ltd. User Guide Table 1: Log Variables Event LOG Variable Overload Sum of currents in all phases Inverter fault (average inverter voltage) in all phases Bypass fault (average bypass voltage) in all phases where there is a bypass voltage fault Hz (Frequency) where there is a bypass frequency fault Input fault... - Page 30 User Guide Gamatronic Electronic Industries Ltd. "?" (Help Button) Pressing this button provides on-line configuration data for display purposes. Note: Configuration can be modified in service mode only 1. Use the UP and DOWN arrows to scroll through the information. The following messages are presented: •...
-
Page 31: System Fault Diagnostics
Gamatronic Electronic Industries Ltd. User Guide System Fault Diagnostics Select the STAT button and press the down arrow . The display will show 2 bytes representing the FAULT (see LOG on page 21) followed by two bytes (each of 8 bits) are now on display, each representing the STATE and the INSTRUCTION. -
Page 32: Figure 11: Active Current Sharing
User Guide Gamatronic Electronic Industries Ltd. Bit 2: 1 = Fault detected by bi-metal temperature sensor Bit 7: 1 = Fault exists Byte 7 shows bypass frequency diagnostics: Bit 0: 1 = Bypass frequency incorrect Byte 8 shows over-current diagnostics. Indications are as follows: Bit 0: 1 = Over-current detected in phase R Bit 1: 1 = Over-current detected in phase S Bit 2: 1 = Over-current detected in phase T... -
Page 33: Led Indicators
Gamatronic Electronic Industries Ltd. User Guide LED Indicators LED indicators provide at-a-glance information regarding the status or operation of the UPS. They are color coded so that the user can easily and quickly identify areas for concern. Red indicates a fault or abnormal status (usually associated with an audible alarm), and green indicates normal status and operation. -
Page 34: Table 2: Led Indicators
User Guide Gamatronic Electronic Industries Ltd. Table 2: LED Indicators MEANING COLOR BYPASS Bypass Normal Green Output Connected to the Bypass OVERLOAD Overload BATTERY Battery Not Normal SYNC Synchronized Inverter Green CHARGER Charger Operating Green INVERTER Inverter Normal Green Output Connected to the Inverter Green LOAD LEVEL Load Level... -
Page 35: Operating The Μps Series Ups
Gamatronic Electronic Industries Ltd. User Guide 5. OPERATING THE μPS SERIES UPS Turning the UPS ON To turn the UPS ON: 1. Turn on the Static Switch Bypass circuit breaker. 2. Wait 20 seconds, then turn on the Rectifier CB. 3. -
Page 36: Turning The Ups Off
User Guide Gamatronic Electronic Industries Ltd. 7. Check the LED indicators to verify “B/P” LED that the UPS is now in Inverter mode. ”INV” LED GREEN 8. The UPS executes an automatic "TIME XXXXXXXX" battery test for 1 minute. 9. Verify that the message “UPS OK” appears on the LCD display, and that "UPS OK"... -
Page 37: Activating Maintenance Bypass
Gamatronic Electronic Industries Ltd. User Guide Activating Maintenance Bypass The UPS includes a Maintenance Bypass switch which allows the UPS to be shut down for servicing without interrupting the loads. The Maintenance Bypass switch is locked in the OFF position with a small padlock or a protective cover. -
Page 38: Deactivating Maintenance Bypass
User Guide Gamatronic Electronic Industries Ltd. Verify that there are no LEDs lit on the display panel. The UPS can now be serviced. Deactivating MAINTENANCE BYPASS WARNINGS The Maintenance Bypass switch should be operated by authorized personnel only. To avoid accidental short-circuiting of the UPS output to the mains when entering or leaving Maintenance Bypass mode, be sure to follow these instructions in the order given! To avoid accidental disconnection of the load devices from AC power, be... -
Page 39: After Use Of The Emergency Power-Off Switch
Gamatronic Electronic Industries Ltd. User Guide After Use of the Emergency Power-Off Switch After use of the optional Emergency Power-Off switch, the UPS must be restarted as follows: 1. Return the Emergency Power-Off switch to its normal position (N.C.). 2. Turn off all of the ciruit breakers: •... -
Page 40: Communications
User Guide Gamatronic Electronic Industries Ltd. 6. COMMUNICATIONS The UPS is connected to a computer or a modem using a shielded cable, with an RS232-type 9-pin female connector. Maximum allowed cable length is 15 meters. There are two types of UPS connections: •... -
Page 41: The Alarm Interface
Gamatronic Electronic Industries Ltd. User Guide The Alarm Interface The following diagram describes the Alarm Interface µPS-SP 3:3, 3x220 in, 3x208 60 Hz out Communications... -
Page 42: Remote Monitor Box (Optional)
User Guide Gamatronic Electronic Industries Ltd. Remote Monitor Box (Optional) The remote monitor box can be located a maximum distance of 50m from the UPS. It is directly connected to the UPS with a 4-wire cable connected to the REMOTE MONITOR interface of the UPS. -
Page 43: Connecting The Monitor Box To The Ups
Gamatronic Electronic Industries Ltd. User Guide The monitor panel also contains buttons for controlling the UPS which are described in the following table: BUTTON PURPOSE UPS ON Not in use UPS OFF Not in Use Manually switches the load from the bypass to the inverter Manually switches the load from the inverter to the bypass BATTERY TEST Manually starts a battery test... -
Page 44: Troubleshooting
User Guide Gamatronic Electronic Industries Ltd. 7. TROUBLESHOOTING If unit stops operating normally, a red alarm light (ALARM) flashes, a warning beep sounds, and one of the following emergency messages appears on the LCD: MESSAGE STATE COMMENTS BATTERY LOW Battery is low Input voltage is too low. - Page 45 Gamatronic Electronic Industries Ltd. User Guide START Check all board Turn ALL UPS connectors are switches OFF secure Wait 5 minutes Check IC2 on and restart the PC901 is securely seated in socket UPS operating Problems? properly? Correct the problem Turn all UPS and Connect UPS to battery cabinet...
-
Page 46: Table 7: Pc Board Check Points & Voltage Ranges
User Guide Gamatronic Electronic Industries Ltd. Table 7: PC Board Check Points & Voltage Ranges CHASSIS CHECK BOARD VOLTAGE POINT 5V ± 5% PC 801 TP10 12V ± 5% PC 800 P13/1 12V ± 20% PC 800 P13/2 µPS-SP 3:3, 3x220 in, 3x208 60 Hz out Troubleshooting... -
Page 47: Site Preparation
Gamatronic Electronic Industries Ltd. User Guide 8. SITE PREPARATION Electrical codes may vary according to location. Observe all local, state, and Federal electrical codes for acceptable external wiring practices. Note: These instructions make reference to two types of UPS cabinets. The “80K” cabinet (this is just the cabinet name;... -
Page 48: Electrical Wiring
User Guide Gamatronic Electronic Industries Ltd. unit will pass through all elevators, corners, and doorways without damage. Refer to Table 10 on page 54 for specific information about cabinet size and weight. 11) Heat output of UPS equipment is significant. Make sure that environmental conditioning systems can accommodate this heat load, even during utility outages. -
Page 49: Table 8: External Circuit Breakers - Required Minimum Ratings
Gamatronic Electronic Industries Ltd. User Guide Table 8: External circuit breakers – required minimum ratings CB S1: CB S2: CB S2: CB S4: Model Input to Bypass Output Battery Rectifier Input from UPS Cabinet 10 kVA 3 x 50 A 3 x 40 A 3 x 32 A 63 A... -
Page 50: Terminal Connections
User Guide Gamatronic Electronic Industries Ltd. Terminal Connections TERMINALS FOR 10-20KVA MODELS (WITH INTERNAL BATTERIES) TERMINAL FOR 30-60KVA MODELS Figure 17: Terminal Connections µPS-SP 3:3, 3x220 in, 3x208 60 Hz out Site Preparation... -
Page 51: Installation
Gamatronic Electronic Industries Ltd. User Guide 9. INSTALLATION Accessibility All access to the UPS is through the front of the unit. All connections—connection panel, input, output, and static switches—are accessed by opening the front door of the UPS and removing the lower protective panel to reveal the terminal block. -
Page 52: Figure 19: Circuit Breakers On The 30-60 Kva Models
User Guide Gamatronic Electronic Industries Ltd. Figure 19: Circuit breakers on the 30-60 kVA models µPS-SP 3:3, 3x220 in, 3x208 60 Hz out Installation... -
Page 53: Installation Of Standalone Ups
Gamatronic Electronic Industries Ltd. User Guide Installation of Standalone UPS 9.3.1 Wiring/Cabling Instructions 1. Open the front access door using a flathead screwdriver to turn the lock. 2. Remove the lower access panel or protection cover. 3. Turn off ALL the circuit breaker switches: •... -
Page 54: External Battery Cabinet
User Guide Gamatronic Electronic Industries Ltd. 9.3.2 External Battery Cabinet This section is relevant for all models of the UPS. The UPS batteries supply a nominal voltage of 192VDC. The battery cabinet houses 16 batteries of 12V each. 1. Connect the battery cabinet to the UPS with a 3-wire cable (plus, minus, ground). -
Page 55: Turning On The Ups For The First Time
Gamatronic Electronic Industries Ltd. User Guide 9.3.3 Turning On the UPS for the First Time 1. Verify that all the circuit breakers on the UPS are turned OFF 2. Turn ON the circuit breakers on the electrical supply board. 3. Measure to insure that you have the indicated voltage at the UPS’s Rectifier and AC Input terminals: Between R and S 220V ±... - Page 56 User Guide Gamatronic Electronic Industries Ltd. 9. Press UPS ON, and wait 60 seconds before proceeding to the next step. While you are waiting, the UPS turns on the Inverter, then checks the Bypass voltage. If the Bypass voltage is acceptable the UPS connects the Bypass voltage to the output terminal.
-
Page 57: Installation Of Decentralized Parallel Systems
Gamatronic Electronic Industries Ltd. User Guide Installation of Decentralized Parallel Systems The installation of two or more μ PS-SP UPSs in Decentralized Parallel mode starts with the individual installation of each of the UPSs. The UPSs are installed as for Standalone mode (see section 9.3 beginning on page 47) with the following differences. -
Page 58: Parallel Start-Up
User Guide Gamatronic Electronic Industries Ltd. Parallel Start-Up This section describes the start-up procedure for parallel UPSs. For a technical description of the parallel scenario, please refer to section 3.1.1 on page 8. 9.5.1 Decentralized (2 UPSs only) To start-up both UPSs, after successfully completing the installation procedure, and connecting the cables to the rectifier input, ST.SW input, maintenance bypass output and batteries, perform the following steps: 1. - Page 59 Gamatronic Electronic Industries Ltd. User Guide 15. Turn ON the Output circuit breaker of the Slave UPS. 16. Measure the output current of the Master UPS. The current for each phase (R,S,T) should be less than 10% Inom, as shown in the table. UPS Model 10 kVA 15 kVA...
-
Page 60: 10. Technical Specifications
User Guide Gamatronic Electronic Industries Ltd. 10. TECHNICAL SPECIFICATIONS Table 10: Technical Specifications MODEL 10 K 15 K 20 K 30 K 40 K 50 K 60 K INPUT 3 Phase X 3 x 220 Vac Voltage range ±20 % Frequency 57-63 Hz Power walk-in... - Page 61 Gamatronic Electronic Industries Ltd. User Guide MODEL 10 K 15 K 20 K 30 K 40 K 50 K 60 K COMMUNICATION OPTIONS RS232 Shutdown, monitor Alarm Shutdown software Remote indication panel Optional SNMP Optional LCD DATA Input Voltage Output & Inverter Voltage, current, frequency Bypass Voltage &...
Need help?
Do you have a question about the PS-SP Series and is the answer not in the manual?
Questions and answers