Table of Contents
Advertisement
Advertisement
Table of Contents

Related Manuals for Dell Studio PP39L


Summary of Contents for Dell Studio PP39L
- Page 1 SETUP GUIDE...
- Page 3 SETUP GUIDE Model PP39L...
- Page 4 Trademarks of these materials used in this text: Dell , the DELL logo, Wi-Fi Catcher , YOURS IS HERE, and DellConnect are trademarks of Dell Inc.; Intel , and C ore are registered trademarks and Core is a trademark of Intel Corporation in the United States and/or other countries;...
-
Page 5: Table Of Contents
Computer Base and Keyboard Features . . . 18 Dell Diagnostics ..... . 36 Media Controls......19 Restoring Your Operating System . - Page 6 Before You Call......47 Contacting Dell......48 Finding More Information and Resources .
-
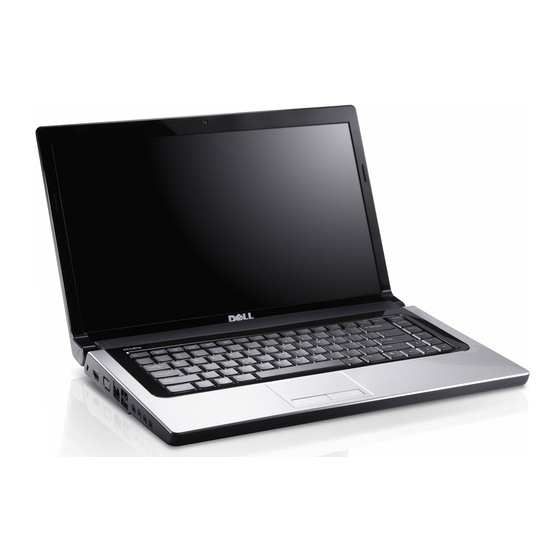
Page 7: Setting Up Your Studio Laptop
Studio 1555 laptop and connecting or allow dust to accumulate in the air vents. peripherals. Do not store your Dell™ computer in a low-airflow environment, such as a closed Before Setting Up Your Computer briefcase, while it is running. Restricting... -
Page 8: Connect The Ac Adapter
Setting Up Your Studio Laptop Connect the AC Adapter WARNING: The AC adapter works with electrical outlets worldwide. However, Connect the AC adapter to the computer and power connectors and power strips vary then plug it into an electrical outlet or surge among countries. -
Page 9: Connect The Network Cable (Optional)
Setting Up Your Studio Laptop Connect the Network Cable (optional) If you plan to use a wired network connection, plug in the network cable. -
Page 10: Press The Power Button
Setting Up Your Studio Laptop Press the Power Button... -
Page 11: Set Up Windows Vista
Setting Up Your Studio Laptop Set Up Windows Vista Connect to the Internet (Optional) ® Your Dell computer is preconfigured with NOTE: ISPs (Internet Service Providers) Windows Vista. To set up Windows Vista for the and ISP offerings vary by country. - Page 12 Setting Up Your Studio Laptop Setting Up a Wired Internet Connection Internet service If you are using a dial-up connection, connect cable or DSL modem the telephone line to the external USB modem wireless router (optional) and to the telephone wall connector portable computer with wireless before you set up your Internet connection.
- Page 13 Setting Up Your Studio Laptop Setting Up Your Internet Connection Save and close any open files, and exit any open programs. To set up an Internet connection with a provided → Control Panel. ISP desktop shortcut: Click Start Save and close any open files, and exit any Under Network and Internet, click Connect open programs.
-
Page 14: Using Your Studio Laptop
Using Your Studio Laptop Your Studio 1555 has indicators, buttons, and ExpressCard slot – Supports one features that provide information at-a-glance ExpressCard. The Express card slot is of and time-saving shortcuts for common tasks. 34 mm. Right Side Features NOTE: Your computer ships with a plastic blank installed in the ExpressCard slot. - Page 15 Using Your Studio Laptop 3 Optical Drive – Plays or burns only SD/MMC - MS/Pro - xD standard-size and shape (12 cm) CDs, and 8-in-1 Media card reader – Provides a DVDs. Ensure that the side with print or fast and convenient way to view and writing is facing upward when inserting share digital photos, music, videos, and discs.
- Page 16 Using Your Studio Laptop Battery status light – Indicates the Power button and light – Turns the battery charging state power on or off when pressed. The light in Battery status (running on battery) : the button indicates the power state: •...
- Page 17 Using Your Studio Laptop...
-
Page 18: Left Side Features
Using Your Studio Laptop Left Side Features... - Page 19 Using Your Studio Laptop 1 Security cable slot – Attaches a USB 2.0 connector – Connects to commercially available antitheft device to USB devices, such as a mouse, keyboard, the computer. printer, external drive, or MP3 player. NOTE: Before you buy an antitheft eSATA Connector –...
-
Page 20: Computer Base And Keyboard Features
For more information on using the keyboard, see the Dell Technology Guide . Backlit Keyboard Brightness Settings – Press <Fn> + F6 key to toggle the three lighting states (in the given order). -
Page 21: Media Controls
Media Controls To change the circular scrolling and zoom settings, double click the Dell Touch pad The media controls are located on the keyboard. icon in the notification area of your taskbar. These keys control CD, DVD, and media In the Scrolling tab, you can enable or playback. - Page 22 Using Your Studio Laptop To use the media controls, press the required key. Play or pause Mute the sound Play the next track or chapter Turn down the volume Eject the disc Turn up the volume Play the previous track or chapter...
-
Page 23: Display Features
FastAccess facial recognition (optional) – Helps to keep your Dell™ computer secure. This advanced facial recognition software learns your face and minimizes the need for you to use login passwords. -
Page 24: Removing And Replacing The Battery
This computer should only use a battery 5 Display – Your display can vary based on purchased from Dell. Do not use batteries selections you made when purchasing from other computers. your computer. For more information about WARNING: Before removing the battery, displays, see the Dell Technology Guide . -
Page 25: Using The Optical Disc Drive
Using Your Studio Laptop To remove the battery: To replace the battery, slide it into the bay until it clicks into place. Shut down the computer and turn it over. Slide the battery release latch until it clicks 1 Battery into place. -
Page 26: Software Features
Dell Technology Guide on your hard drive or on the Dell Support website at support.dell.com. Productivity and Communication You can use your computer to create presentations, brochures, greeting cards, fliers, and spreadsheets. - Page 27 ® ® and cell phones. Optional software applications with Dell computer provides three default enable you to organize and create music and options: video files that can be recorded to disc, saved — This power option •...
- Page 28 Using Your Studio Laptop Backing Up Your Data It is recommended that you periodically back up files and folders on your computer. To back up files: → Control Panel→ System Click Start and Maintenance→ Welcome Center→ Transfer files and settings. Click Back up files or Back up computer.
-
Page 29: Solving Problems
If you can The following beep codes help you troubleshoot not solve your problem using the following problems with your computer. guidelines, see “Using Support Tools” on page 33 or “Contacting Dell” on page 48. Number Description Failure of Beeps... - Page 30 Solving Problems Number Description Failure Number Description Failure of Beeps Coverage of Beeps Coverage Chipset Error Motherboard RTC Power Fail CMOS (North and South Failure battery Bridge Chipset, failure DMA/IMR/Timer Video BIOS Test Video card Error for Intel Failure failure platform);...
-
Page 31: Network Problems
If the problem persists, see the Dell Technology • If the computer is plugged into a power strip, Guide on the Dell Support website at ensure that the power strip is plugged into support.dell.com. -
Page 32: Memory Problems
If • Reseat the memory modules (see the necessary, install additional memory (See Service Manual on the Dell Support website at the Service Manual on the Dell Support support.dell.com) to ensure that your computer website at support.dell.com). -
Page 33: Lockups And Software Problems
Solving Problems Lockups and Software Problems If the computer stops responding — WARNING: You might lose data if you are If the computer does not start up — Ensure unable to perform an operating system that the power cable is firmly connected to the shutdown. - Page 34 If you have other software problems — – If necessary, uninstall and then reinstall • Back up your files immediately. the program Dell Support Center. • Use a virus-scanning program to check the hard drive or CDs. • Save and close any open files or programs...
-
Page 35: Dell Support Center
The Dell Support Center helps you find Upgrades & Accessories) the service, support, and system-specific The top of the Dell Support Center home page information you need. For more information displays your system’s model number along with about Dell Support Center and available support its service tag and express service code. -
Page 36: System Messages
NOTE: If the message you received is not CPU fan failure — CPU fan has failed. Replace listed in the following examples, see the the CPU fan. See the Service Manual on the Dell documentation for either the operating Support website at support.dell.com. -
Page 37: Hardware Troubleshooter
— S.M.A.R.T error, possible hard disk a boot device. drive failure (see “Contacting Dell” on page 48 for assistance). • Enter system setup and ensure that the boot... -
Page 38: Dell Diagnostics
Using Support Tools Dell Diagnostics Starting Dell Diagnostics From Your Hard Drive The Dell Diagnostics is located on a hidden If you experience a problem with your diagnostic utility partition on your hard drive. computer, perform the checks in “Lockups and Software Problems”... - Page 39 Using Support Tools Press any key to start the Dell Diagnostics Select the Boot from CD-ROM option from from the diagnostics utility partition on your the menu that appears and press <Enter>. hard drive. Type 1 to start the CD menu and press <Enter>...
-
Page 40: Restoring Your Operating System
Any changes that and remove any programs installed after System Restore makes to your computer are you received the computer. Use Dell Factory completely reversible. Image Restore only if System Restore did not CAUTION: Take regular backups of your resolve your operating system problem. - Page 41 Undoing the Last System Restore were written for the Windows default view, NOTE: Before you undo the last system so they may not apply if you set your Dell ™ restore, save and close all open files and computer to the Windows Classic view.
-
Page 42: Dell Factory Image Restore
Dell Factory Image Restore Restore permanently deletes all data on the hard drive and removes any programs Turn on the computer. When the Dell logo or drivers installed after you received appears, press <F8> several times to access your computer. If possible, back up the the Vista Advanced Boot Options Window. -
Page 43: Operating System Reinstallation
Restoring Your Operating System Operating System Reinstallation Click Next. The Confirm Data Deletion screen appears. Before you Begin CAUTION: If you do not want to proceed If you are considering reinstalling the Windows with Factory Image Restore, click Cancel. operating system to correct a problem with a Select the checkbox to confirm that you newly installed driver, first try using Windows want to continue reformatting the hard drive... - Page 44 When the DELL logo appears, press <F12> the assembly of the computer. Use the immediately. Dell Drivers and Utilities media to load any NOTE: If you wait too long and the required drivers. Depending on the region operating system logo appears, continue to...
-
Page 45: Getting Help
NOTE: Some of the services are not procedures. See “Online Services” on always available in all locations outside page 44 for a more extensive list of Dell the continental U.S. Call your local Dell Support online. representative for information on availability. -
Page 46: Technical Support And Customer
Getting Help Technical Support and Customer Online Services Service You can learn about Dell products and services on the following websites: Dell’s support service is available to answer • www.dell.com your questions about Dell hardware. Our support staff use computer-based diagnostics to provide •... -
Page 47: Autotech Service
Automated Order-Status Service • sales_canada@dell.com (Canada only) To check on the status of any Dell products that Anonymous file transfer protocol (FTP) you have ordered, you can go to support.dell.com, or you can call the automated • ftp.dell.com order-status service. -
Page 48: Product Information
Dell Diagnostics (see If you need information about additional “Dell Diagnostics” on page 36). products available from Dell, or if you would like Include any accessories that belong with the to place an order, visit the Dell website at item(s) being returned (power cables, software, www.dell.com. -
Page 49: Before You Call
Remember to fill out the following Diagnostics • Express Service Code: Checklist. If possible, turn on your computer before you call Dell for assistance and call from • Return Material Authorization Number (if a telephone at or near the computer. You may be... -
Page 50: Contacting Dell
Getting Help See your operating system documentation To contact Dell for sales, technical support, or to determine the contents of the computer’s customer service issues: start-up files. If the computer is connected to Visit support.dell.com. a printer, print each file. Otherwise, record the... - Page 51 Getting Help...
-
Page 52: Resources
® networking, and e-mail. upgrade your computer with new or additional the Service Manual on the Dell Support website memory, or a new hard drive. at support.dell.com reinstall or replace a worn or defective part. NOTE: In some countries, opening and replacing parts of your computer may void your warranty. - Page 53 End User License Agreement. find your Service tag/Express Service Code— the back or bottom of your computer. You must use the service tag to identify your computer on support.dell.com or to contact technical support. find drivers and downloads. the Dell Support website at ™...
-
Page 54: Basic Specifications
Basic Specifications System Model Processor Dell Studio 1555 Type L2 cache Intel Core 2 Duo 3 MB or 6 MB ® ™ This section provides basic information that you Processor may need when setting up, updating drivers for, Intel Pentium Dual-Core and upgrading your computer. - Page 55 32-bit Operating controller System (OS). Cards supported ExpressCard/34 (34 mm) NOTE: For instructions on upgrading your memory, see the Service Manual on the 1.5 V and 3.3 V Dell Support website at support.dell.com. ExpressCard 26 pins connector size...
- Page 56 Basic Specifications Computer Information Communications System Chipset Intel GM45/PM45 + Modem interface Universal Serial Bus ICH9M (USB) Data bus width 64 bits Network adapter 10/100/1000 Ethernet LAN on system board DRAM bus width dual channel (2) 64-bit buses Wireless 1 x half Mini-Card for WLAN for basic config Processor address 32 bits...
- Page 57 Basic Specifications Video Audio Internal Interface Intel High Definition Audio Video type integrated on system board External Interface microphone-in Video controller Mobile Intel GMA 4500MHD connector, stereo headphones/speakers Video memory Up to 358 MB of shared connector memory Speaker two 4.5-ohm speakers LCD interface LVDS and one 4 ohm...
- Page 58 Basic Specifications Ports and Connectors Display Audio microphone connector, two Type (TrueLife) 15.6-inch WLED HD TrueLife stereo headphone/speakers Dimensions: connector Height 193.5mm (7.61 in) IEEE 1394a 4-pin serial connector (optional) Width 344.2 mm (13.55 in) Mini-Card one Type IIIA, 2 full Mini- Diagonal 396.2 mm (15.6 in) Card slots...
- Page 59 TrueLife resolution at 30fps) Controls brightness can be controlled Diagonal 66° through keyboard shortcuts viewing angle (see the Dell Technology Guide for more information.) Touch pad X/Y position 240 cpi Keyboard resolution Number of keys 86 (U.S. and Canada); (graphics table 102 (Europe);...
- Page 60 (4/6/9-cell) under certain power- Height 20.4 mm (0.8 in) (4/6-cell) intensive conditions. 37.8 mm (1.5 in) (9-cell) See the Dell Technology Guide for more information. Width 206.6 mm (8.13 in) (4/6-cell) Life span 300 discharge/charge 284.9 mm (11.2 in) (9-cell)
- Page 61 Basic Specifications AC Adapter AC Adapter Input voltage 100–240 VAC Dimensions: 115–230 VAC (Auto- 65 W (E-Series) Air Adapter) Height 16 mm (0.6 in) Input current 1.5 A 15 mm (0.59 in) (Auto- (maximum) 2.5 A (Auto-Air Air Adapter) Adapter) Width 66 mm (2.6 in) Input frequency...
- Page 62 Basic Specifications AC Adapter Physical Depth 147 mm (5.8 in) Height 25.3 mm to 38.9 mm (0.996 in to Weight (with cables) 0.345 kg (0.76 lb) 1.23 in) Temperature ranges: Width 371.6 mm (14.63 in) Operating 0° to 35°C (32° to Depth 253 mm (9.96 in) 95°F)
-
Page 63: Appendix
Appendix Macrovision Product Notice This product incorporates copyright protection technology that is protected by method claims of certain U.S. patents and other intellectual property rights owned by Macrovision Corporation and other rights owners. Use of this copyright protection technology must be authorized by Macrovision Corporation, and is intended for home and other limited viewing uses only unless otherwise authorized by... -
Page 64: Index
25 creating 26 damage, avoiding 5 calling Dell 47 data, backing up 26 CDs, playing and creating 24 DellConnect 44 chipset 54 Dell Diagnostics 36 computer capabilities 24 Dell Factory Image Restore 38 computer, setting up 5... - Page 65 Index Dell Support Center 33 energy Dell support website 51 conserving 25 Dell Technology Guide expansion bus 54 for further information 50 device status lights 12 finding more information 50 Diagnostic Checklist 47 FTP login, anonymous 45 disc drive supported disc sizes 23...
- Page 66 Index installing the stand 6 power problems, solving 29 Internet connection 9 power strips, using 6 problems, solving 27 Internet Service Provider 9 processor 52 products information and purchasing 46 memory problems solving 30 memory support 53 reinstalling Windows 38 Microsoft™...
- Page 67 Index software problems 31 Windows Vista ® solving problems 27 Program Compatibility Wizard 31 specifications 52 reinstalling 42 support email addresses 45 wired network support sites network cable, connecting 7 worldwide 44 System Messages 34 System Restore 38 technical support 44 ventilation, ensuring 5 warranty returns 46 Windows, reinstalling 38...
- Page 70 Printed in the U.S.A. www.dell.com | support.dell.com...
Need help?
Do you have a question about the Studio PP39L and is the answer not in the manual?
Questions and answers