Table of Contents
Advertisement
Quick Links
Download this manual
See also:
Quick Reference Manual
Advertisement
Table of Contents

Related Manuals for Kyocera Hydro Life


Summary of Contents for Kyocera Hydro Life
- Page 1 User Guide...
-
Page 2: Table Of Contents
Table of Contents Phone Basics ........................1 Phone Overview ......................1 Key Functions ......................1 Smart Sonic Receiver ..................... 3 Get the Phone Ready ....................3 Insert the Battery ....................3 Charge the Battery ....................4 Insert the SIM Card ....................5 Insert a microSD Card .................... - Page 3 Call from Contacts ....................25 Call a Number in a Text Message................. 26 Call an Emergency Number ................. 26 Call a Number with Pauses .................. 27 Call Using a Speed Dial Number ................27 Call Using the Plus (+) Code Dialing ..............28 Call Using Wi-Fi Calling ..................
- Page 4 Copy a Contact ..................... 43 Assign a Ringtone to a Contact ................43 Assign a Vibration to a Contact ................43 Add a Contact to Favorites .................. 43 Send a Contact’s Call to Voicemail ..............44 Add a Contact Widget to the Home Screen ............44 Delete Single or Multiple Contacts ..............
- Page 5 Text and MMS Settings ..................62 Social Networking Accounts ..................63 Facebook ......................63 Google+ ........................ 64 YouTube ....................... 64 Apps and Entertainment ....................66 myMetro ........................66 AppStore ........................66 Google Play Store App ....................67 Find and Install an App ..................67 Create a Google Wallet Account ................
- Page 6 Select Text on a Web Page .................. 82 MetroWEB Menu ....................82 Adjust MetroWEB Settings .................. 83 Read Web Page Offline ..................86 Manage Bookmarks ..................... 86 Chrome Menu ...................... 87 Adjust Chrome Settings ..................88 Manage Bookmarks ..................... 89 USB Tethering and Mobile Hotspot ................
- Page 7 Calendar ........................106 Add an Event to the Calendar ................106 Invite Guests to Your Calendar Event ..............107 Calendar Event Alerts ..................107 View Calendar Events ..................108 Erase Calendar Events ..................109 Edit Calendar Events ..................109 Show or Hide Calendars ..................110 Synchronize Calendars with Your Phone ............
- Page 8 Use the Phone’s microSD Card as a Media Device or Camera ......126 File Manager ......................126 Settings ..........................128 Access to Phone’s Settings Menu ................128 Wireless & Networks Settings .................. 128 Wi-Fi Settings ..................... 128 Access the Wi-Fi Settings Menu ................ 128 Bluetooth Settings .....................
- Page 9 Do Not Rely on Your Phone for Emergency Calls ..........157 Using Your Phone While Driving ................ 157 Following Safety Guidelines ................158 Medical Devices ....................158 Using Your Phone Near Other Electronic Devices ..........158 Turning Off Your Phone Before Flying ............... 158 Turning Off Your Phone in Dangerous Areas .............
-
Page 10: Phone Basics
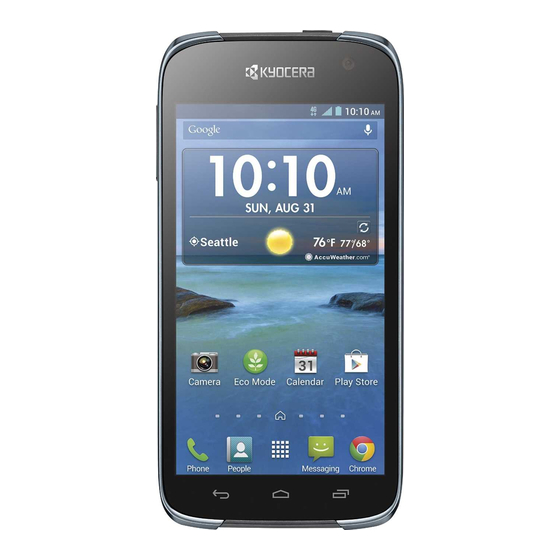
Phone Basics Phone Overview Key Functions CAUTION! Inserting an accessory into the incorrect jack may damage the phone. ● LED Indicator displays a phone notification, charging status, or alert. ● Proximity Sensor/Light Sensor detects how close an object is to the surface of the screen. - Page 11 ● Smart Sonic Receiver (Internal) lets you hear the caller and automated prompts. Smart Sonic Receiver. ● Self Camera Lens takes pictures and records videos while facing the screen, and allows you to video conference. ● Touchscreen displays all the information needed to operate your phone. Use finger gestures to navigate and interact with items on the screen.
-
Page 12: Smart Sonic Receiver
Smart Sonic Receiver Smart Sonic receiver transmits sound through vibrations on your phone’s display screen. Place your ear around the internal receiver and adjust the position of the phone to find the best hearing point depending on the surrounding environment. Get the Phone Ready Insert the Battery 1. -
Page 13: Charge The Battery
3. Replace the battery compartment cover and press down firmly on all sides of the back cover as shown by the arrows in the figure to make sure all the tabs are seated and there are no gaps around the cover. Charge the Battery Plug the smaller end of the micro-USB cable into the phone’s charger/accessory jack. -
Page 14: Insert The Sim Card
Insert the SIM Card Insert your thumbnail or fingernail into the slit and lift the battery cover. Grasp the white pull-tab extending from the battery pack and pull the battery out of its compartment. Use your fingernail to carefully pull out the SIM card tray. Place the SIM card into the tray, with the gold contacts facing down and the cut off corner on the top left. -
Page 15: Insert A Microsd Card
Insert a microSD Card Insert a compatible microSD card into your phone. For more details on microSD card, microSD Card. 1. Insert your thumbnail or fingernail into the slit and lift the battery cover. 2. Grasp the white pull-tab extending from the battery pack and pull the battery out of its compartment. -
Page 16: Turn The Phone On And Off
Sleep. Setup Wizard Your Hydro LIFE has the Setup Wizard to set up your phone quickly and easily. On the Welcome screen which is displayed when you turn on your phone for the first time, touch Get Started to start the Setup Wizard. -
Page 17: Customer Support
● Google Account Setup ● Signing in to Email ● Signing in to Social Network Follow the onscreen instructions to quickly set up your phone. Customer Support Customer support is available from the following resources: ● Visit metropcs.com and click Support link at the bottom left side of the screen. ●... - Page 18 Touch and Hold To open the available options for an item (for example, a keyboard), touch and hold the item. Drag Touch and hold your finger before you start to move it. Do not release your finger until you have reached the target position. Phone Basics...
- Page 19 Swipe or Slide To swipe or slide means to quickly drag your finger vertically or horizontally across the screen. Flick Flicking the screen is similar to swiping, except that you need to swipe your finger in light, quick strokes. Phone Basics...
- Page 20 Pinch and Spread Pinch the screen using your thumb and forefinger to zoom out or spread the screen to zoom in when viewing a picture or a Web page. (Move fingers inward to zoom out and outward to zoom in.) Rotate For most screens, you can automatically change the screen orientation from portrait to landscape by turning the phone sideways.
-
Page 21: Home Screen
Home Screen The home screen is the starting point for all applications, functions, and menus. From any application screen, touch Home to return to the main home screen. Home Screen Overview ● Status Bar: Displays the time, notification, and phone status icons. Slide down to display the Notifications panel. -
Page 22: Extended Home Screens
● Google Search Bar: Allows you to enter text or spoken keywords for a quick search on the phone or on the Internet. Touch to enter text or touch to speak your keyword. Tip: Press Home to return to the main Home screen from any other screen. Tip: You can access step-by-step tutorials to learn the basic features of your phone by touching... - Page 23 – or – Lightly pinch any home screen with your thumb and index finger to display the home screen thumbnails. The following options are available: Touch a thumbnail of the home screen you want to open. Touch to add a new home screen. ...
-
Page 24: Use Folders
Move or Remove Items on the Home Screen ► Touch and hold the item you want to move or remove on the screen. To move the item, drag it to a new area and release it. To remove the item, drag it over “ Remove”... -
Page 25: Change Wallpaper
Drag the app to “ Remove” at the top of the screen to remove it from the home screen. Change Wallpaper 1. Touch and hold the empty area on the home screen. 2. Touch Wallpapers, and select one of the following options: ... -
Page 26: Quick Settings Panel
Rearrange Your Apps on the Launcher Screens Touch Home > > > App sorting. Touch and hold an app, drag it to a new position and release it. To move it to another screen, drag the app to Jump to another screen and release it on the screen you want to place it. -
Page 27: Status Bar
Status Bar The status bar at the top of the screen provides phone and service status information on the right side and notification alerts on the left. Slide the status bar down to open the Notifications panel and see the list of notifications you received. Status Icons Icon Description... -
Page 28: Notification Icons
Notification Icons Icon Description Missed call New email New Gmail New SMS or MMS message New voicemail message Event Music application is running background USB connection Alarm When animating, GPS is active Downloading USB tethering or/and Mobile Hotspot active Phone Basics... -
Page 29: Text Entry
Text Entry Touchscreen Keyboard The touchscreen keyboard lets you enter text directly onscreen. Your phone provides convenient ways to enter letters, numbers, and symbols whenever you are prompted to enter text. The keyboard appears automatically onscreen when you touch a text entry field and can be used in either portrait or landscape mode. -
Page 30: Text Mode
Some of the keys on the Google keyboard are given below: Description Shift: Touch to toggle between lower case and upper case. Caps lock: Double-touch the lower case or upper case shift key. Text mode: Touch to toggle between the Alphabet keyboard and Number &... -
Page 31: Gesture Typing
You can select the caps lock by double-touching or touching and holding to make all letters in a word uppercase. (Caps Lock) to enter all letters in a word uppercase. In Number & Symbol mode, touch to display more symbols. ... -
Page 32: Google Voice Typing
Enter Text Using Gesture typing When you enter text using the onscreen keyboard, slide your finger slowly across the letters of the word you want to input. The phone suggests a word based on the letter you have entered. Lift your finger when the word you want is displayed in the floating preview. ... - Page 33 To copy and paste the text: In a text entry field, touch and hold the text body. Selection tabs appear and the currently selected words or characters are highlighted. Drag the tabs to expand or reduce the range of the selected text. Touch an onscreen option from the edit menu bar.
-
Page 34: Phone Calls
Phone Calls Make Phone Calls Call Using the Phone Dialpad Touch Home > > Dialpad tab to display the phone dialpad. Touch the number keys on the dialpad to enter the phone number. Touch at the bottom of the screen to call the number. To end the call, touch Call from Call Log Touch Home... -
Page 35: Call A Number In A Text Message
Touch the Phone book tab to display the Contacts list. Your frequent contacts are displayed at the top of the list. Touch to search for your contact. Touch the contact you want to call. For additional information on contacts, see Contacts. Call a Number in a Text Message Touch Home >... -
Page 36: Call A Number With Pauses
Safety Answering Points (PSAPs), may not be equipped to receive GPS location information from your phone. Call a Number with Pauses You can dial phone numbers with pauses for use with automated systems, such as voicemail or credit card billing numbers. There are two types of pauses available on your phone: ●... -
Page 37: Call Using The Plus (+) Code Dialing
To remove a number from a speed dial location: Touch Home > > Dialpad tab to display the phone dialpad. Touch > Speed dial setup. Touch the assigned contact you want to remove and touch Remove > OK. To replace a number in a speed dial location: Touch Home >... -
Page 38: Call Using Internet Calling
Set Connection Preferences Touch Home > to display the phone app. Touch > Call settings > Wi-Fi Calling. Select Wi-Fi Preferred, Cellular Network Preferred, or Never use Cellular Network. Learn about Wi-Fi Calling Touch Home > to display the phone app. Touch >... -
Page 39: Receive Phone Calls
For all calls when data network is available to use Internet calling for all calls when Wi-Fi network is available. Only for Internet calls to use Internet calling only for calls to Internet calling addresses. Ask for each call to ask each time you make a call. Receive Phone Calls When you receive a phone call from a contact, the Incoming call screen appears and displays the caller ID icon, name, and phone number of the calling party. -
Page 40: Voicemail Notification
Touch and hold to dial your voicemail number. Follow the system prompts to: Create your password. Record your name announcement. Record your greeting. Important: Voicemail Password – It is strongly recommended that you create a password when setting up your voicemail to protect against unauthorized access. -
Page 41: Voicemail Settings
Enter your password. Voicemail Settings Touch Home > to display the phone app. Touch > Call settings > Voicemail. The following options are available: Service to select the voicemail service provider. Setup to display the voicemail number. Sound to select the ringtone for the voicemail. ... -
Page 42: Call Waiting
● Speaker: Route the phone’s audio through the speaker (ON) or through the earpiece (OFF). Warning: Because of higher volume levels, do not place the phone near your ear during speakerphone use. ● Mute: Mute the microphone during an active call. Touch the ON/OFF button to mute or unmute your microphone. -
Page 43: Fixed Dialing Numbers (Fdn)
4. If you want to add another call to the existing conference, touch Add call, and dial the number. If one of the people you called hangs up during your call, you and the remaining caller stay connected. If you initiated the call and are the first to hang up, all callers are disconnected. -
Page 44: Additional Settings
Forward when unreachable to automatically forward incoming calls to your voicemail number when the phone is not in service, or is turned off. Additional Settings Caller ID Caller ID identifies a caller before you answer the phone by displaying the number of the incoming call. -
Page 45: Auto Answer
– or – Touch TTY Off to turn TTY mode off. Note: When enabled, TTY mode may impair the audio quality of non-TTY devices connected to the headset jack. Warning: 911 Emergency Calling It is recommended that TTY users make emergency calls by other means, including Telecommunications Relay Services (TRS), analog cellular, and landline communications. -
Page 46: Call Log
Call Log The Call log tab of the Phone app lists max. 500 recent incoming, outgoing, and missed calls. View Call Log Touch Home > Touch the Call log tab to display the Call log list. You can determine if an entry was an incoming, outgoing, or a missed call from the icons shown below. - Page 47 Touch > Remove from call log to remove the log. Touch > Edit number before call to edit the number before calling. Phone Calls...
-
Page 48: Contacts
Contacts The People application lets you store and manage contacts from a variety of sources, including contacts you enter and save directly in your phone as well as contacts synchronized with your Google account or compatible email programs. Display Contacts ►... -
Page 49: Display Options
Speed dial setup: Assigns speed dial numbers to your contacts. See Set Up Speed Dialing. Delete: Selects contact(s) you want to delete. See Delete Single or Multiple Contacts. Import/export: Imports/exports your contacts from/to the microSD/SIM card or shares your visible contacts. ... -
Page 50: Add A Contact
Set the following options: Sort list by to choose how your contacts are sorted. View contact names as to choose how your contacts name is displayed. Add a Contact Touch Home > > People > Contacts tab. Touch ... -
Page 51: Save A Phone Number
Add another field: Touch to include additional information such as IM, Notes, Nickname, Website, Internet call, etc. Note: To select a type (label) for a phone number, email address, or postal address (such as MOBILE, HOME, WORK, etc.), touch the type to the right of the field and select the appropriate type. -
Page 52: Copy A Contact
3. Touch the contact icon to the right of the name. 4. To assign a stored picture, touch Choose photo from Gallery, select the app to use, and locate and select a picture. – or – To assign a new picture, touch Take photo and take a picture. You may be prompted to size the picture for use with entries. -
Page 53: Send A Contact's Call To Voicemail
Touch . The icon changes to when the contact is added to Favorites. Send a Contact’s Call to Voicemail You can transfer your contact’s voice call to voicemail anytime you receive it. Touch Home > > People> Contacts tab. Touch a contact to display it, and touch . Select the All calls to voicemail check box. -
Page 54: Edit A Group Contact
Edit a Group Contact Manage the group contacts that you have created. Add or Remove a Group Contact Entry, or Rename a Group Touch Home > > People > Groups tab. Touch a group contact, and touch > Edit. The following options are available: ... -
Page 55: Personal Information
Touch Home > > People > Contacts tab, and then touch ICE- In Case of Emergency. Touch and touch the contact to remove. Touch OK. Personal Information You can register your own information, medical information, etc. Touch Home > > People > Contacts tab, and then touch ICE- In Case of Emergency. - Page 56 Touch Home > > People > Contacts tab. Touch an entry, and touch > Share. In the Share contact via menu, select a method: Bluetooth to send the information via Bluetooth. See Bluetooth information on pairing and sending via Bluetooth. ...
-
Page 57: Accounts And Messaging
Accounts and Messaging Gmail You will need a Google Account to access several phone features such as Gmail, Google Maps, and the Google Play Store applications. Before you are able to access Google applications, you must enter your account information. These applications sync between your phone and your online Google Account. -
Page 58: Sign In To Your Google Account
problems or forget your password. It is strongly encouraged for Android users so you can regain access to Google Mobile™ services and purchases on your phone. Select if you set up recovery options now. Select if you want to join Google+ now. Select if you want to allow Google Play to send news and offers and touch Touch I accept if you agree to the Google Terms of Service and Privacy Policy, Chrome Terms of Service and Privacy Notice, and Google Play Terms of Service. -
Page 59: Send A Gmail Message
Select messages and conversations: Touch the box before the email or conversation. View the inbox of your other Gmail account: Touch the account name at the top of the inbox, and then touch the account you want to view. ... -
Page 60: Email
Tip: You can also access new messages through the status bar. When a new Gmail message arrives, you will see the icon in the status bar. Slide the bar down to display notifications. Touch a message to display it. To reply to or forward a message: ... -
Page 61: Add A Corporate Account
Add a Corporate Account If you synchronize your phone with your corporate account, you can read, manage, and send email in the same easy way as with a POP3/IMAP account. However, you can also access some powerful Exchange features. Touch Home >... -
Page 62: Compose And Send Email
Exchange Server settings after you touch Next. Ask your Exchange Server administrator for details. Compose and Send Email Compose and send email using any account you have set up on your phone. Increase your productivity by attaching files such as pictures or videos to your email messages. Touch Home >... -
Page 63: General Email Settings
You have the following options: Touch Inbox at the top of the screen to select a different email account. Touch to compose a new email message. Touch to search an email. Touch to display folders. Touch to refresh your email box. -
Page 64: Email Account Settings
Email Account Settings You can edit the settings of your individual email accounts, such as email address and password, name display and signature, frequency of retrieval, and more. Touch Home > > Email. On the email account Inbox, touch > Settings. Select the account you want to edit. -
Page 65: Delete An Email Account
Download attachments: Check if you want to automatically download attachments via Wi-Fi. Email notifications: Check to display the email notification icon on the status bar when a new email is received. Choose ringtone: Select a ringtone for new email messages. ... -
Page 66: Send A Multimedia Message (Mms)
Enter phone numbers in the Enter up to 10 recipients field. If you are sending the message to several recipients, separate the phone numbers with commas. As you enter information, any matching phone numbers from your contacts list are displayed. Touch a match to enter that number. Touch Type message and then start composing your message. - Page 67 Tip: You can type a name saved in your Contacts to call up the phone number, or touch to access your Contacts. Touch Type message and then start composing your message. Tip: Touch to select options for composing messages, such as Add subject, Add preset message, and Insert smiley.
-
Page 68: Save And Resume A Draft Message
When finished, touch Return to attach the slideshow to your message. When you have finished composing the multimedia message, touch Save and Resume a Draft Message While composing a text or multimedia message, touch Back > Yes to save your message as a draft. - Page 69 To see available options menu: ► To see available options menu for a text message, touch and hold the text message. For example, if a text message contains a phone number, you will see the options menu to send a message to the number or add the number to your contacts by touching and holding the text message.
- Page 70 Delete a Message Thread Touch Home > > Messaging. On the Messaging screen, touch and hold the message thread that you want to delete. Touch another thread to select multiple threads. Touch When prompted to confirm, touch Delete. Delete All Message Threads Touch Home >...
-
Page 71: Text And Mms Settings
Text and MMS Settings The messages settings menu lets you control options for your text and MMS messages including message limits, and notifications. Touch Home > > Messaging. On the Messaging screen, touch > Settings. You can set the following options. Storage ●... -
Page 72: Social Networking Accounts
Help: Displays the Help information for Emergency Alerts. ● Emergency Alert Tone/Vib: Select this option to play a tone, vibrate the phone when receiving an Emergency Alert, or repeat an Emergency Alert after one, three, and five minutes of reception when you have missed it. Multimedia (MMS) Messages ●... -
Page 73: Google
Sign in to Your Facebook Account Touch Home > > Facebook. Touch Sign Up for Facebook on the main Facebook home page. Enter your Facebook details and touch Sign Up. Follow the onscreen prompts to complete. Google+ With Google+ you can check your friends’ updates, post updates of your own, and chat with friends in your Google+ circles. - Page 74 Touch one of the results, or touch on the keyboard. Scroll through the results and touch a video to watch it. Accounts and Messaging...
-
Page 75: Apps And Entertainment
Apps and Entertainment All of your phone’s features are accessible through the Apps list. Note: Available applications and services are subject to change at any time. myMetro myMetro allows you to view your account balance, make payments, view your rate plan and services, record your E911 (Enhanced 911) address, and access your account settings. -
Page 76: Google Play Store App
Google Play Store App Google Play™ is your digital content destination to discover Android apps, books, movies, music and much more on your phone and on the web. Choose from a wide variety of free and paid content ranging from productivity apps and games to bestselling books and blockbuster movies and music. -
Page 77: Create A Google Wallet Account
The subsequent screen notifies you whether the app will require access to your personal information or access to certain functions or settings of your phone. If you agree to the conditions, touch ACCEPT to begin downloading and installing the app. ... -
Page 78: Open An Installed App
Touch Refund. Your app is uninstalled and the charge is cancelled. Open an Installed App There are options for opening an installed app. ► On the status bar, check if you see the icon. If you see the icon, open the Notifications panel, and then touch the app to open it. -
Page 79: Get Help With Google Play
Get Help with Google Play The Google Play Store app offers an online help option if you have questions or want to know more about the app. ► Touch > Help and select a browser to use. The Web browser will take you to the Google Play Help Web page. - Page 80 If you are not signed in to a Google account, sign in to or create a Google account by touching Sign in > Add Account > Existing or New and following the onscreen instructions. See Sign In to Your Google Account Create a Google Account Using Your Phone.
-
Page 81: Music
Get Directions On the Google Maps screen, touch Do one of the following: The starting point is set to your current location as default. If you want to change the starting point, touch My Location, and type new point in the Choose starting point... - Page 82 Touch an item to display the contents or play the item. Touch , or touch and hold an item, for available options. Touch the Now Playing tab at the bottom of screen to play the song, if available.
-
Page 83: Google Play Music
On the Music Player app, browse for the item you want to add to the playlist. Touch next to the item, or touch and hold the item, and touch Add to playlist. On the Add to playlist window, touch New. Type the name of your new playlist and touch Save. -
Page 84: Manage The Music Library
library you want to access from the Google Play Music application. Follow the onscreen instructions to continue. Open the Music Library ► Touch Home > > Play Music. The music library screen appears. Manage the Music Library You will see a list of all the tabs open at the left side of the Google Play Music screen; ►... -
Page 85: Web And Data
Web and Data Your phone’s data capabilities let you wirelessly access the Internet or your corporate network through a variety of connections, including Wi-Fi, Data Services, and Virtual Private Networks (VPN). The following topics address your phone’s data connections and the built-in Web browser. -
Page 86: Check The Wireless Network Status
your phone to its factory default settings or you instruct the phone to forget the network. Note: Wi-Fi networks are self-discoverable, which means no additional steps are required for your phone to connect to a Wi-Fi network. It may be necessary to provide a username and password for certain closed wireless networks. -
Page 87: Start A Data Connection
WCDMA/GSM (Auto mode): The phone will connect to WCDMA or GSM. The phone will scan for the appropriate network and will automatically connect to it when it is available. WCDMA only: The phone will connect to WCDMA only. ... -
Page 88: Virtual Private Networks (Vpn)
If you do not see an indicator, your phone does not have a current data connection. To launch a connection, see Start a Data Connection. Virtual Private Networks (VPN) From your phone, you can add, set up, and manage virtual private networks (VPNs) that allow you to connect and access resources inside a secured local network, such as your corporate network. -
Page 89: Connect To Or Disconnect From A Vpn
Set up all options according to the security details you have obtained from your network administrator. Touch Save. The VPN is then added to the VPNs section of the VPN settings screen. Connect to or Disconnect from a VPN Once you have set up a VPN connection, connecting and disconnecting from the VPN is easy. -
Page 90: Learn To Navigate Web Browser
Learn to Navigate Web Browser Scrolling As with other parts of your phone’s menu, you’ll have to drag up and down to see everything on some websites. To scroll through a website’s page: ► In a single motion, touch and drag across or up and down a page. Selecting To select onscreen items or links: ►... -
Page 91: Select Text On A Web Page
Touch Go on the keyboard to launch the new page. Note: Not all websites are viewable on your phone. Select Text on a Web Page You can highlight text on a Web page and copy it, search for it, or share it. Scroll to the area of the Web page containing the text you want to select. -
Page 92: Adjust Metroweb Settings
● Bookmarks: Allows you to access and manage your bookmarks. ● Save to bookmarks: Adds the currently viewed page to bookmarks. ● Share page: Allows you to share the URL via Gmail, SMS, Email, Bluetooth, etc. ● Find on page: Allows you to search in the current page. ●... - Page 93 Clear all cookie data: Clears all current browser cookies files. Touch OK to complete the process. Remember form data: Allows the phone to store data from any previously filled-out forms. Clear the check mark to disable this function. ...
- Page 94 Open in background: New pages are launched in a separate page and displayed behind the current one. Select the check box to enable this function. Enable JavaScript: Enables JavaScript for the current Web page. Without this feature, some pages may not display properly. Clear the check mark to disable this function.
-
Page 95: Read Web Page Offline
Fullscreen: Enables the full screen mode and hides the status bar. Select the check box to enable this function. Read Web Page Offline You can save web pages for offline reading. ► Touch Home > MetroWEB > > Save for offline reading. The Web page will be saved in SAVED PAGES of Bookmarks. -
Page 96: Chrome Menu
Touch the HISTORY tab. Locate the Web page you want to bookmark and touch the star icon next to it. Edit the necessary information and touch OK. Chrome Menu Open the Chrome Menu The Chrome menu may be opened anytime you have an active data session, from any page you are viewing. -
Page 97: Adjust Chrome Settings
Adjust Chrome Settings You can control many of the Chrome settings through the settings menu. Touch Home > > Chrome > > Settings. You can access the following settings menu: Search engine: Sets the search engine. Select a search engine from the available list. -
Page 98: Manage Bookmarks
Content settings: Accept cookies: Allows sites that require cookies to save and read cookies from your phone. Enable JavaScript: Enables JavaScript for the current Web page. Without this feature, some pages may not display properly. Clear the check mark to disable this function. -
Page 99: Usb Tethering And Mobile Hotspot
Enter a descriptive name for the new bookmark. Select or create a folder to save the bookmark. Touch Save. Edit Bookmarks Touch Home > > Chrome > > Bookmarks. Touch and hold the bookmark you want to edit and touch Edit bookmark. Edit the bookmark and touch Save. -
Page 100: Mobile Hotspot
If your phone's mobile data access is not enabled, you will be prompted to turn it on. Follow the onscreen instructions. See Enable Data. Follow the onscreen instructions. Mobile Hotspot The Mobile Hotspot turns your phone into a wireless router and shares your phone’s data connection with one or more computers or mobile devices using Wi-Fi. - Page 101 Touch Home > > Settings > More… > Tethering & Mobile Hotspot > Mobile Hotspot settings > Mobile Hotspot turn off timer. Select a timer option. To limit maximum connections: Touch Home > > Settings > More… > Tethering & Mobile Hotspot > Mobile Hotspot settings >...
-
Page 102: Camera And Video
Camera and Video You can use the camera or camcorder to take and share pictures and videos. Your phone comes with a 5.0 megapixel back camera and 2.0 megapixel front-facing camera with an autofocus feature that lets you capture sharp pictures and videos. Take Pictures Open the Camera ►... -
Page 103: Take A Picture
● Zoom slider: Allows you to adjust your zoom level. Touch to zoom in and out of an image. ● Thumbnail: Displays the thumbnail of the latest image. Touch to view and manage. ● Battery Icon: Displays how full the battery is. ●... -
Page 104: Review Screen
Review Screen After capturing a picture, touch the thumbnail image to see the item on the review screen. From there, you can access options such as share, delete, and more. ● Gallery: The app you have selected to view the image is displayed. Touch to access the app. -
Page 105: Record Videos
Record Videos Record high-quality videos using your phone’s video camera. Touch Home > > Camera. Frame your subject on the screen. Touch to start capturing video. Touch to stop capturing video. Camera and Video Camera Settings Follow the steps below to change the advanced settings on your camera. Touch Home >... - Page 106 HDR: Takes three pictures at different exposure levels and combines them into one picture. It compensates the loss of detail at each exposure level and helps produce a clear and detailed picture. The shutter sounds only once while taking the three pictures. ...
-
Page 107: Use Panorama Mode
Store location: Stores the location information of the image. Selects from On or Off. Auxiliary line: Selects from Off or Grid. Time lapse recording: Allows you to capture in the interval shooting mode. Selects from Off, 1s, 1.5s, 2s, 2.5s, 3s, 5s, or 10s. ... -
Page 108: View Pictures And Videos Using Gallery
View Pictures and Videos Using Gallery Using the Gallery application, you can view pictures and watch videos that you have taken with your phone’s camera, downloaded, or copied onto your microSD card or phone memory. For pictures that are on your microSD card or phone memory, you can do basic editing such as rotating and cropping. -
Page 109: Zoom In Or Out On A Picture
Zoom In or Out on a Picture There are two ways you can zoom in or out of a picture. ► Touch the screen twice quickly to zoom in. Touch the screen twice quickly to zoom out. – or – Use pinch and spread to zoom in or out. -
Page 110: Edit A Picture
2. With the picture displayed, touch to show the following menu. Delete: Deletes the selected picture. Slideshow: Starts the slideshow of the pictures stored. Edit: Edits the picture. See Edit a Picture. Rotate left/Rotate right: Rotates the picture. ... -
Page 111: Rotate And Save A Picture
to select a frame for the picture. to modify the picture. to add color effect to the picture. to undo the action. to redo the action. to display the options menu. When finished, touch SAVE. Rotate and Save a Picture Touch Home >... -
Page 112: Share Pictures And Videos
The cropped picture is saved in the album as a copy. The original picture remains unedited. Share Pictures and Videos The Gallery application lets you send pictures and videos using email or multimedia messages. You can share pictures on your social networks (such as Facebook, Flickr Picasa , and Twitter) and share videos on YouTube. -
Page 113: Send Pictures Or Videos Using Bluetooth
For more information about sending a multimedia message, see Send a Multimedia Message (MMS). Send Pictures or Videos Using Bluetooth You can select several pictures, videos, or both and send them to another phone or your computer using Bluetooth. Touch Home >... -
Page 114: Share Videos On Youtube
Select the online album where you want to upload the pictures, or touch create a new album. Touch Upload. You can view the pictures online at picasaweb.google.com. Share Videos on YouTube You can share your videos by uploading them to YouTube. Before you do this, you must create a YouTube account and sign in to that account on your phone. -
Page 115: Tools And Calendar
Tools and Calendar Calendar Use Calendar to create and manage events, meetings, and appointments. Your Calendar helps organize your time and reminds you of important events. Depending on your synchronization settings, your phone’s Calendar stays in sync with your Calendar on the Web, or the corporate calendar. -
Page 116: Invite Guests To Your Calendar Event
Note: You can add another reminder time in a Google Calendar event. Touch Add reminder to add another reminder. Select your status to be displayed on your calendar. Set the privacy status of this event. Touch Done. Invite Guests to Your Calendar Event If you want to invite guests to your event, you need to create and add the event in your Calendar using your Google account or Exchange account. -
Page 117: View Calendar Events
Note: If you have other pending event reminders, these events will also appear on the screen. Do one of the following: Touch Snooze under the event name to postpone the event reminder for ten minutes. Touch the event name to access the reminder settings. ... -
Page 118: Erase Calendar Events
● Slide left or right across the screen to view earlier or later weeks. Month View In Month view, you will see markers on days that have events. When in Month view: ● Touch a day to view the events of that day. ●... -
Page 119: Show Or Hide Calendars
Show or Hide Calendars If you have multiple calendars available, you can choose to show or hide a calendar from your current view. Touch Home > > Calendar. In any Calendar view, touch > Calendars to display, and then select or clear the check box to show or hide the calendar. -
Page 120: Alarm
Change Clock Settings Touch Home > > Clock. Touch the Clock tab to display the Clock screen, if necessary. Touch Menu > Settings and choose from the following options: Style: Select to change the clock style. Choose from Analog or Digital. ... -
Page 121: Stopwatch
Note: When you first open the alarms, two alarms are set up by default and ready for you to customize. These alarms are turned off by default. Touch Add new to add a new one and set the alarm time. Set the hours and minutes you want, and select AM or PM and touch OK. -
Page 122: Timer
Touch the Stopwatch tab to display the Stopwatch screen, if necessary. Touch START to start the stopwatch. Do any of the following: Touch STOP to stop timing. Touch Lap to record the time. Touch Reset to reset the stopwatch to zero. ... -
Page 123: Calculator
Touch Back to confirm. (An overview of the time zones you have added is displayed in the Clock screen.) Calculator Your phone’s convenient built-in calculator lets you perform basic mathematical equations. Touch Home > > Calculator. Enter numbers by touching the onscreen keys. Touch DELETE to clear a number. -
Page 124: Magnifont
To rewind a recording to a specific location, drag the playback slider to the left. Touch to share selected voice data via Bluetooth, Gmail, Messaging, etc. Touch > Delete to delete selected voice data. Touch OK to confirm. Voice Data List Options Touch Home >... -
Page 125: Text-To-Speech Settings
Activate the Voice Dialer ► Touch Home > > Voice Dialer. The phone prompts you to say a command from the list displayed on the screen. To complete your task, simply follow the onscreen prompts or touch an onscreen option. If the application does not recognize the number, name, or application name, it will find the most likely matches and display a list. -
Page 126: Voice Search
Touch Text-to-speech output. Select your engine. Touch to configure the settings of the selected engine. Touch Speech rate and select a speed. Touch Listen to an example to play a short demonstration of the set speech synthesis. Voice Search Voice Search allows you to find information on the web as well as items and information on your phone by speaking your search terms. -
Page 127: Eco Mode
Eco Mode The Eco Mode allows you to save battery life while using your phone. Touch Home > > Eco Mode. Touch an option to enable or disable the Eco Mode: On: Enables the Eco Mode. The Eco Mode On icon appears on the status bar when selected. -
Page 128: The Bluetooth Settings Menu
Note: Turn off Bluetooth when not in use to conserve battery power, or in places where using a wireless phone is prohibited, such as aboard an aircraft and in hospitals. The Bluetooth Settings Menu The Bluetooth settings menu gives you access to information and controls for your phone’s Bluetooth feature. -
Page 129: Reconnect A Headset Or Car Kit
Touch SEARCH FOR DEVICES. Your phone will start to scan for Bluetooth devices within range. When you see the name of your headset displayed on the AVAILABLE DEVICES list, touch the name. Your phone then automatically tries to pair with the headset. If automatic pairing fails, enter the passcode supplied with your headset. -
Page 130: Send And Receive Information Using Bluetooth
Unpair from a Bluetooth Device Touch Home > > Settings > Bluetooth. On the PAIRED DEVICES list, touch next to the device to unpair. Touch Unpair. Send and Receive Information Using Bluetooth You can use Bluetooth to transfer information between your phone and another Bluetooth-enabled device such as a phone or notebook computer. -
Page 131: Microsd Card
On the receiving device, accept the file. Receive Information from Another Device Your phone is capable of receiving a wide variety of file types with Bluetooth, including pictures, videos, or contacts. Touch Home > > Settings > Bluetooth. If Bluetooth is not switched on, touch the off icon to turn Bluetooth on. -
Page 132: Insert A Microsd Card
Note: Your phone also has some internal space for storing picture, music, etc. just like the SD card. See Storage Settings for more information. Insert a microSD Card Insert a compatible microSD card into your phone. Turn the phone off and remove the back cover. Grasp the white pull-tab extending from the battery pack and pull the battery out of its compartment. -
Page 133: Remove A Microsd Card
Replace the cover, applying equal pressure from the top down on both sides and making sure all the locking tabs of the cover are seated with no gaps. Remove a microSD Card Before removing your phone’s microSD card, use the Storage settings menu to unmount the card. -
Page 134: Unmount The Microsd Card
Unmount the microSD Card Unmount the microSD card first before removing it to prevent corrupting the data stored on it or damaging the microSD card. Touch Home > > Settings > Storage > User storage. Touch Unmount SD card > OK. The microSD card will be mounted automatically when inserted. -
Page 135: Use The Phone's Microsd Card As A Media Device Or Camera
Note: The phone will not recognize the microSD card when it is connected to a computer as a disk drive. You will not be able to use some of the phone’s applications such as Camera or Play Music. Use the Phone’s microSD Card as a Media Device or Camera You can connect your phone as a media device to your computer. - Page 136 Share to share the file via Bluetooth, Gmail, Messaging, etc. Copy to copy the file or folder. Move to move the file to another folder. Delete to delete the file or folder. Edit file name/Edit folder name to change the file or folder name. ...
-
Page 137: Settings
Settings Access to Phone’s Settings Menu ► Touch Home > > Settings. – or – Touch the status bar and slide it down, and then touch at the upper right of the screen, and then touch Wireless & Networks Settings Wi-Fi Settings The Wi-Fi settings menu lets you turn Wi-Fi on or off, set up and connect to available Wi-Fi networks, and configure advanced Wi-Fi options. -
Page 138: Bluetooth Settings
Bluetooth Settings Your phone’s Bluetooth capabilities let you use wireless headsets, send and receive pictures and files, and more. For details on your phone’s Bluetooth settings, see Bluetooth Settings Menu. Access the Bluetooth Settings Menu ► Touch Home > > Settings > Bluetooth. MaxiMZR Settings MaxiMZR automatically limits the background data connection of certain apps when you are not using them. - Page 139 Limit Mobile Data Usage Warning: The usage displayed is measured by your phone. Your carrier’s data usage accounting may differ and the usage in excess of your data limit plan can result in charges. Data usage limit set in this menu is not guaranteed to prevent additional charges.
-
Page 140: Airplane Mode Settings
Airplane Mode Settings Airplane mode allows you to use many of your phone’s features, such as Gallery, Camera, and Music, when you are on an airplane or in any other area where making or receiving calls or data is prohibited. When you set your phone to Airplane mode, it cannot send or receive any calls or access online information. -
Page 141: Network Operators
WCDMA/GSM(Auto mode): The phone will connect to WCDMA, or GSM. The phone will scan for the appropriate network and will automatically connect to it when it is available. WCDMA only: The phone will connect to WCDMA only. GSM only: The phone will connect to GSM only. Access Point Names To add an access point name: Touch Home... -
Page 142: Roaming Settings
Roaming Settings Roaming is the ability to make or receive calls and access data services when you are off the home network. Roaming on Other Networks When you are roaming on other networks, your call quality and security will be similar to the quality you receive when making calls on the home network. -
Page 143: Vibrate Pattern
To assign a ringtone: Touch Home > > Settings > Sound > Phone ringtone. Select a ringtone from the available list. – or – Touch the Add icon at the top of the screen and select a music track from the available list. -
Page 144: Default Notification Sound
Audible tone to beep when notification is on the notification bar. Vibrate to vibrate when notification is on the notification bar. Blink LED to blink the LED indicator when notification is on the notification bar. 3. If you see a message, read it and touch OK. 4. -
Page 145: Display Settings
Hearing Aid Use your hearing aid device effectively. 1. Touch Home > > Settings > Sound. 2. Select the Hearing aid check box. Display Settings Adjusting your phone’s display settings not only helps you see what you want, it can also help increase battery life. -
Page 146: Key Backlight
Daydream When Daydream is on, your phone displays photos, colors, and more while it is charging or docked. 1. Touch Home > > Settings > Display > Daydream. 2. Touch the on/off slider to turn Daydream on. 3. Choose from the following options: ... -
Page 147: Storage Settings
1. Touch Home > > Settings > Key backlight. 2. Select a delay time. Display Battery Percentage This feature allows you to display the battery percentage next to the battery icon at the top right of your screen. 1. Touch Home >... -
Page 148: Battery Settings
Erase Phone Storage To delete all the data in the internal user storage: 1. Touch Home > > Settings > Storage. 2. Touch User storage > Erase phone storage > Erase > Erase everything. Note: The deleted data CANNOT be retrieved. Primary Storage You can switch the designated storage area of your phone between the phone and SD card. -
Page 149: Apps Settings
Camera (PTP): Connects the phone as a camera and transfers pictures using a camera software, and also transfers any files on the computer that do not support MTP. Charge only: Charges the battery. Mass storage: Lets you transfer data files on the SD card to the PC. While connected, your phone is mounted as a disk drive. -
Page 150: Lock Screen Settings
Read the message displayed and touch Agree to enable GPS satellites. Read the second message displayed and touch Agree to enable Wi-Fi & mobile network location. Lock Screen Settings The lock screen settings let you set your method for unlocking your phone, customize lock screen options, and enter your owner information to be displayed on the lock screen. - Page 151 Read a message and touch Continue. Using the front-facing camera, adjust the phone so that your face fits in the area outlined with dots on the screen. The message “Face captured.” appears when the Face Unlock set up was successful. Touch Continue. You will be prompted to set up a backup lock.
-
Page 152: Improve Face Matching
Enter a password and touch Continue. Enter your password again and touch OK to confirm it. Important: To protect your phone and data from unauthorized access, it is recommended that you use the screen unlock password (highest security). It is also recommended that you frequently change your password to ensure the safety of your phone and personal data. -
Page 153: Lock Screen Widgets
Touch Home > > Settings > Lock screen. Select the Power button instantly locks check box. Owner Information Display the text on the lock screen. Touch Home > > Settings > Lock screen > Owner info. Type the text to display on the lock screen. The text will be displayed on the lock screen when the Show owner info on lock screen check box is selected except when any battery information is displayed on the same area. -
Page 154: Security Settings
Touch the widget you want to add. You can add one widget to each page. Tip: You can add up to five widgets to your lock screen. To reorder locations, drag the widgets panel down to expand it, touch and hold a widget, and then drag it to a new location you want. -
Page 155: Device Administration
1. Touch Home > > Settings > Security. 2. Clear the Make passwords visible check box. Device Administration You can disable the authority to be a device administrator of certain applications. If disabled, you will typically lose some functionality in those applications, such as the ability to sync new email or calendar events to your phone. -
Page 156: Personal Dictionary
This menu also provides the settings when using voice function. See Text-to-Speech Settings Voice Search. Language The Language settings menu lets you select an onscreen language and add custom words to your phone’s user dictionary. 1. Touch Home > > Settings > Language & input > Language. 中文... - Page 157 Sound on keypress: Select to activate a clicking sound when a key is touched. Popup on keypress: Select to display a larger image of the key above it when you touch it. Voice input key: Touch to select where the voice input key is displayed from On main keyboard, On symbols keyboard, or Off.
- Page 158 Google Voice Typing Settings The Google voice typing settings menu lets you change the input languages and block offensive words. 1. Touch Home > > Settings > Language & input, and then check the Google voice typing check box. 2. Touch next to Google voice typing to configure its settings: ...
-
Page 159: Pointer Speed
3. Touch Speech rate and select a speed. 4. Touch Listen to an example to play a short demonstration of the set speech synthesis. Pointer Speed You can change the pointer speed. 1. Touch Home > > Settings > Language & input > Language > Pointer speed. 2. -
Page 160: Accounts Settings
1. Touch Home > > Settings > Backup & reset. 2. Select the Automatic restore check box. Collect Diagnostics You can use diagnostic data for troubleshooting. 1. Touch Home > > Settings > Backup & reset. 2. Touch Collect Diagnostics. 3. -
Page 161: System Settings
Manage Existing Accounts 1. Touch Home > > Settings. 2. Select an account type, such as Corporate, Google, and Email. 3. Manage the settings or select an account. Available settings menus vary according to the account type. Select a check box next to the item to sync. ... -
Page 162: Magnification Gestures
Note: You can also enable your TTY (teletypewriter, also known as a TDD or Text Telephone) settings. See Mode. SERVICES Under SERVICES, the list of accessibility-related applications is provided. Touch Home > > Settings > Accessibility. Touch an application and configure its settings. TalkBack By default, the TalkBack application comes preinstalled on your phone. -
Page 163: About Phone
1. Touch Home > > Settings > Accessibility. 2. Select the Power button ends call check box. Auto-Rotate Screen Automatically change the orientation of some onscreen content when the phone is rotated. This option can be set from Home > >... -
Page 164: System Updates
System updates From time to time, updates may become available for your phone. You can download and apply updates through the System updates menu. ► Touch Home > > Settings > About phone > System updates. Settings... -
Page 165: Notes
● All features, functionality and other specifications, as well as the information contained in this guide are based upon the latest available information and are believed to be accurate at the time of issuing. Kyocera Communications, Inc. reserves the right to change or modify any information or specifications without notice or obligation. -
Page 166: Important Safety Information
Note: For the best care of your phone, only Kyocera-authorized personnel should service your phone and accessories. Failure to do so may be dangerous and void your warranty. -
Page 167: Following Safety Guidelines
Following Safety Guidelines To operate your phone safely and efficiently, always follow any special regulations in a given area. Turn your phone off in areas where use is forbidden or when it may cause interference or danger. Medical Devices If you have a medical device, including an implantable medical device such as a pacemaker or defibrillator, consult your healthcare provider and the device manufacturer’s directions before using this mobile phone. -
Page 168: Turning Off Your Phone In Dangerous Areas
Waterproof Capability Your Hydro LIFE is waterproof and meets IPX5 and IPX7 standards, immersible for up to 30 minutes at a depth not exceeding one meter (about 3.28 feet). Exposing your phone to water outside these limits or not following the precautions can result in water damage. -
Page 169: Charging
● Do not spray or immerse your phone in liquids other than fresh water or tap water. ● Do not expose your phone to water heated in excess of 104°F (40°C), or to liquids other than water, such as detergent, beverages, or chlorinated or treated water. Should your phone be accidentally exposed to other liquids, rinse the phone gently in clean fresh water. -
Page 170: Using Your Phone With A Hearing Aid Device
Phones that have been rated have a label located on the box. Your Hydro LIFE has an M3 and a T3 rating. These ratings are not guarantees. Results will vary depending on the user’s hearing device and the individual’s type and degree of hearing loss. -
Page 171: Getting The Best Hearing Device Experience With Your Phone
● Any combined rating equal to or greater than six offers excellent use. ● Any combined rating equal to five is considered normal use. ● Any combined rating equal to four is considered usable. Thus, if you pair an M3 hearing aid with an M3 phone, you will have a combined rating of six for “excellent use.”... -
Page 172: Charging
● Keep the metal contacts on top of the battery clean. ● Battery usage by children should be supervised. Charging ● In order to avoid damage, charge the battery only in temperatures that range from 32° F to 113°(0° C to 45° C). ●... -
Page 173: Radio Frequency (Rf) Energy
● Do not handle a damaged or leaking Li-Ion battery as you can be burned. ● For safe disposal options of your Li-Ion batteries, contact your nearest authorized service center. Special Note: Be sure to dispose of your battery properly. In some areas, the disposal of batteries in household or business trash may be prohibited. -
Page 174: Specific Absorption Rates (Sar) For Wireless Phones
As stated above, variations in SAR values between different model phones do not mean variations in safety. SAR values at or below the federal standard of 1.6 W/kg are considered safe for use by the public. The highest reported SAR values of the Hydro LIFE are: Head: 1.02 W/kg Body-worn: 0.69W/kg Hotspot: 0.82 W/kg... -
Page 175: Owner's Record
The model number, regulatory number, and serial number are located on a nameplate inside the battery compartment. Record the serial number in the space provided below. This will be helpful if you need to contact us about your phone in the future. Model: Hydro LIFE (C6530N) Serial No.: Important Safety Information... -
Page 176: Copyright Information
Morpho, Inc. "QuickPanorama®" is a registered trademark of Morpho, Inc. The Bluetooth® word mark and logos are registered trademarks owned by Bluetooth SIG, Inc. and any use of such marks by Kyocera Corporation is under license. Other trademarks and trade names are those of their respective owners. -
Page 177: Index
Index Accessibility, 153 Send, 121 Accessibility Settings Settings menu, 119 Auto-rotate screen, 154 Turn on or off, 118 Large text, 153 Unpair, 120 Power button ends call, 154 Calculator, 114 Speak passwords, 154 Calendar, 106 TalkBack, 153 Add an event, 106 Text-to-speech output, 154 Edit events, 109 Touch &... - Page 178 Set an Alarm, 111 Manage inbox, 53 Conference calling, 33 View and reply, 53 Connectivity Settings, 139 Emergency Call, 26 Contacts, 39 Enhanced 911 (E911), 26 Add a contact, 41 Entertainment, 66 Add a group contact, 44 Facebook, 63 Delete single or multiple contacts, 44 Factory Data Reset, 151 Display, 39 File Manager, 126...
- Page 179 Important Safety Information, 157 Navigation, 70 In-Call Options, 32 Notifications, 18 Incoming Calls Notification icons, 19 Answer, 30 Phone Mute the ringtone, 30 Information, 155 Reject, 30 Overview, 1 Reject and send a text message, 30 Restart, 7 Internet Calling, 29 Turn off, 7 Keyboard Turn on, 7...
- Page 180 Improve face matching, 143 Status Bar, 18 Liveness check, 143 Status icons, 18 Owner information, 144 Storage Settings, 138 Password, 142 Erase phone storage, 139 Pattern, 142 Memory information, 138 PIN, 142 Primary storage, 139 Power button instantly locks, 143 System Settings, 152 Security Settings System updates, 155...
- Page 181 Volume, 133 MetroWEB Button, 2 Bookmarks, 86 VPN (Virtual Private Networks), 79 Launch, 80 Add a connection, 79 Menu, 82 Connect to or disconnect from, 80 Offline reading, 86 Install security certificates, 79 Settings, 83 Prepare for a connection, 79 Navigation, 81 Wallpaper, 16, 136 Text selection, 82...
Need help?
Do you have a question about the Hydro Life and is the answer not in the manual?
Questions and answers