
Related Manuals for Nikon Coolpix S02


Summary of Contents for Nikon Coolpix S02
- Page 1 Table of Contents DIGITAL CAMERA For Your Safety Prepare Shoot Reference Manual View Connect The Setup Menu Technical Notes Index...
- Page 2 Thank you for your purchase of a Nikon COOLPIX S02 digital camera. To get the most from your Nikon product, be sure to read “For Your Safety” (A iii–iv) and all other instructions thoroughly and keep them where they will be read by all who use the camera.
-
Page 3: Table Of Contents
Table of Contents For Your Safety............iii Touch Shooting.............. 25 Notices ..............v Special Effects..............27 Prepare ..............1 Autofocus Mode............. 28 Parts of the Camera ..........5 Movie Options ..............29 Using the Touch Screen .......... 6 Opening with Normal-Speed or HS Footage..32 Adjusting Camera Settings........ - Page 4 Connect Technical Notes Copying Pictures to a Computer ......52 File Names ..............75 Installing ViewNX 2 ............52 Caring for the Camera: Cautions......76 Using ViewNX 2: Downloading Pictures ....53 Cleaning and Storage..........79 Printing Photographs..........54 Troubleshooting ............80 Print Orders (DPOF) ..........57 Error Messages............85 Viewing Pictures on TV .........59 Specifications ............87 Index ...............91...
-
Page 5: For Your Safety
For Your Safety To prevent damage to your Nikon product or injury to yourself or to others, read the following safety precautions in their entirety before using this equipment. Keep these safety instructions where all those who use the product will read them. - Page 6 Sunlight focused by the input and output jacks, use only the cables provided or lens could cause fire. sold by Nikon for the purpose to maintain compliance Follow the directions of airline and hospital with product regulations.
-
Page 7: Notices
• No part of the manuals included with this product may be reproduced, transmitted, • Nikon will not be held liable for any damages resulting from the use of this product. • While every effort has been made to ensure that the information in these manuals is accurate transcribed, stored in a retrieval system, or translated into any language in any form, by any means, without Nikon's prior written permission. - Page 8 Notice for Customers in Canada CAN ICES-3 B / NMB-3 B Notices for Customers in Europe This symbol indicates that electrical and electronic equipment is to be collected separately. The following apply only to users in European countries: • This product is designated for separate collection at an appropriate collection point. Do not dispose of as household waste. •...
- Page 9 Use Only Nikon Brand Electronic Accessories Nikon cameras are designed to the highest standards and include complex electronic circuitry. Only Nikon brand electronic accessories (including charging AC adapters) certified by Nikon specifically for use with this Nikon digital camera are engineered and proven to operate within the operational and safety requirements of this electronic circuitry.
- Page 10 Nikon will not be held liable for damages or lost profits that may Visit these sites to keep up-to-date with the latest product result from product malfunction.
-
Page 11: Prepare
Prepare Attach the strap. If a plug adapter is included, attach it securely to the charging AC adapter; note that once the adapter is attached, attempting to forcibly remove the plug adapter could damage the product. Shape of plug adapter varies with country or region of purchase. - Page 12 Charge the camera. The power-on lamp slowly Use the supplied charging AC adapter when charging the flashes orange during charging and turns off when charging is camera for the first time. complete (charging a fully- 2.1 Turn the camera off and connect the USB cable to the exhausted battery takes about 2 hours and 50 minutes).
- Page 13 Ready the camera for shooting. 3.1 Turn the camera on. 3.2 Tap the desired language. 3.3 Set the clock. To turn daylight saving time on or off, tap p. When prompted to choose whether to set the camera clock, tap Yes. Tap C or The clock is powered by the D to highlight your home time zone camera’s built-in battery.
- Page 14 3.4 Choose a design for the HOME display. Tap to highlight a HOME design and tap I to select. The camera exits to the HOME display when setup is complete. The HOME display...A 7 Prepare...
-
Page 15: Parts Of The Camera
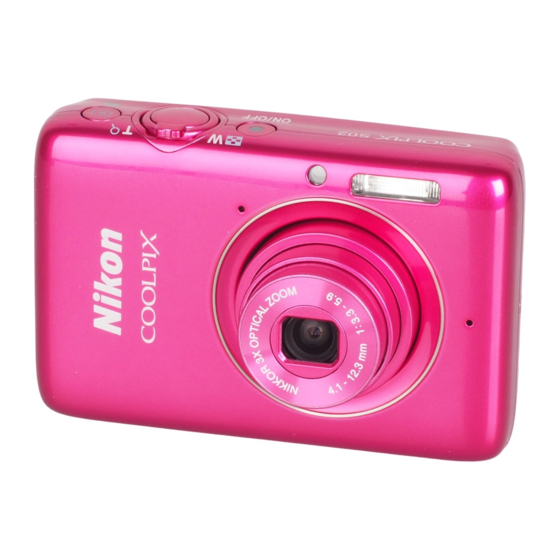
Parts of the Camera Power switch/power-on lamp ..........2 Monitor/touch screen ............6 Shutter-release button............9 Speaker ................36, 46 c (playback) button............35 Connector cover ............2, 53, 59 Zoom control...............9, 39, 40 HOME button ................7 Eyelet for camera strap ............1 Reset button.............. -
Page 16: Using The Touch Screen
Using the Touch Screen The following operations can be performed by touching or sliding a finger over the monitor: Tap: Tap the monitor. Touch and hold: Touch the monitor and leave your finger in place for a short period. Drag: Drag a finger over the The touch screen: Do not apply excessive force or touch the monitor. -
Page 17: Adjusting Camera Settings
Adjusting Camera Settings Use the HOME display when adjusting camera settings or switching between photo, movie, and playback modes. To view the HOME display, touch the W button. Shooting Play Take photos (A 8). View pictures (A 35). Set up Movie Adjust basic camera settings (A 61). -
Page 18: Shoot
Shoot View Connect The Setup Menu Technical Notes Shoot Point-and-Shoot Photography and Movie Recording Still Pictures Touch the W button. Battery level and memory remaining.......A 10 The shutter-release button........A 9 The self-timer ....A 19 Tap Shooting. The flash......A 20 Scene selection....A 22 Exposure compensation ............A 23... - Page 19 Shoot View Connect The Setup Menu Technical Notes Ready the camera and frame the shot. Holding the camera: Be careful not to obstruct the lens, flash, AF- assist illuminator, or microphone. When framing pictures in “tall” (portrait) orientation, hold the camera so that the flash is above the lens.
-
Page 20: The Shooting Mode Display
Shoot View Connect The Setup Menu Technical Notes The Shooting Mode Display Scene..................22 w Flash indicator ............20 Macro zoom range..............14 Zoom indicator ..............9, 13 O “Date not set” indicator .......... 11, 61 x Travel destination ............66 e Battery level ..............11 ij Self-timer ..............19 b Exposure compensation..........23 u Hand-held night scene..........22... - Page 21 Shoot View Connect The Setup Menu Technical Notes The indicators displayed vary with camera settings and Motion detection: If the camera detects subject movement shooting conditions. Some indicators only appear for a few or camera shake, it will raise ISO sensitivity for faster shutter seconds after the camera is turned on or an operation is speeds and the shutter speed and aperture will be displayed in performed;...
-
Page 22: The Shooting Menu
Shoot View Connect The Setup Menu Technical Notes The Shooting Menu The shooting menu can be displayed by touching the W button when the camera is in shooting mode and tapping C. Tap B or C to display the desired item and tap to view options. Release the shutter ten seconds after the shutter-release button is A 19 Self-timer... -
Page 23: Taking Photographs
Shoot View Connect The Setup Menu Technical Notes ❚❚ Taking Photographs If you hold the zoom control to g Autofocus: If faces are detected, Optical Digital after zooming in to the maximum the camera will focus on the face zoom zoom optical zoom position, you can closest to the camera. - Page 24 Shoot View Connect The Setup Menu Technical Notes At the zoom position where G and the zoom indicator light in green, the camera can focus on subjects as close as about 20 cm ( 8 in.) or farther from the lens. At a wider-angle zoom position than that indicated by G, it can focus on subjects as close as about 5 cm (2 in.) or farther from the lens.
-
Page 25: Movies
Shoot View Connect The Setup Menu Technical Notes Movies Touch the W button. The self-timer ....A 19 Exposure compensation ............A 23 Touch shooting .....A 25 Special effects ....A 27 Tap Movie. Autofocus mode ...A 28 Movie type and frame size ............A 29 More on movies ....A 18 HS movies ......A 30... -
Page 26: The Movie Mode Display
Shoot View Connect The Setup Menu Technical Notes The Movie Mode Display Movie mode indicator............15 Zoom indicator ............... 15, 18 O “Date not set” indicator .......... 11, 61 x Travel destination ............66 e Battery level ..............11 ij Self-timer ..............19 b Exposure compensation..........23 “My Menu”... -
Page 27: The Movie Menu
Shoot View Connect The Setup Menu Technical Notes The Movie Menu The movie menu can be displayed by touching the W button when the camera is in movie mode and tapping C. Tap B or C to display the desired item and tap to view options. Start recording about ten seconds after the shutter-release button A 19 Self-timer... -
Page 28: Recording Movies
Shoot View Connect The Setup Menu Technical Notes ❚❚ Recording Movies The display shows the approximate amount of recording The temperature of the camera may rise if it is used for time available; but note that the actual length that can be extended periods or in hot environments. -
Page 29: More On Photography And Movie Recording
Shoot View Connect The Setup Menu Technical Notes More on Photography and Movie Recording The Self-Timer Tap: W ➜ C ➜ Self-timer Mode: A or D Shutter release is delayed until about ten seconds after the shutter-release button is pressed. Tap Self-timer. -
Page 30: Choosing A Flash Mode
Shoot View Connect The Setup Menu Technical Notes Choosing a Flash Mode Tap: W ➜ C ➜ Flash mode Mode: A Choose a flash mode as follows: Tap Flash mode. The flash indicator shows flash status when the shutter-release button is pressed halfway. Tap an option. - Page 31 Shoot View Connect The Setup Menu Technical Notes The flash will not fire when Hand-held night scene or Backlit scene HDR is chosen for Scene selection (A 22). Depending on shooting conditions, the flash may sometimes not fire in Scene auto selector mode. Red-eye reduction: If the camera detects red-eye, it will process pictures as they are saved to reduce its effects, slightly increasing recording times.
-
Page 32: Scene Selection
Shoot View Connect The Setup Menu Technical Notes Scene Selection Tap: W ➜ C ➜ Scene selection Mode: A Follow the steps below to match settings to the subject or situation. Tap Scene selection. In Hand-held night scene and Backlit scene HDR modes, the flash will not fire, special effects and digital zoom can not be used, and edges may... -
Page 33: Exposure Compensation
Shoot View Connect The Setup Menu Technical Notes Exposure Compensation Tap: W ➜ C ➜ Exposure comp. Mode: A or D Adjust exposure to make pictures lighter or darker. Tap Exposure comp. Adjust exposure. Tap U to make pictures Tap U or V to adjust exposure. brighter, V to make pictures darker. -
Page 34: Image Size
Shoot View Connect The Setup Menu Technical Notes Image Size Tap: W ➜ C ➜ C ➜ Image mode Mode: A Choose the size (measured in pixels) of photographs taken with the camera. Tap Image mode. The approximate number of pictures that can be recorded at current settings is shown in the shooting display (A 10). -
Page 35: Touch Shooting
Shoot View Connect The Setup Menu Technical Notes Touch Shooting Tap: W ➜ C ➜ C ➜ Touch shooting Mode: A or D Choose whether photos can be taken and movies recorded by tapping the display. Tap Touch shooting. Tapping too hard may move the camera, blurring pictures. - Page 36 Shoot View Connect The Setup Menu Technical Notes If a focus area (X) appears when you tap the display, to shoot you must either tap inside the focus area or, if faces are detected, inside any of the square borders indicating faces.
-
Page 37: Special Effects
Shoot View Connect The Setup Menu Technical Notes Special Effects Tap: W ➜ C ➜ C (A only) ➜ Special effects Mode: A or D Record photos or movies with special effects. Tap Special effects. Displaying the Special effects option requires two taps of the C button in shooting mode, one tap in movie mode. -
Page 38: Autofocus Mode
Shoot View Connect The Setup Menu Technical Notes Autofocus Mode Tap: W ➜ C ➜ Autofocus mode Mode: D Choose how the camera focuses in movie mode. Tap Autofocus mode. Tap an option. Select W Single AF to prevent sounds made by the Choose if the distance to the subject will not change very W Single AF (default) camera focusing being recorded... -
Page 39: Movie Options
Shoot View Connect The Setup Menu Technical Notes Movie Options Tap: W ➜ C ➜ C ➜ Movie options Mode: D Choose the frame size and type of movie recorded with the camera. Tap Movie options. Shooting movies...A 15 HS movies ......A 30 Opening HS movies with normal or HS footage ..A 32 Tap an option. - Page 40 Shoot View Connect The Setup Menu Technical Notes ❚❚ Filming HS Movies To film HS movies: Select an HS movie mode. The camera automatically In the Movie options menu (A 29), select HS 720/2× or switches to recording normal- speed footage when the HS 1080/0.5×.
- Page 41 Shoot View Connect The Setup Menu Technical Notes HS 720/2× Versus HS 1080/0.5× HS footage shot using HS 720/2× plays back in slow motion, taking twice as long to play back as it does to record. Shooting 30 s Playback 1 minute Slow-motion playback The camera can record up to 30 seconds of HS footage, which...
-
Page 42: Opening With Normal-Speed Or Hs Footage
Shoot View Connect The Setup Menu Technical Notes Opening with Normal-Speed or HS Footage Tap: W ➜ C ➜ C ➜ Open with HS footage Mode: D To choose whether HS movies open with HS or normal-speed footage: Tap Open with HS footage. Movie options ....A 29 HS movies ......A 30 Tap an option. -
Page 43: Customizing My Menu
Shoot View Connect The Setup Menu Technical Notes Customizing My Menu Mode: A or D Tap: “My Menu” icon For quick access, a frequently-used setting can be assigned to “My Menu” icon in the lower left corner of the shooting display as described below. The functions for shooting and movie modes are assigned separately from the shooting and movie menus. - Page 44 Shoot View Connect The Setup Menu Technical Notes Tap the item you wish to assign to “My Menu”. ❚❚ Using My Menu Tap the “My Menu” icon at the bottom left corner of the display. Tap an option. More on Photography and Movie Recording...
-
Page 45: View
Shoot View Connect The Setup Menu Technical Notes View Basic Playback Viewing Photographs Full Frame To start playback, press the c button. Drag Viewing movies.....A 36 pictures left or right or tap C or D to view Playback zoom....A 39 other images, or touch and hold C or D to Viewing multiple images ........A 40... -
Page 46: Viewing Movies
Shoot View Connect The Setup Menu Technical Notes Viewing Movies To view movies, press c to view pictures and then scroll through images as described on page 35 until you find a picture marked with a R icon. Tap R to start playback. Movie Playback Controls Tapping the monitor displays the following controls:... -
Page 47: The Playback Display
Shoot View Connect The Setup Menu Technical Notes The Playback Display Date/time of recording............64 P Favorite ..............41, 43 a Print order icon..............57 e Battery level ..............11 w Image mode..............24 e Movie options .............29 p Filter effect .................47 Movie icon................36 Frame number/total number of images Movie length File name.................75... -
Page 48: The Playback Menu
Shoot View Connect The Setup Menu Technical Notes The Playback Menu The playback menu can be displayed by touching the W button during playback and tapping C. Tap B or C to display the desired item and tap to view options. A 51 Delete Delete multiple pictures. -
Page 49: More On Playback
Shoot View Connect The Setup Menu Technical Notes More on Playback Playback Zoom To zoom in on a picture in full-frame Playback zoom is not available playback, double-tap the image or select with movies. i (g) with the zoom control. If faces are detected, zoom will be centered on the closest Use the zoom control to zoom in and out. -
Page 50: Viewing Multiple Images (Thumbnail Playback)
Shoot View Connect The Setup Menu Technical Notes Viewing Multiple Images (Thumbnail Playback) To view pictures in a thumbnail list, select h (f) with the zoom control when a picture is displayed full frame. Use the zoom control to choose the number of pictures displayed. -
Page 51: Adding Pictures To Favorites
Shoot View Connect The Setup Menu Technical Notes Adding Pictures to Favorites Add pictures to favorites for easy viewing (A 43, 45) and to protect them from accidental deletion. ❚❚ Adding a Picture to Favorites To add individual pictures to favorites during playback: Display the picture. - Page 52 Shoot View Connect The Setup Menu Technical Notes ❚❚ Adding Multiple Pictures to Favorites Tap: W ➜ C ➜ Favorites Mode: B Use the Favorites option in the playback menu to add multiple pictures to favorites. Tap Favorites. Adding the current picture to favorites.....A 41 Viewing favorites ..A 43 To exit without adding...
-
Page 53: Viewing Favorites
Shoot View Connect The Setup Menu Technical Notes Viewing Favorites To hide images not in the “favorites” list, Adding pictures to tap h. favorites........A 41 To make all pictures available for viewing, tap C. View favorites More on Playback... -
Page 54: Viewing Pictures By Date
Shoot View Connect The Setup Menu Technical Notes Viewing Pictures by Date Follow the steps below to restrict playback to pictures taken on a selected date. During playback, tap C. Only the last 30 days of shooting are listed individually; other images are listed under Others. -
Page 55: Slide Shows
Shoot View Connect The Setup Menu Technical Notes Slide Shows Tap: W ➜ C ➜ Slide show Mode: B View pictures as a slide show. Pictures will be displayed one at a time in the order recorded. Tap Slide show. Movie playback is not available during slide shows. - Page 56 Shoot View Connect The Setup Menu Technical Notes Slide Show Playback Controls Tapping the monitor displays the following controls: Pause: Tap to pause the show. Resume: Tap to resume playback. Skip back/skip ahead: Tap to skip back or ahead one frame. Volume: Tap to adjust volume.
-
Page 57: Filter Effects
Shoot View Connect The Setup Menu Technical Notes Filter Effects Tap: W ➜ C ➜ Filter effects Mode: B Apply filter effects to create retouched copies of pictures during playback: Tap Filter effects. Filter effects can not be applied to movies or to copies created with filter effects. - Page 58 Shoot View Connect The Setup Menu Technical Notes Select a filter. To exit without creating a Tap a filter and tap I. retouched copy, tap J. Toy camera effect Vignetting and color are adjusted for a toy camera effect. Apply a soft-filter effect from the center of the image outwards and in the vicinity of faces detected by the Soft camera.
-
Page 59: Deleting Pictures
Shoot View Connect The Setup Menu Technical Notes Deleting Pictures Delete pictures as described below. Note that once deleted, pictures can not be recovered. ❚❚ Deleting Individual Pictures To delete individual pictures during playback: Display the picture. Deleting multiple Display the picture you want to delete. pictures........A 51 Favorites can not be deleted. - Page 60 Shoot View Connect The Setup Menu Technical Notes Delete the picture. To exit without deleting the A confirmation dialog will be displayed; picture, tap No. tap Yes. More on Playback...
- Page 61 Shoot View Connect The Setup Menu Technical Notes ❚❚ Deleting Multiple Pictures Tap: W ➜ C ➜ Delete Mode: B Use the Delete option in the playback menu to delete multiple pictures. Tap Delete. Deleting individual pictures........A 49 Some time may be required if the number of pictures affected is very large.
-
Page 62: Connect
Installing ViewNX 2 Install ViewNX 2 to upload, view, edit, and share photos and movies. An Internet connection is required. For system requirements and other information, see the Nikon website for your region. Your Imaging Toolbox Download the ViewNX 2 installer. -
Page 63: Using Viewnx 2: Downloading Pictures
Under Import pictures and videos, click Change program. When prompted, select Import File using Nikon Transfer 2 and click Start Nikon Transfer 2 component of ViewNX 2. Double-click Import File. Click Start Transfer. To launch ViewNX 2 manually, double-click the ViewNX 2 Pictures will be copied to the computer. -
Page 64: Printing Photographs
Shoot View Connect The Setup Menu Technical Notes Printing Photographs Selected photos can be printed on a PictBridge printer connected directly to the camera. ❚❚ Connecting the Camera Print orders......A 57 Turn the camera off. Ensure that the camera is fully Connect the USB cable. - Page 65 Shoot View Connect The Setup Menu Technical Notes ❚❚ Printing Multiple Pictures Tap F. Choose a page size. Tap an option. • Print selection: Tap the B and C arrows on the right to display pictures and tap a picture to select, then tap the B and C arrows on the left to choose the number of copies (up to nine).
- Page 66 Shoot View Connect The Setup Menu Technical Notes • Print all images: Tap Start print to print one copy of all pictures in memory. • DPOF printing: Tap Start print to print the pictures in the print order created with the Print order option in the playback menu. To view the print order, tap View images.
-
Page 67: Print Orders (Dpof)
Shoot View Connect The Setup Menu Technical Notes Print Orders (DPOF) Tap: W ➜ C ➜ C ➜ Print order Mode: B Create a digital “print order” for PictBridge printers and for devices that support DPOF (Digital Print Order Format). Tap Print order. - Page 68 Shoot View Connect The Setup Menu Technical Notes Select imprint options. The date is the date recorded Tap the following options to select or deselect: when the picture was taken. The Date and Info options are reset • Date: Print the date of recording on all pictures. each time the print order menu is •...
-
Page 69: Viewing Pictures On Tv
Shoot View Connect The Setup Menu Technical Notes Viewing Pictures on TV To view pictures on a TV, connect the camera using an optional EG-CP16 audio/video cable or a third-party HDMI cable. Turn the camera off and connect the cable. Ensure that the connectors are •... -
Page 70: Turn The Camera On
Shoot View Connect The Setup Menu Technical Notes Tune the TV to the video- or HDMI-input channel. If pictures are not displayed on the TV when the camera is Turn the camera on. connected via an A/V cable, check Press and hold the c button to turn the that the correct option is selected camera on. -
Page 71: The Setup Menu
Shoot View Connect The Setup Menu Technical Notes The Setup Menu Use the setup menu to adjust basic camera settings. To display the setup menu, touch the W button and tap Set up. Tap B or C to display the desired item and tap to view options. -
Page 72: Choosing A Home Design
Shoot View Connect The Setup Menu Technical Notes Choosing a HOME Design Tap: W ➜ z Set up ➜ Choose HOME display Choose the design of the HOME display. Tap Choose HOME display. To exit without changing settings, tap J. Select a design. -
Page 73: Welcome Screen
Shoot View Connect The Setup Menu Technical Notes Welcome Screen Tap: W ➜ z Set up ➜ Welcome screen Choose whether the camera displays a welcome message when turned on. Tap Welcome screen. To exit without changing settings, tap J. Select an option. -
Page 74: Time Zone And Date
Shoot View Connect The Setup Menu Technical Notes Time Zone and Date Tap: W ➜ z Set up ➜ Time zone and date Set the camera clock. Tap Time zone and date. To exit without changing settings, tap J. Tap an option. Tap items and tap A or B to edit. - Page 75 Shoot View Connect The Setup Menu Technical Notes ❚❚ Choosing a Time Zone Tap Time zone. To exit without changing settings, tap J. Tap o. Tap o to choose your home time zone (to choose the time zone for a travel destination, tap x Travel destination before tapping o).
- Page 76 Shoot View Connect The Setup Menu Technical Notes ❚❚ Switching Between Home and Travel Destination Time Zones Tap Time zone. To exit without changing settings, tap J. Tap w Home time zone or x Travel destination. To change the time for the selected item, tap o (A 65).
-
Page 77: Sound Settings
Shoot View Connect The Setup Menu Technical Notes Sound Settings Tap: W ➜ z Set up ➜ Sound settings Choose whether the camera sounds a beep when an operation is performed. Tap Sound settings. If On is selected, a beep will sound when the shutter is released, the monitor is touched, the camera focuses, or the power... -
Page 78: Formatting
Shoot View Connect The Setup Menu Technical Notes Formatting Tap: W ➜ z Set up ➜ Format memory Format camera memory. Note that this permanently deletes all data in memory. Copy any pictures or other data you wish to keep to a computer before proceeding (A 52). Tap Format memory. -
Page 79: Choosing A Language
Shoot View Connect The Setup Menu Technical Notes Choosing a Language Tap: W ➜ z Set up ➜ Language Choose a language for camera menus and displays. Tap Language. To exit without changing settings, tap J. Tap a language. Choosing a Language... -
Page 80: Video Mode
Shoot View Connect The Setup Menu Technical Notes Video Mode Tap: W ➜ z Set up ➜ Video mode Before connecting the camera to a TV, set the camera to the correct video standard. Tap Video mode. To exit without changing settings, tap J. -
Page 81: Computer Charging
Shoot View Connect The Setup Menu Technical Notes Computer Charging Tap: W ➜ z Set up ➜ Charge by computer Choose whether the camera charges when connected to a computer (A 53). Tap Charge by computer. To exit without changing settings, tap J. - Page 82 Shoot View Connect The Setup Menu Technical Notes The camera will turn on automatically and begin charging when connected to a computer. Charging will end if the camera is turned off. Turn the camera off before connecting or disconnecting the USB cable.
-
Page 83: Restoring Default Settings
Shoot View Connect The Setup Menu Technical Notes Restoring Default Settings Tap: W ➜ z Set up ➜ Reset all To restore camera settings to their default The camera clock, language values, tap Reset all. A confirmation dialog selection, and other basic settings are not affected. -
Page 84: Firmware Version
Shoot View Connect The Setup Menu Technical Notes Firmware Version Tap: W ➜ z Set up ➜ Firmware version View the camera firmware version. Tap J to exit. Firmware Version... -
Page 85: Technical Notes
(0001–9999) assigned in ascending order by camera Copy created with filter Movie FSCN effects Files are stored in folders created automatically by the camera using names beginning with a three-digit folder number followed by “NIKON” (e.g., “100NIKON”). File Names... -
Page 86: Caring For The Camera: Cautions
The Setup Menu Technical Notes Caring for the Camera: Cautions To ensure continued enjoyment of your Nikon product, observe the precautions listed in this section and in “For Your Safety” (A iii–iv) when storing or using the device. ❚❚ Camera Care... - Page 87 A marked drop in the time the camera retains its charge when used at room temperature indicates that the battery requires replacement. The battery is not user-serviceable but can be replaced, for a fee, by a Nikon-authorized service representative. Caring for the Camera: Cautions...
- Page 88 Contact a Nikon-authorized service representative for The charging AC adapter: Use the EH-70P with compatible devices information on disposing of Nikon cameras with built-in only. Do not attempt to charge the camera with other AC or USB- batteries. Before disposing of the camera, be sure to delete all AC adapters.
-
Page 89: Cleaning And Storage
Shoot View Connect The Setup Menu Technical Notes Cleaning and Storage ❚❚ Cleaning ❚❚ Storage Do not store the camera next to equipment that produces strong Lens: Avoid touching the glass with your fingers. Remove dust or electromagnetic fields (such as televisions or radios) or in lint with a blower (typically a small device with a rubber bulb on locations that are poorly ventilated, subject to humidities over one end, which is pumped to produce a stream of air from the... -
Page 90: Troubleshooting
The Setup Menu Technical Notes Troubleshooting If the camera fails to function as expected, check this list of common problems before consulting your retailer or Nikon representative. ❚❚ Battery/Display/Setup Problem Cause/solution Wait for recording to end. If the problem persists, turn the camera off. If the camera does not —... - Page 91 Shoot View Connect The Setup Menu Technical Notes Problem Cause/solution • The camera is cold. The camera turns off • The camera’s internal temperature is elevated. Wait for the camera to cool. unexpectedly. • The USB cable was disconnected while the camera was connected to a computer or printer.
- Page 92 Shoot View Connect The Setup Menu Technical Notes ❚❚ Shooting Problem Cause/solution • Pictures or menus are displayed: Press the shutter-release button to exit. • The battery is exhausted. 2, 11 • The flash indicator flashes: The flash is charging. No pictures can be taken.
- Page 93 Shoot View Connect The Setup Menu Technical Notes Problem Cause/solution • Off is selected for Sound settings in the setup menu. The shutter is silent. • The camera is in movie mode. • The speaker is covered. The AF-assist illuminator does The AF-assist illuminator may not light depending on shooting conditions or the position of not light.
- Page 94 — • The camera is off. • The camera battery is exhausted. Nikon Transfer 2 does not • The USB cable is not correctly connected or the computer has not detected the camera. start when the camera is • The computer does not satisfy the system requirements for ViewNX 2.
-
Page 95: Error Messages
Shoot View Connect The Setup Menu Technical Notes Error Messages This section provides tips on what to do when the following messages are displayed. Message Cause/solution The camera’s internal temperature is elevated. Wait for the camera to cool. — The camera will turn off to prevent overheating. - Page 96 — again. If the problem persists, press the reset button with a pointed object (A 5). If the System error problem still persists, contact a Nikon-authorized service representative. Tap Resume to continue printing once the problem is resolved. — Printer error: check printer status.
-
Page 97: Specifications
Shoot View Connect The Setup Menu Technical Notes Specifications ❚❚ Nikon COOLPIX S02 Digital Camera Type Compact digital camera 6.7 cm (2.7-in.), approx. 230k-dot touch screen TFT LCD with anti- Monitor Number of effective pixels 13.2 million reflection coating -in. type CMOS; total pixels:... - Page 98 Shoot View Connect The Setup Menu Technical Notes Hi-Speed USB ISO sensitivity (standard Interface ISO 125–1600 output sensitivity) Data transfer protocols MTP, PTP Exposure Video output NTSC, PAL Matrix, center-weighted (at under 2× • Audio video output/digital I/O digital zoom), spot (at 2× digital zoom and Metering mode (USB) I/O terminal...
-
Page 99: Optional Accessories
Recording may end before this limit is reached if camera Specifications subject to change without notice. Nikon will not temperature becomes elevated. be held liable for damages that may result from any errors this manual may contain. -
Page 100: Trademark Information
Portions of this software are copyright © 2013 The FreeType All other trade names mentioned in this manual or the other Project (http://www.freetype.org). All rights reserved. documentation provided with your Nikon product are trademarks or registered trademarks of their respective holders. ❚❚ MIT License (HarfBuzz) Portions of this software are copyright ©... -
Page 101: Index
Shoot View Connect The Setup Menu Technical Notes Index Symbols Charging AC adapter......2 Firmware version ......74 Charging the camera......2 Fisheye..........48 W (HOME) ........7, 62 Choose HOME display.....62 Flash mode..........20 A (photo/shooting) ......8 Close-ups ........14, 22 Focus ............9 B (playback) ........35 Computer ..........52 Focus area ...........11... - Page 102 Reset button......... 5 Touch shooting .........25 Night landscapes ......22 Toy camera effect ......48 Night portraits ........22 Scene auto selector ......22 Nikon Transfer 2........53 Scene selection........22 USB and audio/video Nostalgic sepia ........27 Self-timer ..........19 connector......2, 5, 53, 59 Number of exposures remaining10 Sepia............48...
- Page 103 Shoot View Connect The Setup Menu Technical Notes Video mode ........70 ViewNX 2 ..........52 Vivid color ...........48 Volume ..........36, 46 f (zoom out) ........9 Welcome screen........63 Zoom............9 Zoom control ........9 Zoom in..........9 Zoom out..........9 Index...
- Page 104 No reproduction in any form of this manual, in whole or in part (except for brief quotation in critical articles or reviews), may be made without written authorization from NIKON CORPORATION. SB3H01(11) 6MN26411-01...
Need help?
Do you have a question about the Coolpix S02 and is the answer not in the manual?
Questions and answers