
Subscribe to Our Youtube Channel
Related Manuals for Green Machines 636


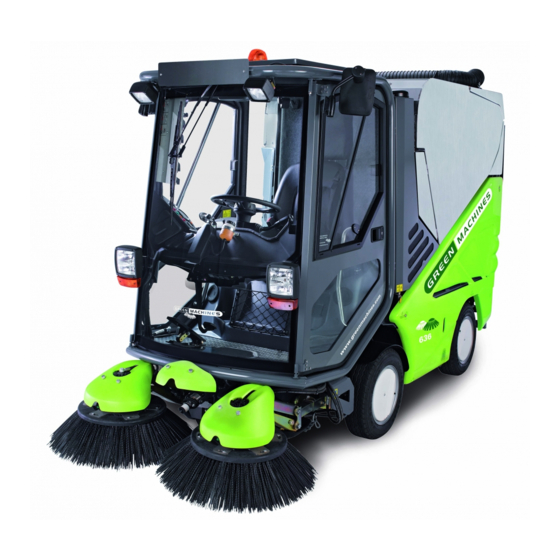
Summary of Contents for Green Machines 636
- Page 1 Air Sweeper Operator Manual ® CloudMaker Technology Vari- track Technology 9006280 Global Rev. 04 (10-2011) *9006280* www.greenmachines.com Home Find... Go To..
- Page 2 Engine exhaust from this product contains chemicals known to the State of California to cause cancer, birth defects, or other reproductive harm. Vari- -track Technology is a US registered and unregistered trademark of Green Machines Company. Specifications and parts are subject to change without notice.
-
Page 3: Table Of Contents
....Post Operation Cleaning ....636 9006280 (10- -11) Home Find... Go To.. - Page 4 ....... . . Machine Dimensions ....636 9006280 (10- -11) Home Find... Go To..
-
Page 5: Safety Precautions
5. Before leaving or servicing machine: - - Stop on level surface. - - Place the drive lever in neutral. - - Set parking brake. - - Turn off machine. - - Remove key from ignition. 636 9006280 (10- -11) Home Find... Go To.. - Page 6 380 mm (15 in) or less from the ground. - - Set parking brake after machine is loaded. - - Block machine tires. - - Tie machine down to truck or trailer. 636 9006280 (2- -08) Home Find... Go To..
- Page 7 SAFETY PRECAUTIONS The following safety labels are mounted on the machine in the locations indicated. If any label becomes damaged or illegible, install a new label in its place. 636 9006280 (2- -08) Home Find... Go To..
- Page 8 SAFETY PRECAUTIONS 636 9006280 (2- -08) Home Find... Go To..
-
Page 9: Operation
18. Wander hose access door 8. Right brush 19. Hydraulic fluid level indicator 9. CloudMaker (dust suppression) 20. Engine compartment 10. Spray jets (dust suppression) 21. Left brush 11. Rear view camera (Optional) 636 9006280 (2- -09) Home Find... Go To.. -
Page 10: Controls And Instruments
11. Headlight High Beam Indicator 28. Warning Beacon / Audible Alarm Switch 12. Tachometer 29. 4- -Way Warning Light Switch 13. Hour Meter 30. Water Control Knob (Dust Suppression) 14. Wander Hose Switch 636 9006280 (2- -09) Home Find... Go To.. - Page 11 8. Steering Wheel Height Adjustment 3. Brush Pressure Adjustment Knob Handle 4. Water Flow Control Knob 9. Headlight and Multifunctional Switch 5. Accelerator Pedal 10. Windshield Wiper / Washer Switch 6. Brake Pedal 11. Horn Button 636 9006280 (2- -09) Home Find... Go To..
-
Page 12: Symbol Definitions
Oil Pressure Dust Suppression 0 Master Lights Dust Suppression 1 Heater Fan Dust Suppression 2 Rear Fog Lights Water Flow Control Raise / Lower Hopper Wander Hose (Option) Hopper Drain Pressure Washer (Option) 636 9006280 (2- -09) Home Find... Go To.. -
Page 13: Operation Of Controls
Use the Brush levers to adjust the brush path width and edge sweep. HOUR METER The Hour meter displays the number of hours the machine was operated. Use this information to determine machine service intervals. 636 9006280 (2- -09) Home Find... Go To.. -
Page 14: Engine Temperature Gauge
The Turn signal /4- -way warning light indicator illuminates when the turn signals or 4--way The Headlight high beam indicator illuminates warning lights are activated. when the headlight high beams are on. 636 9006280 (2- -09) Home Find... Go To.. -
Page 15: Glow Plug Indicator (Amber)
HOPPER DRAIN SWITCH Use the Hopper drain switch to drain excess water from the hopper. 636 9006280 (2- -09) Home Find... Go To.. -
Page 16: Transit / Work Modes Switch
5 km/h (approximately 3 mph). The brushes lower and begin rotating, the vacuum head lowers, and the vacuum fan begins operating. 636 9006280 (2- -09) Home Find... Go To.. -
Page 17: Vacuum Fan Speed Knob
5--minute intervals per hour. After five boost periods, the vacuum fan speed will be limited to 2300 rpm for the rest of the hour WINDSHIELD DEFROSTER SWITCH Use the Windshield defroster switch to defrost the windshield. 636 9006280 (9- -09) Home Find... Go To.. -
Page 18: Master Light Switch
CAB TEMPERATURE CONTROL KNOB Turn the Cab temperature control knob clockwise to increase the temperature and counterclockwise to decrease the temperature inside the cab when the heater is on. 636 9006280 (2- -09) Home Find... Go To.. -
Page 19: Heater Fan Switch
4- -WAY WARNING LIGHT SWITCH Use the 4- -way warning light switch to operate the 4--way warning lights. The warning beacon can be swung back behind the cab to allow for lower clearances. 636 9006280 (2- -09) Home Find... Go To.. -
Page 20: Water Switch (Dust Suppression)
NOTE: To operate only the CloudMaker and conserve water, turn the water switch to position 1 and the water flow control knob to the minimum flow setting to turn off the water to the brush spray jets. 636 9006280 (2- -09) Home Find... Go To.. -
Page 21: Brush Pressure Adjustment Knob
Pull the Parking brake lever to engage the parking Press the Brake pedal to stop the machine. brake. Slightly lift the Parking brake lever, press the button, and completely lower the lever to disengage the parking brake. 636 9006280 (1- -10) Home Find... Go To.. -
Page 22: Steering Wheel Height Adjustment Handle
Bright Headlights Off: Pull the lever up. Flash Bright Headlights: Pull the lever up, then release. Signals: Push the lever forward for the right signal. Pull the lever back for the left signal. 636 9006280 (2- -09) Home Find... Go To.. -
Page 23: Operator Seat
Move the lever down to unlock the door. NOTE: Doors locked from the inside cannot be unlocked from the outside using a key. Ensure that the door(s) are unlocked before closing the cab door. 636 9006280 (9- -09) Home Find... Go To.. -
Page 24: Brush Information
Brush -- Recommended for areas where there is a heavy build up of debris. The stiffer / thicker bristles provide more aggressive digging action to remove compacted debris from along buildings, curbs, and in corners. 636 9006280 (10- -11) Home Find... Go To.. -
Page 25: Pre--Operation Checklist
- Check safety equipment. - Ensure all panels are secured in place. - Check the fuel level. - Ensure all controls, gauges, and indicators function properly. 636 9006280 (10- -11) Home Find... Go To.. -
Page 26: Starting The Machine
2. Turn the key clockwise until the glow plug indicator comes on, but not far enough to start the engine. Hold the key in this position for 5 seconds, depending on temperature. Colder temperatures require longer time. 636 9006280 (2- -09) Home Find... Go To.. -
Page 27: Turning Off The Machine
2. FOR SAFETY: When using machine, go slow on inclines and slippery surfaces. Maximum rated climb and descent for a full hopper is 9_/20%. 636 9006280 (2- -09) Home Find... Go To.. -
Page 28: Sweeping
Accelerator pedal to begin sweeping. FOR SAFETY: When using machine, go slow on inclines and slippery surfaces. 4. Adjust the brush speed and vacuum fan speed knobs and the brush pressure adjustment knob for sweeping conditions. 636 9006280 (2- -09) Home Find... Go To.. -
Page 29: Driving Over Curbs
11. Turn off all sweeping functions. 12. Empty the debris hopper at the end of each shift or as needed. See EMPTYING THE HOPPER section of this manual. 636 9006280 (2- -09) Home Find... Go To.. -
Page 30: Raising / Lowering The Hopper
4. Press and hold the top of the Hopper raise / lower switch to raise the hopper. 5. Press and hold the bottom of the Hopper raise / lower switch to lower the hopper. 636 9006280 (2- -09) Home Find... Go To.. -
Page 31: Engaging The Hopper Safety Arm
WARNING: Lift arm pinch point. Stay clear of hopper lift arms. FOR SAFETY: When using machine, make sure adequate clearance is available before raising hopper. 636 9006280 (2- -09) Home Find... Go To.. -
Page 32: Disengaging The Hopper Safety Arm
WARNING: Lift arm pinch point. Stay 6. Open the wander hose access door to access clear of hopper lift arms. the vacuum adapter cover. 636 9006280 (7- -10) Home Find... Go To.. - Page 33 15. Start the machine and raise the hopper. Secure the wander hose onto the top of the hopper. Remove the hopper inlet blanking plate. Lower the hopper. 636 9006280 (7- -10) Home Find... Go To..
-
Page 34: Emptying The Hopper
6. Press and hold the bottom of the Hopper FOR SAFETY: When using machine, make raise / lower switch to lower the hopper. sure adequate clearance is available before raising hopper. 7. Close and secure both hopper lid latches. 636 9006280 (7- -10) Home Find... Go To.. -
Page 35: Cleaning The Machine
5. Press and hold the top of the Hopper raise / lower switch to raise the hopper. WARNING: Lift arm pinch point. Stay clear of hopper lift arms. 636 9006280 (10- -11) Home Find... Go To.. - Page 36 The warranty will be invalidated if the invalidated if hydraulic system is damaged due to engine is damaged due to water entering it while water entering the system while cleaning. cleaning. 636 9006280 (10- -11) Home Find... Go To..
- Page 37 WARNING:Lift arm pinch point. Stay clear of hopper lift arms. NOTE: Do not use excessive water pressure when cleaning the radiator and areas around the radiator. Excessive water pressure could damage the radiator. 636 9006280 (10- -11) Home Find... Go To..
- Page 38 19. Close and secure the water tank door. Attach the water tank door retainer chain to the bracket. 20. Clean the brushes and vacuum head area. 21. Clean the rest of the machine as necessary. 636 9006280 (10- -11) Home Find... Go To..
-
Page 39: Cleaning The Vacuum Fan Assembly
1. Check the water tank level at the water tank level tube. If necessary, fill the water tank. 636 9006280 (10- -11) Home Find... Go To.. -
Page 40: Using The Machine Display Module (Mdm) System
Module (MDM) System while the machine is moving. Always stop machine before making adjustments. 1. Press the F1 select button. If necessary, press the F3 (Reset) button to reset the engine to the default speed (2200 rpm). 636 9006280 (2- -09) Home Find... Go To.. -
Page 41: Using The Engine Speed Boost
4. When finished using the engine speed boost, stop the machine and place the drive lever into neutral. 5. Reset the engine to the normal operating range. 636 9006280 (2- -09) Home Find... Go To.. -
Page 42: Machine Display Module (Mdm) Fault Screens
Hydraulic fluid temperature Shut off machine. Hyd. Oil Temperature High--Stop reaches 95_ C (203_ F). Call authorized service Vehicle representative. Warning Parking brake is engaged. Release parking brake. Park Brake On--Release Park Brake 636 9006280 (2- -09) Home Find... Go To.. - Page 43 Add hydraulic fluid. Warning Wheels tracked out when Shut off machine. Track Wheels In For Full. Fan And machine is in work mode 1 / Call authorized service Brushes On forward. representative. 636 9006280 (2- -09) Home Find... Go To..
-
Page 44: Options
2. Check the water tank level. Do Not operate the pressure washer if the water tank is low or empty. 3. Remove the pressure washer wand from the brackets, and pull the pressure washer hose completely out from the reel. 636 9006280 (2- -09) Home Find... Go To.. -
Page 45: Rear View Camera (Option)
12. Wind the pressure washer hose back onto the 3. Reinstall the cap onto the automatic greasing reel. Return the pressure washer wand to the system reservoir. storage brackets. Close the access door. 636 9006280 (2- -09) Home Find... Go To.. -
Page 46: Winter Equipment (Option)
WINTER EQUIPMENT (OPTION) 4. Use the vacuum fan speed knob to adjust the snow brush speed. The 636 can be fitted with a front snow brush, front straight plow, blade front V plow blade, and a rear grit dispenser for clearing snow. -
Page 47: Snow Plows (Option)
1 (middle position) for sweeping. 7. Turn off all plow functions. 3. Use the Brush levers to adjust the path of the plow. 4. Place the Drive lever into the forward position. 636 9006280 (10- -11) Home Find... Go To.. -
Page 48: Grit (Sand / Road Salt) Dispenser (Option)
3. Press the bottom of the Grit dispensing switch to start dispensing grit. 4. Use the brush speed knob to adjust the rate at which the grit is being dispensed. 636 9006280 (10- -11) Home Find... Go To.. -
Page 49: Machine Troubleshooting
Pump vacuum tube disconnected Reconnect pump vacuum tube to tank at tank drain tube drain tube Blocked tank vacuum strainer Clear debris from tank vacuum strain- Defective water pump Call authorized service representative 636 9006280 (2- -09) Home Find... Go To.. - Page 50 -- Faulty turbo Incorrect fuel in fuel tank Call authorized service representative Front wheel spinning on Machine is in work mode 1 or Place machine into work mode 2 uneven surface transit mode 636 9006280 (10- -11) Home Find... Go To..
-
Page 51: Conditions Table
(13) Also required: Sufficient supply of water in water tank, In- -cab water flow control knob CLOSED, Pressure Washer Switch OFF. CloudMaker rotates in Work Mode 1, even with Water Switch OFF. 636 9006280 (9- -09) Home Find... Go To.. -
Page 52: Maintenance
Side panels--not shown Check for damage and ensure they are secured to machine Check operation of controls Check fuel level gauge. Fill tank if necessary 636 9006280 (1- -10) Home Find... Go To.. - Page 53 Lubricate front hub top bearing Lubricate axle beam (upper and lower) Check tracking cylinder pivots for wear and damage. Lubricate Lubricate rear trailing arms Check condition of rear axle conical stops 636 9006280 (10- -11) Home Find... Go To..
- Page 54 Check cables and cable connections for wear and damage Check terminals for corrosion Apply terminal stud protectant Hopper raised safety Clean and lubricate switch Fan access door open Clean and lubricate safety switch 636 9006280 (1- -10) Home Find... Go To..
- Page 55 (50% ethylene glycol) Battery Clean and grease terminals Brakes Check shoes and drums for wear Wander hose Check hose for wear and damage Check adapter seal on hopper for wear and damage 636 9006280 (1- -10) Home Find... Go To..
- Page 56 ..Dielectric grease NOTE: More frequent maintenance intervals may be required in extremely dusty conditions. NOTE: Refer to the Green Machine 636HS Workshop Manual for additional service requirements. 636 9006280 (1- -10) Home Find... Go To..
-
Page 57: Lubrication
3. Right and left hopper door arm 11. Tracking cylinders 4. Right and left hopper lift cylinders 12. Axle beam (upper and lower) (upper and lower) 13. Rear trailing arms 5. Cab pivots 636 9006280 (2- -09) Home Find... Go To.. -
Page 58: Hydraulics
Apply a light film of hydraulic fluid onto the filler cap gasket before reinstalling the cap onto the reservoir. Replace the hydraulic return line filter after every 2000 hours of operation. 636 9006280 (2- -09) Home Find... Go To.. -
Page 59: Hydraulic Hoses
ATTENTION! Hydraulic components depend on system hydraulic fluid for internal lubrication. Malfunctions, accelerated wear, and damage will result if dirt or other contaminants enter the hydraulic system. 636 9006280 (1- -10) Home Find... Go To.. -
Page 60: Engine
7 mm to 9 mm (0.28 to 0.35 in). FOR SAFETY: When servicing machine, do not remove cap from radiator when engine is hot. Allow engine to cool. WARNING: Moving belt and fan. Keep away. 636 9006280 (1- -10) Home Find... Go To.. -
Page 61: Air Filter
Press the reset button to reset the air filter Clean the interior of the air filter housing after indicator after replacing the air filter. every 250 hours of operation. 636 9006280 (1- -10) Home Find... Go To.. -
Page 62: Fuel Filters
VALVE CLEARANCES Check and adjust the valve clearances after every 2000 hours of operation. 636 9006280 (1- -10) Home Find... Go To.. -
Page 63: Battery
If one or more of the battery cells test water to the battery. lower than the other battery cells, the cell is damaged, shorted, or is near failure. Replace the battery if it is damaged. 636 9006280 (2- -09) Home Find... Go To.. -
Page 64: Fuses
Reverse Camera, Monitor, Radio 15 A Wipers, Modem, Screen Wash, Horn 10 A AC Compressor 10 A Engine Stop Solenoid NOTE: Always replace a fuse with a fuse of the same type and amperage rating. 636 9006280 (2- -09) Home Find... Go To.. -
Page 65: Brushes
3. Remove the brush from the brush drive. 4. Install the new brush. Rotate the right brush clockwise and the left brush counterclockwise until all the allen screws slide into the slots. Tighten the screws. 636 9006280 (2- -09) Home Find... Go To.. -
Page 66: Brush Linkage
3. Adjust the pitch (front to rear) angle. Loosen the four hex screws. Adjust the angle of the brush assembly. Tighten the hex screws. 4. Reinstall the brush assembly cover. 636 9006280 (2- -09) Home Find... Go To.. -
Page 67: Dust Suppression / Vacuum
NOTE: Little or no flap vibration is necessary for light sweeping (light litter). More flap vibration may be necessary for heavier sweeping (wet sand). 636 9006280 (2- -09) Home Find... Go To.. -
Page 68: Vacuum Nozzle Skid
19 mm (0.75 in) from the ground. Ensure the cast iron skid is level with the vacuum nozzle skid. Check the cast iron skid for wear and damage every 250 hours of operation. 636 9006280 (10- -11) Home Find... Go To.. -
Page 69: Cloudmaker
750 hours of operation. Replace DRAIN CAP FILTER the level sensor if it is damaged or if the wires are Check the drain cap filter for damage and clean worn or damaged. the filter weekly. 636 9006280 (2- -09) Home Find... Go To.. -
Page 70: Hopper
Check the hopper cyclone screens for wear and damage every 250 hours of operation. Be sure the cyclone drain holes are clear. HOPPER DRAIN SCREEN Check the hopper drain screen for wear and damage every 250 hours of operation. 636 9006280 (2- -09) Home Find... Go To.. -
Page 71: Hopper External Drain Tube
250 hours of operation. Apply a light coat of dielectric grease onto the switch after it is cleaned. VACUUM FAN ACCESS DOOR Check the vacuum fan access door for wear and damage every 250 hours of operation. 636 9006280 (2- -09) Home Find... Go To.. -
Page 72: Cab
250 hours of operation. Replace when necessary. REAR VIEW CAMERA (OPTION) Check the rear view camera every 250 hours of operation. Clean the camera lens with a soft clean cloth. 636 9006280 (2- -09) Home Find... Go To.. -
Page 73: Steering And Suspension
Check the steering linkage components for wear and damage every 250 hours of operation. Replace worn or damaged components. Check the steering ball joints every 750 hours of operation. Replace damaged or worn ball joints. 636 9006280 (10- -11) Home Find... Go To.. -
Page 74: Brakes And Tires
Check the brake fluid level at the brake fluid hours of operation. reservoir after every 250 hours of operation. PARKING BRAKES Check the parking brake adjustment after every 250 hours of operation. 636 9006280 (2- -09) Home Find... Go To.. -
Page 75: Wander Hose
750 hours hoses for wear and damage every 250 hours of of operation. operation. Check the pressure washer manifold filter for wear and damage every 250 hours of operation. 636 9006280 (1- -10) Home Find... Go To.. -
Page 76: Tilting / Lowering The Cab
3. Lift the safety hook handle located on the left rear side of the cab and tilt the cab. 636 9006280 (2- -09) Home Find... Go To.. -
Page 77: Tilting / Lowering The Hopper Manually
LOWERING THE HOPPER MANUALLY section of this manual. FOR SAFETY: When using machine, make sure adequate clearance is available before raising hopper. 5. Use the hopper pump to manually tilt the hopper. 636 9006280 (2- -09) Home Find... Go To.. -
Page 78: Lowering The Hopper Manually
WARNING: Lift arm pinch point. Stay clear of hopper lift arms. NOTE: Keep personnel clear of the area around the hopper before manually lowering the hopper. 636 9006280 (2- -09) Home Find... Go To.. -
Page 79: Towing / Transporting The Machine
Turn the emergency tow valve 90_ (either direction) before towing the machine. Return the bypass valve to the normal position when finished towing the machine. Do Not open the emergency tow valve during normal machine operation. 636 9006280 (2- -09) Home Find... Go To.. - Page 80 (15 in) or less from the ground. 10. If the loading surface is horizontal AND is 380 mm (15 in) or less from the ground, drive the machine off the truck or trailer. 636 9006280 (2- -09) Home Find... Go To..
-
Page 81: Machine Jacking
Jack machine up at designated locations only. Support machine with jack stands. Rear jacking locations are located directly beneath the rear bumper and in front of each rear tire. 636 9006280 (2- -09) Home Find... Go To.. -
Page 82: Storage And Freeze Protection
CloudMaker, both brush spray jets, and the vacuum tube spray jet. 3. Park the machine in a cool, dry area. Do not expose the machine to rain. Store indoors. 636 9006280 (2- -09) Home Find... Go To.. -
Page 83: Specifications
Travel speed forward (maximum--work mode 2) 16 Km/h (9 mph) Travel speed reverse (maximum) 6 Km/h (4 mph) Vacuum Speed--standard 0--2400 rpm Vacuum Speed--boosted (maximum) 2700 rpm Maximum rated climb and descent 9_/20% 636 9006280 (10- -11) Home Find... Go To.. -
Page 84: Hydraulic System
API CF4/ACEA2 BRAKING SYSTEM Type Operation Service brakes Expanding shoe drums (front and back) Parking brake TIRES Location Type Size Front / Rear (4) Pneumatic 155/70 R12C -- Rating 104 / 102 636 9006280 (9- -09) Home Find... Go To.. -
Page 85: Machine Dimensions
SPECIFICATIONS MACHINE DIMENSIONS 1140 mm (45 in) 1980 mm 78 in 3450 mm 136 in 636 9006280 (2- -09) Home Find... Go To..
Need help?
Do you have a question about the 636 and is the answer not in the manual?
Questions and answers