Table of Contents
Advertisement
Advertisement
Table of Contents

Related Manuals for Green Machines 400 Series


Summary of Contents for Green Machines 400 Series
- Page 1 Series YM036 Global Rev. 05 (12-2015) *YM036* www.greenmachines.com...
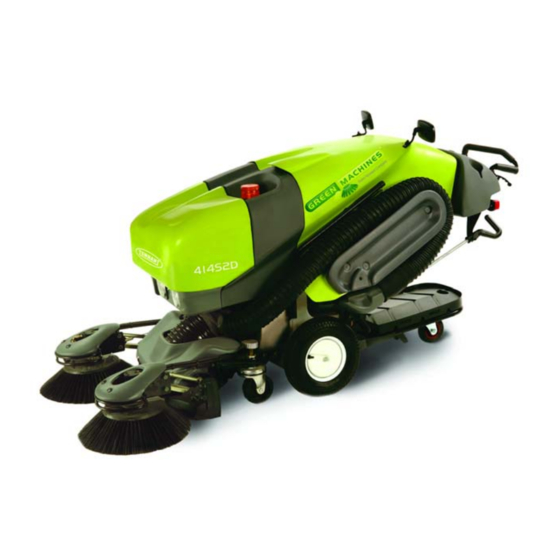
- Page 2 Operators Manual Service Schedule Kubota Engine Parts Catalog Parts Catalog Please contact a local Green Machines distributor to Kubota Engine Manual order additional publications. INTENDED USE The 414S2D, 414RS, 424TR, 424HS machines are designed to sweep disposable debris from surfaces typically found in outdoor urban areas (city streets, pedestrian malls, sidewalks, parking lots, etc…).
-
Page 3: Table Of Contents
....Machine Jacking ..... . 400 Series YM036 (12−2015) - Page 4 ....... . . Machine Dimensions ....400 Series YM036 (12−2015)
-
Page 5: Safety Precautions
Only use water. 3. When starting machine: - Keep directional lever in neutral. WARNING:Allow engine to cool. Do not remove cap from radiator when engine is hot. Avoid contact with hot engine coolant. 400 Series YM036 (12- 2015) - Page 6 - Do not modify the machine from its - Reduce speed when turning. original design. - Keep all parts of body inside operator - Use Green Machines supplied or station while machine is moving. approved replacement parts. - Always be aware of surroundings - Wear personal protective equipment while operating machine.
- Page 7 Avoid contact with hot engine coolant − Located on coolant tank cap Moving Fan. Keep Away. Read Operator Manual. Remove Key From Machine. Refer To Workshop Manual − Located on vacuum fan housing. 400 Series YM036 (12−2015)
-
Page 8: Operation
13. Side access panel 5. Operator console / controls 14. Headlights 6. Operator seat (414RS only) 15. Spray jets (dust suppression) 7. Debris bag 16. Sweeping brushes 8. Rear tire 17. Suction nozzle 9. Main tires (2) 400 Series YM036 (12−2015) -
Page 9: Controls And Instruments
Clean and Safe Attachment (CSA) / 19. Brush spray jets (414S2D / 414RS only) Dog Excrement Attachment (DEA) 20. Wander hose handle (Option) switch (Option) 21. Forward drive lever 10. Headlight / taillight switch 22. Reverse drive lever 400 Series YM036 (12−2015) -
Page 10: Symbol Definitions
Throttle Lever Vacuum Nozzle Up Vacuum Nozzle Down Brush Dust Suppression Debris Bag Dust Suppression Dust Suppression Control Dust Suppression Switch Off (Warning Beacon / Audible Emergency Shutoff Warning, Headlights / Taillights, and Dust Suppression Switches) 400 Series YM036 (12−2015) -
Page 11: Removing The Protective Plastic Sheet
414RS only), turn off machine, and remove key. 1. Loosen both toggle clamps and open the back duct. 2. Remove the protective plastic sheet. 3. Lift the hinge lock pin and close the back duct. 4. Refasten the toggle clamps. 400 Series YM036 (12−2015) -
Page 12: Operation Of Controls
(FORWARD / NEUTRAL / REVERSE) Forward: Squeeze the Drive lever. Slightly push the Parking brake lever down and press the button to release the parking brake. Neutral: Release the Drive lever into the middle position. Reverse: Press the Drive lever. 400 Series YM036 (12−2015) -
Page 13: Engine Temperature Gauge
ENGINE OIL PRESSURE INDICATOR The Engine oil pressure indicator illuminates when the oil pressure is low. 400 Series YM036 (12−2015) -
Page 14: Warning Beacon / Audible Alarm Switch
Use the Operating light switch to operate the rear tail lights and headlights. WATER SWITCH (DUST SUPPRESSION) (414RS) Use the Water switch to turn on the dust control system for the brushes and the filter bag. 400 Series YM036 (12−2015) -
Page 15: Variable Speed Water Pump (Dust Suppression) (424Tr / 424Hs)
Use the Brush spray valve located below the console to turn the brush sprays on or off. Use the Inside filter bag spray valve located below the console to turn the filter bag spray on or off. 400 Series YM036 (12−2015) -
Page 16: Operator Seat (414Rs)
2. Pull the seat assembly out from the machine until the seat locks into the fully extended position. 3. Rotate the rear wheel until the hole in the rear wheel cover is aligned with the rear seat locking pin. 400 Series YM036 (12−2015) -
Page 17: Stowing The Operator Seat (414Rs)
3. Rotate the rear wheel until the hole in the rear wheel cover is oriented to the front of the machine and the rear wheel is pointed straight to the front of the machine. 400 Series YM036 (12−2015) -
Page 18: Adjusting The Operator Seat (414Rs)
To make a such turns, first stop the machine, get off the operator seat, step to the side of the machine opposite of the direction of the turn, and squeeze the drive lever, and turn handle bars in the direction of the turn. 400 Series YM036 (12−2015) -
Page 19: Operator Seat (424Tr / 424Hs)
2. Lift the yellow cover located at the back of the machine. 7. Push down on the locking plate, slide the lock screw into position, and hand tighten the screw clockwise. 3. Turn the lock screw counterclockwise to loosen. 400 Series YM036 (12−2015) -
Page 20: Adjusting The Seat (424Tr / 424Hs)
Use the hand wheel located on the right side to adjust the recline. There are three weight settings on the spring suspension unit under the seat. Push the segment button at the top right side of the seat to adjust the weight setting. 400 Series YM036 (12−2015) -
Page 21: Brush Information
PET (Polyethylene Terephthalate) Heavy Duty Brush − Recommended for areas where there is a heavy build up of debris. The stiffer / thicker bristles provide more aggressive digging action to remove compacted debris from along buildings, curbs, and in corners. 400 Series YM036 (12−2015) -
Page 22: Pre−Operation Checklist
- Ensure all controls, gauges, and indicators function properly. - Check tire pressure and condition of tires. - Ensure side panel is secured in place. - Machines with optional snow plow only: Check snow plow for damage. 400 Series YM036 (12−2015) -
Page 23: Starting The Machine
(if equipped), turn off machine, and remove key. 5. Turn the key further clockwise to start the engine. 6. Allow the engine and hydraulic system to warm up for three to five minutes. 400 Series YM036 (12−2015) -
Page 24: While Operating The Machine
Avoid turning too sharply when the machine is in motion. The machine is very responsive to sudden turns. Avoid sudden turns, except in emergencies. If poor sweeping performance is observed, stop cleaning and refer to MACHINE TROUBLESHOOTING section of this manual. 400 Series YM036 (12−2015) -
Page 25: Sweeping
4. If sweeping in wet weather or in areas with standing water, open sludge door to allow excess water to drain from the machine. Close sludge door when sweeping in dry conditions. 400 Series YM036 (12−2015) -
Page 26: Sweeping Into Corners
To clean out corners, drive the machine into the the opposing wall. Ensure neither the handle bars corner approximately 450 mm (18 in) away from nor the brush arms touch the walls. the adjacent wall. Stop when the brushes touch the opposing wall. 400 Series YM036 (12−2015) -
Page 27: Selecting High Speed Mode (424Hs)
This prevents the handlebars from hitting the operator’s knees when moving over uneven surfaces and gives a more stable and secure ride at high speeds. 400 Series YM036 (12−2015) -
Page 28: Driving Over Curbs
When descending the curb, move slowly forward, push down firmly on the handles before mounting the curb, and keep them down until the front brushes and castor wheels clear the curb as the machine moves forward. 400 Series YM036 (12−2015) -
Page 29: Clearing Blockages From The Vacuum Nozzle
4. Remove debris / blockages from the vacuum vacuum assembly 4. Start the machine and drive to new location. 5. Reinstall the front vacuum fan cover onto the machine 400 Series YM036 (12−2015) -
Page 30: Sweeping Leaves
VACUUM NOZZLE for instructions how to clear blockages from the vacuum fan. 12. Start machine and use the machine to clear 3. Loosen the panel knob and remove the bag leaves from hard surface and grass areas. support frame. 400 Series YM036 (12−2015) -
Page 31: Replacing The Plastic Trash Bag
3. Loosen the toggle clamp and pull the sliding 10. Close the top cover and reinstall the wander frame out towards body. hose onto the machine. 4. Remove the trash bag, plastic screen, and holder from inside the filter bag. 400 Series YM036 (12−2015) -
Page 32: Cleaning The Machine
2. Unzip the outer filter bag and remove the inner plastic bag and filter screen from the machine. 6. Open the radiator cover door. 3. Loosen both toggle clamps to release the back trucking from the machine. 400 Series YM036 (12−2015) - Page 33 13. Thoroughly clean the radiator and area around the radiator. NOTE: Do not use excessive water pressure when cleaning the radiator and areas around the radiator. Excessive water pressure could damage the radiator. 400 Series YM036 (12−2015)
- Page 34 21. Clean the exterior of the machine (brushes, front nozzle, covers, etc...). 16. Remove the filter from the filter housing and tap dust and debris from the filter. Wipe the interior of the filter housing. Reinstall the filter. 400 Series YM036 (12−2015)
-
Page 35: Weekly Cleaning
/ prevent the impeller from moving freely. 9. Clean all dirt and debris buildup from areas around the engine and the hydraulic block. 10. Reinstall the engine top cover and the side access panel 400 Series YM036 (12−2015) -
Page 36: Water Tank
These products can leave a sticky residue on the water pump seals. Never use herbicides or products containing poisonous or harmful chemicals. There is a strong risk of inhaling such products when they are vacuumed up by the machine. 400 Series YM036 (12−2015) -
Page 37: Options
400 Series YM036 (12−2015) -
Page 38: Clearing A Blockage From The Wander Hose
3. Stretch the wander hose out to its full length. 4. Turn on the machine and set the throttle to approximately 1/3 power. 5. Grasp the wander hose handle and pull sharply to straighten the hose and clear the blockage. 400 Series YM036 (12−2015) -
Page 39: Clean And Safe Attachment (Csa) / Dog Excrement Attachment (Dea) (Option)
2. Turn on the CSA / DEA system. 3. Reinstall container onto machine. 4. Add 1 L (1 qt) of disinfectant into the water tank. 3. Increase the engine speed to approximately 2/3rd power. 5. Add water to water tank as necessary. 400 Series YM036 (12−2015) - Page 40 Continue until all excrement is removed. CSA / DEA plastic sack and cardboard tube in the CSA / DEA container. 8. Open the CSA / DEA lance water valve again and spray the area with the water / disinfectant solution. 400 Series YM036 (12−2015)
-
Page 41: Snow Plow (Option)
4. Use a wrench to loosen the nut and release the threaded adjuster from its anchorage. 400 Series YM036 (12−2015) - Page 42 16. Reinstall the front box assembly. 17. Fill the water tank with an approved deicer. See FILLING THE WATER TANK WITH DEICER. 18. Inspect the sprays on the spray bar for correct operation. 400 Series YM036 (12−2015)
-
Page 43: Using The Snow Plow
100 mm (4 in). The machine can not effectively plow deeper snow accumulations or wet / heavy snow. 3. Squeeze the drive lever to begin plowing snow. 400 Series YM036 (12−2015) -
Page 44: Machine Troubleshooting
Brush speed too low for travel Increase brush speed sweeping. speed. Excessive brush pressure. Decrease brush pressure Brush arm assemblies need grease Grease brush arm assemblies. / bushings need to be replaced. Replace bushings if problem persists. 400 Series YM036 (12−2015) - Page 45 Emergency shutoff is engaged. Disengage the Emergency shutoff. Debris wrapped in impeller Remove obstruction(s) from impeller. (vacuum fan assembly). Bad / contaminated diesel fuel. Drain bad / contaminated fuel. Refuel machine from another fuel source. 400 Series YM036 (12−2015)
- Page 46 Locking mechanism is not released Release locking mechanism. not pull out / stow. Slide and roller mechanism filled Clear debris from slide and roller with debris. mechanism. Electrical problems. Fuse(s) is / are blown. Replace blown fuse(s). 400 Series YM036 (12−2015)
-
Page 47: Maintenance
Ensure water pump is − operational Debris bag assembly Check outer bag, nylon sock, − and inner bag for cleanliness and damage. Vacuum nozzle Check the vacuum nozzle − height. Operating lights Check operation and for − damage. 400 Series YM036 (12−2015) - Page 48 50/50 mix of water and ethylene glycol permanent, −34_ C (−30_ F). NOTE: More frequent maintenance intervals may be required in extremely dusty conditions. NOTE: Refer to the Green Machine 414 Workshop Manual for additional service requirements. 400 Series YM036 (12−2015)
-
Page 49: Hydraulics
Substitute fluids can cause premature failure of hydraulic components. ATTENTION! Hydraulic components depend on system hydraulic fluid for internal lubrication. Malfunctions, accelerated wear, and damage will result if dirt or other contaminants enter the hydraulic system. 400 Series YM036 (12−2015) -
Page 50: Engine
2.2 L (2.3 qt) with oil filter. Oil filler cap is located the coolant tank is overfilled. below the dip stick. Check the radiator for damage daily. 400 Series YM036 (12−2015) -
Page 51: Air Filter
Avoid spilling fuel on the air intake screen located beneath the air filter housing. If fuel is spilled on the air intake screen, dirt will stick to the screen, causing the engine to start smoking. (See TROUBLESHOOTING section). 400 Series YM036 (12−2015) -
Page 52: Battery
If one or more of the battery cells test lower than the other battery cells, the cell is damaged, shorted, or is near failure. Replace the battery if it is damaged. 400 Series YM036 (12−2015) -
Page 53: Fuses
Beacon / Audible Warning / Fuel Cutoff Solenoid 10 A Radio / Wiper Motor (414 TR / 424 HS machines equipped with cabs only) Spare (Various Options) NOTE: Always replace a fuse with a fuse of the same type and amperage rating. 400 Series YM036 (12−2015) -
Page 54: Safety Interlock Switches
If the engine does not crank with the rear duct open, the safety interlock switch is operating correctly 6. Close the rear duct and secure the toggle clamps. 7. Remove the front box (CSA/DEA, if equipped) from the machine. 400 Series YM036 (12−2015) -
Page 55: Brushes
5. Reinstall the brush assembly cover. 6. Adjust the brush angle. See ADJUSTING THE BRUSH PRESSURE section of this manual. 3. Align the plastic locking cam lugs with the lugs on the metal drive hub. 400 Series YM036 (12- 2015) -
Page 56: Checking / Adjusting The Brush Pressure
3. Reinstall the brush assembly cover. 4. Recheck the brush pressure. Adjust brush pressure as necessary. The brush pressure is incorrect if the tips of the brush spread out too far. 400 Series YM036 (12−2015) -
Page 57: Dust Suppression / Vacuum
5. Reassemble the brush spray jet assembly.. 6. Reinstall the brush and brush assembly cover onto the machine.. 7. Swing the back duct open until it locks into the open position. 2. Rotate the brush from the brush drive. 400 Series YM036 (12−2015) -
Page 58: Adjusting The Vacuum Nozzle Height
The vacuum nozzle will make contact with uneven surfaces, causing the skid underneath the vacuum nozzle to prematurely wear down. Adjust the nozzle higher if surface being swept is extremely uneven. 4. Reinstall the castor locking pins 400 Series YM036 (12−2015) -
Page 59: Filter Bag
Do Not apply grease or oil to the zippers since such lubricants will cause dust and dirt to stick to the zippers, eventually making the zippers more difficult to use. 400 Series YM036 (12−2015) -
Page 60: Brakes And Tires
(if equipped), turn off machine, and remove key. Check the snow plow for wear and damage daily. WHEEL TORQUE Torque wheel nuts twice in the pattern shown to 55 Nm (40 ft lb) after every 250 hours of operation. 400 Series YM036 (12−2015) -
Page 61: Pushing / Transporting The Machine
Do Not open the emergency brake release during normal machine operation. ATTENTION! Do not open the emergency brake release if the machine is on a gradient unless the road wheels are chocked or the parking brake is applied. 400 Series YM036 (12−2015) - Page 62 380 mm (15 in) or less from the ground. 11. If the loading surface is horizontal AND is 380 mm (15 in) or less from the ground, push the machine off the truck or trailer. 400 Series YM036 (12−2015)
-
Page 63: Machine Jacking
Use a hoist or jack that will support the weight of the machine. Jack machine up at designated locations only. Support machine with jack stands. Jacking locations are located directly behind each rear tire. 400 Series YM036 (12−2015) -
Page 64: Storage And Freeze Protection
3. Park the machine in a cool, dry area. Do not expose the machine to rain. Store indoors. 4. Start the machine and operate the dust control system until screen wash is discharging from both brush spray jets and the vacuum tube spray jet. 400 Series YM036 (12−2015) -
Page 65: Specifications
Maximum ramp incline for loading − Empty Maximum ramp incline for sweeping − including operator @ 110 Kg (242.4 lbs) Maximum ramp incline for transporting (GVWR) Maximum ambient operating temperature 51_ C (124_ F) Minimum ambient operating temperature −20_ C (−4_ F) 400 Series YM036 (12−2015) -
Page 66: Hydraulic System
Main axle (414S2D, 424RS, 424TR) Pneumatic 4.80 / 4.00 x 8, 6 ply Main axle (414HS) Pneumatic 5.00 x 8, 6 ply Rear (414S2D, 414RS) Pneumatic 3.00 x 4, 6 ply Rear (424TR, 414HS) Pneumatic 4.00 x 4, 4 ply 400 Series YM036 (12−2015) -
Page 67: Machine Dimensions
SPECIFICATIONS MACHINE DIMENSIONS 1143 mm 45 in 3515 mm 99 in 2997 mm 118 in 1170 mm (46 in) 400 Series YM036 (12−2015) - Page 68 SPECIFICATIONS 400 Series YM036 (12−2015)
Need help?
Do you have a question about the 400 Series and is the answer not in the manual?
Questions and answers