Table of Contents
Advertisement
Quick Links
Advertisement
Table of Contents

Related Manuals for K.M.E. VSS 18


Summary of Contents for K.M.E. VSS 18
-
Page 1: User Manual
User Manual VSS 18 SD 7 SD 8... -
Page 2: Table Of Contents
VSS 18 is allowed. Please read this instructions before you switch on the VSS 18 for the first time, to get in touch with particular features of your new product. If you have questions about this product please contact the K.M.E. support. -
Page 3: The Delivery Status
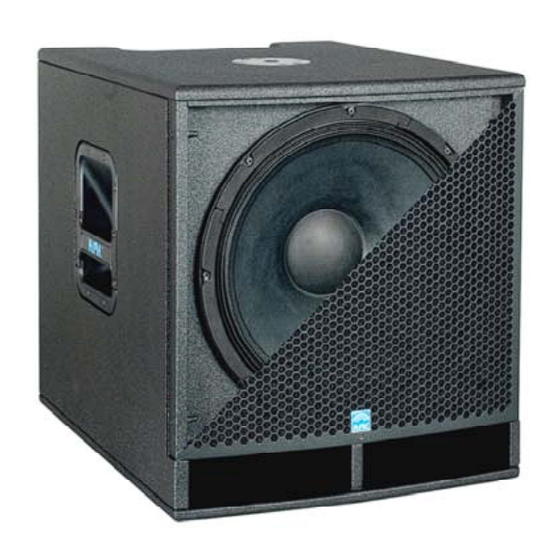
With a powerful bass base and very compact dimensions as well as the lightweight of 34 kg, the VSS 18 is also the core and control center within the self-powered PA-systems SD 7, SD 8 and also in directional radiating active bass arrays. -
Page 4: The Connection Panel
5. 7. 7. 6. Power 1. Power switch, Attention: please turn down all volume controls before switching on the VSS 18 to avoid an undesirable sound reproduction. 2. GROUND/FREE switch (disconnects the ground of the input channels from chassis to avoid ground loops) 3. -
Page 5: The Control Panel
- there is a malfunction, you must power cycle the VSS 18 3. The LCD display is used as operation mode display of the VSS 18. The arrows in the LCD display show the directions to navigate through the submenus (see navigation structure). All software parameters must be set on the unit itself. -
Page 6: Navigation Structure On The Hardware Unit
7. The navigation structure (menu navigation) by means of the information on the LCD display... - Page 8 by means of the information of the menu list...
-
Page 9: Operation
“audio-channel” of the digital signal on the input of VSS 18, e.g. for the digital controlling of SD 7 and SD 8 (for the left and right side). Password (see page 14) In this menu item you can enter an 8-digit password. - Page 10 • User Presets [appears only from preset no. 9 to 12] Names Preset Name [enter preset name, max. 12 digits] Out A Name [enter name of output A, max. 6 digits] Out B Name [enter name of output A, max. 6 digits] Bass Routing [routing of the input channels]...
- Page 11 Limiter [adjust limiter] Attack Time Release Time Threshold This dynamic processor is working when the audio signal exceeds the entered threshold-value. The two time constants attack and release time draw the speed of the gain regulation mechanism and are dependent to the program material. Out A (see adjustable parameter bass) Out B (see adjustable parameter bass) Level Control Mode...
-
Page 12: Choose Your Factory Preset - Play
Follow the instructions (e.g. select SD 8)! After power on the VSS 18 for the very first time the left graphic appears on the LCD display. You have to press the marked arrow key of the navigation pad once to select preset 2 „SD8 OMNI“... -
Page 13: Switching Input Of Channel A Between Analog / Digital / Digital
10.3 Switching input of channel A between analog / digital / digital X If you want to control your PA system with a digital signal you have to switch the input of channel A to „digital“ resp. “digital X” (see page 9). In the programmed initial state all inputs are switched to „analogue“. -
Page 14: Entering Password
10.5 Entering password You can lock the VSS 18 with or without a password. To lock the VSS 18 with a password (max. 8 digits) you have to enter it first. This password can be changed every time. Note! Keep in mind resp. note down the entered password because if you want to „unlock“... - Page 15 Set all required parameters (also the volume controls) and press, like shown in the graphics, the OK button for 2 seconds and your system is locked (now your VSS 18 is ready for a rental, for example). When switching it off and on again the “lock-function” is re-activated.
-
Page 16: Specifications Vss 18
11. Specifications VSS 18 Speaker: Components 18“ Neodymium Dispersion omnidirectional / directional, depending on preset Frequency range 38 Hz – 160 Hz (fx), depending on preset SPL nominal 102 dB SPL maximal 129 dB Electronic: Amplifiers three fully digital amplifiers with high efficiency, about 90 %... -
Page 17: Preset Overview - 12.1 Factory Presets
2x VSS 18 + 2x VB 18 + 2x VL 750: analogue or digital audio signal each to input A of the VSS 18 & link it through the top units (e.g. with a dual-cable from K.M.E., includes audio signal & power supply);... -
Page 18: The Digital System Unit Vss
2x VSS 18 + 4x VB 18 + 2x VL 760: analogue or digital audio signal each to input A of the VSS 18 & link it through the top units (e.g. with a dual-cable from K.M.E., includes audio signal & power supply);... - Page 19 2x VSS 18 + 4x VB 18 + 2x VL 750 or VL 760: analogue or digital audio signal each to input A of the VSS 18 & link it through the top units (e.g. with a dual-cable from K.M.E., includes audio signal & power supply);...
- Page 20 Preset 6: SINGLE BASS 1x VSS 18 (speaker outputs are inactive): analogue audio signal to input A + B or digital audio signal to input A, only the system volume control is active Preset 7: TOPS ONLY 2x top units full-range (bass is inactive): analogue audio signal to input A + B or digital audio signal to input A, the volume control for „Out A“...
- Page 21 1x VSS 18 + 2x VL 12 2x VSS 18 + 2x VL 12 you can set-up your audio inputs & you can set-up your audio inputs & speaker outputs speaker outputs...
- Page 22 Bass management system for smaller surround systems (5.1). The VSS 18 for the center channel and LFE-channel (low frequency enhancement) is used with this preset. You can connect an additional bass VB 18 on the speaker output B. The VSS 18 for the L/LS and R/RS are used with the presets no. 9.
-
Page 23: Specifications Sd 7 And Sd 8
SD 8 2 x VL 750 (12“+1“), 2 x VL 760 (15“+1“), Components 2 x VSS 18 (18“), 2 x VSS 18 (18“), 2 x VB 18 (18”) 4 Ohm 4 x VB 18 (18”) 4 Ohm total: 4000 W RMS... -
Page 24: Pa-Systems Active - 14.1 Set-Up Pa Systems
14. PA systems active: Set-up, connection shemes & system versatility 14.1 Set-up PA systems Note! Please note specific and useful set-up of a first-class loudspeaker system. A universal statement about the correct (standard)-adjustment and set-up of PA systems is impossible, because each reinforcement is bound to a different place and has always different features. -
Page 25: Connection Shemes
(on solid underground) - place a VB 18 each on a VSS 18 or directly next to a VSS 18 (front in line) - place the top units each on a distance rod on the VSS 18 or each on a high stand (front in line) 2. - Page 26 SD 8 consists of: 2x VSS 18 + 4x VB 18 + 2x VL 760 1. Set-up PA: - place a VSS 18 to the left and right side in front of the audience (on solid underground) - place two VB 18 each on a VSS 18 or place all subwoofers in front of the...
- Page 27 VB 18 Setup consists of: 2x VSS 18 + 2x VB 18 + 2x VL 750 or VL 760 1. Set-up PA: - place a VSS 18 to the left and right side in front of the audience (on solid underground) - place a VB 18 each behind of the VSS 18 in a distance of 24 cm;...
- Page 28 Out B for front sub VB 18 Setup consists of: 2x VSS 18 + 4x VB 18 + 2x VL 750 or VL 760 1. Set-up PA: - place a VSS 18 to the left and right side in front of the audience (on solid underground) - place one VB 18 to the front and one backwards next to VSS 18 (side by side and front in line, see drawing);...
- Page 29 VB 18 Setup consists of: 2x VSS 18 + 4x VB 18 + 2x VL 750 or VL 760 1. Set-up PA: - place a VSS 18 to the left and right side in front of the audience (on solid underground) - place one VB 18 to the front and one backwards on each VSS 18 (see drawing);...
-
Page 30: System Versatility
2x VL 750 or VL 760 + 2x VSS 18 + 2x VL 750 or VL 760 + 2x VSS 18 + 2x VB 18 + max. 8 monitors (VL 8 / VL 12 / VL 15) max. 4 monitors (VL 8 / VL 12 / VL 15) - Page 31 2 2x VL 750 or VL 760 + 2x VSS 18 + 2x VL 750 or VL 760 + 2x VSS 18 + 4x VB 18 2x VB 18 + 2x 500 watts speaker outputs ((e.g. free routable as top...
-
Page 32: Notes
For your notes... -
Page 35: Ec-Declaration Of Conformity
Warranty claims please learn from the warranty card included. You will find the User Manual of the VERSIO-Series in an other manual or on K.M.E.`s website at www.kme-sound.com. -
Page 36: Disposal Of Your Old Appliance
Deutsch Entsorgung von Altgeräten 1. Wenn dieses Symbol eines durchgestrichenen Abfalleimers auf einem Produkt angebracht ist, unterliegt dieses Produkt der europäischen Richtlinie 2002/96/EC. Klingenthaler 2. Alle Elektronik-Altgeräte müssen getrennt vom Hausmüll über dafür Musikelektronik GmbH staatlich vorgesehene Stellen entsorgt werden. Auerbacher Straße 268 08248 Klingenthal Germany 3.
Need help?
Do you have a question about the VSS 18 and is the answer not in the manual?
Questions and answers