Table of Contents
Advertisement
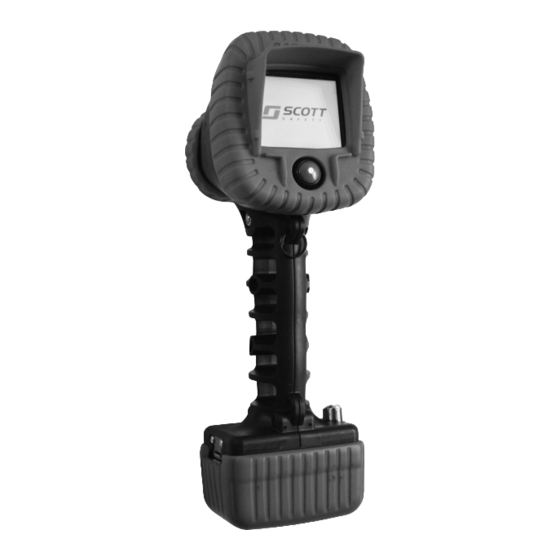
THERMAL IMAGING CAMERA
OPERATING AND MAINTENANCE INSTRUCTIONS
USE OF THIS THERMAL IMAGING CAMERA MUST BE PART OF A COMPLETE
TRAINING PROGRAM. INTERPRETATION OF THE THERMAL IMAGE REQUIRES
TRAINING AND EXPERIENCE. DO NOT USE THE EAGLE ATTACK THERMAL
IMAGING CAMERA IF YOU HAVE NOT BEEN THOROUGHLY TRAINED IN ITS
USE AND OPERATION. USE OF THIS DEVICE WITHOUT PROPER TRAINING AND
UNDERSTANDING OF ITS OPERATION MAY CAUSE ERRORS IN JUDGEMENT
BASED ON MISINTERPRETATION OF THERMAL IMAGING INFORMATION
WHICH MAY RESULT IN SERIOUS INJURY OR DEATH.
SCOTT, the SCOTT SAFETY Logo, Scott Health and Safety, and EAGLE ATTACK are registered
and/or unregistered marks of Scott Technologies, Inc. or its affiliates.
SCOTT EAGLE ATTACK
AND CHARGING SYSTEM
WARNING
© 2012 Scott Safety.
Advertisement
Table of Contents

Summary of Contents for Scott Eagle Attack
- Page 1 BASED ON MISINTERPRETATION OF THERMAL IMAGING INFORMATION WHICH MAY RESULT IN SERIOUS INJURY OR DEATH. © 2012 Scott Safety. SCOTT, the SCOTT SAFETY Logo, Scott Health and Safety, and EAGLE ATTACK are registered and/or unregistered marks of Scott Technologies, Inc. or its affiliates.
-
Page 3: Table Of Contents
BATTERY SAFETY WITH THE LITHIUM-ION BATTERY PACK ..9 USE OF THE CHARGING SYSTEM ..........10 BATTERY INSTALLATION ............... 12 USING THE EAGLE ATTACK THERMAL IMAGING CAMERA ..14 THE DISPLAY SCREEN ..............17 TEMPERATURE INDICATOR ............18 THERMAL VIDEO RECORDER OPTION .......... 20 RECORDING VIDEO .............. -
Page 4: Description
AC adapter or up to three units may be wired together if using the 12 VDC adapter or 12 or 24 VDC source power from a vehicle. The EAGLE ATTACK Thermal Imaging Camera is available with a black housing with a choice of outer boots in bright RED, BLACK, YELLOW, or ORANGE. - Page 5 The unit shall be inspected after each use. There are no user serviceable parts inside the camera except as outlined in this instruction. If any malfunction is noted, remove the unit from service and return to SCOTT Safety or an authorized SCOTT Safety Service Center for repair.
-
Page 6: Options / Accessories
Over Temperature Protection If the core temperature of the camera reaches 160 °F / 71 °C, the EAGLE ATTACK Thermal Imaging Camera will alert the user with a OVER TEMP warning in the upper middle of the display screen. This warning indicates that camera performance will begin to degrade and the unit may shut down until the core temperature drops below 158 °F / 70 °C. -
Page 7: Radio Frequency Interference (Rfi)
RADIO FREQUENCY INTERFERENCE (RFI) The EAGLE ATTACK Thermal Imaging Camera may be susceptible to Radio Frequency Interference (RFI) from a two-way radio or other radio frequency source. If the image in the display screen appears distorted or unclear, it may be caused by a nearby powerful source of radio frequency or by a two-way radio in close proximity. -
Page 8: Theory Of Operation
THEORY OF OPERATION Thermal imaging cameras only show temperature differences between objects and not an optical image of the objects. Experience and training are required to correctly interpret the thermal image. WARNING THIS IS NOT, NOR IS IT INTENDED TO BE, AN EXHAUSTIVE LIST OF THE BEHAVIORS OF INFRARED ENERGY THAT DIFFER FROM VISIBLE LIGHT. - Page 9 Keep the lens clean while operating the thermal imaging camera. • Dirt or soot build up on the lens will obscure or reduce the clarity of the thermal image. Wipe the lens with a glove or cloth as needed. Clean the lens thoroughly after use.
-
Page 10: Battery Charging System
BATTERY CHARGING SYSTEM The EAGLE ATTACK Charging System provides a secure camera storage and recharg- ing station for the SCOTT EAGLE ATTACK Thermal Imaging Camera. The Charging System consists of a camera charger assembly which holds a camera with battery and has an additional bay to charge a spare battery. -
Page 11: Battery Safety With The Lithium-Ion Battery Pack
BATTERY SAFETY WITH THE LI-ION BATTERY PACK HANDLING • Use care when handling the lithium-ion battery pack used with the EAGLE ATTACK Thermal Imaging Camera. • Always inspect batteries before use. The electrolyte contained within the lithium-ion cells can cause severe irritation to the respiratory tract, eyes and skin. A ruptured battery cell can vent hazardous air contaminants, including corrosive or flammable vapors. -
Page 12: Use Of The Charging System
USE OF THE CHARGING SYSTEM The EAGLE ATTACK Thermal Imaging Camera may be used only with the approved Li-Ion Battery, SCOTT P/N 200848-01). The battery charger for the EAGLE ATTACK Thermal Imaging Camera can charge two batteries at once: one installed on a camera and a second battery in the additional charging bay. - Page 13 To release the hold down strap, pull the strap end DOWN and AWAY from the base to unhook the pin from the two strap hooks. If the light on the charger base FLASHES RED as soon as a EAGLE ATTACK Thermal Imaging Camera is placed in the charger assembly, it indicates a defect in the battery.
-
Page 14: Battery Installation
BATTERY INSTALLATION A single specially designed Rechargeable Battery Pack is used for operation of the EAGLE ATTACK Thermal Imaging Camera. Install the battery as follows: Loosen the finger screw on the bottom of the camera handle by turning it counter- clockwise. - Page 15 Thread the finger screw clockwise onto the top of the battery. Turn the screw until it is snug. DO NOT OVER TIGHTEN. DO NOT USE ANY TOOL TO TIGHTEN THE FINGER SCREW. Over tightening may damage the threads or make battery changing more difficult.
-
Page 16: Using The Eagle Attack Thermal Imaging Camera
USING THE EAGLE ATTACK THERMAL IMAGING CAMERA Hold the EAGLE ATTACK Thermal Imaging Camera by the handle with the display side toward you. To turn ON the EAGLE ATTACK Thermal Imaging Camera, press and release the POWER button below the display. The initialization screen will appear followed by the thermal image. - Page 17 WHAT THE HUMAN EYE SEES FIGURE 8 WHAT THE EAGLE ATTACK THERMAL IMAGING CAMERA SEES FIGURE 9 NOTE THE IMAGES IN THE DISPLAY SCREEN WILL APPEAR SHARPER WHEN VIEWING A SCENE WHERE THE OBJECTS HAVE A GREATER TEMPERATURE DIFFERENTIAL. Page 15 of 32...
- Page 18 The Display Screen will periodically update the image to assure that the image remains clear. This will momentarily freeze the image in the display. To turn OFF the EAGLE ATTACK Thermal Imaging Camera, press and hold the POWER Button for three (3) seconds. The EAGLE ATTACK Thermal Imaging Camera will turn OFF.
-
Page 19: The Display Screen
THE DISPLAY SCREEN The Display Screen on the EAGLE ATTACK Thermal Imaging Camera provides infor- mation on the scene being viewed as well as the status of the camera. • EI ICON (INDICATES TEMPERATURES ABOVE APPROXIMATELY 200 °F / 93 °C) •... -
Page 20: Temperature Indicator
IMAGING CAMERA MAY RESULT IN SERIOUS INJURY OR DEATH. NOTE WHEN THE EAGLE ATTACK THERMAL IMAGING CAMERA IS POWERED UP, THE SCREEN WILL DISPLAY THE TEMPERATURE INDICATOR ALL THE TIME. Positioning the cross-hair target over an object seen in the display will register an approximate temperature of that object on the display. - Page 21 DIGITAL TEMPERATURE INDICATOR FIGURE 11 DIGITAL TEMPERATURE INDICATOR IS SHOWING APPROXIMATELY 211 °F TRAINING IS REQUIRED BEFORE USE Page 19 of 32 P/N 595224-01 Rev E 7/12...
-
Page 22: Thermal Video Recorder Option
THERMAL VIDEO RECORDER OPTION The SCOTT EAGLE ATTACK Thermal Camera may be equipped with an optional built in Thermal Video Recorder (TVR). On TVR equipped cameras, the connector in the handle base next to the battery connectors is used for TVR output. See FIGURE 12. -
Page 23: Recording Video
SCOTT also recommends deleting the files from the camera after they have been saved to the computer so that the full capacity of video memory is available the next time the camera is used. -
Page 24: Saving The Video Files
THERMAL VIDEO RECORDER OPTION CONTINUED... SAVING THE VIDEO FILES SCOTT recommends that the recorded video be downloaded after each incident to assure that a back-up copy of recorded events is secured before the camera begins to record over the oldest file. -
Page 25: Viewing Or Editing Video Files
After saving, the files on the camera may be erased (deleted) from the camera just as any unlocked files on a computer disk drive. SCOTT recommends deleting the files from the camera after they have been saved to the computer so that the full capacity of video memory is available the next time the camera is used. -
Page 26: Flashlight Accessory
FLASHLIGHT ACCESSORY An external flashlight accessory is available. The STREAMLIGHT TLR-1 flashlight mounts on a rail on the top of the camera housing. The flashlight projects a beam of light in whatever direction the camera is pointed. The flashlight can be removed for independent operation. -
Page 27: Installation Of The Charging System In A Vehicle
INSTALLATION OF THE CHARGER SYSTEM IN A VEHICLE If you have any questions about installing the Charger assembly, consult a qualified electrician before proceeding. Choose a suitable location for the Charger Assembly where the assembly will be readily accessible but will not pose a hazard to occupants of the vehicle. Also, choose a location where the Charger Assembly will not be exposed to excess moisture. -
Page 28: Regular Inspection
Check all battery contacts. The contacts must be clean and undamaged. Spring loaded contacts must be straight and move without sticking. If any loose, worn, or damaged components are found, remove the EAGLE ATTACK Thermal Camera from service and tag for repair by authorized personnel. -
Page 29: Maintenance
ABOVE TO CLEAN THE OUTSIDE OF THE CAMERA. IMMERSION MAY AFFECT THE OPERATION OF THE CAMERA. STORAGE Store the EAGLE ATTACK Thermal Imaging Camera in its carrying case or in the charger when not in use. When storing the EAGLE ATTACK Thermal Imaging Camera for an extended period of time, the battery pack should be removed to prevent damage to the battery terminals. -
Page 30: Replacement Parts
REPLACEMENT PARTS These replacements must be performed in a clean work area. Clean the EAGLE ATTACK Thermal Imaging Camera according to the MAINTENANCE section of this instruction. Be sure the camera is OFF before beginning any work. After performing any service... -
Page 31: Lens Boot
LENS BOOT The LENS Boot, P/N 31001914-XX, (-XX extension number indicates color of boot) stretches to fit around the lens side of the main housing. To remove the LENS Boot, gently lift one edge of the boot until the boot is “TOP”... -
Page 32: Lens Replacement
If the Lens Assembly becomes damaged, it can be replaced with replacement Lens, P/N 31000409. This replacement must be performed in a clean work area. Be sure the camera is OFF before beginning any work. Clean the EAGLE ATTACK Thermal Imaging Camera according to the MAINTENANCE section of this instruction. - Page 33 Reinstall the LENS Boot with the two flats oriented above and below the lens. See FIGURE 18. Check the operation of the camera according to the USING THE EAGLE ATTACK THERMAL IMAGING CAMERA section of this instruction to verify the operation before returning the camera to service.
-
Page 34: Limited Warranty
(2) years from the date of shipment by SCOTT. SCOTT’s obligation under this warranty is limited to replacing or repairing (at SCOTT’s option) THE PRODUCT or components shown to be defective in either workmanship or materials. - Page 36 SCOTT Safety Monroe Corporate Center PO Box 569 Monroe, NC 28111 Telephone 1-800-247-7257 Fax (704) 291-8330 www.scottsafety.com Europe: United Kingdom SCOTT Safety Pimbo Road, West Pimbo Skelmersdale, Lancashire WN8 9RA, England Tel: +44 (0)1695 711711 Fax: + 44 (0)1695 711772 Email:scottintuk@tycoint.com...
Need help?
Do you have a question about the Eagle Attack and is the answer not in the manual?
Questions and answers