
Related Manuals for AIRLUX YPH-12H-S1


Summary of Contents for AIRLUX YPH-12H-S1
-
Page 1: User Manual
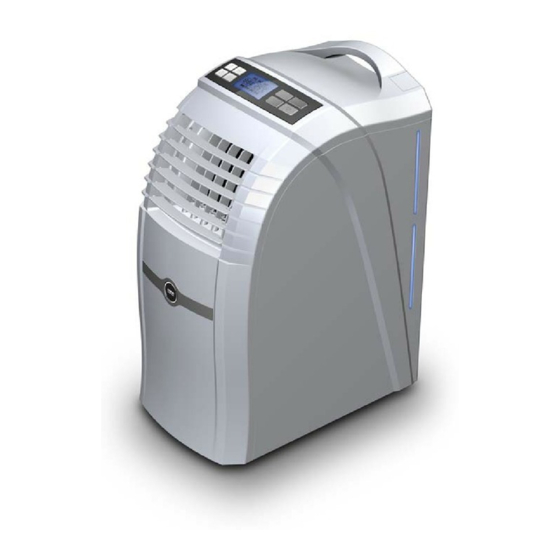
USER MANUAL Model: YPH-12H -S1 PORTABLE AIR-CONDITIONER Thank you for selecting super quality air conditioner. Please be sure to read this manual carefully before using it. Any question, please contact the professional for help. -
Page 2: Table Of Contents
CONTENTS CONTENTS……………………………………………………………1 IMPORTANT SAFEGUARD…………………………………………2 FEATURES AND PARTS LIST………………………………………3 CONTROL PANEL……………………………………………………4 REMOTE CONTROL…………………………………………………6 OPERATION METHODS……………………………………………..8 INSTALLATION……………………………………………………….10 WATER & DRAINAGE METHODS…………………………….…..13 MAINTENANCE………………………………………………………14 TROUBLE SHOOTING………………………………………………15 INSTALLATION ACCESSORIES…………………………………...16 APPENDIX……………………………………………………………..17 - - 1 - -... -
Page 3: Important Safeguard
IMPORTANT SAFEGUARDS Read all instructions for the safety of yourself and your family. *Keep the unit on a flat and dry place. Leave at least 50cm space all around the unit. *Installation suits to national electrical net layout rules. *After installation, please check if the plug is perfect and firmly insert in the jack. -
Page 4: Features And Parts List
FEATURE AND PARTS LIST Feature *No installation is required. *Easily moved . The handle makes moving more convenient. *Totally luxury panel and modern appearance design. *LCD Blue screen display. *Water-cooled mode and adding water mode is most energy saving and environmental protecting. *Low noise and strong wind. -
Page 5: Control Panel
CONTROL PANEL CAUTIONS: If the unit is turned off in cool mode and started immediately, it will wait at least 3 minutes before running. 图3 Buttons ON/OFF:Press this button to turn on/off the unit. Mode: Press this button to select mode. Up/down: Press up or down button to set temperature or adjust time in Timer mode. - Page 6 display 2.LCD :Cool mode indicator. :Dehumidifying mode indicator : Fan mode indicator, also will flash when inner-dehumidifying mode is chosen. :Heating mode indicator :Water Full indicator. :Set temperature under cooling mode or room temperature under fan mode. TEMP means temperature, ℃ means centigrade, and ℉...
-
Page 7: Remote Control
REMOTE CONTROL 1.Button instruction Up/Down Mode Press temperature will When unit is on or 1℃or1℉ , increase under Timer Mode, press temperature press this key to choose will decrease 1℃or 1℉。 cooling, heating, Or adjust time under dehumidifying or fan timer Mode Power Button Press this to choose fan... - Page 8 2. Symbol instruction: (1).Mode From up to down, it is cooling, heating dehumidifying and fan mode, press Mode key to set. The default is Fan, when the unit is on first time. (2). Signal It flashes when signal’s sent out. (3).Economic It appears when it is under economic mode, and disappears when the...
-
Page 9: Operation Methods
(3) Temperature tolerance:±1℃or ±1℉; (4)Temperature range:18-30℃/ 64-86℉。 OPERATION METHODS Timer set 1. Set timer-off Press the Timer button when the unit is on. The screen will flash “- -“ five times. During this period, press Up or Down button to adjust set time (range: 0.5h to 24h). - Page 10 or decrease 1℃ or 1°F by pressing *Press Speed button to choose a proper fan speed. * Press Econ in the cooling and heating mode, the set temperature is “27℃/ 80℉” under cooling mode, “23℃/ 73℉” under heating mode, and fan speed is low. If want to change temperature or speed, please Econ again to cancel..
-
Page 11: Installation
INSTALLATION 1. Selection of Installation Place Please install the unit where is flat and dry. Leave at least 50cm space all around the Unit (when the hose is not connected). (Fig.5) 2. Air Exhaust Duct Mounting Method 1) Fix the square end of the exhaust dust to the exhaust terminal of the unit. - Page 12 The window kit is designed to fit most standard vertical and horizontal windows. However, it may be necessary for you to modify in some aspects of the installation procedures for certain Vertical Horizontal Window Window Window Kit Size: Window Kit Size: Min Size:90cm Min Size:90cm Max Size:130cm...
- Page 13 2) Correct bending θ≤45° Fig 10 θ≤45° Fig 11 3) Wrong bending Fig 12 - - 12 - -...
-
Page 14: Water & Drainage Methods
Adding and Draining Water Adding water *The condensing water is recycled to improve efficiency through cooling condenser. Also it will lower the noise and save energy. *When the condensing water is not enough for pumping, the water Injection indicator on the control panel will illuminate, you’d better inject some water into the water draw, right of the handle, there is a cover. -
Page 15: Maintenance
MAINTENANCE Cleaning Turn off the unit and pull the plug out of the socket before cleaning. 1. Clean the surface Clean the surface of the unit with a duster or a half-wet soft cloth. Do not use chemical solvent like benzene, alcohol, gasoline, etc., otherwise the surface may be damaged or even deformed. -
Page 16: Trouble Shooting
TROUBLE SHOOTING Before contacting the professional, please first check it yourself referring to the followings. Trouble Check Solution Is power fail? It is normal. Is plug out? Insert the plug into the The unit doesn’t Is power fuse or switch off? socket steadily. -
Page 17: Installation Accessories
INSTALLATION ACCESSORIES Flexible exhaust hose with adapters…………………………….1/set Stretch from 28cm up to 150cm Square connector…………………………………………………..1 pc Flat and round connector…………………..………………………1 pc Adjustable window slider kit….…………………………………….1/set Stretch from 90cm 130cm Screw (the length is 10mm)…………………………………………...1 pc Plug (square)………………………………………………………..1 pc Fig16 - - 16 - -... -
Page 18: Appendix
APPENDIX Fuse Parameter Type: FSD Voltage: 250V Current: 3.15A Disposal: Do not dispose this product as unsorted municipal waste. Collection of such waste separately for special treatment is necessary. - - 17 - -...
Need help?
Do you have a question about the YPH-12H-S1 and is the answer not in the manual?
Questions and answers
AIR CONDITCIONER Airlux-Yph-12h ( fault code E 5 )