Vorwerk TM5 Instruction Manual
For domestic food use or similar areas of application
Hide thumbs
Also See for TM5:
- Instruction manual (68 pages) ,
- Instruction manual (35 pages) ,
- Instruction manual (34 pages)
Table of Contents
Advertisement
Advertisement
Table of Contents

Subscribe to Our Youtube Channel
Related Manuals for Vorwerk TM5


Summary of Contents for Vorwerk TM5
- Page 1 Thermomix® Tm5 insTrucTion manuaL ID: 20872-2105 AU V1...
-
Page 3: Table Of Contents
Starting the Thermomix ................27 ® Switching the Thermomix off ............... 28 ® Security measures ................... 28 Weighing ingredients with the Thermomix ..........29 ® Further information about weighing .............. 29 Operating the Thermomix from the Home screen ........30 ®... - Page 4 Favourite recipes ..................... 36 Recipes ......................36 By category ...................... 37 From A to Z ...................... 37 Recently cooked ....................37 Cooking a recipe from a Thermomix recipe chip ® using the “guided cooking function” .............. 38 Parallel Steps ....................38 Automated recipes ...................
-
Page 5: Notes For Your Safety
Vorwerk therefore manual carefully before using your accepts no liability for any damages that Thermomix TM5 for the first time and may arise as a consequence. ® be sure to pay particular attention to Danger of electric shock the notes for your safety. - Page 6 TM5 with a hot food or frothing up of liquid. ® clean mixing bowl lid and sealing ring. • Be sure to place your Thermomix ® Ensure that the brim of the mixing on a clean, solid, even and non-heatable...
- Page 7 Varoma. • Remove the mixing bowl carefully to prevent any spillage, especially when • Always keep the Thermomix TM5 out ® the mixing bowl contents are hot. of children’s reach and warn children...
-
Page 8: Property Damage
• Never touch the locking arms or mixing • Use only the lid provided to close the bowl lid when opening or closing the mixing bowl. Thermomix TM5. Do not attempt to • Use only the Thermomix ® ® remove the mixing bowl or the mixing measuring cup to close the hole in bowl lid with force. - Page 9 ® cable on any heat source as this may bowl, so no moisture can enter the cause damage to the Thermomix TM5. Thermomix TM5 via the contact pins. ® ® • By short-circuiting the Do not place the Thermomix ®...
-
Page 10: Technical Data
Mixing bowl Stainless steel, with heating system and temperature sensor integrated. Maximum capacity 2.2 litres. Connected load Only for 220 … 240 V 50/60 Hz (TM5-1). Maximum power consumption 1,500 W. Pull-out power cord, 1 m long. Dimensions and weight excl. -
Page 11: Introduction
Congratulations on your purchase of the Thermomix TM5! ® During a Thermomix TM5 demonstration, you experienced and tested with your five senses the benefits of your new ® Thermomix TM5. An experienced Thermomix advisor helped you optimize the usage of all possible functions to ®... -
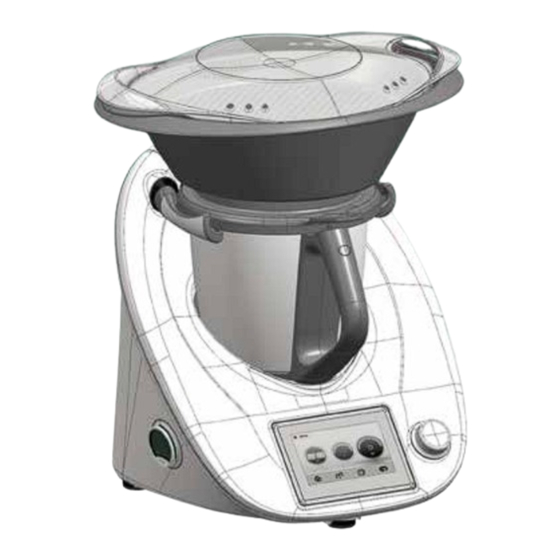
Page 12: 12 Your Thermomix® Tm5
After opening the package please check that all Thermomix TM5 components are included. These are: ® • Thermomix TM5 including mixing bowl and mixing bowl lid ® • Simmering basket • Butterfly whisk (Stirring attachment) • Measuring cup • Spatula •... - Page 13 Seal ring for mixing knife Mixing knife Mixing bowl lid Butterfly whisk (Stirring attachment) Thermomix Recipe Chip Varoma ® Spatula with safety disk Lid sensor Varoma lid Simmering basket Selector Varoma tray Measuring cup Handle Varoma dish Your Thermomix® TM5...
-
Page 14: Before You Start
“0” and the locking mechanism has released it. • never touch the locking arms or mixing bowl lid when opening or closing the Thermomix®. Do not attempt to remove the mixing bowl or the mixing bowl lid with force. Before you start... -
Page 15: How To Remove The Mixing Knife
How to remove the mixing knife To remove the mixing knife: Hold the mixing bowl with one hand so that it’s opening points upwards. With your other hand turn the mixing bowl base 30 degrees counterclockwise and pull the mixing bowl base off downwards 3 . Carefully hold the upper part of the mixing knife and remove it together with its seal ring 4 . -
Page 16: How To Insert The Mixing Knife
Ensure that the sealing ring of the mixing knife is fitted to the knife bearing. If the sealing ring is damaged the ingredients may leak out and damage the Thermomix®. Ensure that the mixing knife is locked into the bowl base correctly. -
Page 17: Accessories
The whole mixing bowl may be placed on any work surface. IMpORTanT: The mixing bowl base must be turned as far as it will go and locked. Failure to fit the mixing bowl base and mixing knife correctly may result in damage to other parts of the Thermomix®. accessories... -
Page 18: Mixing Bowl Lid, Measuring Cup
• use only the lid provided to close the mixing bowl. • Only use your Thermomix® with a clean mixing bowl lid and sealing ring. Ensure that the brim of the mixing bowl is clean at all times. Inspect the sealing ring regularly for possible damage. -
Page 19: Simmering Basket
To add ingredients through the hole in the mixing bowl lid lift the measuring cup and add them into the mixing bowl. Simmering basket The simmering basket for the Thermomix is made of high-quality plastic. ® It is a multi-purpose item: •... -
Page 20: Spatula
CauTIOn Danger of injury by usage of not intended items • use only the Thermomix® spatula with safety disk for stirring food in the mixing bowl. • never use other items or utensils such as spoons, whisks or knives for stirring. -
Page 21: Butterfly Whisk (Stirring Attachment)
Butterfly Whisk (Stirring attachment) • The butterfly whisk 3 (here positioned on the mixing knife 4 ) will help you to achieve best results when whipping cream or beating egg whites. It is also the perfect accessory for the preparation of creamy puddings or cream mixtures. -
Page 22: Varoma
• While cooking, always keep the Varoma lid on top of the Varoma 1 . • use the Varoma only with the Thermomix® (The Varoma is not suitable for use with microwave, ovens or other appliances). How to combine the Varoma parts... -
Page 23: How To Use The Varoma
How to use the Varoma Your Varoma is an accessory designed for the Thermomix and can only be ® used with the Thermomix . Before you can start steaming with the Varoma ® you will need to set up your Thermomix correctly: ®... - Page 24 Water or waterbased liquid in the mixing bowl is brought to the boil, producing 250 g of steam per quater hour for steam cooking or reducing the liquid. The steam rises through the hole in the mixing bowl lid of the Thermomix ®...
- Page 25 CauTIOn Danger of scalding by hot steam and hot condensed water • Touch only the handles on the sides of the Varoma. • When removing the Varoma lid hold it in such a way that the escaping steam or hot dripping liquid cannot come into contact with you. •...
-
Page 26: Practical Work With The Varoma
aCCESSORIES Practical work with the Varoma This description explains clearly how easy it is to use the Varoma. Observe the following basic rules for using the Varoma: • Place enough water in the mixing bowl. IMpORTanT: 30 minutes steam cooking requires 0.5 litre (500 g) of water, for every additional 15 minutes an additional 250 g of water is required. -
Page 27: Working With The Thermomix
Thermomix® can move it to the mains power supply. You can choose whatever Place your Thermomix® on a clean, solid, even and length of power cord you need, up to 1 m. If you do not non-heatable surface so that it cannot slip. Keep the need the whole length of the power cord the remaining Thermomix®... -
Page 28: Switching The Thermomix ® Off
You can then release the ® selector. CauTIOn Danger of injury from sharp edges The Thermomix® display is made from glass and can shatter if handled incorrectly. Safety measures Please read the safety measures carefully when using the Thermomix ®... -
Page 29: Weighing Ingredients With The Thermomix
The variation for up to 3.0 kg is +/–30 g. IMpORTanT: When weighing do not touch or lean anything against the Thermomix® and make sure that there is nothing underneath the Thermomix®. also make sure the power cord is without tension. -
Page 30: Operating The Thermomix From The Home Screen
Tap the temperature dial and use the selector to set the desired temperature to heat or cook the ingredients in the mixing bowl. If the dish should not be heated, skip this step. Please note that the heating function of the Thermomix ®... -
Page 31: Adjustment Of Preset Time
00:00 or press the selector. If no time has been preset and the speed selector is activated the Thermomix ® will automatically stop after a maximum time of 99 minutes. After this time, a buzzer will sound. -
Page 32: Temperature Dial
60 °C or higher, an electronic system will prevent food from escaping by delaying the speed increase. This soft start will only work if the food has been heated in the Thermomix®. Only then can the temperature sensor correctly gauge the current temperature and trigger the soft start accordingly. -
Page 33: Varoma Temperature Setting
CauTIOn never heat up the mixing bowl when it is empty. Speed dial Tap on the speed dial and turn the selector to start the Thermomix ® The following speeds are available: Designation Speed / mode Revolutions/min. -
Page 34: Mixing/Blending
Do not reach into the hole in the mixing bowl lid or touch the mixing knife when the Thermomix ® is in operation. Turbo mode Use the Turbo mode to operate the Thermomix at maximum speed. ® To activate the Turbo mode, tap on the modes icon 1 and select Turbo 2 . -
Page 35: Forward/Reverse Knife Movement Operation
• Place your Thermomix® on a clean, solid, even and non-heatable surface so that it cannot slip. • Keep the Thermomix® at a sufficient distance from the edge of the surface to prevent it from falling off. • Be aware that occasionally when kneading dough or chopping food, an imbalance can develop in the mixing bowl which, under certain... -
Page 36: Thermomix ® Menu
WORKInG WITH THE THERMOMIX® Thermomix Menu ® When you tap on “Menu”, it features a list of further useful Thermomix ® functions 1 . Favourite recipes Selecting “Favourite recipes” is the quickest way to access the recipes that you have tagged as favourites. -
Page 37: By Category
By category When you search by category, the Thermomix will suggest different categories ® such as starters or main meat courses. The recipes are ordered alphabetically within the category 5 . From A to Z You can search for the recipe name in the alphabetical list. You can scroll through the list by swiping vertically over the screen or by using the scroll bar on the right side of the screen. -
Page 38: Cooking A Recipe From A Thermomix ® Recipe Chip Using The "Guided Cooking Function
A Thermomix recipe chip icon will appear in front of the “Recipes” menu ® entry in the main menu. The recipes on the Thermomix recipe chip may now ® be selected and cooked from the “Recipes” and “Favorite recipes” submenu. -
Page 39: Automated Recipes
10 . Once you have all the ingredients, you can start cooking. Follow the instructions on the screen. As you complete each step select “Next” 11 . Picture 1 2 shows the recipe state in which the Thermomix ®... -
Page 40: Transportation Mode
WORKInG WITH THE THERMOMIX® Transportation mode If you need to transport the Thermomix , you should first lock the mixing ® bowl. Select “Transportation mode” to do so 1 . A message explaining how to release the transportation mode will be displayed 2 . -
Page 41: Language
As soon as you have made your selection, all information will appear on the screen in your chosen language 6 . About Thermomix ® Information on your Thermomix ’s serial number and the current software ® version is available under the About Thermomix option 7 8 . ® Working with the Thermomix®... -
Page 42: Reset To Factory Settings
WORKInG WITH THE THERMOMIX® Reset to factory settings Use the “Reset to factory settings” option to revert to the original Thermomix ® manufacturer settings 1 . Please note that your personal settings will be lost 2 . Background colour Choose between light text on a dark background and black text on a light background 3 4 . -
Page 43: Locking Your Thermomix
• If you wish to activate the lock again, the Thermomix will request whether ® you wish to use the same PIN again. If you select “Yes”, the Thermomix will ® be locked immediately. If you select “No”, you will be asked to enter a new PIN and the Thermomix will then be locked once this has been saved 15 . -
Page 44: Contact
WORKInG WITH THE THERMOMIX® Contact You can find your customer service local contact as follows: Select “Contact” in the Settings menu 17 . Select your country from the list 18 . The full contact details will be displayed 19 . -
Page 45: Things To Remember
® Electronic motor protection working order. If the motor has turned off: • Remove the mixing bowl from the Thermomix ® • Reduce the quantity contained in the bowl and/or add some liquid, as appropriate for the recipe. • Wait for approx. 5 minutes (cooling down time). -
Page 46: Cleaning
We recommend that you dismantle the mixing bowl for cleaning, especially when you clean it in the dishwasher. IMpORTanT: never use pointed or sharp objects for cleaning as this may damage functional parts or affect the safety of the Thermomix®. 46 Cleaning... -
Page 47: How To Clean The Mixing Knife
How to clean the mixing knife To clean the mixing knife hold it under running water with the mixing knife pointing upwards, as shown in picture 2 . In order to facilitate the cleaning, use a brush or clean it in the dishwasher. IMpORTanT: Do not leave the mixing knife in water for a long time as this may damage the gasket system of the knife bearing. -
Page 48: How To Clean The Main Thermomix
Danger of electric shock • Disconnect the Thermomix® from the mains power supply before cleaning and if Thermomix® is not to be used for a prolonged period of time. • Do not immerse the Thermomix® in water. Clean with a damp cloth only. -
Page 49: Changing The Insect Mesh
4 and insert it. It fits snugly over the ventilation slits 5 . The ventilation grille can now be reattached. Carefully press it into the clips until it locks entirely in place. Never operate your Thermomix without the ®... -
Page 50: Changing The Insect Mesh On The Bottom
1 . Take the protection grid for the bottom 2 . ® It has an oval bump that must face the bottom of the Thermomix ® Lay the insect mesh under the upper ridges, then press down until you hear that the grid has locked in place 4 . -
Page 51: Notes For Your Own Recipes
The easy to Settings: 7 sec/speed 5: understand step by step design of our recipes enables you 1 set timer to 7 seconds to prepare your own recipes with your Thermomix 2 set speed 5 ® Order of ingredients... -
Page 52: Troubleshooting
Danger of electric shock Regularly inspect your Thermomix® and its accessories (including the mixing bowl and the connecting cable) for possible damage. If damage does occur, do not use the Thermomix® and contact Vorwerk customer service or an authorised Vorwerk repairer. Troubleshooting... -
Page 53: Legal Regulations/Copyright
Directions regarding the EU-Member States: US market As an owner of an electrical or electronic product, Please note that, to date, the Thermomix ® you are not allowed by law (according to EU- (the appliance) has and is only being produced,... -
Page 54: Warranty/Customer Service
Vorwerk Thermomix . Never use the Thermomix ® ® combination with parts or equipment not provided by Vorwerk Thermomix ® Otherwise your warranty is rendered void. Customer service For details of your local customer service centre please contact your... - Page 55 Customer service Monday to Friday, 8 a.m. to 5 p.m. Telephone 1800 004 834, Email: info@thermomix.com.au Thermomix® in new Zealand – Vorwerk Official Distributor Customer service Monday to Friday, 8 a.m. to 5 p.m. Telephone 0800 766 966, Email: info@thermomix.co.nz This instruction manual is available in other languages at www.thermomix.com...
Need help?
Do you have a question about the TM5 and is the answer not in the manual?
Questions and answers