Emotiva XMC-1 User Manual
Xmc-1 gen 2 - 7.2 channel av preamp/processor
Hide thumbs
Also See for XMC-1:
- User manual (104 pages) ,
- Firmware update (4 pages) ,
- Firmware update procedure (4 pages)
Table of Contents
Advertisement
Quick Links
Advertisement
Table of Contents

Related Manuals for Emotiva XMC-1


Summary of Contents for Emotiva XMC-1
- Page 1 ENTER VOLUME TUNER INPUTS MENU AUDIO INFO STANDBY...
-
Page 3: Important Safety Precautions And Explanation Of Symbols
Do not install the XMC-1 on any stand, shelf, or other piece of furniture that is unable to support its weight. If a cart is used to move the XMC-1, use caution to avoid injury from tip-over. - Page 4 The power cable for the XMC-1 should be unplugged from the outlet during severe electrical storms, or when unused for a long period of time. Only replace the fuse(s) in the XMC-1 with a fuse(s) of proper value and voltage rating.
-
Page 5: Fcc Interference Statement
Connect the equipment to an outlet on a circuit different from that of the receiver. Consult the manufacturer or an experienced radio/TV technician for help. For questions regarding service, please contact: Emotiva Audio Corporation Attn: Repair Department 139 Southeast Parkway Court... -
Page 7: Table Of Contents
About This Manual ......................3 Unpacking ...........................4 Welcome to the XMC-1 ....................5 Specifications ........................7 Operating the XMC-1 ......................8 The XMC-1 Menu System ................... 22 Connecting the XMC-1 ....................55 Care and Maintenance ....................79 Troubleshooting ......................88 Emotiva Audio Corporation Limited Warranty ........... 89 Notes .......................... -
Page 8: Introduction
While some pre/pros give you a simplified automatic room correction system, or a manual equalizer, the XMC-1 offers a full set of powerful controls that let you get the absolute best from your room and speakers. Dirac Live™ provides the best automatic room correction available today;... -
Page 9: About This Manual
About This Manual This manual will provide you with all the information you need to install and configure the XMC-1 to achieve its optimum potential. You may wish to record serial numbers or other purchase information on the Notes page at the back of this manual. -
Page 10: Unpacking
XMC-1: User Manual Unpacking Your XMC-1 was carefully packed and should reach you in perfect condition. If you notice any shipping damage or other issues when you unpack it, please contact Emotiva immediately. Gently remove your XMC-1 from the packing carton and remove all wrappings and shipping material. -
Page 11: Welcome To The Xmc-1
- in a single A/V preamp/processor that will truly redefine everything you know about home theater. Even better, the XMC-1 is designed and manufactured in the United States of America... and costs far less than you might imagine possible. - Page 12 The XMC-1 incorporates an advanced feature which not only allows you to watch - or continue to watch - video on your monitor while the XMC-1 is in Standby Mode, but even allows you to change sources while in Standby. This feature is great if you just want to do a quick check of the weather, or let the kids watch TV without turning on your main system.
-
Page 13: Specifications
XMC-1: User Manual Specifications Inputs • 8 - HDMI V1.4b. • 3 - digital optical audio (Toslink) up to 24/192K. • 3 - digital coax audio (RCA) up to 24/192K. • 1 - digital AES/ESB audio • 1 - pair reference quality balanced analog audio (XLR). -
Page 14: Operating The Xmc-1
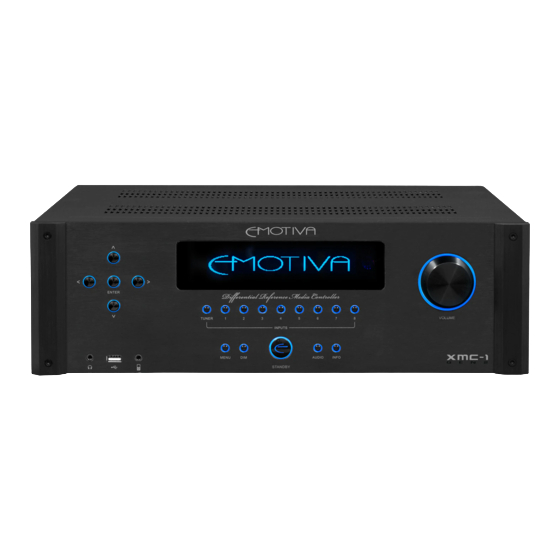
XMC-1: User Manual Operating the XMC-1 ntia Refe nce Medi Contro er ENTER VOLUME TUNER ------------------------------------------ INPUTS ------------------------------------------ MENU AUDIO INFO XMC-1 STANDBY Page 8... - Page 15 XMC-1: User Manual Audio Modes Reference Stereo Mode Reference Stereo Mode provides the purest listening experience, with the fewest options for processing or modifying the signal. In Reference Stereo Mode: • The output is always TWO CHANNEL STEREO. • There is NO bass management, and NOTHING is sent to the subwoofer.
-
Page 16: Stereo Mode
XMC-1: User Manual • Bass management IS available and the subwoofer IS active. • You CANNOT use the Loudness Control, or the Tone Controls, or the Tone Trims • You CANNOT use Dirac or the manual parametric EQ Presets. •... - Page 17 For audio encoded in these formats, the XMC-1 will automatically detect the format and use the correct decoder.
- Page 18 The combination of Surround Sound decoding and Surround Sound processing the XMC-1 uses for a given input signal will depend on the format of the incoming signal, and on how you have configured the Surround Mode in the Setup Inputs Menu and Main Zone Menu.
- Page 19 Setup | Advanced Menu. When the Video on Standby feature is NOT Enabled When you turn on the rear panel Power switch, the XMC-1 will go into Standby Mode (the halo ring around the front panel Standby button will illuminate amber).
-
Page 20: Bass Management
Standby. In this mode, all video and audio processing is disabled, but the XMC-1 will still pass audio and video directly to your TV or monitor, and the controls on the XMC-1 will still allow you to change sources. This feature may be used to allow your family to continue to watch TV on the TV monitor connected to the XMC-1 even when “the big stereo”... - Page 21 The Tone Controls accessed via the Setup | Speakers | Presets | {preset} | Equalization | System EQ Menu are retained when the XMC-1 is powered Off. The Tone Trims accessed via the Main Zone | Trims | Tone Menu are temporary trims, and are not retained when the XMC-1 is turned Off.
-
Page 22: Headphone Output
EQ processing is disabled (Dirac and the Speaker Presets are disabled while the headphones are connected.) The XMC-1 also includes a unique level of intelligence in how it handles Level Trims and Tone Trims for the headphones; both sets of trims are configured and stored independently for the Main Outputs and the Headphone Outputs. - Page 23 (If you connect only the Coax digital output of your universal disc player to the appropriate input on your XMC-1, you will be able to use that connection to play CDs, and to play the CD layer on hybrid sACDs, but you will get silence if you attempt to play an sACD, or the sACD layer of a hybrid disc, through that output.
- Page 24 The Tune Up and Tune Down buttons can be used to instruct the XMC-1 to move up or down to the next station frequency increment.
- Page 25 This section of the final manual will include detailed instructions for: Installing the Dirac live software on your computer Configuring the Dirac live softwware on the XMC-1 and your computer Using Dirac live to perform accurate room correction Configuring Inputs on the XMC-1 to use Dirac live preset...
- Page 26 NoT recommend “stacking” bands to generate excessive boost or cut in level. It is even possible to cause the XMC-1 to clip by stacking multiple bands with gain. Page 20...
- Page 27 A typical example would be to connect Trigger 1 to the amplifier that powers your main speakers, configured to be active whenever your XMC-1 is turned on; and connect Trigger 2 to the amplifier that powers your surround speakers, configured to be active only when the surround speakers are to be used.
-
Page 28: The Xmc-1 Menu System
XMC-1: User Manual The XMC-1 Menu System ntia Refe nce Medi Contro er ENTER VOLUME TUNER ------------------------------------------ INPUTS ------------------------------------------ MENU AUDIO INFO XMC-1 STANDBY Page 22... - Page 29 XMC-1: User Manual The front panel of the XMC-1 is dominated by a large, bright, easy to read blue OLED display. The XMC-1’s front panel display can be set to any of six different brightness levels, including totally off. If the display is fully dimmed, it will illuminate for a few seconds when you press the Info button, and, when you activate the Menu, the display will illuminate for as long as you are using the Menu.
- Page 30 XMC-1: User Manual This is what the front panel menu on the XMC-1 looks like when configuring the various settings for the HDMI 1 Input in the Setup | Inputs Menu. Lip Synch Auto HDMI 1 Button Input 1 5.1 Mode Auto This is what the same Setup | Inputs Menu for HDMI 1 looks like in the on-screen display.
- Page 31 XMC-1: User Manual The Menu System is entered by pressing the Menu button on the XMC-1’s front panel, or on the remote control; pressing the button a second time, or pressing the left arrow button when you are already at the top level of the menu, exits the menu and returns you to the Information Screen.
- Page 32 This example will show you exactly how the process works, although it seems a lot more complicated on paper than it does in real life. Once you have an XMC-1 in front of you in person, you’ll see how simple and intuitive the incredibly powerful XMC-1 Menu System really is to use.
- Page 33 Menu button and all your settings will be saved. Once you try the XMC-1’s menu system for a few minutes, you’ll realize how incredibly intuitive it really is - and how easy it makes controlling the amazing power and flexibility of the XMC-1.
-
Page 34: Main Menu
Note: Trim adjustments made in the Main Zone menu are temporary and are not saved when the XMC-1 is shut down. To make permanent adjustments, use the setup menu Zone 2 (menu) The Zone 2 menu provides the controls used to operate the XMC-1’s second listening zone in day- to-day use. Page 28... -
Page 35: Tuner Menu
XMC-1: User Manual Tuner Menu The Tuner Menu is used to select a station Tuner on the XMC-1’s built-in high quality AM/ Band (menu) FM tuner, and to create, rename, and delete station presets. Band & Frequency Frequency The Band and Frequency controls are used to select a radio station to listen to by number (frequency). - Page 36 XMC-1. This address may be requested by some routers in order to allow the XMC-1 to access the Internet. CPLD Version Firmware Version This is the current version of the main XMC-1 firmware installed on your XMC-1. Page 30...
- Page 37 This is the current version of the front panel firmware installed on your XMC-1. Kernel Version This is the current version of the operating system kernel installed on your XMC-1. The XMC-1 operates on a highly-customized version of the Linux operating system.
- Page 38 XMC-1: User Manual Main Zone Menu Main Zone Speaker Trims Level (menu) List Bass Tone Level Bass Frequency Treble Level Treble Frequency Delay Synch Loudness Input Input List Speaker Presets Surround Surround Mode Mode List Page 32...
- Page 39 Menu - with the result that the Treble will actually be set to +0 dB (flat). When you restart your XMC-1, the Treble adjustment you made in the setup Menu will remain in effect, while the Treble Trim adjustment you made in the Main Zone Menu will revert to the default +0 dB.
-
Page 40: Surround Mode
Input The Input control is used to select which input on the XMC-1 to listen to or view. Inputs may also be assigned to individual Input Select buttons in the Setup Menu. - Page 41 On and Off directly from the remote control. Input The Input control is used to select which input on the XMC-1 to listen to or view. Inputs may also be assigned to individual Input Select buttons in the Setup Menu.
-
Page 42: Setup Menu
EQ using the XMC-1 built-in test tones and parametric equalizers. Setup | Inputs Menu The Inputs Menu is used to configure each Input on the XMC-1, including the Input Name and how the XMC-1 handles various types of input signals on each input Page 36... - Page 43 (menu) settings and defaults. Note: Settings configured in the Setup Preferences Popups Menu remain in effect after the XMC-1 is shut down and restarted. LFE Level Friendly Name The Friendly Name is used by various remote control applications to identify the...
- Page 44 The Turn-On Input setting allows you to configure which Input on your XMC-1 is active when you first turn it on. If you select Last Used, then the input which was in use when the XMC-1 was shut down will be chosen.
- Page 45 List The setup Triggers Menu allows you to configure how the four independent triggers on the XMC-1 operate. Each trigger can be independently configured to switch a piece of trigger-enabled equipment On based on what the XMC-1 is doing. After selecting Setup Triggers you will be asked to select one of the four triggers, and then given an opportunity to configure whether that trigger will be turned on under various conditions.
- Page 46 This instructs the trigger to switch On when the selected Input is active. Headphone Override When a headphone is plugged into the XMC-1’s headphone jack, the main outputs are disabled. In addition, this selection will instruct the trigger to be switched off when headphones are inserted.
- Page 47 Iput XMC-1 when you insert a disc Change in your Blu-Ray player. Many equipment manufacturers implement some form of CEC control, although they may...
- Page 48 XMC-1 manually, then disabling the DHCP check box will allow you to set each parameter manually. Note: Most users will find DhCp the best choice. If you prefer to configure your XMC-1 network parameters manually, please consult your network service provider or local computer expert about the appropriate addresses and subnet mask to enter.
- Page 49 Con g initiated from this menu. Factory Reset Tuner Selecting Factory Reset Region clears all user settings and returns the XMC-1 to its factory defaults. After Setup selecting Factory Reset you Lock will be prompted to Confirm your choice. Front...
- Page 50 After selecting Restore Config you will be prompted to Confirm your choice. Note: If a UsB stick is inserted in the XMC-1, the configuration stored there will be used. If no UsB stick is inserted, or no external configuration file is present, then the configuration that is stored internally will be used.
-
Page 51: Firmware Update
XMC-1 will continue to pass video and audio from the selected input source to the display, and will allow you to change the Input source, even when the XMC-1 is in Standby Mode. The XMC-1 uses slightly more power when in Standby Mode if Video on Standby Mode is enabled. - Page 52 The setup speakers Menu is where you access the powerful speaker and room correction features of the XMC-1, including Dirac Live automatic room correction, and the XMC-1’s incredibly flexible manual calibration system, which includes two fully independent banks of parametric equalizers, along with pink noise and test tone generators.
- Page 53 XMC-1: User Manual If you chose Dirac, you will be sent to the Dirac Live Menu. If you choose to manually configure a preset, you will be prompted to choose Preset 1 or Preset 2; the following settings will be available for EACH preset.
- Page 54 XMC-1: User Manual setup | speakers | EQ Setup System Bass Tone Spkrs EQ Level Speakers List Bass Frequency Treble Level Treble Frequency Filters Level List ( lter) Width ( lter) Frequency ( lter) Test Tone Level Tone Frequency Page 48...
- Page 55 Once you have set the basic parameters for each preset (speaker size, crossover points, level trims), you can use the XMC-1’s powerful parametric EQ filters and convenient tone controls to customize the sound just the way you want. Both the Tone Controls and the Parametric EQ...
- Page 56 +6 dB. Although unlikely, it is possible, by applying excessive gain to overlapping bands,to cause the XMC-1 to clip. Filter Width For each filter, you can set the band width from narrow to wide over a wide range. As you change the Filter Width setting, the width you set will be displayed as a traditional “Q”...
- Page 57 XMC-1: User Manual Test Tone Frequency Use the Test Tone Frequency control to set the output frequency of the sine wave test tone used to calibrate the parametric EQs. There is only a single Tone Generator, even though the control appears in duplicate under the options for each filter.
- Page 58 XMC-1: User Manual setup | Inputs Menu Setup Input Inputs Name Selector List (menu) Lip Synch Con rm Delay Lip Synch Auto Button Surround 5.1 Mode Mode List Surround 2.0 Mode Mode List Speaker Preset Level Trim Visible Page 52...
- Page 59 (multi-channel pCM for example) with no decoding or modification. selecting DD Ex Movie or DD Ex Music [MAy ChANGE - plIIx] will instruct the XMC-1 to use the Dolby decoder to synthesize 7.1 channels from 5.1 channel content by creating rear surround channels.
- Page 60 The 2.0 Mode setting determines what mode will be used by default when a two channel signal is received at this Input. You will be offered a lit of valid modes to choose from. Selecting Auto, which is the default, will instruct the XMC-1 to select the best mode for each particular type of signal received.
-
Page 61: Connecting The Xmc-1
XMC-1: User Manual Connecting the XMC-1 ntia Refe nce Medi Contro er ENTER VOLUME TUNER ------------------------------------------ INPUTS ------------------------------------------ MENU AUDIO INFO XMC-1 STANDBY This section of the final manual will include a brief summary of: Input connections output connections Network connections... - Page 62 Connect any standard pair of stereo headphones for high-quality personal listening. When you plug in a pair of headphones, the main volume is automatically muted. 5. Front Panel USB Input This input is used to apply firmware updates to the XMC-1 via a standard USB stick (thumb drive). Page 56...
-
Page 63: Standby Button
9. Standby Button Press this to switch the XMC-1 from Standby to On; press it again to return the XMC-1 to Standby mode. (The rear panel AC power switch must be On.) The halo ring around the Standby button illuminates amber for Standby and blue for On. - Page 64 Note: When playing DVD and Blu-Ray discs, your player and the disc itself will probably offer you a choice of several audio modes. After you select one, the XMC-1 will determine which type of audio is being supplied by your source component, and will oNly allow you to choose audio modes that are compatible with that input signal.
- Page 65 XMC-1: User Manual XMC-1 Rear panel AM & FM HDMI INPUTS HDMI OUTPUTS ANTENNAS STEREO RECORD ETHERNET DIGITAL 7.1 CHANNEL ANALOG INPUTS ZONE & USB TRIGGER AUDIO DIGITAL AUDIO INPUTS ANALOG INPUTS INPUTS & OUTPUTS UPDATE & OUTPUTS OUTPUTS 2 & 3...
- Page 66 XMC-1: User Manual Rear panel - Video Inputs and outputs (hDMI) 7.1 ANALOG IN CENTER ANALOG IN RECORD ZONE OUT IR IN TRIGGER OUT FRONT SURR BACK SUB DIGITAL AUDIO AES/EBU IR OUT ANALOG IN 1 PUSH PUSH BALANCED ANALOG IN...
- Page 67 XMC-1: User Manual Rear panel - Analog Audio Inputs 7.1 ANALOG IN CENTER ANALOG IN FRONT SURR BACK SUB 7.1 ANALOG IN CENTER ANALOG IN RECORD ZONE OUT IR IN TRIGGER OUT FRONT SURR BACK SUB DIGITAL AUDIO AES/EBU IR OUT...
- Page 68 XMC-1: User Manual 2. & 3. Stereo Unbalanced Analog Audio Inputs (3 pairs) Provide inputs for three unbalanced stereo analog sources. 4. Stereo Balanced Analog Audio Inputs (1 pair) Provides an input for one balanced analog source. Note: The Balanced Analog Input is independent from Analog In 1 (they may be used and configured separately).
- Page 69 Note: When both options are available, balanced connections are preferred because they are more robust and less sensitive to noise. If your other components are fully differential, you must use balanced connections between them and the XMC-1 to maintain a fully differential system topology.
- Page 70 Connect these line level outputs to a pair of external powered subwoofers. Note: The XMC-1 supports true 7.2 surround operation when used with two subwoofers. If you choose to use only one subwoofer, connect it to the left Channel subwoofer output.
-
Page 71: Record Output
XMC-1: User Manual Rear panel - Record Input and output RECORD 7.1 ANALOG IN CENTER ANALOG IN RECORD ZONE OUT IR IN TRIGGER OUT FRONT SURR BACK SUB DIGITAL AUDIO AES/EBU IR OUT ANALOG IN 1 PUSH PUSH BALANCED ANALOG IN... - Page 72 2. Zone 2 Audio Output Provide a stereo unbalanced line level analog audio output for Zone 2. Note: on the XMC-1, the main zone is designated as “Zone 0”, and the two additional zones available are designated as Zone 1 and Zone 2.
-
Page 73: Digital Audio Outputs
2. & 3.Digital Audio Inputs The XMC-1 provides seven digital audio inputs, designated Coaxial 1, Coaxial 2, Coaxial 3, Optical 1, Optical 2, Optical 3, and AES/EBU. Page 67... - Page 74 Note: This input requires a source device that supports UsB Audio Class 2 (UAC2). To computers connected to this input, the XMC-1 will appear as “an external UsB sound card”. Modern Apple computers support this directly (without any additional drivers); Windows computers will require you to load a driver on the computer (we provide the driver);...
-
Page 75: Ethernet Connection
XMC-1 . Note: A network connection with an Internet connection is required for configuring Dirac live but, once DIrac is configured, the XMC-1 does NoT need to remain connected to the Internet - or to your local network - to operate. - Page 76 1. & 2. IR Remote Input and Output Connect a remote IR detector (eye) to this input. This is especially useful if your XMC-1 is located in a cabinet or other area where the front panel IR detector is blocked. Connect a remote IR transmitter (“blaster”) to this output to control other equipment.
- Page 77 7 CHANNEL ANALOG OUT SUBWOOFER OUT 1. Trigger Outputs (4) Connect each Trigger Output to one piece of trigger-enabled audio equipment. You can then configure the XMC-1 to turn on specific trigger-enabled equipment when specific input sources or modes are selected. Page 71...
-
Page 78: Power Switch
The XMC-1 can be used with either a two-wire or three-wire standard IEC power cable. 2. Fuse Holder [NEED MORE INFORMATION HERE.] 3. Power Switch Switches the AC main power to the XMC-1 On and Off. When this switch is Off, the XMC-1 will not respond to trigger signals or manual controls. Page 72... - Page 79 0%. (Brightness can be adjusted in six steps: 0%, 20%, 40%, 60%, 80%, 100%). MODE INPUT VOLUME 2. Standby Button Press the Standby button to switch the XMC-1 from On to Standby mode. MUSIC MOVIE LOUDNESS SPEAKER PRESET 3.
-
Page 80: Menu Navigation Buttons
Down button to move to the previous/next preset station. Press the Seek Up or Seek Down button to instruct the XMC-1 to seek to the previous/next received station. Press or hold the Tune Up or Tune Down button to instruct the XMC-1 to manually seek a station by tuning up or down the frequency band. - Page 81 Press the On button to switch the XMC-1 from Standby mode to On. 14. Volume Up and Volume Down Buttons Use the Volume Up and Volume Down buttons to raise and lower the audio volume on the XMC-1. 15. Speaker Preset Button Toggles between the speaker presets: Dirac Live, and the two manual presets, which will show the names you have configured for them.
- Page 82 In the final version of this manual, this section will include detailed instructions about: Downloading and installing drivers Using the DAC input with Apple computers Tips for configuring computer audio sources Note: The XMC-1 supports DsD over hDMI only Page 76...
- Page 83 XMC-1: User Manual XMC-1 Network Remote Control Apps Information in this section is still pRElIMINARy. The final version will contain additional details how to install and use the network remote control apps. + installing the Android RC app (app store)
- Page 84 XMC-1: User Manual XMC-1 IR Remote Control Codes Information in this section is still pRElIMINARy. The final version will contain a list of the IR Remote Control codes - for use with harmony and other universal remotes. Page 78...
-
Page 85: Care And Maintenance
If necessary, the XMC-1 should be cleaned gently with a soft rag. • If something sticky gets on the front panel or case of the XMC-1, it should be cleaned with a mild cleaning solution applied to a soft rag, followed by wiping with a clean rag dampened with plain water and drying with a soft dry rag or cloth. - Page 86 • You will need access to the top, sides, back, and bottom of the XMC-1, so move it to a location where you have room to work, and be sure to place it on a soft or padded surface to avoid scratching the finish;...
- Page 87 XMC-1: User Manual To close your XMC-1 back up for use after testing or changing the internal fuses, do the following: • While your XMC-1 is still in an upright position, put the shielding enclosure back in its proper position and replace the four screws securing it to the XMC-1 front panel. Remember that the shielding enclosure mounts under the lip on the inside of the front panel, and that the screws go through the front panel lip and thread into the metal of the shielding enclosure.
-
Page 88: Installing The Remote Control Batteries
Installing the Remote Control Batteries The back plate of the XMC-1 remote control is attached by magnets. To remove it, simply insert a small screwdriver into the slot on the back plate - toward the bottom - and pry gently. - Page 89 Note: It is perfectly acceptable to use the same UsB drive for a firmware update file and a configuration backup. Note: Do NoT remove the UsB drive or power down the XMC-1 while the update is in progress. To update the XMC-1 firmware: •...
- Page 90 The Backup Configuration feature on the XMC-1 allows you to save your entire current configuration onto a USB drive. We STRONGLY suggest that, after configuring your XMC-1 just the way you want it, you save a backup copy of the configuration. You can then use this backup at a later date to restore your XMC-1 to its current configuration.
- Page 91 Note: It is perfectly acceptable to use the same UsB drive for a firmware update file and a configuration backup. Note: In order to restore a configuration to the XMC-1, it must be stored in the default location on the UsB drive, and must have the default fie name. If you are managing multiple configuration files, be sure to put the one you want in the correct location, and rename it to the default name, before proceeding.
- Page 92 NoT erase the internal configuration backup file stored on the XMC-1 - if one exists. Note: A factory Reset is used to restore your XMC-1 to its factory default configuration. It is NoT necessary to perform a factory Reset after performing a Restore Configuration. It is NoT necessary to perform a factory Reset after performing an Update firmware - unless otherwise noted in the instructions you receive with the update file or from Emotiva Technical support.
- Page 93 XMC-1: User Manual Page 87...
-
Page 94: Troubleshooting
Troubleshooting Information in this section is still pRElIMINARy . If none of these simple suggestions eliminates your problem, please contact Emotiva Technical Support, at 1-877-366-8324, where a real live person will be happy to get you up and running. Page 88... -
Page 95: Emotiva Audio Corporation Limited Warranty
XMC-1: User Manual Emotiva Audio Corporation Limited Warranty What does this warranty cover? Emotiva Audio Corporation (“Warrantor”) warrants its products against defects in materials and workmanship. how long does this coverage last? This warranty commences on the date of retail purchase by the original retail purchaser and... - Page 96 In order to make a claim under the warranty, you must: 1. Call or email a customer service representative at 1-877-EMO-TECH (1-877-366-8324) or support@emotiva.com. Provide a description of your problem and the serial number of the product for which the warranty claim is being made.
- Page 97 XMC-1: User Manual Manufactured under license under U.S. Patent Nos: 5,956,674; 5,974,380; 6,226,616; 6,487,535; 7,212,872; 7,333,929; 7,392,195; 7,272,567 & other U.S. and worldwide patents issued & pending. DTS-HD, the Symbol, & DTS-HD and the Symbol together are registered trademarks & DTS-HD Master Audio is a trademark of DTS, Inc. Product includes software.
-
Page 98: Notes
All information contained in this manual is accurate to the best of our knowledge at the time of publication. In keeping with our policy of ongoing product improvement, we reserve the right to make changes to the design and features of our products without prior notice. PRELIMINARY XMC-1 User Manual Revision 0.1 Page 92... - Page 99 XMC-1: User Manual Page 93...
Need help?
Do you have a question about the XMC-1 and is the answer not in the manual?
Questions and answers