Mercedes-Benz Comand Operator's Manual
Hide thumbs
Also See for Comand:
- Operating instructions manual (298 pages) ,
- Operator's manual (271 pages) ,
- Supplement manual (190 pages)

Related Manuals for Mercedes-Benz Comand


Summary of Contents for Mercedes-Benz Comand
- Page 1 Grafik auf der Vorgabeseite in den Grafikrahmen importieren! COMAND Operator’s Manual Mercedes-Benz...
- Page 2 Order-No. DaimlerChrysler 6515 6668 13 Blaupunkt 8 622 403 703 Index E Parts-No. 230 584 38 82 US Edition E 07/03...
- Page 4 Please make yourself familiar with your we reserve the right to make changes in COMAND control unit and read the instruc- design and equipment. Therefore, informa- tions in this manual before operating the tion, illustrations and descriptions in this COMAND system.
-
Page 6: Table Of Contents
Selecting a station ... . . 30 COMAND control unit ....6 Memory functions....34 Satellite radio* . - Page 7 Contents Service numbers....126 Entering Points of Interest ..155 Telephone* ..... 85 Calling a service number.
- Page 8 Contents Driving on a non-digitized road. . . 186 Info Services*/System settings. . . 201 Glossary ..... . 221 Interrupting route guidance during Info Services*.
- Page 9 Contents...
-
Page 10: Introduction
Directories components. If you are operating service numbers. COMAND for the first time or if you have The glossary explains the most important rented or borrowed the vehicle, this is the technical terms. -
Page 11: Symbols
COMAND system equip- The continuation symbol ment may deviate from some marks an interrupted proce- descriptions and illustrations. -
Page 12: Operating Safety
COMAND screen to read na- vigational maps, instructions, or downloa- ded information. - Page 13 Introduction Operating safety...
-
Page 14: At A Glance
At a glance COMAND control unit Multifunction display Quick reference COMAND... -
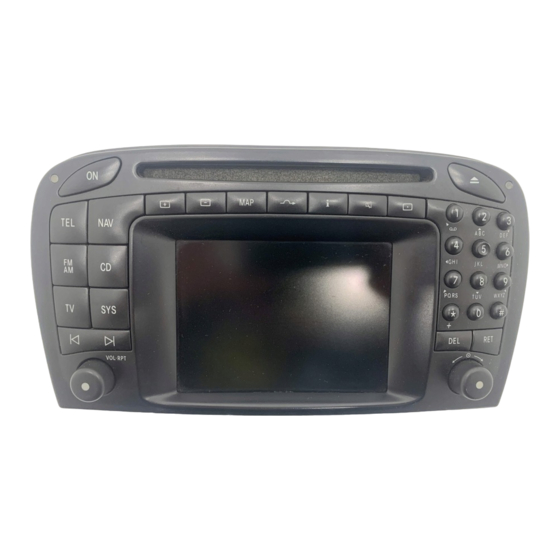
Page 15: Comand Control Unit
At a glance COMAND control unit COMAND control unit... - Page 16 At a glance COMAND control unit Function Page Function Page Function Page 1 Switching COMAND on 8 Requesting destination Navigation (Destination and off and route information input): Selecting destination via 2 Switching the navigation 9 Muting of: the map system on...
- Page 17 At a glance COMAND control unit Function Page Function Page Function Page g General: j Turn to adjust the volu- m Requesting and dis- Altering or deleting me of playing Info Services entries Audio source Adjusting system set- CD operation:...
-
Page 18: Screen Displays
At a glance COMAND control unit Main menu structure Status line and symbol bar Screen displays Screen displays include: Symbols Meaning Main system menus, e.g. the main ra- Status line dio menu The radio is switched on in Lists for the selection of entries, FM Band;... -
Page 19: Comand Control Unit
You will see the message “Caution. Please COMAND will mute an audio source or one start engine. Otherwise COMAND will shut Pop-up screen messages of the two service sources Voice output in down in 10 seconds”. -
Page 20: Multifunction Display
At a glance Multifunction display Multifunction display The starter switch must be in position 1 or Function Function 2. Refer to vehicle operating instructions. 6 Moving within a menu system 1 Left display in speedometer F next display 2 Right display in tachometer G previous display Operating the control system 3 Adjusting the volume... -
Page 21: Quick Reference Comand
COMAND system. You should read this section with particu- Switching on lar care if you are operating COMAND for the first time. For detailed information, please refer to the pages indicated and the respective system chapters. - Page 22 The navigation system was the last sys- Switching another system on tem used Press a system key, e.g. d. If COMAND is switched off for more The menu displayed will vary according to than 30 minutes during active route The main CD menu will appear.
-
Page 23: Adjusting The Volume
To lower the volume you can set the volume jointly. Press I. For the service source At the COMAND operating unit Telephone Turn the the left-hand rotary/push- you can alter the listening volume for the button v. -
Page 24: Cd Operation
Switching another system on Selecting a CD Press any system key, e.g. d. Press one of the number keys P82.85-9063-31 COMAND will switch to CD mode. Key 0 select the CD drive Switching on You will find more information regarding Keys 1 - 6 select the corresponding Press d. -
Page 25: Satellite Radio* Operation
Switching another system on Press g or h on the rocker Press any system key, e.g a. switch longer than 2 seconds. COMAND will switch to Telephone ope- You will hear a confirmation beep when ration. Switching on the function is active. -
Page 26: Telephone* Operation
Outgoing call P82.85-9064-31 Press any system key, e.g c. Enter a telephone number Switching on COMAND will switch to normal radio operation. Use the number keys 1 through 0 to Press a. enter the telephone number. You will find more information in chapter The menu to enter the unlock code will “Satellite radio”... -
Page 27: Entering A Destination And Calculating A Route
Press the right-hand rotary/push-but- ton v to confirm the “End” button. P82.85-9065-31 Main destination input menu Switching another system on Press any system key, e.g. b. COMAND switches to the navigation system. You will find more information in chapter “Telephone” ( page 96). - Page 28 At a glance Quick reference COMAND Entering destination address Entering a city Turn the right-hand rotary/push- button v to highlight the first letter and press to confirm. Enter other characters until the desired city appears in the input line. Correcting entry Last character Press r briefly.
- Page 29 At a glance Quick reference COMAND P82.85-9068-31 P82.85-9069-31 City list Press the right-hand rotary/push- You have now selected the destination and button v to confirm “Street…”. can calculate the route. Press the right-hand rotary/push- button v again to confirm the city.
- Page 30 At a glance Quick reference COMAND Route types available: Fast Route Short Route Including P/avoiding traffic routes Q Freeway Ferry Toll Press the right-hand rotary/push- button v to confirm “OK”. P82.85-7484-31 P82.85-9071-31 P82.85-9072-31 “Route mode ” selection menu Symbol display...
-
Page 31: Selecting Beeps
You will see the arrow indicating the direc- change between day and night display emergency broadcast on the radio. You tion of travel if COMAND recognizes the automatically via the ambient light sen- can only switch off the beep if you also road you are travelling on. -
Page 32: Audio
Audio Radio operation CD operation Sound settings... -
Page 33: Radio Operation
Audio Radio operation Radio operation Quick reference... - Page 34 Radio operation Function Page Function Page 6 Turn to highlight a func- 1 Switching COMAND on and off tion or a menu field 2 Muting the radio audio Press to perform a func- (muting on/off) tion or access a subme-...
- Page 35 Audio Radio operation Menu overview P82.85-9076-31...
- Page 36 Audio Radio operation Function Page Function Page 1 Main radio menu FM 9 Preset menu Save a station automati- 2 Current frequency band cally FM, AM (FM) and memory preset Select a station selected (e.g. 1) 3 Current frequency 4 Symbol indicates stereo reception 5 Menu fields 6 Main sound menu...
-
Page 37: Switching On
CD, or if you alter the volume. 2 Station frequency 3 Symbol bar Switching another system on Press c to switch to radio operati- Press any system key, e.g. d. COMAND will switch to CD mode. The station last tuned to will begin to play. -
Page 38: Changing The Radio Band
Audio Radio operation Changing the Radio band Frequency band Frequency range If a weather band station cannot be re- You can select between FM-, AM- and WB- 87.7 - 107.9 FM ceived on this channel, an automatic Band. 530 - 1710 AM search run of all 7 channels will take place. -
Page 39: Selecting A Station
Audio Radio operation Automatic seek tuning FM- and AM-Bands, Weather Band WB Selecting a station The radio will tune in to the next receivable You can use the following functions: station (FM, AM) or channel (WB) with de- Automatic seek tuning ( page 30) scending/ascending frequency depending Seek tuning at the multifunction stee- on the direction of seek. - Page 40 Audio Radio operation Seek tuning at the multifunction stee- Manual tuning (FM, AM) FM Band ring wheel The frequency displayed will change in in- If the multifunctional display shows the crements of 0.2 MHz. station frequency, then: AM Band Press F or G to select a higher/ lower frequency preset.
- Page 41 Audio Radio operation Station selection via number keypad Station selection via direct frequency (presets) entry (FM, AM) FM and AM presets are independent and can only be accessed while in the FM- and AM-Bands corresponding band. Saving stations for FM and AM ( page 34).
- Page 42 Audio Radio operation Automatic station scan Weather Band WB If you do not make another entry within The stations on same band (FM/AM/WB) The individual weather stations stored in 8 seconds, the function will be canceled can be scanned one after the other for 8 the memory on 7 channels will be scanned and you will listen to the station last tu- seconds each.
-
Page 43: Memory Functions
Audio Radio operation Saving stations manually (FM) The radio saves the current station at Memory functions the memory preset selected. The me- You can use the following functions: In the main radio menu mory preset selected will appear in the Saving stations manually FM status line, e.g. - Page 44 Audio Radio operation On the memory list Turn the right-hand rotary/push-button v to highlight “FM Presets” in the There are 2 presets for each of the FM main radio menu and press to confirm. and AM waveband, standard FM/AM The FM preset memory will appear. presets (saving stations manually) and Auto presets (saving stations automati- Turn the right-hand rotary/push-button...
- Page 45 Audio Radio operation Saving stations manually (AM) On the memory list Saving stations automatically (FM, AM) P82.85-9087-31 P82.85-9088-31 P82.85-9089-31 Activate the AM Band ( page 29). Press the right-hand rotary/push- 1 Function is active button v to confirm “AM Presets”. Save a station in the same way as descri- If the FM/AM main radio menu is display- bed for the FM Band ( page 34)
- Page 46 Audio Radio operation Select other station Weather Band Turn the right-hand rotary/push-button v to highlight the memory position and press to confirm. The main radio menu appears. automatically after 8 seconds if you press *. P82.85-9090-31 The radio stores the 10 strongest stations. P82.85-9091-31 The station frequencies available will ap- Activate the Weather Band WB.
- Page 47 Audio Radio operation Selecting a station from the preset You can use one of the following two ways Selecting a channel from the WB preset menu (FM, AM) to select a station from the FM/AM pre- menu sets Press the corresponding number key (e.g.
- Page 48 Audio Radio operation Selecting a station by entering the sta- For both FM/AM Bands tion frequency in the presets (FM/AM) Press t. If you enter a frequency which is not The station frequency can be entered in within the given range, the message “In- An input line 1 will appear on the top FM and AM Bands in the corresponding valid input”...
-
Page 49: Multifunction Display
Audio Radio operation Multifunction display P82.85-9095-31 Press # at the COMAND control 1 No audio source has been switched on 5 “SP” (memory) - appears if “Memory” 2 The radio is switched on unit to switch on COMAND. instead of “Station search” or “Freq.”... - Page 50 Audio Radio operation Repeatedly press F or G at the Press E or H at the multifunc- multifunction steering wheel until the tion steering wheel to display the next desired station frequency appears. or previous system.
-
Page 51: Cd Operation
Audio CD operation CD operation Quick reference... - Page 52 Raises the volume CD changer operation 7 Return to previous menu Turn to the left: Switching COMAND on Lowers the volume 8 Press briefly: and off b Press briefly: Deletes the character 2 CD drive for audio CD or...
-
Page 53: General Information On Cd Operation
For safe- CD playback locations are ty reasons, have any necessary service work the CD drive in the COMAND operating performed by qualified personnel. unit Use only CDs with a diameter of 12 cm, You can play audio CDs or read data do not use 8-cm CDs. - Page 54 Do not expose the CDs to heat or direct indicator are displayed. This indicates S Y S sunlight. that COMAND is currently loading the Do not write or put stickers on CD. program stored on the navigation CD. O L-R P P82.85-7234-31...
- Page 55 You can also slide out the magazine if Open the sliding door by pushing in the COMAND is switched off. direction of the arrow above. Push the However, the eject button will not func- door completely open until it locks in tion if the battery is not connected or the open position.
- Page 56 Audio CD operation P82.85-9057-31 P82.85-7238-31 P82.85-7239-31 Place a CD in the tray. The CD should Slide the magazine into the CD changer 1 Arrow tip on the rack wall be inserted with the label side up. until it clicks into place (listen for the Push the CD tray into the magazine click).
-
Page 57: Menu Overview
Audio CD operation Menu overview P82.85-9097-31... - Page 58 Audio CD operation Function Page 1 Main CD menu 2 Status line CD 0: The CD drive is in operation CD 1-6: The CD changer is in operation 3 Main sound menu Sound settings 4 “CD Naming” menu Naming a CD 5 “Settings”...
-
Page 59: Switching On
CD operation Press d. Switching on The main CD menu will appear. If you switch on CD mode, COMAND will Playback begins if a CD was inserted in check which playback unit (CD drive or one of the playback locations. -
Page 60: Track Select
Audio CD operation With the rocker switch g/h With the number keypad Track select Next track Press h briefly. Previous track or start of title (if more than 9 seconds of playing time has elapsed) Press g briefly. Select any desired track Press g/h as often as necessary. - Page 61 Audio CD operation Press t and the number key for the You will hear the selected track In the “CD Select” menu track you wish to select, e.g. 2. automatically after 3 seconds You will hear the track you have chosen if you press t.
-
Page 62: Selecting A Cd
CD drive Keys 1 - 6 magazine slots 1 to 6 of the CD changer No CD has been inserted: COMAND will show the messages P82.85-9102-31 P82.85-9103-31 You can select a CD 1 Current track and the name of the CD “CD drive: No CD”... -
Page 63: Fast Forward/Reverse
Audio CD operation Turn the right-hand rotary/push-button Fast reverse Fast forward/reverse v to highlight “CD Select” in the main Press g longer than 2 seconds and CD menu and press to confirm. keep it depressed. The “CD Select” menu will appear. The message “T Reverse”... -
Page 64: Cd Track Scan
Audio CD operation Use one of these ways to switch off the CD track scan Naming a CD function The tracks on a CD can be scanned one af- ter the other for 8 seconds each. Press the right-hand rotary/push- button v again. - Page 65 Audio CD operation Naming the CDs inserted in the CD chan- Deleting the character that has been ente- ger or CD drive red last Press r briefly. Turn the right-hand rotary/push-button v to highlight “CD Naming” in the The input marker moves to the left as it main CD menu and press to confirm.
- Page 66 Audio CD operation Deleting a CD name Turn the right-hand rotary/push-button v to highlight the name you wish to The CD names are stored in the names delete and press to confirm. list in alphabetical order. If the name The name is deleted, the following ent- memory is full, the following message ry will then move up one position.
-
Page 67: Playback Mode
Audio CD operation Turn the right-hand rotary/push-button “Magazine Mix” appears in the main CD Playback mode v to highlight “Settings” and press to menu. confirm. Track Repeat The “CD Settings” menu will appear. Select this function to repeat the current track until you switch the function off. - Page 68 Audio CD operation CDs Scan (CD changer only) Switching off playback mode Return to the main CD menu Select this function to scan all of the CDs Turn the right-hand rotary/push-button v to highlight the current playback in the magazine slots 1-6 for 8 seconds each (track 1).
-
Page 69: Muting Cd Playback
Select another magazine slot. “No CD changer” CD drive COMAND is unable to activate the CD changer. No CD is in the CD drive or the CD in the drive is not ready to play. If necessary, contact an authorized... - Page 70 “Being activated” The CD changer is not yet ready for opera- If an error occurs in the operation of the tion. CD drive or CD changer, COMAND auto- matically switches to the other device “Reading error” after 3 seconds. The CD that has been inserted cannot be If it is not possible to play the CD selec- read.
-
Page 71: Multifunctional Display
Audio CD operation Multifunctional display P82.85-9074-31 1 No audio source has been switched on Press d on COMAND. Press F or G until the desired 2 CD unit is switched on track number 4 appears. CD unit is switched on. -
Page 72: Sound Settings
Sound settings Sound settings Audio sources include: Activating the main sound menu Adjusting sound settings Radio FM, AM, WB COMAND is equipped with a standard am- For audio sources plifier. CD (CD drive, CD changer) You can set Satellite radio* the sound Bass/Treble individually auxiliary audio source, e.g. - Page 73 During adjustment in the “Speech ve audio source Bass/Treble” menu, COMAND will issue “0” The volume of the audio source a repetitive voice output of “Sample” to is not affected during voice out- allow you to set the settings as you pre- put.
- Page 74 Turn the right-hand rotary/push-button confirm. P82.85-9114-31 v to set the desired value. 1 Setting mode active COMAND sets treble and bass to “0” Press the button. and sets the sound-center into the Turn the right-hand rotary/push-button middle of the vehicle.
- Page 75 Return to the main audio menu Press *. Available sound optimizations Standard - COMAND set the sound li- near for the center of the vehicle P82.85-9117-31 Speech - the emphasis is on the spo- Turn the right-hand rotary/push- ken word P82.85-9116-31...
-
Page 76: Satellite Radio
Satellite radio* Important notes Satellite radio operation Multifunction display... -
Page 77: Important Notes
At time of printing, no date for garages, or within or next to buildings) the availability of optional equipment or near other technologies. required for satellite radio operation had been set. Contact your authorized Mercedes-Benz Center for details and availability for your vehicle. -
Page 78: Subscribing To Satellite Radio
Satellite radio* Important notes Press W to switch to satellite radio Subscribing to satellite radio operation. Credit card information may be re- The Service information display will ap- quired for your application. pear if the satellite radio function has The activation process takes up to ap- not yet been subscribed to. -
Page 79: Satellite Radio Operation
Satellite radio* Satellite radio operation Satellite radio operation Quick reference... - Page 80 Satellite radio* Satellite radio operation Function Page Function Page 1 Switching COMAND on 5 Changing between sta- and off tion name and channel number 2 Muting the satellite radio audio (muting on/off) 6 Return to previous menu 3 Selecting a station via di-...
- Page 81 Satellite radio* Satellite radio operation Menu overview...
- Page 82 Satellite radio* Satellite radio operation Function Page Function Page 1 Main satellite radio menu a Displays the current sta- with menu section 4 tion information 2 Main satellite radio menu b Displays the current with menu section 5 track information 3 Information list: Station c Displays the service in- category, station name,...
-
Page 83: Switching On
Satellite radio* Satellite radio operation After the COMAND acquires the Switching on signal, the main satellite radio menu will You can display 2, 3 and 4 in full: See “Subscribing to satellite radio” for im- appear. The station last tuned to will begin... -
Page 84: Switching Another System On
Muting Switching another system on Press Ö while listening to the satel- Press key, e.g. c. lite radio. COMAND will switch to normal radio The symbol R will appear in the symbol operation mode. bar. Changing the program category Press Ö again to resume listening to Satellite radio stations are split up into ca- the current station. - Page 85 Satellite radio* Satellite radio operation Repeatedly press g or h again Selecting a program category Turn the right-hand rotary/push- button v to highlight the desired cate- within 5 seconds until the desired cate- Turn the right-hand rotary/push- gory appears. gory and press to confirm. button v to highlight “Category”...
-
Page 86: Selecting A Station
Satellite radio* Satellite radio operation Station selection via station list Selecting a station You can use the following functions: The station list shows all the stations allo- cated to the selected category in alphabe- Automatic tuning tical order. Station selection via station list Automatic station scan ( page 78) The station list shows up to 24 station Manual category scan ( page 75) - Page 87 Satellite radio* Satellite radio operation Selecting another station (within 8 se- Automatic station scan Selecting a station via direct channel conds) entry The stations in the selected category can Turn the right-hand rotary/push- be scanned in alphabetical order for 8 se- button v to highlight the desired stati- conds each.
-
Page 88: Memory Functions
Satellite radio* Satellite radio operation Enter the number of the channel you Saving station manually wish to select, e.g. 76. It is also possible to select a station via The channel you have selected will be- direct channel number entry on the me- gin to play. - Page 89 Satellite radio* Satellite radio operation In the main satellite radio menu, turn The memory preset selected will ap- Selecting a station on the memory list the right-hand rotary/push-button v pear in the status line, e.g. “SAT2”. Turn the right-hand rotary/push-button to highlight “SAT Presets”...
-
Page 90: Displaying Track Information
Satellite radio* Satellite radio operation Selecting a station by entering the Turn the right-hand rotary/push-button Displaying track information v to highlight “Title Info” and press to channel number confirm. The channel number can be entered in the satellite preset memory. You will see (if available) Press t. -
Page 91: Displaying Station Information
Satellite radio* Satellite radio operation Turn the right-hand rotary/push-button Displaying station information Displaying service information v to highlight “Station Info” and press You can call the provider service center for to confirm. questions or releases, whenever you need. You will see (if available) the full station name the full category name additional information coming from... -
Page 92: Sound Settings
Satellite radio* Satellite radio operation Switching back to the main satellite radio Set Bass/Treble/Balance ( page 65). Sound settings menu Activate sound optimization Press *. ( page 66). Press the right-hand rotary/push- button v. In the main satellite radio menu, turn the right-hand rotary/push-button v to highlight “Sound”... -
Page 93: Multifunction Display
Satellite radio* Satellite radio operation Multifunction display Press W on COMAND. Press F or G until the desired 1 No audio source has been switched on 2 The satellite radio is switched on station name appears. The satellite radio is switched on. -
Page 94: Telephone
Telephone* Important notes Multifunction display Telephone operation SMS function Emergency call Service numbers... -
Page 95: Important Notes
Whether or not prohibited by law, for terior antenna that has been approved safety reasons, the driver should not use the by Mercedes-Benz. cellular telephone while the vehicle is in mo- tion. Stop the vehicle in a safe location be- Please read the chapter “Telephone”... - Page 96 The message “Telephone defective” If a menu other than the telephone due to weak signals appears. menu is displayed on the COMAND if you try to make a call (message Please contact an authorized screen, the display will change if an appears for 8 seconds) Mercedes-Benz Center.
- Page 97 The mobile telephone has been busy. plugged into its holder correctly, the “No service, redial?” COMAND operating unit has been swit- ched on and the phone book download Dialing has failed because network function has been actuated (see Tele- cannot be received.
-
Page 98: Multifunction Display
Telephone* Multifunction display Multifunction display Function Page Function Page L End a call 1 Left display on the speedo- meter Interrupt dialing Right display on the tacho- The message meter READY appears Using the control system 5 Changing from system to system, displaying network Adjusting the dial/idle provider... -
Page 99: Display Overview
Telephone* Multifunction display Display overview P82.85-9118-31... - Page 100 Reception strength is indica- Switching telephone operati- has not been loaded into the ted by up to 5 bars for a con- on on COMAND telephone memory nected and functional telephone. 2 Entering the unlock code 7 Name selected from the...
-
Page 101: Telephone Operation
Telephone* Telephone operation Telephone operation Quick reference... - Page 102 Telephone operation Function Page Function Page Function Page 1 Switching the COMAND 7 Turning 8 Sets the volume for hands- on/off free operation of the telepho- Highlights a menu field, a list ne (during a call) 2 Entering the unlock code...
-
Page 103: Menu Overview
Telephone* Telephone operation Menu overview P82.85-9120-31... - Page 104 2 Telephone system is active 8 Alphabet to enter the name Dialing from the notebook 3 Accepting a call using 9 Menu fields to activate sub- f “Calls” function COMAND menus Begin dialing The last incoming calls are a “Phone book” selection menu stored...
-
Page 105: Switching Telephone Operation On
Telephone* Telephone operation Asterisks instead of digits will appear in Switching telephone operation on the input line. If entered code is correct and the pho- ne is registered in a network, the phone is ready for use. Your unlock code prevents unauthori- zed persons from using your telephone. -
Page 106: Switching Telephone Operation Off
# on the phone. The system detects an incoming call, If different systems appear, the changes the phone rings made to COMAND will have no effect on 2 Reception strength the driver information display. The more bars appear, the stronger the... - Page 107 Telephone* Telephone operation Accepting a call using COMAND Switching the microphone for the hands-free telephone off Turn the right-hand rotary/push-button v to highlight the “Mute” button and press to confirm. Press the right-hand rotary/push- button v again to cancel muting.
- Page 108 Telephone* Telephone operation Refusing or ending a call Accepting an incoming call using the mobile telephone handset Warning Use one of the three ways: The telephone is located in the storage Press the right-hand rotary/push- Some jurisdictions prohibit the driver from compartment under the armrest.
-
Page 109: Outgoing Calls
( page 100) Dialing a number from the phone book ( page 103) Redial ( page 109) Dialing from calls list ( page 112) Speed-dialing (only with COMAND) ( page 113) Dialing a telephone number from the notebook ( page 115) P82.85-9125-31 Emergency call ( page 124) Press a. - Page 110 Dialing will begin. If a name is associa- ted with the phone number stored in the phone book, the name appears on the screen. COMAND will mute an active audio source.
- Page 111 Telephone* Telephone operation Conducting a call Use one of these three ways to end a call: Subsequent dialing When the call is initiated, the call time ap- Press the right-hand rotary/push- Transmitting other dial tones: button v to confirm the “End” button pears in the screen.
- Page 112 In order to use this feature, the phone appear. TEL M39 MERCEDES book must have previously been downloa- ded to the COMAND memory. This is per- Press F or G longer than 2 se- formed automatically each time the conds. portable phone is connected to the coiled cord.
- Page 113 Telephone* Telephone operation The message DIALING appears in the display. COMAND will mute an active Phone numbers are stored in the phone audio source. book according to memory locations. A When the call is initiated, the call time memory location starts with “M”.
- Page 114 Telephone* Telephone operation Dialing with COMAND Enter up to 3 letters by highlighting them one by one with the right-hand ro- Opening phone book with names tary/push-button v and press to con- firm. The input appears in 1. Turn the right-hand rotary/push-button v until 2 is highlighted and press to confirm.
- Page 115 Telephone* Telephone operation The phone book stored in the phone me- mory is being downloaded. Turn the right-hand rotary/push-button v to highlight the desired entry and press to confirm. The main telephone menu appears, in- dicating the selected name. P82.85-9132-31 P82.85-9133-31 Begin dialing Phone Book page (names)
- Page 116 Telephone* Telephone operation Use the number keys 1 through 0 to Use one of these three ways to end a call: Opening phone book (phone number) enter up to 2 digits one by one. Press the right-hand rotary/push- button v to confirm the “End” button The input appears in 1.
- Page 117 Telephone* Telephone operation If the input line is empty Turn the right-hand rotary/push-button v to highlight the desired entry and Turn the right-hand rotary/push-button press to confirm. v until 2 is highlighted and press the button. The main telephone menu appears indi- cating the selected phone number and The “Phone book”...
- Page 118 Telephone* Telephone operation Redial Dialing using the multifunction steering wheel P82.85-9136-31 1 The telephone is ready for operation. 4 Dialing is completed. Name or still the 6 Memory location number, the last 10 2 Number in the redial memory dialed number (name has not been sa- dialed telephone numbers are stored 3 Number in the redial memory, dialing ved).
- Page 119 Telephone* Telephone operation Press L to end the call. The telephone is switched on Press E or H repeatedly until the The telephone display 1 appears. If you do not wish to place a call, press corresponding telephone menu 1 ap- L.
- Page 120 Telephone* Telephone operation Dialing with COMAND Turn the right-hand rotary/push-button v to highlight “Last Calls” in the main telephone menu and press to confirm. if there is a blank input line in the main telephone menu Press the right-hand rotary/push- button v when the “Send”...
- Page 121 Telephone* Telephone operation Begin dialing Dialing from calls list Turn the right-hand rotary/push-button v to select the desired phone number Press the right-hand rotary/push- or name and press to confirm. button v to confirm the “Send” but- ton. The main telephone menu appears indi- cating the number or name selected.
- Page 122 Telephone* Telephone operation Speed-dialing (only with COMAND) Warning For all memory locations If you enter “1” and confirm this memory lo- You can enter up to 2 digits cation using one of the described ways in “Begin dialing”, the emergency number 9-1-1 (default input) will be dialed.
- Page 123 Telephone* Telephone operation Quick-dialing for the first 10 memory locations Warning If the memory location called is free, the message “Memory location not alloca- If you press “1” the emergency number ted” will appear. 9-1-1 (default input) will be dialed. The 9-1-1 emergency call system is a public Ending a call ( page 112).
-
Page 124: Notebook
Telephone* Telephone operation Opening the notebook Closing the notebook and storing input Notebook Press *. The main telephone menu is displayed You can enter a telephone number in the notebook or edit an existing one Turn the right-hand rotary/push-button Dialing a telephone number from v to highlight the “V”... -
Page 125: Editing The Phone Book
Telephone* Telephone operation Changing entries in the phone book Editing the phone book You can edit the phone book and transfer a phone number from the notebook. In the main telephone menu, turn the right-hand rotary/push-button v until “Phone book” is highlighted and press to confirm. - Page 126 Telephone* Telephone operation Changing a name Turn the right-hand rotary/push-button Input with number keys v to highlight the desired letters one Select a character by pressing the key by one and press to confirm. as listed below the corresponding num- The name will appear in the input line.
- Page 127 Telephone* Telephone operation The selected character is automatically ad- Changing a telephone number Entering a telephone number opted in the input line after 2 seconds Press the number keys 1 through 0, u and t. Press t or turn the right-hand rotary/ The telephone number appears in a.
- Page 128 (light brown) 2 Query (light brown) firm. 1 Input line 3 COMAND will delete the entry from the 2 Transfers name The phone book list will appear. phone book 4 The entry remains in the phone book...
- Page 129 4 Input line for phone number, entering Now change the phone number. and store the entry. phone number with numeric keys 1 to Correcting an input ( page 117). 0, key u and key t 5 COMAND stores the phone number...
-
Page 130: Sms Function
Other menu fields will appear. COMAND may have to read in SMS Turn the right-hand rotary/push-button messages first. The message “SMS loa- v to highlight 2 and press to con- ding...”... -
Page 131: Reading Sms Messages Received
Turn the right-hand rotary/push-button v to highlight the desired SMS mes- sage and press to confirm. The SMS message will appear. COMAND does not display so called “chained” SMS messages. These con- tain more than 160 characters. For you P82.85-9152-31... - Page 132 If there are other SMS messages: After you have deleted the oldest SMS message, COMAND highlights the cur- The message is deleted, the next SMS P82.85-9153-31 rent SMS message in the list. message will appear.
-
Page 133: Emergency Call
Telephone* Emergency call Emergency call You can make an emergency call to an emergency rescue station with a mobile Warning It will not be possible to complete the communication network. emergency call if the cellular system is The 9-1-1 emergency call system is a public The emergency call will be placed as long busy. -
Page 134: Telephone Is Ready For Operation
Telephone* Emergency call Initiating an emergency call Telephone is ready for operation If the telephone main menu or a memory menu is displayed Please ensure that the number stored in Press number key 1 longer than 2 se- the memory location is the number you conds (quick-dialing). -
Page 135: Service Numbers
Telephone* Service numbers Service numbers Turn the right-hand rotary/push-button Begin dialing Calling a service number v to highlight “Service No.” in the Press the right-hand rotary/push- main telephone menu and press to button v to confirm the “Send” but- confirm. ton. -
Page 136: Changing Personal Service Number
Telephone* Service numbers Enter the new service number with Changing personal service number number keys 1 through 0. Pressing the right-hand rotary/push- Press the right-hand rotary/push- button v and inserting an empty input button v to confirm the service num- line will delete the personal service ber. -
Page 137: Changing The Number For Roadside Assistance
Telephone* Service numbers Select a new country service number from Changing the number for Roadside the list Assistance Turn the right-hand rotary/push-button v to highlight the country abbrevia- tion you want and press to confirm. The new service number is now stored in the “Service No.”... -
Page 138: Navigation
Navigation Important notes Quick reference Destination input Route guidance Destination memory Settings... -
Page 139: Important Notes
14 m) every second. fully and always obey traffic laws and road and select route before driving. The route calculated by COMAND is a re- signs even if they contradict COMAND in- Do not watch display screen or operate but- commendation on how to best reach your structions. - Page 140 Navigation Important notes Warning The CD drive can read navigation CDs COMAND calculates the route with the and playback audio CDs. The CD reader contains a Class 1 laser pro- help of data that is stored on the navi- duct. There is a danger of invisible laser ra- gation CD.
- Page 141 If your vehicle has been transported by Contact your Mercedes-Benz Center or Deviations from the actual position a car, train or ferry, COMAND needs the Customer Assistance Center at may occur some time to find its exact position.
- Page 142 Changing tires Mercedes-Benz recommends that you have your tires changed by an authorized Mercedes-Benz Center. COMAND operates based on measure- ments taken by wheel revolutions. When changing tires, the correct tire information must be entered for the system to operate as expected.
-
Page 143: Quick Reference
Navigation Quick reference Quick reference... - Page 144 Navigation Quick reference Function Page Function Page Function Page 1 Switching COMAND on 7 CD drive for navigation 9 Muting current route in- and off CD or audio CD structions or 2 Switching the navigation Switching off voice out- system on...
- Page 145 Navigation Quick reference Function Page Function Page f Turn to h Requesting and dis- playing Info Services Highlight menu field, list entry or character System settings j Color screen Alter the map scale Press to Confirm entry/selection, starting function or acti- vating submenu Activate map scale bar g Turn to...
-
Page 146: Changing The Navigation Cd
If you do not remove an ejected CD, it The illustrated message will appear. will be automatically retrieved by the CD COMAND loads the program stored on drive after 10 seconds. the navigation CD. The CD drive can read navigation CDs, or Do not interrupt the loading process. -
Page 147: Destination Input
Navigation Destination input Destination input Menu overview P82.85-9160-31... - Page 148 Navigation Destination input Function Page Function Page 1 Main destination input 4 “Destination via map” menu menu Entering a destinati- Setting destination via on address location on map Retrieving a destina- Setting destination via tion from the destina- coordinates tion memory 5 “Settings”...
-
Page 149: Switching The Navigation System On
( page 162) ther CD”. Route guidance has been switched on, Eject the inserted CD and insert a P82.85-9162-31 COMAND has been switched off for navigation CD. Main destination input menu more than 2 hours “No CD available. Please insert Press b. -
Page 150: Entering Destination Address
Navigation Destination input Press the right-hand rotary/push- Entering destination address button v in the main destination input Select one of the following possibilities to menu and confirm “Address”. enter a destination: The main address menu will appear. Entering a destination address Selecting destination via the map Switching back to the main destination in- ( page 149) - Page 151 5. and confirm and confirm “City/Sub- urb”. For quicker input, COMAND will offer The input menu “City/Suburb Entry” available characters from the character will appear. set 6 based on your selections and the...
- Page 152 Navigation Destination input Activating the city list If the input menu “City/Suburb Entry” is Display the previous/next page displayed Turn the right-hand rotary/push- button v to highlight one of the ar- Press the right-hand rotary/push- button v longer than 2 seconds. rows b or c.
- Page 153 Input line with letters that have already Press the right-hand rotary/push- been entered button v to activate the input menu For quicker input, COMAND will offer h Character set “Street”. available characters from the character j The character selected appears...
- Page 154 Navigation Destination input Activating the street list If the input menu “Street Entry” is display- Press the right-hand rotary/push- button v longer than 2 seconds. Press the right-hand rotary/push- This will confirm city/suburb and street button v longer than 2 seconds. of the desired destination.
-
Page 155: Continuing Destination Input
Navigation Destination input You have now selected the destination and Adding an intersection Continuing destination input can define your destination address more precisely in the following manner: Adding an intersection Adding a house number In order to do so, “House No.” must be shown in black. - Page 156 Navigation Destination input Turn the right-hand rotary/push-button Adding a house number v to highlight the name of the inter- Depending on the data stored on the navi- section. gation CD, you can add a house number to the destination address. In order to do so, the menu field “House The previous/next page can be display- no.”...
- Page 157 Navigation Destination input Selecting a city center Turn the right-hand rotary/push-button v to highlight the desired entry and The house numbers usually appear on You can activate the list “Center Entry” in press to confirm. the list in blocks, e.g. the main address menu ( page 141) or af- ter selecting a city ( page 144).
-
Page 158: Selecting A Destination Via The Map
Navigation Destination input Setting the map center Turn the right-hand rotary/push-button Selecting a destination via the map v to highlight 1, 2, 3 or 4 and 1 To the previous destination press to confirm. Activating the map from the main des- 2 To the current vehicle location tination input menu 1 and 2 The map with the crosshairs... - Page 159 Navigation Destination input Continue destination input via the map Turn the right-hand rotary/push-button Moving the crosshairs v to highlight “Map” and press to con- Use the number keys (refer also to the firm. arrows shown on the keypad) to move The map with the crosshairs will ap- the crosshairs around the map.
- Page 160 Navigation Destination input Altering the map scale Activating the scale selector a. As you move the crosshairs towards the Press + or ,. edge of the screen using the number keys, an adjacent section of the map is Press the right-hand rotary/push- activated.
- Page 161 Navigation Destination input Zooming in for more detailed map Zooming out for less detailed map Confirming destination and calculating route Press +. Press ,. The crosshairs highlight the desired desti- nation Turn the right-hand rotary/push-button Turn the right-hand rotary/push-button Press the right-hand rotary/push- v to the left.
- Page 162 Navigation Destination input Destination entry via coordinates Activating the adjustment mode You can enter a destination if the corres- Press the right-hand rotary/push- Adjustment range button v. ponding coordinates are known. Longitude (W - West or E - East) The entry will appear in red. 0-179°...
- Page 163 Navigation Destination input Starting the adjustment mode Activate the map with crosshairs Turn the right-hand rotary/push-button Turn the right-hand rotary/push-button v to highlight “OK” and press to con- v to highlight “Map” and press to con- firm. firm. Storing the coordinate destination in the This will activate the map destination memory with a name ( page 150).
-
Page 164: Entering Points Of Interest
Navigation Destination input Select a Point of Interest Around the current area of vehicle loca- Entering Points of Interest tion or previous destination area 1 Around the current area of vehicle loca- This function allows you to select Points of tion Interest such as gas stations, parking faci- 2 Around the previous destination area... - Page 165 Navigation Destination input Turn the right-hand rotary/push-button Display the entry in full in a window 9 v to highlight 1 or 2 and press to Press u. confirm. Press u again to remove 9. The list “Select Category” will appear. Turn the right-hand rotary/push-button Selecting the desired destination v to highlight the desired category...
- Page 166 Navigation Destination input In the surrounding area of another city Turn the right-hand rotary/push-button Regional destinations v to highlight the desired destination in the city list and press to confirm. The list “Select Category” will appear. If several options of a city/suburb are available, another menu will appear where you must make and confirm your desired selection.
- Page 167 Navigation Destination input Activating the list Turn the right-hand rotary/push-button v to highlight the desired entry and press to confirm. Then calculate the route ( page 159). Turn the right-hand rotary/push-button P82.85-9189-31 v to highlight the desired category Press the right-hand rotary/push- and press to confirm.
-
Page 168: Selecting The Last Destinations
The list “Last destinations...” will ap- Selecting calculation mode pear. COMAND calculates the route either as Turn the right-hand rotary/push-button the Fast Route 1 or Short Route 2 whe- v to highlight the desired destination reby traffic routes 3, 4 and 5 can be in- and press to confirm. - Page 169 6 COMAND calculates the route with the As soon as calculation begins, you will selected settings see a corresponding message and hear the voice output “The route is being calculated”.
- Page 170 Destination input P82.85-9192-31 P82.85-9194-31 P82.85-9194-31 During the calculation, the symbol display The route will be calculated. COMAND 7 Calculation method will appear after a few seconds. identifies the road you are travelling on. 8 Destination Position c now indicates the driving di-...
-
Page 171: Route Guidance
Navigation Route guidance Route guidance Route guidance principles... - Page 172 (blue line) 4 Other display types being recalculated c Destination flag Distance bar to the “NO ROUTE” - the next maneuver COMAND is unable Distance to the next to calculate a route maneuver in miles...
- Page 173 During route guidance, you can select the OFF ROAD). v to display the menu fields again. following 3 screen displays: If COMAND recognizes a stored road, Symbol display the symbol display is called up again. Always appears after a route has been...
-
Page 174: Requesting Destination And Route Information
Navigation Route guidance Turn the right-hand rotary/push-button Requesting destination and route in- v to highlight 3 to 8 and press to formation confirm. Once you have calculated the route, you can request destination and route informa- tion. If the vehicle drives on a road which is not digitized, 1 and 2 will appear in Press .. - Page 175 Navigation Route guidance Displaying route list Displaying the entry in full in a window Switching back to the symbol or map dis- play Press u. Press * twice. Press u again to remove the window. Displaying the next/previous page (if ar- The route list is updated during the trip.
- Page 176 2 Number of satellites received If the location map appears after 3 Scale used the last time the location COMAND has been switched on, map was activated press b to activate the main destina- 4 Current vehicle location in the center of tion input menu.
- Page 177 ( page 181) Marking a way point ( page 178) Switching back to the symbol or map dis- play After 15 seconds, COMAND will return au- tomatically to the symbol or map display. P82.85-9200-31 Turn the right-hand rotary/push-button 1 Settings for route calculation mode v in the selection menu “Destination...
- Page 178 Navigation Route guidance Activating the route map Turn the right-hand rotary/push-button Displaying a stop-over v in the selection menu “Destination You can display this information if you Info” to highlight “Route Map” and have previously selected a way point press to confirm. ( page 178).
-
Page 179: Beginning Route Guidance
During the trip, apart from visual informati- cident. on (symbol or map displays), COMAND also provides all of the necessary route in- formation via voice output. Once the route has been calculated, the COMAND gives you spoken recommenda- symbol display will appear. - Page 180 You will see the message “Voice output COMAND will accept this setting for source ( page 64). COMAND mutes navi- is muted”. following voice outputs. gation voice outputs during telephone/ Tele Aid operation.
-
Page 181: Turning Onto A Street
3 “Please, turn next right” As you approach a junction or inter- Manual recall of the current voice instruc- change (e.g. I-695), COMAND will advi- tion se you the direction of travel to follow In special situations, e.g. when turning (e.g. -
Page 182: Following The Course Of The Road
4 Distance in miles to the next maneuver 4 Distance graph to turning-point an intersection point As you approach a junction or inter- change (e.g. I-695), COMAND will advi- se you the direction of travel to follow (e.g. North) as well as the name of the route. -
Page 183: Changing To Map Display
1. Press l. The map will appear in the scale last se- lected. COMAND will remove the menu bar (ex- cept for 3) after 6 seconds. 2 Return to symbol display Turn the right-hand rotary/push- 3 Last scale selected... -
Page 184: Mix Of Map And Symbol Display
Map display before a maneuver, mix func- As the vehicle approaches the maneuver Switching the mix function off tion is switched on point (e.g. U-turn), COMAND will activate the symbol display. Turn the right-hand rotary/push-button v to highlight “Mix” in the map or sym- After you have made the U-turn, the map bol display and press to confirm. -
Page 185: Altering The Map Scale
Navigation Route guidance Altering the map scale Activating the scale selector Press + or ,. Turn the right-hand rotary/push-button v to highlight 1 and press to con- firm. The scale bar will appear. 1 Current map scale A division mark corresponds to an avai- Zooming out for less detailed map 2 Scale selector lable scale. -
Page 186: Selecting Map Orientation
Navigation Route guidance Selecting driving direction pointing up To return to North-up Selecting map orientation Turn the right-hand rotary/push-button You can either select the map north or po- v to highlight 1 and press to con- sition it with the driving direction pointing firm. -
Page 187: Marking A Way Point
Navigation Route guidance Turn the right-hand rotary/push-button Marking a way point v to highlight 2 to 6 and press to You can store a way point during route confirm. guidance. Select the desired way point. Start route guidance. “Way Point” menu 2 Select a category 3 Activates the main address menu ( page 141) - Page 188 Navigation Route guidance Starting route guidance After you have entered an address, the menu fields “Intersection…” and “House No...” may appear in black, indicating that it is possible to select them. P82.85-9220-31 You will now see the information corres- ponding to route calculation and hear the Press the right-hand rotary/push- voice output: “The route to your intermedi- button v to confirm “Start...
- Page 189 Navigation Route guidance Cancel the calculation Deleting way point Press the right-hand rotary/push- button v to confirm “Delete stop- Press the right-hand rotary/push- over...”. button v to confirm “Cancel”. The way point has been deleted. If you do not want to delete the way point Press *.
-
Page 190: Selecting A Detour
Traffic jams are identified by the driver, Traffic Jam Ahead/Detour in Route not by the COMAND. List activated: If you switch off COMAND for more than “Cancel” is highlighted 30 minutes during active route guidance, all manually entered traffic 3 It is possible to block route sections in P82.85-9222-31... - Page 191 Turn the right-hand rotary/push-button The traffic jam menu will appear. v to the right. Decreasing the blocked section COMAND suggests reasonable route Turn the right-hand rotary/push-button sections. v to the left. Minimum/maximum length of detour is Calculating detour governed by the logical grouping of rou- te sections.
- Page 192 Navigation Route guidance Detour in route list Displaying an entry in full in a window Press u. Turn the right-hand rotary/push-button v to highlight “Detour in Route List” in Press u again to remove the window. the main detour menu and press to confirm.
- Page 193 The road name will appear in red. Press the right-hand rotary/push- button v. Undoing street block Turn the right-hand rotary/push-button COMAND re-calculates the route in the v to the left. previously selected calculation mode. A corresponding message will appear. The street name will appear in black Detailed route list again.
-
Page 194: Resetting Functions
1 to 4 are shaded out v to highlight the desired menu field and cannot be selected. and press to confirm. COMAND will re-calculate the route using the previously selected calculati- on mode. You will see the corresponding infor- mation. -
Page 195: Deviating From The Calculated Route
After the new calculation has been suc- ve to the route will appear after 5 seconds. cessfully completed, COMAND continues COMAND automatically changes back to route guidance. the symbol display if a known road is used The arrow indicating the driving direction again. -
Page 196: Interrupting Route Guidance During A Journey
Canceling active route guidance you have selected a detour and the Turn the right-hand rotary/push-button COMAND was switched off for lon- v to highlight “No” and press to con- ger than 30 minutes during active firm. -
Page 197: Arriving At Destination
Navigation Route guidance Then the main destination input menu ap- Arriving at destination pears and you can now enter another des- tination. You will also hear voice outputs and see display messages when you approach and arrive at way points. When you reach the destination, you will see the destination flag. -
Page 198: Activating Audio System
During route guidance, you can operate an bol or map display) you can select another audio source that is active in the back- COMAND system by pressing the corres- ground. Although the options are limited, ponding key. you can operate the audio source without... - Page 199 Navigation Route guidance Removing the window Starting manual search CD mode is active Press g or h longer than This is done automatically after 3 seconds. Selecting CD with number keys 2 seconds. CD drive The search run will start in the desi- Press *.
-
Page 200: Canceling Route Guidance
Navigation Route guidance Continuing route guidance Canceling route guidance Press *. Turn the right-hand rotary/push- button v to highlight “No” and press to confirm. The map or the symbol display will ap- pear. Press the right-hand rotary/push- button v and confirm “Yes”. While the map or symbol display is ac- The main destination input menu will tive, press b. -
Page 201: Destination Memory
Navigation Destination memory Destination memory You can save frequently used destinations Turn the right-hand rotary/push-button Retrieving a destination from the v to highlight “Destination memory” in the destination memory. destination memory in the main destination input menu and press to confirm. The main destination memory menu will appear. -
Page 202: Saving The Current Destination
Navigation Destination memory Turn the right-hand rotary/push-button In the selection menu “Destination Entry” Saving the current destination v to highlight the desired entry and ( page 146) When you have entered or reached the cur- press to confirm. Turn the right-hand rotary/push-button rent destination, you can save the destina- Then calculate the route ( page 159). - Page 203 Navigation Destination memory Saving with a name You can enter a name for the current des- tination. Turn the right-hand rotary/push-button v to highlight the desired character and press to confirm. The letter you have selected appears in the input line. Enter the other letters until the name is complete.
-
Page 204: Saving The Current Vehicle Location
If you do not wish to enter a name, With this function, you can save the cur- on...” in the main destination memory COMAND will save the destination with rent vehicle location in the destination me- menu and press to confirm. -
Page 205: Sorting Destination Memory
Navigation Destination memory Turn the right-hand rotary/push-button Sorting destination memory v to move the entry to the desired po- sition and press to confirm. The entry is saved at that location. The entry is shown in black again. The main destination memory menu is re- activated automatically. -
Page 206: Deleting A Destination
Navigation Destination memory Turn the right-hand rotary/push-button If you do not want to delete the destination Deleting a destination v to highlight the entry you wish to de- Turn the right-hand rotary/push-button lete and press to confirm. v to highlight “No” and press to con- The inquiry “Do you really want to dele- firm. -
Page 207: Settings
Settings Enter the city/suburb and then the Entering the vehicle location street and select the required entries COMAND normally determines the vehicle from the corresponding list. See “Ente- location automatically with the GPS. In ex- ring destination address” ceptional cases, this may not be possible. -
Page 208: Calibration
Navigation Settings Calibration In order to ensure an exact fix on position, you have to calibrate COMAND by entering the correct tire information whenever tires are changed. Mercedes-Benz recommends that you have tires changed by an authorized Mercedes-Benz Center. Turn the right-hand rotary/push-button Menu “Settings”... - Page 209 Navigation Settings Press the right-hand rotary/push- button v longer than 2 seconds to confirm the entry. The main destination input menu will appear. 4 Tread depth ≥ 4 mm (3/16 in.) Enter the new tire type 5 Tread depth < 4 mm (3/16 in.) Turn the right-hand rotary/push-button Enter the front axle tire parameters.
-
Page 210: Info Services*/System Settings
Info Services*/System settings Info Services* System settings Auxiliary audio source... -
Page 211: Info Services
This function is not available in some When you subscribe to Info Services, you countries. can download information directly to your COMAND. You can select from news, wea- Adjusting the brightness ther, sports, stocks, and calendar remin- Selecting the language for the menu ders. - Page 212 Info Services*/System settings Info Services* Press ( in any menu. You will hear a beep tone if there is a new incoming message. The main service menu will appear. There are three ways to cancel the request and switch to a main menu, e.g. radio main The characters are displayed in light menu: grey...
- Page 213 Info Services*/System settings Info Services* Warning If information cannot be retrieved, one “Tele Aid Call in Progress” of the following messages will be dis- Request has failed because SOS or A driver’s attention to the road must always played: Roadside call is in progress. be his/her primary focus when driving.
-
Page 214: System Settings
Info Services*/System settings System settings System settings Press (. Activating the main settings menu The main service menu will appear. Turn the right-hand rotary/push-button v to highlight “System Settings” and press to confirm. The main system settings menu will ap- pear. -
Page 215: Adjusting The Brightness
Info Services*/System settings System settings Darkening screen Adjusting the brightness Activating settings menu Turn the right-hand rotary/push-button v to the left. The triangle 2 will move to the left. Brightening screen Turn the right-hand rotary/push-button v to the right. The triangle 2 will move to the right. Confirming new settings P82.85-7710-31 Press the right-hand rotary/push-... -
Page 216: Selecting The Language
The settings menu will appear. Turn the right-hand rotary/push-button v to highlight the desired language and press to confirm. COMAND displays the message “Loa- ding the [name of language] language” and loads the selected language. You will hear the corresponding voice output. -
Page 217: Setting Date And Time
COMAND will use the same language settings menu. as is set in instrument cluster COMAND does not receive a GPS time “Deutsch” the clock has been disconnected from the vehicle battery The clock displays e.g. the estimated “English”... - Page 218 Press the right-hand rotary/push- button v. Setting mode is active, the minutes will P82.85-7714-31 appear in red. 1 COMAND receives GPS time 2 Setting the clock (increments of 30 mi- nutes) 3 Selects the country and the time zone ( page 210)
- Page 219 Canada and USA, you can select the appli- Each click will move the time 30 mi- cable time zone. nutes ahead. COMAND will indicate this information in Setting the clock back the main system settings menu. Turn the right-hand rotary/push- button v to the left.
- Page 220 Info Services*/System settings System settings Turn the right-hand rotary/push-button Selecting time zone v to highlight “Country (Time)...” in the settings menu and press to con- firm. An input menu will appear. Turn the right-hand rotary/push-button v to highlight the initial letter for the country name and press to confirm.
- Page 221 Info Services*/System settings System settings Automatic time conversion Press the right-hand rotary/push- Position 1 Meaning button v. Automatic sum- The time in this Checkmark P indicates that auto- mer/winter time country/timezone matic time change is active. changes, the dates of the time change Press the right-hand rotary/push- button v longer than 2 seconds.
- Page 222 Setting You must manually set the date and clock, Press the right-hand rotary/push- button v. COMAND does not receive a GPS time The day appears in red letters, setting mode is active. the clock has been disconnected from the vehicle battery...
- Page 223 Info Services*/System settings System settings Adopting settings Selecting the time format In the “Date/Time” menu Press the right-hand rotary/push- Turn the right-hand rotary/push-button button v longer than 2 seconds. v to highlight “Time format” and press to confirm. The main system settings menu will ap- pear with the changed settings.
-
Page 224: Switching Beep Tones On And Off
You will hear this beep if you confirm a function or select an entry. 1 Acknowledgement beep Info beep 2 Info beep You will hear this beep if COMAND pro- P Tone is switched on vides information, e.g. navigation turn Q Tone is switched off is approaching. -
Page 225: Setting The Display Dimming Characteristics
Info Services*/System settings System settings If the settings menu ( page 206) is dis- Changing the display Setting the display dimming charac- played teristics (day and night display) Press Ä to access the following dis- Turn the right-hand rotary/push-button plays in succession. v to highlight “Display (day/night)...”... -
Page 226: Resetting All Settings To The Factory Settings
Info Services*/System settings System settings If the settings menu is displayed The factory settings are: Resetting all settings to the factory settings Turn the right-hand rotary/push-button Acknowledgement beep – off v to highlight “Factory settings” and Info beep – off press to confirm. -
Page 227: Auxiliary Audio Source
Mercedes- Benz Center. COMAND will play back voice outputs du- ring route guidance even if the auxiliary au- The auxiliary audio source (e.g. tape recor- dio source has been switched on. - Page 228 Canceling mute function ary audio source will switch on if it has deck and to vehicle (socket in glove Press Ö again. been connected to the COMAND cont- box). rol unit. Symbol R will disappear. Press ( button on COMAND unit.
-
Page 229: Switching Auxiliary Audio Source Off
Info Services*/System settings Auxiliary audio source Switching auxiliary audio source off Press e.g. c on the COMAND control unit. The COMAND audio source selected will switch on. -
Page 230: Glossary
CD guidance. about the COMAND systems radio, CD player, as well as for other optional and telephone. The displays can be Info Services* equipment (CD changer, telephone,... - Page 231 The RM indicator and information. Tele Aid is initially ac- via voice output. in the COMAND display indicates that a tivated by completing a subscriber call is being made using a non-home Voice control system* agreement and placing an acquain- type system.
-
Page 232: Index
Track select 51 Points of Interest 155 Amplifier 66 Changing the navigation CD 45, 137 requesting 165 Arrow indicating the direction to the COMAND control unit 6 saving 193 destination 161 Cross hairs 150 selecting the last destinations 159 Audio sources 63... - Page 233 125 detailed route list 184 GPS 132 Ending a call route list 183 GPS time 209 at the COMAND control unit 99 Loading at the multifunctional steering CD drive with an audio CD 45 wheel 97 Important notes CDs in the changer 46...
- Page 234 North arrow 177 Main destination memory menu 192 “Caution. Please start engine. Otherwi- North-up 177 Main radio menu FM 28 se COMAND will shut down in 10 Symbol for current vehicle Main system setting menu 202, 205 seconds” 10 location 177 Phone book page (names) 106 “Caution.
- Page 235 “OFF ROAD” 163 CD playback 60 Navigation 134 “Personal service number” 126 Radio operation 24 “Reading error” 61 Notebook 115 Quick reference COMAND 12 “Roadside Assistance” 126 “SMS loading...” 121 “Telephone defective” 87 Outgoing calls 100 Radio station automatically saving 36...
- Page 236 Index deleting in memory 39 beginning (way point) 179 changing personal service manually saving 36 canceling 191 number 127 saving station manually 34 changing to the map display 174 Service numbers 126 selecting from memory 37 deviating from the calculated calling 126 Reception quality of the mobile phone 9 route 186...
- Page 237 Index Speed dialing (only with COMAND) 113 Switching off Station Beeps 215 Voice output Radio station COMAND control unit 13 “Bear left after 250 feet” 173 Automatic station scan 33 Mix 175 “Please bear left” 173 Manual tuning 31 Telephone mode 97 “Please, make the next right...
- Page 238 Index...
- Page 239 Index...
- Page 240 Index...
- Page 241 Index...
- Page 242 We reserve the right to modify the technical details of the COMAND system as given in the data and illustrations of this Operator's Manual. Reprinting, translation and copying, even of excerpts, is not permitted without prior authorization in writing. Press time: 07/25/2003...
Need help?
Do you have a question about the Comand and is the answer not in the manual?
Questions and answers