Table of Contents
Advertisement
Advertisement
Table of Contents

Related Manuals for Generac Power Systems Automatic Standby Generators


Summary of Contents for Generac Power Systems Automatic Standby Generators
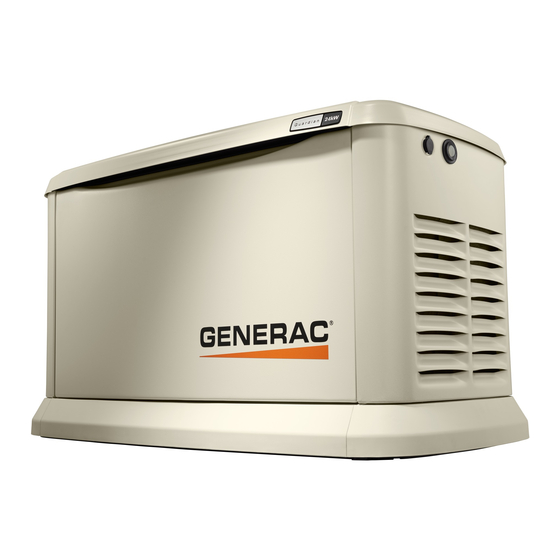
- Page 1 Owner’s Manual 8, 10, 12, 14, 16, 17 & 20kW Air-cooled, Automatic Standby Generators LISTED DO NOT LIFT UNIT BY ROOF! Not intended for use as Primary Power in place of utility or in life-support applications. DANGER DEADLY EXHAUST FUMES. OUTDOOR INSTALLATION ONLY!
-
Page 2: Introduction
INTRODUCTION This symbol points out potential explosion haz- Thank you for purchasing this compact, high per- ard. formance, air-cooled, engine-driven generator. It is This symbol points out potential fire hazard. designed to automatically supply electrical power to operate critical loads during a utility power failure. ... -
Page 3: Table Of Contents
Table of Contents Air-cooled Generators Introduction ......Inside Front Cover Section 3 – Operation ........16 Read This Manual Thoroughly ......IFC Control Panel Interface ........ 16 Contents ............IFC Automatic Transfer Operation ..... 17 Operation and Maintenance ......IFC Sequence of Automatic Operation ....18 How to Obtain Service ........ -
Page 4: Safety Rules
IMPORTANT SAFETY INSTRUCTIONS Air-cooled Generators SAVE THESE INSTRUCTIONS – The manufacturer suggests that these rules for safe operation be copied and posted near the unit’s installation site. Safety should be stressed to all opera- tors and potential operators of this equipment. ... -
Page 5: Standards Index
IMPORTANT SAFETY INSTRUCTIONS Air-cooled Generators • Keep a fire extinguisher near the generator at all ELECTRICAL HAZARDS times. Extinguishers rated “ABC” by the National Fire Protection Association are appropriate for • All generators covered by this manual produce use on the standby electric system. -
Page 6: Section 1 - General Information
Section 1 — General Information Air-cooled Generators PROTECTION SYSTEMS DANGER Unlike an automobile engine, the generator may have to run for long periods of time with no operator pres- Only qualified electricians or contractors should ent to monitor engine conditions. For that reason, attempt such installations, which must comply the engine is equipped with the following systems strictly with applicable codes, standards and regu-... -
Page 7: Emission Information
Section 1 — General Information Air-cooled Generators If during the installation of the home standby system The Emissions Compliance Period referred to on the the decision is made to provide back up power to a Emissions Compliance Label indicates the number of bedroom branch circuit, then the circuit breaker in operating hours for which the engine has been shown the transfer switch should be replaced with an Arc... -
Page 8: The Generator
Section 1 — General Information Air-cooled Generators THE GENERATOR Figure 1.1 – 8kW, Single Cylinder, GH-410 Engine Figure 1.2 – 10kW, V-twin, GT-530 Engine (door removed) (door removed) Roof Latch Roof Latch Circuit Data Label Control Data Label Control Breaker Dipstick (see sample) Panel... -
Page 9: Specifications
Section 1 — General Information Air-cooled Generators SPECIFICATIONS 1.6.1 GENERATOR Model 10kW 12kW 14kW 16kW 17kW 20kW Rated Maximum 7,000 NG 9,000 NG 12,000 NG 13,000 NG 16,000 NG 16,000 NG 18,000 NG Power Capacity (Watts*) 8,000 LP 10,000 LP 12,000 LP 14,000 LP 16,000 LP... -
Page 10: System Set Led
Section 1 — General Information Air-cooled Generators SYSTEM SET LED Special considerations should be given when install- ing the unit where local conditions include flooding, The “System Set” LED (single cylinder) or "Ready to tornados, hurricanes, earthquakes and unstable Run" on the display (v-twin) is ready when all of the ground for the flexibility and strength of piping and following conditions are true: their connections. -
Page 11: Reconfiguring The Fuel System
Section 1 — General Information Air-cooled Generators NOTE: NOTE: A minimum of one approved manual shut-off valve Use an approved pipe sealant or joint compound must be installed in the gaseous fuel supply line. on all threaded fittings to reduce the possibility The valve must be easily accessible. -
Page 12: Location
Section 1 — General Information Air-cooled Generators 1.11 LOCATION Figure 1.6 - 10kW, GT-530 (Inlet Hose Slid Back) 1.11.1 GENERATOR Install the generator set, in its protective enclosure, Fuel Selection outdoors, where adequate cooling and ventilating air Lever - "Out" is always available (Figure 1.9). -
Page 13: Battery Requirements
Section 1 — General Information Air-cooled Generators • Install the generator as close as possible to the fuel supply, to reduce the length of piping. • Install the generator as close as possible to the If the AUTO/OFF/MANUAL switch is not set to its transfer switch. -
Page 14: The Battery
Section 1 — General Information Air-cooled Generators NOTE: Lead-acid batteries present a risk of fire because Dielectric grease should be used on battery posts they generate hydrogen gas. The following to aid in the prevention of corrosion. procedures are to be followed: •... -
Page 15: Section 2 - Post Installation Start-Up And Adjustments
Section 2 — Post Installation Start-up and Adjustments Air-cooled Generators BEFORE INITIAL START-UP ELECTRICAL CHECKS NOTE: Complete electrical checks as follows: These units have been run and tested at the fac- 1. Set the generator's main circuit breaker to its tory prior to being shipped and do not require any OFF (or OPEN) position. -
Page 16: Generator Tests Under Load
Section 2 — Post Installation Start-up and Adjustments Air-cooled Generators 12. Set the generator’s main circuit breaker to its • 12, 14, 16, 17 and 20kW voltage should be OFF (or OPEN) position. Let the engine run at no- greater than 240 volts and frequency should be load for a few minutes to stabilize internal engine 60 Hz. -
Page 17: Engine Governor Adjustment
Section 2 — Post Installation Start-up and Adjustments Air-cooled Generators ENGINE GOVERNOR ADJUSTMENT 2.6.3 ADDITIONAL CORROSION PROTECTION If both AC frequency and voltage are correspondingly high or low, adjust the engine governor as follows: Periodically spray all engine linkage parts and brack- ets with corrosion inhibiting spray such as WD-40 or 2.6.1 8 KW UNITS a comparable product. -
Page 18: Section 3 - Operation
Section 3 — Operation Air-cooled Generators CONTROL PANEL INTERFACE Figure 3.2 – 10/12/14/16/17 & 20kW Generator Control Panel 3.1.1 USING THE AUTO/OFF/MANUAL SWITCH (FIGURES 3.1 & 3.2) 1. “AUTO” Position – Selecting this switch activates fully automatic system operation. It also allows the unit to automatically start and exercise the engine every seven days with the setting of the exercise timer (see the Setting the Exercise Timer... -
Page 19: Automatic Transfer Operation
Section 3 — Operation Air-cooled Generators 10 to 20KW DISPLAY INTERFACE MENUS NOTE: The exerciser will only work in the AUTO mode The LCD display is organized as detailed below: and will not work unless this procedure is per- • The “Home”... -
Page 20: Sequence Of Automatic Operation
Section 3 — Operation Air-cooled Generators SEQUENCE OF AUTOMATIC Cranking Conditions The following notes apply during cranking cycle. OPERATION 1. Starter motor will not engage within five (5) sec- 3.3.1 UTILITY FAILURE onds of the engine shutting down. 2. The fuel output will not be energized with the Initial Conditions: Generator in Auto, ready to run, starter. -
Page 21: Manual Transfer Operation
Section 3 — Operation Air-cooled Generators 2. Auto DANGER • Will start and run if Utility fails for 10 consecu- tive seconds. Do not attempt to activate the transfer switch • Will start a five (5) second engine warm-up manually until all power voltage supplies to the timer. -
Page 22: Side Compartment (V-Twin Only)
Section 3 — Operation Air-cooled Generators Figure 3.4 – Side Compartment DANGER Do not attempt to activate the transfer switch manually until all power voltage supplies to the switch have been positively turned off. Failure to turn off all power voltage supplies may result in extremely hazardous and possibly fatal elec- trical shock. - Page 23 Section 3 — Operation Air-cooled Generators High Engine Temperature (Shutdown Alarm – RPM Sense Loss (Shutdown Alarm) Auto Reset) During cranking, if the Control Board does not see a valid RPM signal within three (3) seconds, it will A 10 second delay on start-up and one (1) second shut down and lock out on RPM sense loss.
-
Page 24: Section 4 - Maintenance
Section 4 — Maintenance Air-cooled Generators 3.6.3 MAINTENANCE ALERTS (10 - 20KW 4. Install the dipstick. 5. Reset the AUTO/OFF/MANUAL switch to its origi- ONLY) nal position. Third priority Figure 4.1 — Oil Dipstick and Fill, 8kW Maintenance Message When a maintenance period expires, a warning mes- Oil Dipstick and Fill sage will be displayed. -
Page 25: Changing The Engine Oil
Section 4 — Maintenance Air-cooled Generators CHANGING THE ENGINE OIL 4. Refill with the proper recommended oil (see the Engine Oil Recommendations section). See the Specifications section for oil capacities. 4.3.1 OIL CHANGE INTERVALS 5. Start the engine, run for one (1) minute, and See the "Service Schedule"... -
Page 26: Spark Plug(S)
Section 4 — Maintenance Air-cooled Generators 4.4.3 8KW GENERATOR Figure 4.5 — 12, 14, 16, 17 & 20kW Engine Air Cleaner See "The Generator" section to locate the air box. Use the following procedures to replace the dirty air filter Screw within the air box (Figure 4.7). -
Page 27: Battery Maintenance
Section 4 — Maintenance Air-cooled Generators Figure 4.8 – Setting the Spark Plug Gap • Wear full eye protection and protective clothing; • Where electrolyte contacts the skin, wash it off SET PLUG GAP AT 0.76 mm (.030 inch) - 8, 10 & immediately with water;... -
Page 28: Cooling System
Section 4 — Maintenance Air-cooled Generators • Make sure the piston is at Top Dead Center (TDC) • Install spark plugs. of its compression stroke (both valves closed). To • Re-attach the spark plug wire to the spark plug. get the piston at TDC, remove the intake screen at •... -
Page 29: Corrosion Protection
Section 4 — Maintenance Air-cooled Generators 4.10 CORROSION PROTECTION 4. Clean and wipe the entire generator. 5. Make sure the 7.5A fuse is removed from the Periodically wash and wax the enclosure using auto- generator control panel. Reconnect the battery. motive type products. -
Page 30: Service Schedule
Section 4 — Maintenance Air-cooled Generators 4.12 SERVICE SCHEDULE ATTENTION: It is recommended that all service work be performed by the nearest Dealer. SYSTEM/COMPONENT PROCEDURE FREQUENCY X = Action W = Weekly R = Replace as Necessary M = Monthly Inspect Change Clean... -
Page 31: Section 5 - Troubleshooting
Section 5 — Troubleshooting Air-cooled Generators TROUBLESHOOTING GUIDE Problem Cause Correction The engine will not crank. 1. Fuse blown. 1. Correct short circuit condition, replace 7.5A fuse in generator control panel. 2. Loose, corroded or defective 2. Tighten, clean or replace battery cables. -
Page 32: Section 6 - Appendix
Section 6 — Appendix Air-cooled Generators MENU SYSTEM NAVIGATION To get to the MENU, use the "Esc" key from any page. It may need to be pressed many times before getting to the menu page. The currently selected menu is displayed as a flashing word. Navigate to the menu required by using the +/- keys. -
Page 33: Menu System
Section 6 — Appendix Air-cooled Generators... -
Page 34: Section 7 - Notes
Section 7 — Notes Air-cooled Generators... -
Page 35: Section 8 - Installation Diagrams
Section 8 — Installation Diagrams Air-cooled Generators Circuit Breakers - Drawing No. 0G8573-A... - Page 36 Section 8 — Installation Diagrams Air-cooled Generators Generator - Drawing No. 0G8280-C...
- Page 37 Section 8 — Installation Diagrams Air-cooled Generators Generator - Drawing No. 0G8280-C...
-
Page 38: Section 9 - Warranty
Owner’s Manual. For warranty purposes, Generac recommends that you retain all receipts covering maintenance on your engine. However, Generac cannot deny warranty solely due to the lack of receipts or for your failure to ensure the completion of all scheduled maintenance. - Page 39 Such use voids this ECS Warranty and shall be sufficient grounds for disallowing an ECS Warranty claim. Generac shall not be held liable hereunder for failures of any warranted parts of a Generac engine caused by the use of such an unapproved, add-on, modified, counterfeit and/or “grey market”...
- Page 40 ® GENERAC POWER SYSTEMS, INC. P.O. BOX 297 • WHITEWATER, WI 53190 Part No. 0G8334 Revision A (04/11/08) Printed in U.S.A. Catalog No. OMASPB07-3...
Need help?
Do you have a question about the Automatic Standby Generators and is the answer not in the manual?
Questions and answers