Table of Contents
Advertisement
AIRLESS SPRAY EQUIPMENT
1997 VERSION
BEGINNING AT
SERIAL NUMBER
120285
SAFETY, OPERATING AND
MAINTENANCE INSTRUCTIONS
AND PARTS LIST
Do Not attempt to operate this machine until you have read and
understand ALL safety precautions and operating instructions.
Equipment and chemicals when used improperly can be dangerous
H.E.R.O. Industries
division of Middlefield Bancorp Limited
2719 Lake City Way,
Burnaby, B.C., Canada
Phone: ( 604 ) 420-6543 Fax: ( 604 ) 420-8725
Toll Free: 1-800-494-4376
E-mail: sales@hero.ca Website: //www.hero.ca
U.S. mail: P.O. Box 75, Custer, WA 98240-0052
Page 37
H.E.R.O. Industries .
1140GSD Owner's Manual - "B" Series
Advertisement
Table of Contents
Troubleshooting

Related Manuals for HERO 1140GSD


Summary of Contents for HERO 1140GSD
- Page 1 2719 Lake City Way, Burnaby, B.C., Canada Phone: ( 604 ) 420-6543 Fax: ( 604 ) 420-8725 Toll Free: 1-800-494-4376 E-mail: sales@hero.ca Website: //www.hero.ca U.S. mail: P.O. Box 75, Custer, WA 98240-0052 Page 37 H.E.R.O. Industries . 1140GSD Owner’s Manual - “B” Series...
- Page 2 To qualify for the warranty, the warranty card (attached to this page) supplied with this H.E.R.O. airless pump, must be completed with equipment serial number and signed by the purchaser, and postmarked within ten (10) days of purchase. Page 1 H.E.R.O. Industries . 1140GSD Owner’s Manual - “B” Series...
-
Page 3: Table Of Contents
NOT operate this pump with components rated less than 3000 psi. working pressure (including but not limited to spray guns, hose and connections). Before servicing, cleaning or removing of any part, shut off power and relieve pressure. Page 2 H.E.R.O. Industries . 1140GSD Owner’s Manual - “B” Series... -
Page 4: Important Safety Precautions
NEVER leave unit unattended without first shutting off, triggering the gun to relieve all pump pressure, and setting the trigger lock on gun in "LOCKED" position, with gun locked closed. Page 3 H.E.R.O. Industries . 1140GSD Owner’s Manual - “B” Series... - Page 5 ALWAYS be aware that certain chemicals may react with aluminum, carbide, or other components in the pump system. Read the manufacturer's label on all materials to be sprayed, and follow the manufacturer's recommendations. If in doubt, consult your material supplier to be sure. Page 4 H.E.R.O. Industries . 1140GSD Owner’s Manual - “B” Series...
-
Page 6: Introduction
Welcome to the world of H.E.R.O. airless paint spraying. We are sure you will enjoy owning and operating your new H.E.R.O. model 1140GSD. With H.E.R.O. airless spray equipment you will avoid the inconvenience and mess of overspray. You are spraying paint, not air, and the paint is driven to the painting surface in a clean, fan shaped spray which penetrates all cracks and corners. -
Page 7: Setting Up To Spray
To remove storage solution, add one gallon of thinner, compatible with the type of paint to be used, to the siphon pail. Strainer bag and si- phon tube. ALWAYS strain paint before starting Page 6 H.E.R.O. Industries . 1140GSD Owner’s Manual - “B” Series... -
Page 8: Setting Up To Spray
Any dirt, grime or other undesirable particles which reach the gun filter have passed through the entire paint pump and have possibly created unnecessary damage and inconvenience. Always strain the paint before siphoning. Page 7 H.E.R.O. Industries . 1140GSD Owner’s Manual - “B” Series... -
Page 9: Flushing The Unit
H.E.R.O. Equipment Wonder Wash, available from your H.E.R.O. distributor, will provide the added cleaning benefits of solvent at a much lower cost. Suitable as a short term ( 1-2 days ) storage solution only Page 8 H.E.R.O. Industries . 1140GSD Owner’s Manual - “B” Series... -
Page 10: Special Notes
Run for a minimum 15 minutes each week while in storage. þ Remove gas before storing. þ Have the engine professionally serviced by an approved service technician on a regular bases as recommended by the manufacturer ( Honda ). Page 9 H.E.R.O. Industries . 1140GSD Owner’s Manual - “B” Series... -
Page 11: Spray Tip Selection
When the tip wears beyond .031, its is releasing more material than the unit is bringing in. The natural reserve of product in the paint chamber is reduced and harm to the membrane begins. ALWAYS check your tips for wear when trouble shooting the equipment. The 1140GSD can support up to a maximum of Page 10 H.E.R.O. -
Page 12: Airless Spray Painting Suggestions
This avoids heavy build up of paint at either end of the spray stroke. Always lap your spray pattern by one half. (fig. 5, page 10) This assures full coverage of the surface being painted. Page 11 H.E.R.O. Industries . 1140GSD Owner’s Manual - “B” Series... -
Page 13: Airless Spray Painting Suggestions
AIRLESS SPRAY PAINTING SUGGESTIONS AND TECHNIQUE FIG. 1 Poor Good Tailing Good Pattern Fog, Overspray FIG. 2 FIG. 2 FIG. 3 FIG. 4 FIG. 5 Page 12 H.E.R.O. Industries . 1140GSD Owner’s Manual - “B” Series... -
Page 14: Troubleshooting
(ref# 11-18) to close. The trapped paint requires a means of release, so it forces the outgo valve, (ref# 26), to open and paint flows to the gun. Fig. 2 Fig. 1 Page 13 H.E.R.O. Industries . 1140GSD Owner’s Manual - “B” Series... -
Page 15: Troubleshooting
Replace the intake washer (ref# 12) each time the endcap is removed. See page 23 for details. Page 14 H.E.R.O. Industries . 1140GSD Owner’s Manual - “B” Series... - Page 16 14. Strainer bag plugging siphon screen. UNLESS YOU ARE KNOWLEDGEABLE ABOUT THE REPAIR OF HIGH PRESSURE EQUIPMENT, DO NOT ATTEMPT TO REPAIR AN AIRLESS SPRAYER YOURSELF. ALWAYS FOLLOW ALL SAFETY PRECAUTIONS. Page 15 H.E.R.O. Industries . 1140GSD Owner’s Manual - “B” Series...
- Page 17 If you do not have access to these items, your local H.E.R.O. authorized service center will be able to perform this test. Your model 1140GSD is manufactured to perform at; 2650 psi -- Static pressure, with lock ring (ref# 77) on pressure control valve (ref# 74).
- Page 18 Inspect for foreign material jamming ball. Inspect ball and cage for wear. Replace parts as needed). Outgo valve (ref# 26) incorrectly assembled. (disassemble and reassemble outgo valve, closely following detailed instructions on page 26). Page 17 H.E.R.O. Industries . 1140GSD Owner’s Manual - “B” Series...
- Page 19 NOTE: Unit may be running during purging procedure to speed up the 4-45-3 procedure. If a pressure cap is unavailable, simply running the equipment for approximately 5-10 minutes with the P.C. stem pulled out, will purge the system). Page 18 H.E.R.O. Industries . 1140GSD Owner’s Manual - “B” Series...
- Page 20 Retainer should be below the valve body (approx. 3/8") when positioned correctly. Center ball on retainer, turn valve seat into body until finger tight, using pipe dope or Teflon tape to seal. Fully tighten using wrench. Page 19 H.E.R.O. Industries . 1140GSD Owner’s Manual - “B” Series...
- Page 21 Outgo valve ball (ref# 30) stuck. (remove outgo valve,(ref# 26). Unthread outgo valve upper body, (ref# 31), from outgo body lower,(ref# 27). Remove outgo seat,(ref# 29), from upper body. Free ball and reassemble following detailed instructions on page 26). Page 20 H.E.R.O. Industries . 1140GSD Owner’s Manual - “B” Series...
- Page 22 Plugged tip. (remove and clean tip). Pump malfunctioning or unsuitable for the material. (refer to other areas of troubleshooting guide and check material requirements vs 1140GSD output abilities). SPRAY PATTERN LEAVES LINES OR FINGERS Pressure too low. (increase pressure slowly until problem is corrected).
-
Page 23: Hydrapulse Membrane Replacement
Run the pump on standby ( not triggering gun ) for about 20 minutes, to “break-in” new membrane. 10. Installation is now complete and the pump is ready for use. Page 22 H.E.R.O. Industries . 1140GSD Owner’s Manual - “B” Series... -
Page 24: Intake Seat Replacement
( crush washer is placed under the seat ). The seat will be held in place through the compression of parts during assembly. Page 23 H.E.R.O. Industries . 1140GSD Owner’s Manual - “B” Series... -
Page 25: Outgo Valve
To check the ball for wear, place against a new seat and check sealing edge against a bright light. A used seat may be checked in a similar manner using a new ball. Replace used part if light pass at sealing edge. Page 24 H.E.R.O. Industries . 1140GSD Owner’s Manual - “B” Series... -
Page 26: Piston Repairs
10. Fill the center cavity of piston rod seat until flush with grease. Slide seat into piston with concave side (filled with grease) facing out. 11. Lightly grease the ball end of piston rod. Push piston rod into piston until ball end of rod contacts seat. Page 25 H.E.R.O. Industries . 1140GSD Owner’s Manual - “B” Series... -
Page 27: Piston Repairs
24. Add new hydraulic oil to hydraulic tank, using only genuine H.E.R.O. LVO hydraulic oil. 25. Once the repairs have been completed, the hydraulic oil will require purging to remove the trapped air. See "PURGING" instructions on page 18. Page 26 H.E.R.O. Industries . 1140GSD Owner’s Manual - “B” Series... -
Page 28: Prime Valve Repairs
16. Thread handle onto valve stem. Allow stem to thread down onto ball ( internally ). Tighten handle firmly. 17. Hold handle while tightening jam nut ( Ref # 45 ) tightly against handle. ( ** Use of Loctite is optional ** ) Page 27 H.E.R.O. Industries . 1140GSD Owner’s Manual - “B” Series... -
Page 29: Pressure Control Valve Repairs
Apply pipe dope or Teflon tape to exterior threads of seat. Install into elbow. Tighten to prevent leaks and return to original position. Reattach hydraulic line. 10. See "PURGING" instructions on page 18. Page 28 H.E.R.O. Industries . 1140GSD Owner’s Manual - “B” Series... -
Page 30: H.e.r.o. Accessories
1306 1506 1706 1906 2106 3110 1108 1308 1508 1708 1908 2108 2708 3112 1110 1310 1510 1710 1910 2110 2310 2510 1312 1512 1712 1912 2112 2312 2712 Page 29 H.E.R.O. Industries . 1140GSD Owner’s Manual - “B” Series... -
Page 31: Parts List And Descriptions
OUTGO VALVE COMPLETE, ( Ref# 27-34 ) ASSY 11A-1 LOWER, Valve Body 11A-3CP WASHER, Copper Crush 11A-45 SEAT, 3/8, Tungsten Carbide 11A-5S BALL, STEEL, 3/8 11B-2 UPPER, Valve Body, for use with steel ball Page 30 H.E.R.O. Industries . 1140GSD Owner’s Manual - “B” Series... - Page 32 HYDRAPULSE MEMBRANE ( Includes Ref# 22 & 58 ) 04-22-4001 HORN, Plastic 04-22-4005 SPRING 04-22-4004 LOCATOR HW4032 NUT, 5/15NC Hex Ny-Lock 4-04-22-4501 HEAD, Hydrapulse, Gold O-RING 24/150 CYLINDER, 1", 25-2 ELBOW Page 31 H.E.R.O. Industries . 1140GSD Owner’s Manual - “B” Series...
- Page 33 SEAL SET, Piston, 1" 4-38A/150-1 PISTON, Only, W/O Seals, 1" 38A-3 SEAT, Piston, Bronze 4-38A-2 ROD, Piston, C/W Nut, Washer, O-Ring, Circlip **Nut, Washer, O-Ring & Circlip NOT Sold Individually** Page 32 H.E.R.O. Industries . 1140GSD Owner’s Manual - “B” Series...
- Page 34 CAPSCREW, HX HD, 5/16NC x 3/4 HW5051P WASHER, Flat, 5/16 BRACKET, For Hydraulic Tank PAD, For Hydraulic Tank NOT SHOWN STRAP, For Hydraulic Tank HW1010P CAPSCREW, HX HD, 1/4NC x 1/2” Page 33 H.E.R.O. Industries . 1140GSD Owner’s Manual - “B” Series...
- Page 35 HANDLE, Snap On, Rear 67/16A WHEEL, Pneumatic 67/17 COOTER PIN 4-06-140-454 BELTGUARD HW1059P CAPSCREW, HHCS, 5/16NF x 3/4 DECALS “Quality By Design” 1140GSD “ Release Pressure ”, Belt Guard “H.E.R.O.” Small, Engine Page 34 H.E.R.O. Industries . 1140GSD Owner’s Manual - “B” Series...
-
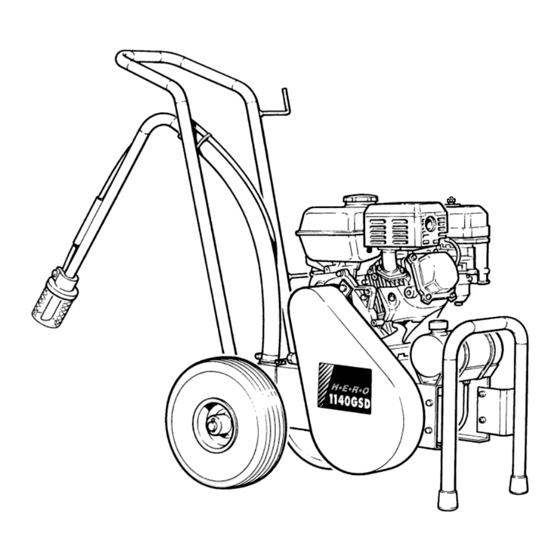
Page 36: Exploded Unit Diagram
PARTS SCHEMATIC Page 35 H.E.R.O. Industries . 1140GSD Owner’s Manual - “B” Series... - Page 37 Page 36 H.E.R.O. Industries . 1140GSD Owner’s Manual - “B” Series...
- Page 38 CANADA PHONE: 604-420-6543 800-494-4376 FAX: 604-420-8725 PURCHASED FROM __________________________ __________________________ __________________________ __________________________ MODEL: __________________ SERIAL #: _________________ DATE OF PURCHASE : _________________________ Page 38 H.E.R.O. Industries . 1140GSD Owner’s Manual - “B” Series Revised April, 2000 File name: 1140gsd-B Series...
Need help?
Do you have a question about the 1140GSD and is the answer not in the manual?
Questions and answers