Advertisement
Advertisement
Table of Contents

Related Manuals for Yamaha LC3 Music lab


Summary of Contents for Yamaha LC3 Music lab
- Page 1 Installation Guide...
- Page 2 Yamaha LC3 Installation Guide Contents Page LC3 Installation List of LC3 Controller Parts ....1 Step 1: Positioning of Instrument in Class ..2 Step 2: Standard Installation of LC3 .
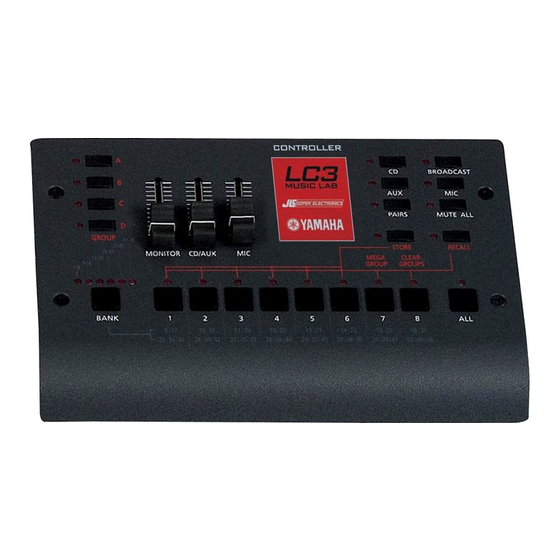
- Page 3 LC3 Installation List of LC3 Controller System Parts LC3 Class Hub with power adapter (Qty 1) lch3 music lab hub LC3 Controller Unit Instrument Box Stereo Instrument Cables (Qty 1) (Qty 9) (Qty 9) 9 17 10 18 11 19 12 20 13 21 14 22...
- Page 4 Step 1: Positioning of Instruments in Classroom 1. With input from the instructor, determine where instruments will be placed. Some teachers want to see student hand positions in keyboard labs. Others want all students facing forward. 2. Determine the numbering system for instruments. The student buttons on the CONTROLLER are labeled 1-8 left-to-right.
- Page 5 Step 2: Standard Installation LC3 1. Determine the position of the Hub in the room. Keep in mind that parts of the LC3 Lab must be connected to the hub so several cables will run to it. 2. Connect the headphone out of all instruments to the FROM INSTRUMENT input on their respective Instrument Boxes using the stereo instrument cables.
- Page 6 If you would like to have two students at each instrument working independently of each other, all that is required is setting your instrument properly and adding additional Yamaha CM500 headset microphones to your system. Each student instrument must have the following settings made for SPLIT MODE to work properly: 1.
- Page 7 Other Optional Items 1. CD or MP3 player. Use an external music player if you would like students to play along with a recording. 2. External Powered Speakers. If it’s necessary that the lab be heard in the room without headphones, external powered speakers can be added.
- Page 8 ©2009 Yamaha Corporation of America. All rights reserved. www.yamaha.com/LC3...
Need help?
Do you have a question about the LC3 Music lab and is the answer not in the manual?
Questions and answers