Table of Contents
Advertisement
Available languages
Available languages
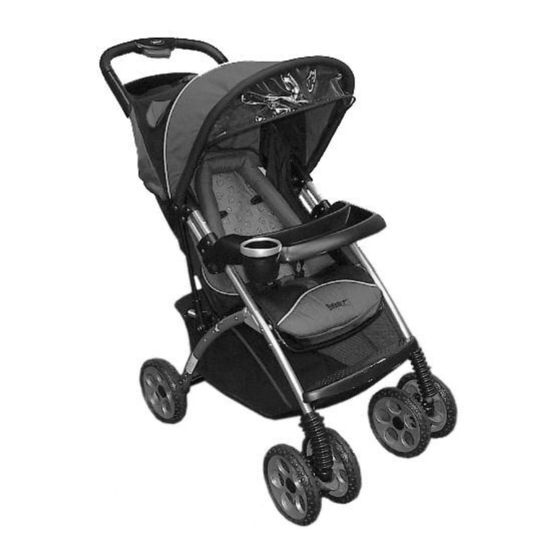
Acella LX Stroller
Acella Alumilite Stroller
Acella LX Travel System
Acella Alumilite Travel System
Models 01621, 01901, 01902, 01905, 01908, 01909, 01915, 01921
User Guide
Questions? Comments?
Missing Parts? Contact Us:
www.safety1st.com
©2006 Dorel Juvenile Group
Made in CHINA
www.safety1st.com
(800) 544-1108
Styles and colors may vary.
Distributed by Dorel Juvenile Group, Inc.,
2525 State Street,
Columbus, IN 47201-7494
Dorel Canada,
Dorel Distribution Canada,
Spanish Guide: page 25
873 Hodge St., St-Laurent,
Guía en español: página 25
QC Canada H4N 2B1
08/22/06 4358-3714B
Advertisement
Table of Contents

Related Manuals for Safety 1st Acella LX


Summary of Contents for Safety 1st Acella LX
- Page 1 Acella LX Stroller Acella Alumilite Stroller Acella LX Travel System Acella Alumilite Travel System Models 01621, 01901, 01902, 01905, 01908, 01909, 01915, 01921 User Guide Questions? Comments? Missing Parts? Contact Us: www.safety1st.com ©2006 Dorel Juvenile Group Made in CHINA www.safety1st.com (800) 544-1108 Styles and colors may vary.
- Page 2 WARNING FOR THE SAFETY OF YOUR CHILD, PLEASE READ THE FOLLOWING WARNINGS AND ASSEMBLY INSTRUCTIONS AND KEEP FOR FUTURE REFERENCE. • Adult assembly required. The product contains small parts which are for adult assembly only. • NEVER LEAVE CHILD UNATTENDED. ALWAYS keep child in view when in stroller.
-
Page 3: Parts List
Parts List 2 Hubcaps 1 Rear axle Footrest 2 Front wheels 2 Rear wheels Seat pad 4 Washers Child’s tray Adapter bar Parent’s tray 2 Cotter pins... -
Page 4: Assembling Your Stroller
Keep these instructions for future use • Lay out and identify all parts. • Do not return this product to the place of purchase. If any parts are missing, call Consumer Relations at (800) 544-1108. Or visit our web site at www.safety1st.com. •... -
Page 5: Install Rear Wheels
Assembling Your Stroller Install Rear Wheels 1. Remove cotter pin and one washer from axle leaving one washer on the axle. With the spokes facing out, slide a wheel onto the axle. Slide on a second washer. 2. Insert straight side of cotter pin through hole in axle. -
Page 6: Install Front Wheels
Assembling Your Stroller Install Rear Wheels 4. Turn stroller upside down. Hold the axle assembly with the brakes toward the handlebars. Push onto frame until buttons snap into place. Install Front Wheels 1. Slide front wheel onto frame tube. Wheel will click when installed properly. - Page 7 Assembling Your Stroller Install Parent’s Tray 1. Open canopy. Slide bottom edge of parent tray onto the frame above the canopy and snap onto handlebar tubes. Install Child’s Tray 1. Guide tray tabs into slots on stroller frame. Push until tray clicks into place.
-
Page 8: Using Your Stroller
Assembling Your Stroller Install Footrest 1. Align pins on lower crossbar with holes on underside of footrest. Snap footrest over crossbar. Push down. Using Your Stroller To Use Brakes 1. Step down onto red levers on both rear wheels. To park stroller, BOTH BRAKES MUST BE LOCKED. -
Page 9: To Adjust Seat Position
Using Your Stroller To Adjust Seat Position 1. To Lower Seat Back–Locate release clip behind backrest. Squeeze release clip, pull away from the stroller and lower seat back. 2. To Raise Seat Back–Holding the ring on the strap, squeeze release clip and push toward the seat back. - Page 10 Using Your Stroller To Use Restraint System WARNING • NEVER LEAVE CHILD UNATTENDED. • AVOID SERIOUS INJURY from falling or sliding out. Always use seat belt. Check frequently to make sure it is secure. Belts must be threaded exactly as shown. •...
-
Page 11: To Use Canopy
Using Your Stroller 3. To tighten straps, pull out bottom loop (B) then pull on strap end. To loosen straps, pull out top loop (C) then pull out on buckle. If the straps should come out of the buckle, rethread as shown. To Use Canopy 1. -
Page 12: To Fold Stroller
Using Your Stroller To Fold Stroller 1. Lock rear brakes and remove your baby. Close canopy. Slide the red button on handlebar to the left and squeeze. 2. Hold the button in and push the handlebar down. 3. Hook tab on the left of the handlebar onto post on stroller frame tube. - Page 13 WARNING To avoid serious injury: • Use ONLY Safety 1st or Eddie Bauer Designer 22 infant car seats with the Acella Travel System or the Acella Alumilite Travel System. • Use ONLY Safety 1st or Eddie Bauer Designer 22 infant car seats, or Graco ®...
- Page 14 Using Your Stroller To Install Safety 1st or Eddie Bauer Designer 22 Infant Car Seats 2. Insert the rigid end of adapter bar through hole in fabric and into hole inside stroller frame. Push in spring end and insert through hole in fabric, then into the hole on the other side.
- Page 15 Using Your Stroller 5. Pull up on car seat to make sure it is securely installed. 6. To remove the car seat, pull up on the release button underneath the head rest. Remove the adapter bar and replace in storage position behind the seat back.
- Page 16 Using Your Stroller To Install Graco SnugRide Infant Car Seat ® ® NOTE: Use ONLY with Acella and Acella Alumilite strollers. (The trade name or trademark of Graco is the trademark of its respective owner.) NOTE: Do not use the adapter bar. 1.
- Page 17 Using Your Stroller To Install Graco SnugRide Infant Car Seat ® ® 3. Bring the elastic loop up from left side of stroller and hook under the slot on the car seat. Twist tab so it lays flat. 4. Pull up on car seat to make sure it is securely installed.
-
Page 18: Care And Maintenance
Care and Maintenance • Spot clean pad with cold water and mild soap. Air dry. • If necessary, pad can be removed for washing (see instructions below). Hand or machine wash in cold water, delicate cycle. No bleach. Line dry. Do not iron or dry clean. - Page 19 To Remove Pad for Cleaning 4. Locate the webbed straps at rear of seat bottom on each side of stroller. Slide the strap through the slit of the D-rings. Unwrap strap from basket. 5. Separate the hook and loop strips under the leg rest.
- Page 20 To Remove Pad for Cleaning 7. Separate the hook and loop strips under the seat bottom. 8. Remove seat pad from stroller frame. 9. To remove headrest, unfasten straps on seat back and pull straps through slots the seat back.
- Page 21 To Remove Pad for Cleaning 10. Unzip the seat back pad. 11. Pull the back board part way out to expose the restraint anchors. Push both restraint anchors through the back board. Pull the back board out. Zip the seat back pad up for washing.
- Page 22 To Replace Pad WARNING • For proper installation of the restraint system, make sure both anchors lay flat against the back board. 1. Insert the back board into the seat back pad. Pull the restraint anchors through the slots of both the pad and the back board.
- Page 23 To Replace Pad 3. Pull pad over leg rest tube and attach hook and loop strips. 4. Pull crotch strap through pad. 5. Wrap webbed strap around black basket side rail. Slide the strap through the slit in the D-ring. Repeat on other side.
- Page 24 To Replace Pad 7. Zip the lower, short zipper at bottom of seat back. 8. Hook D-rings onto each side of the stroller frame. 9. Fasten lower snap and upper hook of arm cover. Wrap arm cover over stroller arms and fasten hook and loop closures.
-
Page 25: Replaceable Parts
Replaceable Parts • Dual wheels • Single wheels • Axle • Hardware bag for back wheel assembly • Child’s tray • Parent’s tray • Footrest • Seat pad • Mounting bar • To order parts call (800) 544-1108. • Include the model number and manufacture date (found on the stroller) and a brief description of the part. -
Page 26: One-Year Limited Warranty
One-Year Limited Warranty Dorel Juvenile Group, Inc. (DJG), warrants this product to the original retail purchaser as follows: This product is warranted against defective materials or workmanship for one year from the date of original purchase. An original receipt is required to validate your warranty. DJG will, at its option, provide replacement parts or replace this product. - Page 27 Carriola Acella LX Carriola Acella Alumilite Sistema de viaje Acella LX Sistema de viaje Acella Alumilite Modelos 01621, 01901, 01902, 01905, 01908, 01909, 01915, 01921 Guía del usuario ¿Preguntas? ¿Comentarios? ¿Faltan piezas? Comuníquese con nosotros: www.safety1st.com ©2004 Dorel Juvenile Group Producto fabricado en CHINA www.safety1st.com...
- Page 28 ADVERTENCIA POR LA SEGURIDAD DE SU HIJO, POR FAVOR LEA LAS SIGUIENTES ADVERTENCIAS E INSTRUCCIONES DE ENSAMBLE, Y GUÁRDELAS PARA CONSULTA FUTURA. • Se requiere que un adulto ensamble el producto. Este producto tiene piezas pequeñas que son para que un adulto ensamble el producto solamente. •...
-
Page 29: Lista De Piezas
Lista de piezas 2 Tapones de cubos Descansapies 1 Eje trasero 2 Ruedas delanteras Acojinado del asiento 2 Ruedas traseras 4 Arandelas Charola para el niño Barra adaptadora Charola para los padres 2 Pasadores de chaveta... - Page 30 Guarde estas instrucciones para consulta futura • Presente todas las piezas e identifíquelas. • No devuelva este producto al lugar donde lo compró. Si faltara alguna pieza, llame a Consumer Relations al (800) 544-1108. O visite nuestro sitio web en www.safety1st.com. •...
- Page 31 Cómo ensamblar su carriola Instale las ruedas traseras 1. Quite el pasador de chaveta y una arandela del eje, dejando una arandela en el eje. Deslice una rueda, con los rayos hacia fuera, en el eje. Deslice otra arandela. 2. Inserte el lado recto del pasador de chaveta a través del orificio del eje.
- Page 32 Cómo ensamblar su carriola Instale las ruedas traseras 4. Voltee la carriola boca abajo. Sostenga el ensamble del eje con los frenos hacia las asas del manubrio. Empuje contra el armazón hasta que los botones encajen en su lugar. Instale las ruedas delanteras 1.
- Page 33 Cómo ensamblar su carriola Instale la charola para los padres 1. Abra la capota. Deslice el borde inferior de la charola para los padres en el armazón sobre la capota y encájela en los tubos de las asas del manubrio. Instale la charola para el niño 1.
-
Page 34: Uso De La Carriola
Cómo ensamblar su carriola Instale el descansapies 1. Alinee los pasadores de la barra transversal inferior con los orificios que se encuentran en la parte inferior del descansapies. Encaje el descansapies sobre la barra transversal. Empuje hacia abajo. Uso de la carriola Para usar los frenos 1. - Page 35 Uso de la carriola Para ajustar la posición del asiento 1. Para bajar el respaldo del asiento–Encuentre el sujetador de liberación que se encuentra detrás del respaldo. Apriete el sujetador de liberación, jálelo alejándolo de la carriola y baje el respaldo. 2.
- Page 36 Uso de la carriola Para usar el sistema de cinturones ADVERTENCIA • NUNCA DEJE AL NIÑO SIN SUPERVISIÓN. • EVITE UNA LESIÓN GRAVE por caída o resbalamiento. Siempre use el cinturón de seguridad. Revise con frecuencia para asegurarse que esté asegurado.
- Page 37 Uso de la carriola 3. Para apretar las correas, saque el lazo inferior (B) y luego jale el extremo de la correa. Para aflojar las correas, saque el lazo superior (C) y luego saque correa en la hebilla. Si las correas se salen de la hebilla, vuelva a pasarlas tal como se muestra.
-
Page 38: Para Plegar La Carriola
Uso de la carriola Para plegar la carriola 1. Ponga los frenos traseros y saque al bebé. Cierre la capota. Deslice hacia la izquierda el botón rojo del asa del manubrio y apriete. 2. Mantenga el botón apretado y empuje hacia abajo el asa del manubrio. - Page 39 • Use SÓLO autoasientos de bebé Safety 1st o Eddie Bauer Designer 22 con el Sistema de Viaje Acella LX o con el Sistema de Viaje Acella Alumilite. • Use SÓLO autoasientos de bebé Safety 1st o Eddie Bauer Designer 22, o autoasientos de bebé...
- Page 40 Uso de la carriola Para instalar los autoasientos Safety 1st o Eddie Bauer Designer 22 2. Inserte el extremo rígido de la barra adaptadora a través del orificio en la tela y dentro del orificio interior del armazón de la carriola.
- Page 41 Uso de la carriola 5. Jale hacia arriba el autoasiento para asegurarse que esté bien instalado. 6. Para quitar el autoasiento, jale hacia arriba el botón de liberación que se encuentra debajo del apoyacabeza. Quite la barra adaptadora y vuelva a colocarla en la posición de almacenamiento detrás del respaldo del asiento.
- Page 42 Para instalar el autoasiento para bebé Graco SnugRide ® ® NOTA: Para uso SOLO con las carriolas Acella LX y Acella Alumilite. (El nombre comercial o marca comercial de Graco es una marca comercial de su respectivo propietario.) NOTA: No use la barra adaptadora.
- Page 43 Uso de la carriola Para instalar el autoasiento para bebé Graco SnugRide ® ® 3. Pase el lazo elástico desde el lado izquierdo de la carriola y engánchelo debajo de la ranura en el autoasiento. Gire la lengüeta para que quede plana.
-
Page 44: Cuidado Y Mantenimiento
Cuidado y mantenimiento • Limpie las manchas del acojinado con agua fría y jabón suave. Deje secar al aire. • Si es necesario, el acojinado se puede quitar para lavarlo. Vea las instrucciones a continuación. Lave a mano o en lavadora en agua fría, ciclo para ropa delicada. No use blanqueador. - Page 45 Para quitar el acojinado para limpiarlo 4. Encuentre las correas reforzadas que se encuentran en la parte trasera del fondo del asiento a cada lado de la carriola. Pase la correa a través de la abertura de los anillos en D. Desenvuelva la correa del cesto.
- Page 46 Para quitar el acojinado para limpiarlo 7. Separe los ganchos y tiras de lazo que están debajo del fondo del asiento. 8. Saque el acojinado del asiento del armazón de la carriola. 9. Para quitar el descansacabeza, desabroche las correas que se encuentran en el respaldo del asiento y páselas a través de las ranuras del...
- Page 47 Para quitar el acojinado para limpiarlo 10. Abra el cierre del acojinado del respaldo del asiento. 11. Jale sacando parcialmente la tablilla del respaldo para descubrir los anclajes del sistema de correas. Empuje ambos anclajes del sistema de correas a través de la tablilla del respaldo.
- Page 48 Para volvera instalar el acojinado ADVERTENCIA • Para la instalación correcta del sistema de correas, asegúrese de que ambos anclajes queden planos contra la tablilla del respaldo. 1. Inserte la tablilla del respaldo en el acojinado del respaldo del asiento. Pase los anclajes del sistema de correas a través de las ranuras tanto del acojinado como de la tablilla...
- Page 49 Para volvera instalar el acojinado 3. Jale el acojinado sobre el tubo de soporte de las piernas y junte los ganchos y las tiras de lazo. 4. Pase la correa de la entrepierna a través del acojinado. 5. Pase la correa reforzada alrededor del riel lateral negro del cesto.
- Page 50 Para volvera instalar el acojinado 7. Abroche el cierre corto inferior que se encuentra en la parte inferior del respaldo del asiento. 8. Enganche los anillos en D a cada lado del armazón de la carriola. 9. Abroche el broche inferior y el gancho superior de la cubierta del brazo.
-
Page 51: Piezas De Repuesto
Piezas de repuesto • Ruedas delanteras • Ruedas traseras • Eje • Bolsa de tornillería para el ensamble de ruedas traseras • Charola para el niño • Charola para los padres • Descansapies • Acojinado del asiento • Barra adaptadora •... -
Page 52: Garantia Limitada De Un Año
Garantia limitada de un año Dorel Juvenile Group, Inc. (DJG) garantiza este producto al comprador particular original, como sigue: Este producto está garantizado contra defectos de materiales y mano de obra por un año a partir de la fecha de compra original. Para validar su garantía se requiere el recibo original.
Need help?
Do you have a question about the Acella LX and is the answer not in the manual?
Questions and answers