
Related Manuals for Hammond XPK-100


Summary of Contents for Hammond XPK-100
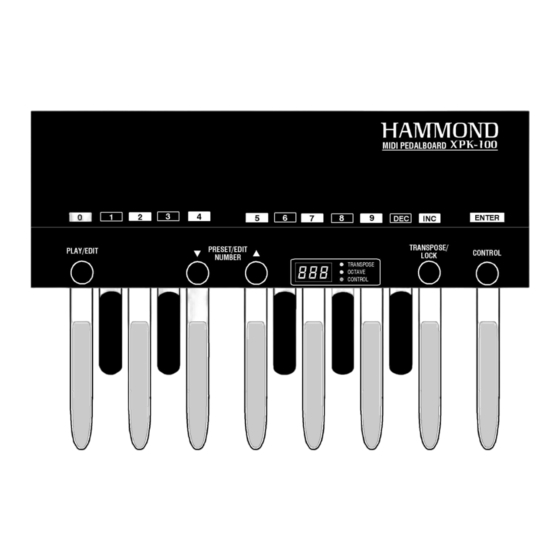
- Page 1 HA<O> XPK-10 0 MIDI PEDALBOARD Quick Features Guide HAMMOND SUZUKI, LTD. Hamamatsu, Japan...
-
Page 2: Table Of Contents
..............3 Using a Sequencer with the XPK-100 and MIDI Keyboards ......4 Using a Sequencer with the XPK-100 and the Hammond XM-1 . -
Page 3: Introduction
Since the XPK-100 has no Power Switch, A.C. power will be applied as soon as the unit is connected to an outlet. NOTE: The XPK-100 is also outfitted with a clip next to the AC receptacle. This is used to secure the AC cord so that it will not accidentally come unplugged. -
Page 4: Connecting The Xpk-100 To A Hammond Drawbar Keyboard
Connecting the XPK-100 to a Hammond Drawbar Keyboard The XPK-100 is designed to interface directly with any current single-manual Hammond Drawbar Keyboard. Simply connect the MIDI OUT of the XPK-100 into the MIDI IN of the Hammond Drawbar Keyboard. Connecting the XPK-100 to another keyboard instrument The XPK-100 can also interface with other keyboard instruments - simply connect the MIDI OUT of the XPK-100 into the MIDI IN of the other keyboard. -
Page 5: Midi Merge - Connecting The Xpk-100 To The Hammond Xm-1 Drawbar Module
Ped als Connecting the XPK-100 to a Hammond Drawbar Keyboard and another keyboard instrument The bottom diagram shows how your XPK-100 can be connected to two keyboards, one of them being a Hammond Drawbar Keyboard. Hammond XPK-100 Quick Features Guide... -
Page 6: Using A Sequencer With The Xpk-100 And Midi Keyboards
Introduction Using a Sequencer with the XPK-100 and MIDI Keyboards The bottom diagram shows you how to connect a Sequencer to two manuals and the XPK-100: Channel 1 - Upper Manual (Hammond Keyboard) Channel 2 - Lower Manual Channel 3 - Ped als Use the above settings for recording your Sequence. -
Page 7: Basic Controls
NOTE: More information about Modes & Advanced Features is covered later in this Guide. TRANSPOSE/LOCK Switch This Switch allows you to change the key in which the XPK-100 will sound, as well as to “lock” the control panel so that you will not accidentally change a setting during performance. -
Page 8: Information Center Display
Volume, etc. The PLAY/EDIT Switch allows you to switch between the two modes. PLAY Mode When you first connect the XPK-100 to AC power, the PLAY Mode will display. The Information Center Display should look similar to this: The designation, “P01” indicates that Preset 1 is active. Presets are predefined combinations of the various parameters on the XPK-100 that can be modified using the Advanced Features. -
Page 9: Edit Mode
NOTE: Doing the following procedure will erase all parameters, settings and registrations, returning the XPK-100 to the original Hammond factory default settings. To ensure that important data is saved, save your information to a MIDI Data recorder before doing this procedure. -
Page 10: Advanced Features
Controller #64 for Sustain, etc. The following is a brief explanation of each of the Advanced Feature functions. E00 PK MIDI Channel - Allows you to select the MIDI Channel on which the XPK-100 will transmit. (See page 10.) E01 Transpose - Allows you to raise or lower the pitch by half-steps sp as to play in one key but sound in another. - Page 11 E09 CONTROL Sw. Mode - Allows you to select how the CONTROL Switch works. (See page 25.) E10 Program Number - Allows you to transmit a Program Number from the XPK-100 to a connected MIDI device, or select a Program Number for each Preset. (See page 26.) E11 Bank No.
-
Page 12: Advanced Feature - E00 Pk Midi Channel
Advanced Features Advanced Feature - E00 PK MIDI Channel This Advanced Feature allows you to select the MIDI Channel on which the XPK-100 will transmit. You can select from “1" through “16.” The default setting is “3.” TRY THIS: From PLAY Mode, press the PLAY/EDIT Switch once. The Information Center Display... - Page 13 To continue editing, instead of pressing the Hi “C” Pedal, use the PRESET/EDIT Switches to select the parameter you want to edit. When you are finished editing, press the “Hi C” Pedal once to return to PLAY Mode. All of your changes will now take effect. Hammond XPK-100 Quick Features Guide...
-
Page 14: Advanced Feature - E01 Transpose
(down 5 half-steps) through “6” (up 6 half-steps). The default setting is “0.” NOTE: The TRANSPOSE LED to the right of the Information Center Display will light whenever the XPK-100 is set to play in any octave other than “0.”... - Page 15 Advan ced Fea tures TRY THIS - To transpose the XPK-100 using EDIT Mode: From PLAY Mode, press the PLAY/EDIT Switch once. The Information Center Display should alternate between two messages as shown below: Current Parameter Current Value Press the PRESET/EDIT “ ” Switch repeatedly until the Information Center Display...
-
Page 16: Advanced Feature - E02 Octave
“-1" (down 1 octave) through “4” (up 4 octaves). The default setting is “0.” NOTE: The OCTAVE LED to the right of the Information Center Display will light whenever the XPK-100 is set to play in any octave other than “0.”... - Page 17 To continue editing, instead of pressing the Hi “C” Pedal, use the PRESET/EDIT Switches to select the parameter you want to edit. When you are finished editing, press the “Hi C” Pedal once to return to PLAY Mode. All of your changes will now take effect. Hammond XPK-100 Quick Features Guide...
-
Page 18: Advanced Feature - E03 Poly/Mono Mode
To continue editing, instead of pressing the Hi “C” Pedal, use the PRESET/EDIT Switches to select the parameter you want to edit. When you are finished editing, press the “Hi C” Pedal once to return to PLAY Mode. All of your changes will now take effect. Hammond XPK-100 Quick Features Guide... -
Page 19: Advanced Feature - E04 Pk Hold On/Off
To continue editing, instead of pressing the Hi “C” Pedal, use the PRESET/EDIT Switches to select the parameter you want to edit. When you are finished editing, press the “Hi C” Pedal once to return to PLAY Mode. All of your changes will now take effect. Hammond XPK-100 Quick Features Guide... -
Page 20: Advanced Feature - E05 Pk Volume
To continue editing, instead of pressing the Hi “C” Pedal, use the PRESET/EDIT Switches to select the parameter you want to edit. When you are finished editing, press the “Hi C” Pedal once to return to PLAY Mode. All of your changes will now take effect. Hammond XPK-100 Quick Features Guide... -
Page 21: Advanced Feature - E06 Fixed Vel. Value
To continue editing, instead of pressing the Hi “C” Pedal, use the PRESET/EDIT Switches to select the parameter you want to edit. When you are finished editing, press the “Hi C” Pedal once to return to PLAY Mode. All of your changes will now take effect. Hammond XPK-100 Quick Features Guide... -
Page 22: Advanced Feature - E07 Control Channel
Now use the Pedal keys to select the MIDI Control Channel you want. Using the DEC/INC Pedal keys: Use the DEC (“A ”) Pedal key to decrease the MIDI Control Channel number selection. Use the INC (“B”) Pedal key to increase the MIDI Control Channel number selection. Hammond XPK-100 Quick Features Guide... - Page 23 To exit the EDIT Mode and return to PLAY Mode, press the “Hi C” Pedal again. The Control Channel of the XPK-100 is now set to the value you selected. NOTE: After doing the above, you will notice a small red dot between the first and second characters of the Information Center Display.
-
Page 24: Advanced Feature - E08 Control Sw. Function
Use the DEC (“A ”) Pedal key to scroll down through the choices. Use the INC (“B”) Pedal key to scroll up through the choices. The data chart on the next page gives a description of the functions available for the CONTROL Switch. Hammond XPK-100 Quick Features Guide... - Page 25 + - Applies to Hammond XM-1 Drawbar Module only. NOTE: In order to use the CONTROL Switch functions that apply to a Hammond MIDI instrument, NRPN must be “ON.” Please refer to the Owner’s Guide or Quick Features Guide for your Hammond Keyboard or Module for information on how to turn on NRPN (Non-Registered Parameter Number).
- Page 26 To continue editing, instead of pressing the Hi “C” Pedal, use the PRESET/EDIT Switches to select the parameter you want to edit. When you are finished editing, press the “Hi C” Pedal once to return to PLAY Mode. All of your changes will now take effect. Hammond XPK-100 Quick Features Guide...
-
Page 27: Advanced Feature - E09 Control Sw. Mode
To exit the EDIT Mode and return to PLAY Mode, press the “Hi C” Pedal again. The CONTROL Switch on the XPK-100 will now operate in the Mode you have selected. NOTE: After doing the above, you will notice a small red dot between the first and second characters of the Information Center Display. -
Page 28: Advanced Feature - E10 Program Number
C” Pedal once to return to PLAY Mode. All of your changes will now take effect. NOTE: The CONTROL Channel and the PK MIDI Channel must be set to the same number in order for Program Changes to be properly recognized by the receiving instrument. Hammond XPK-100 Quick Features Guide... -
Page 29: Advanced Feature - E11 Bank No. Msb
Press the “D ” Pedal “4" Press the “E” Pedal “5" Press the “F” Pedal “6" Press the “F ” Pedal “7" Press the “G” Pedal “8" Press the “G ” Pedal “9" Press the “A” Pedal Hammond XPK-100 Quick Features Guide... - Page 30 To continue editing, instead of pressing the Hi “C” Pedal, use the PRESET/EDIT Switches to select the parameter you want to edit. When you are finished editing, press the “Hi C” Pedal once to return to PLAY Mode. All of your changes will now take effect. Hammond XPK-100 Quick Features Guide...
-
Page 31: Advanced Feature - E12 Bank No. Lsb
Press the “D ” Pedal “4" Press the “E” Pedal “5" Press the “F” Pedal “6" Press the “F ” Pedal “7" Press the “G” Pedal “8" Press the “G ” Pedal “9" Press the “A” Pedal Hammond XPK-100 Quick Features Guide... - Page 32 To continue editing, instead of pressing the Hi “C” Pedal, use the PRESET/EDIT Switches to select the parameter you want to edit. When you are finished editing, press the “Hi C” Pedal once to return to PLAY Mode. All of your changes will now take effect. Hammond XPK-100 Quick Features Guide...
- Page 33 “E” Pedal NOTE: The MIDI Merge feature affects only the MIDI IN 1 port. After doing the above, press the Hi “C” Pedal. The XPK-100 will return to PLAY Mode. Hammond XPK-100 Quick Features Guide...
-
Page 34: Advanced Feature - Lock Feature
LO CK Fe at ure en abled Press and Hold When the XPK-100 is in this mode, except for the CONTROL Switch, touching the Switches will have no effect. To turn the LOCK Feature “OFF” and re-enable the Switches, Press and Hold the TRANSPOSE/LOCK Switch again for approximately 1 second. -
Page 35: Presets
Presets can be restored by doing the RESET ALL procedure. Selecting a Preset You must be in PLAY Mode to select Presets. When you first connect the XPK-100 to AC power, the PLAY Mode will display. The Information Center Display should look similar to this: The designation, “P01”... -
Page 36: Saving To A Preset
TRY THIS: From PLAY Mode, press the PLAY/EDIT Switch once to enter EDIT Mode. Make whatever changes you wish to the XPK-100 by using the Advanced Features. When you have finished editing, then press the Hi “C” Pedal once. The Information Center Display will show you the current parameter alternating with your selected value. -
Page 37: Specifications
E06 Fixed Vel. Value E07 Control Channel E08 CONTROL Sw. Func. Pedal Sustain LONG E09 CONTROL Sw. Mode Alternate E10 Program Change Same as Preset Number E11 Bank Select MSB E12 Bank Select LSB E13 System Reset Hammond XPK-100 Quick Features Guide... -
Page 38: Appendix C - Midi Implementation Chart
*6 Transpose Set, NRPN ON, RAM Data OUT *7 RAM Data IN Mode 1 : OMNI ON, POLY Mode 2 : OMNI ON, MONO : Yes Mode 3 : OMNI OFF, POLY Mode 4 : OMNI OFF, MONO × : No Hammond XPK-100 Quick Features Guide... - Page 39 SUZUKI MUSICAL INSTRUMENT MFG. CO., Ltd 25-12, Ryoke 2 Chome Hamamatsu 430 (Shizuoka) JAPAN ACKNOWLEDGMENTS In appreciation of the many fine players who have made their contributions to Hammond over the years: Axel Alexander Porter Heaps Jimmy Smith Milt Buckner Richard "Groove"...
- Page 40 HAMMOND SUZUKI, LTD., Hamamatsu, Japan...
- Page 41 When using the XPK-100 in performance, it may be possible that you would accidentally touch one of the Switches with your foot and change, say, a Preset when you did not intend to do so.
Need help?
Do you have a question about the XPK-100 and is the answer not in the manual?
Questions and answers