Table of Contents
Advertisement
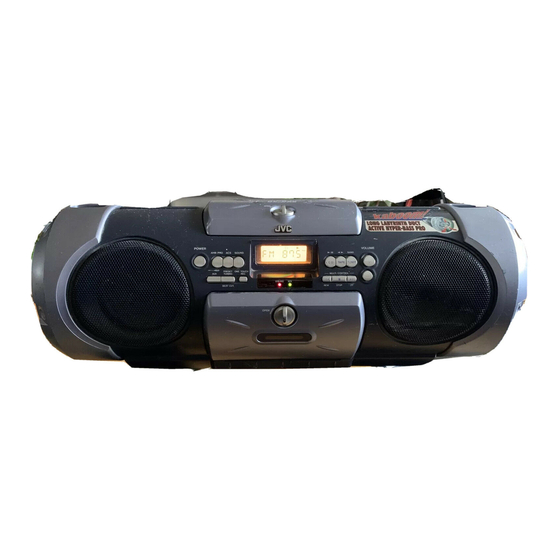
CD PORTABLE SYSTEM
SISTEMA PORTATIL CON CD
SISTEMA PORTATILE CD
RV-B55 GY/BU/LTD
TIMER
CLOCK
TIMER
ON/OFF
SLEEP
DOWN
UP
SET
PROGRAM
RANDOM
AUTO
PRESET
REPEAT
TUNER
AUX
C D
TAPE
BAND
FM MODE
REVERSE MODE
REW
MULTI CONTROL
FF
DISPLAY
SOUND
ACS
AHB PRO
VOLUME
RM-RXVB55
REMOTE CONTROL
INSTRUCTIONS
INSTRUCCIONES
MANUALE DI ISTRUZIONI
LVT0209-004A
[E]
Advertisement
Table of Contents

Related Manuals for JVC RV-B55 GY/BU/LTD


Summary of Contents for JVC RV-B55 GY/BU/LTD
- Page 1 CD PORTABLE SYSTEM SISTEMA PORTATIL CON CD SISTEMA PORTATILE CD RV-B55 GY/BU/LTD TIMER CLOCK TIMER ON/OFF SLEEP DOWN PROGRAM RANDOM AUTO PRESET REPEAT TUNER TAPE BAND FM MODE REVERSE MODE MULTI CONTROL DISPLAY SOUND AHB PRO VOLUME RM-RXVB55 REMOTE CONTROL...
-
Page 2: Table Of Contents
EXTERIOR CLASS LASER PRODUCT ITALIANO Grazie per avere acquistato questo prodotto JVC. Si prega di leggere queste istruzioni con attenzione prima dell’uso per essere certi di ottenere prestazioni ottimali ed una lunga durata dell’unità. INDICE Caratteristiche ... 3 Precauzioni per la sicurezza ... 4 Precauzioni per l'uso ... -
Page 3: Features
2 WARNING LABEL, PLACED INSIDE THE UNIT RV-B55 GY/BU DANGER: Invisible laser VARNING: Osynlig laser- radiation when open and strålning när denna del interlock failed or defeated. är öppnad och spärren är AVOID DIRECT EXPOSURE urkopplad. Betrakta ej strålen. TO BEAM. ADVARSEL: Usynlig laser- VARO: Avattaessa ja suo- stråling ved åbning, når... -
Page 4: Safety Precautions
SAFETY PRECAUTIONS Prevention of Electric Shocks, Fire Hazards and Damage 1. Even when the button is set to STANDBY, a very small current will flow. To save power and for safety when not using the unit for an extended period of time, disconnect the power cord from the household AC outlet. -
Page 5: Handling Precautions
Caution: Proper Ventilation To avoid risk of electric shock and fire, and to prevent damage, locate the apparatus as follows: 1. Front: No obstructions and open spacing. 2. Sides/Top/Back: No obstructions should be placed in the areas shown by the dimensions below. 3. - Page 6 3. Condensation In the following cases, condensation may occur in the unit, in which case the unit may not operate correctly. ÷ In a room where a heater has just been switched on. ÷ In a place where there is smoke or high humidity.
-
Page 7: Shoulder Strap Attachment/ Detachment
SHOULDER STRAP ATTACHMENT/ DETACHMENT ÷ ATTACHMENT As shown in the illustration below, press in the metal fitting at and hook over ÷ DETACHMENT Press in the metal fitting at and unhook. Shoulder strap Correa para el hombro Tracolla CONNECTIONS ÷ Do not switch the power on until all connections are completed. -
Page 8: Power Supply
A. Operation on household AC ÷ Connect the AC power cord after all other connections have been made. CAUTIONS: 1. ONLY USE WITH JVC POWER CORD PROVIDED WITH THIS UNIT TO AVOID MALFUNCTION OR DAMAGE TO THE UNIT. 2. BE SURE TO UNPLUG THE POWER... - Page 9 TIME (MORE THAN TWO WEEKS) OR WHEN ALWAYS USING HOUSEHOLD AC, REMOVE THE BATTERIES TO AVOID A MALFUNCTION OR DAMAGE TO THE UNIT. ÷ WHEN THE JVC POWER CORD PROVIDED WITH THIS UNIT IS CONNECTED, THE POWER IS AUTOMATICALLY SWITCHED FROM BATTERIES HOUSEHOLD AC EVEN WHEN THE BATTERIES ARE LOADED.
- Page 10 Al enchufe del encendedor de cigarrillos del automóvil (12 V) Alla presa dell’accendisigari della vettura (12 V) Optional exclusive car adapter (JVC model CA-R120E) Adaptador exclusivo para automóvil opcional (JVC modelo CA-R120E) Adattatore esclusivo per automobile opzionale (modello JVC CA-R120E) ÷...
-
Page 11: Names Of Parts And Their Functions
NAMES OF PARTS AND THEIR FUNCTIONS CD player/General section 34 5 6 Shoulder strap hook button AHB (Active Hyper Bass) PRO button ACS (Active Clear Sound) button SOUND button OPEN knob Turn the OPEN knob to the left to open the CD door. - Page 12 Tuner/Deck section PRESET TUNING/BEAT CUT button Display window Band display Radio frequency display Mode display during FM broadcast (STEREO/MONO) Tape (TAPE) display Reverse mode indicator ( / Recording indicator (REC) Tape direction indicators (2/3) TAPE 23 button Press to select the tape mode. Press to select the tape direction.
-
Page 13: Remote Control Unit
Rear panel AUX IN (AUX input) jack Telescopic antenna Headphone jack (PHONES) AC IN (AC input) jack Battery compartment cover DC IN 12 V jack ( REMOTE CONTROL UNIT Preparation before use ÷ Installing batteries in the remote control unit 1. - Page 14 Using the remote control unit ÷ Point at the remote sensor and operate within about 7 m. ÷ The remote control range is less when the unit is used at an angle. ÷ Do not expose the remote sensor to strong direct sunlight or artificial lighting.
-
Page 15: Switching The Power On/Off
SWITCHING THE POWER ON/OFF Botón Tasto Switching the power on/off ÷ Switching on: The STANDBY indicator goes out. ON/STANDBY STANDBY El indicador STANDBY se apaga. L'indicatore STANDBY si spegne. ÷ Switching off: ON/STANDBY The STANDBY indicator lights. STANDBY El indicador STANDBY se enciende. L'indicatore STANDBY si illumina. -
Page 16: Volume, Sound Mode And Other Controls
VOLUME, SOUND MODE AND OTHER CONTROLS VOLUME buttons + : Use to increase the volume. – : Use to decrease the volume. (Control range from VOL 0 to VOL 50.) AHB (Active Hyper Bass*) PRO button BASS 1:The AHB PRO indicator lights up, and a mild bass boost is added to the sound. - Page 17 Sound mode button Sound modes can be selected to enhance the type of music being played. ÷ Press the SOUND button to select the sound mode. ÷ Each time the SOUND button is pressed the sound mode changes as follows: Main unit Remote control unit Unidad principal...
-
Page 18: Handling Cds
HANDLING CDs Since dirty, damaged and warped CDs may damage the unit, take care regarding the following: 1. Usable CDs Use CDs with the Compact Disc mark shown below. 2. Notes on handling CDs ÷ Do not touch the reflective recorded surface. -
Page 19: Playing Cds
PLAYING CDs Playing an entire CD The following example of playing an entire CD assumes a CD with 12 tracks and a total playing time of 48 minutes 57 seconds. Operate in the order shown ÷ When AC power is used (When battery power is used, switch on the button first, then perform operation): ON/STANDBY... - Page 20 ÷ Take the disc out of the unit before transporting ÷ Do not place anything other than a CD in the CD player, as this may cause damage to the unit. ÷ Do not apply shock to the unit or use the unit in an unstable position, otherwise mistracking may occur.
- Page 21 Direct access play (using the remote control unit) ÷ Pressing any of the track number buttons will start play from the beginning of the designated track. (This function cannot be used during programmed play.) Press the CD 3 / 8 button to set to the CD mode. Press the 7 button.
- Page 22 Programmed play (using the remote control unit) ÷ Up to 20 tracks can be programmed to be played in any required order. The total playing time of programmed tracks is displayed (up to 99 minutes, 59 seconds). (Example: When programming the 2nd track to be played first, and the 6th track next, then the 12th track, etc.) SLEEP...
-
Page 23: Handling Cassette Tapes
Repeat play (using the remote control unit) Press the REPEAT button before or during play. A single track or all the tracks can be repeated. Whether a single track or all tracks are to be repeated can be specified. Each time the REPEAT button is pressed, the mode will change from single track ( ), to all tracks (... -
Page 24: Cassette Playback
Turn the pencil to tighten the tape. Gire el lápiz para ajustar la cinta. Ruotare la matita per stringere il nastro. Note: If the power is switched off while a tape is running, it may be impossible to remove the cassette. -
Page 25: Using With Another Audio Unit
÷ After loading a cassette tape, simply press the TAPE 23 button. The power is switched on and the tape starts playback. (To select the playback direction, press the TAPE 2 3 button. The change in direction can be checked with the tape direction indicator (2 or 3).) ÷... -
Page 26: Radio Reception
RADIO RECEPTION Operate in the order shown ÷ When AC power is used (When battery power is used, switch on the button first, then perform operation): Press the TUNER BAND button. ÷ The power is switched on. Select the band by pressing the TUNER BAND button. - Page 27 Notes: ÷ When seek tuning to the required station is not possible because the broadcast signal is too weak, press the 4 or ¢ button momentarily to perform manual tuning. ÷ When the power is set to STANDBY, or another mode (TAPE or CD) is selected, the last tuned frequency is stored in memory.
- Page 28 To prevent the preset stations from being erased because of a power failure, etc., install memory back-up batteries in the unit (see page 8). Preset station tuning (Receiving the preset stations) ÷ The stations must be preset before this operation can be performed. (Using the main unit) Press the TUNER BAND button.
-
Page 29: Recording
Synchronized recording with the CD player ÷ In this system, the CD player starts play when the cassette deck enters the recording mode. Operate in the order shown ON/STANDBY AHB PRO ACS SOUND... - Page 30 ONE TOUCH REC button to locate the beginning of the track and enter the one track recording mode. After the recording is finished, the CD player and cassette deck both stop. To record only on side B or in the middle of a tape...
- Page 31 Recording from the radio or an external source connected to the AUX IN terminals Operate in the order shown ON/STANDBY AHB PRO ACS SOUND PRESET ONE TOUCH TUNING BEAT CUT Load a cassette with side A facing out. (Wind past the tape leader before starting recording.) ÷...
-
Page 32: Clock Adjustment
CLOCK ADJUSTMENT USING THE REMOTE CONTROL UNIT) Names of parts in the clock/timer section, and their functions: 1 2 3 Timer mode indicator Timer indicator (ON/OFF) SLEEP indicator CLOCK indicator Time display CLOCK button TIMER button TIMER ON/OFF button DOWN/UP buttons SET button SLEEP button Setting the current time (when this unit... -
Page 33: Timer Operations
TIMER OPERATIONS (USING THE REMOTE CONTROL UNIT) Setting the timer ÷ The current time must be set before the timer can be used. Set the button to ON. Press the TIMER button. TIMER Set the start time. (Example: To set the timer to 12:15.) DOWN Set the stop time. - Page 34 Set the volume. DOWN ÷ The unit enters the previously engaged mode when timer setting has been completed. (The ÷ La unidad ingresa en el modo previamente activado cuando el ajuste del temporizador queda completado. (Se enciende ÷ L’unità entra nel modo precedentemente attivato e l’impostazione del timer è così terminata. (L’indicatore ÷...
- Page 35 ÷ Timer recording will start at timer start time and the power will be switched off at timer stop time. (The timer mode is then released.) ÷ To repeat timer recording every day Press the TIMER ON/OFF button to display the timer mode indicator in the display window.
- Page 36 ÷ Timer playback will start at the timer start time and the power will be switched off at the timer stop time. The unit remains in the same timer mode even after the power is switched off. The same timer function will repeat at the same time on the following day.
-
Page 37: Maintenance
B. To fall asleep while listening to a tape, broadcast or CD and to perform timer playback the following morning Set the timer. (Refer to “Setting the timer” on page 33.) Set to the required source (tape, broadcast or CD). Press the SLEEP button to set the sleep time. -
Page 38: Troubleshooting
* Was the power cord unplugged while the memory back-up batteries were not installed? (CD Player Section) ÷ The CD player does not play. * Is the CD upside down? * Is the CD dirty? * Is there condensation on the lens? (See “Cleaning the lens”... -
Page 39: Specifications
÷ Before making an important recording, be sure to make a test recording first to check that the deck, etc. is working correctly. SPECIFICATIONS CD player section Type : Compact disc player Signal detection system : Non-contact optical pickup... - Page 40 General Speakers (Impedance) Full range: 10 cm x 2 (4 ) Power output : (Max.) 26 W (13 W + 13 W) at 4 (10% THD) 20 W (10 W + 10 W) at 4 Input terminals : AUX IN (300 mV/47 k ) Output terminals : PHONES (Output level: 0 - 12 mW/ch, 32...
Need help?
Do you have a question about the RV-B55 GY/BU/LTD and is the answer not in the manual?
Questions and answers