
Related Manuals for Master audio PA208A


Summary of Contents for Master audio PA208A
- Page 1 PRO SERIES PA-208A Line array Pol.Ind.Norte-Perpinyà,25 08226 TERRASSA (Barcelona-SPAIN) info@master-audio.com www.master-audio.com Manual de usuario / User’s manual May 2009...
- Page 2 9. Desconecte el aparato en caso de tormentas eléctricas o cuando no vaya a emplearlo durante largos períodos de tiempo. 10. No cuelgue nunca el equipo por el asa. 11. Use sólo accesorios recomendados por el fabricante. PA208A.Ver 1.0 May 09...
- Page 3 Amate Electroacústica, s.l. le agradece la confianza depositada en nuestros sistemas de altavoces de la serie PRO. El PA208A combina las ventajas de las fuentes sonoras apiladas verticalmente (line array), la comodidad de un sistema auto amplificado con procesamiento de señal y la flexibilidad de uso adicional como caja de dos vías PA sobre trípode o subwoofer.
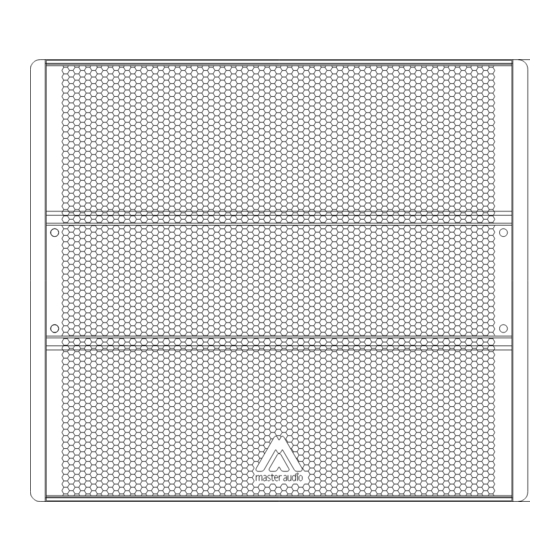
- Page 4 La parte frontal está protegida por una reja de acero de 1.5mm pintada epoxy negra con espuma acústicamente transparente. Formato trapezoidal. Altura 44.5cm, anchura 50cm y profundidad 38.6cm. Ángulo entre caras superior e inferior de 11º. Fig.1. Recinto PA-208A. Medidas exteriores PA208A.Ver 1.0 May 09...
- Page 5 Regulando el nivel de salida de las altas frecuencias podemos conseguir un patrón de cobertura homogéneo a lo largo de toda el área de escucha. HGC = 0dB Campo medio HGC = -3dB Campo cercano HGC = +3dB Campo lejano Fig.2. Control del nivel de agudos PA208A.Ver 1.0 May 09...
- Page 6 E) 90Hz filter: Corta la señal mediante un filtro paso alto a 90Hz (posición 90HZ filter). Útil cuando se utiliza la PA208A con subwoofer. F) POWER ON: Se ilumina para indicar que la señal AC es correcta.
- Page 7 NAC3FCB en un extremo y conector azul Neutrik PowerCon NAC3FCA en el otro extremo. No conecte en paralelo más de 6 recintos de la PA-208A usando el conector AC Stacking Output. No conecte en paralelo recintos de la serie PRO usando cable PowerCon-PowerCon sin toma de tierra. PA208A.Ver 1.0 May 09...
- Page 8 3- No use trípodes ni barras que estén dañadas o con golpes. 4- No coloque más de dos unidades PA-208A encima de un trípode o barra. 5- Vigile cuando use el sistema en recintos abiertos. Una ráfaga de viento inesperado puede provocar el desequilibrio del sistema. PA208A.Ver 1.0 May 09...
- Page 9 Calcule y asegúrese de las resistencias de las estructuras donde van a ser colgados los sistemas, tales como techos o estructuras móviles. Todos aquellos accesorios no suministrados por Amate Electroacústica y empleados por parte del usuario son responsabilidad de éste último. PA208A.Ver 1.0 May 09...
- Page 10 Cada caja puede inclinarse (con respecto a la siguiente) entre 0º y 11º. Para fijar dichas inclinaciones se deben emplear los pines de seguridad suministrados con el kit. Fig.8. Herrajes laterales (vista general) PA208A.Ver 1.0 May 09...
- Page 11 (0º, 1º, 2º, 3º, 5º, 8º ó 11º). Situar esta pieza entre los dos herrajes laterales traseros de la caja situada encima (en forma de sandwich) y blocar la posición mediante los pasadores de seguridad. Fig.11. Colgado PA-208A. Line Array plano. 0 grados (Guía =0º) PA208A.Ver 1.0 May 09...
- Page 12 Amate Electroacústica,s.l. Fig.12 Colgado PA-208A. Line Array curvado. 11 grados (Guía =11º) PA208A.Ver 1.0 May 09...
- Page 13 2 x AC PowerCon (entrada, link) 2 x XLR (entrada, link) Material Tablero contrachapado, Reja frontal de acero pintada epoxy negra con espuma acústicamente transparente Acabado Pintura negra de resinas acrílicas, ecológica a base de agua Rigging (opcional) Acero pintado negro PA208A.Ver 1.0 May 09...
- Page 14 EMI. • Compruebe que no hay ningún regulador de intensidad de luz en el mismo circuito AC de la caja. Conecte SIEMPRE el circuito de sonido y el de iluminación a distintas fases. PA208A.Ver 1.0 May 09...
- Page 15 D. The equipment has been exposed to the rain; or E. The chassis is damaged 9. Disconnect the device in the case of electric storms or during long periods of disuse. 10. Never hang the equipment by its handle. 11. Only use manufacturer recommended accessories. PA208A.Ver 1.0 May 09...
- Page 16 TV channels to even churches, corporative events or medium format concert halls. Thanks to its accurate design, several units of the PA208A perform as a single unit, without sound “holes” on the vertical plane.
- Page 17 -3dB / 0dB / 3db switch which is placed on the rear side of the box. The lower speaker (which covers the nearest listeners) may have its high-frequency output reduced. At the same time, the upper speaker may have its high frequency output PA208A.Ver 1.0 May 09...
- Page 18 HGC = +3dB Far field Fig.2. HF output level control In a three-speaker array, the HFC on the top speaker is set at +3dB, the middle speaker at 0 dB, and the bottom speaker at -3dB. PA208A.Ver 1.0 May 09...
- Page 19 LIMITER indicators are active, they are in red colour. The LIMITER indicators can be in red occasionally, but if they are continuously activated, turn down the level control until the LIMITER indicators are only in red occasionally. H) HF output level: -3dB/0dB/3Db high frequency output level control. PA208A.Ver 1.0 May 09...
- Page 20 NAC3FCB at one end and the blue Neutrik PowerCon NAC3FCA at the other end. Do not connect more than six PA-208A units using the AC Stacking output connector. Do not connect PRO series units in parallel using PowerCon- PowerCon without earth. PA208A.Ver 1.0 May 09...
- Page 21 3- Inspect the stand (or pole) before each use and do not use equipment with worn, damaged, or missing parts. 4- Do not attempt to place more than one PA-208A speaker on a stand or pole. 5- Always be cautious when deploying the system outdoors. Unexpected winds may topple a system. PA208A.Ver 1.0 May 09...
- Page 22 Do not fly systems from unsafe structures. All flying accessories that are not supplied by Amate Electroacústica are the user's responsibility. Use at your own risk. Remember that no risks should be taken with regards to public safety. PA208A.Ver 1.0 May 09...
- Page 23 Angles can be changed from 0º to 11º. To safely lock both guides, the lock pins supplied must be used. Fig.8. Flying hardware Available tilt angles are 0º, 1º, 2º, 3º, 5º, 8º and 11º. Fig.9. Back guide PA208A.Ver 1.0 May 09...
- Page 24 Lock the guides with the safety pins. Fig.11. PA-208A flying. Flat Line Array. 0º (Guide =0º) Fig.12 PA-208A flying. Curved line array. 11º (Guide =11º) PA208A.Ver 1.0 May 09...
- Page 25 29 Kg Connectors 2 x AC PowerCon (input, link) 2 x XLR (input, link) Material Birch plywood, Steel frontal grille with black acoustic foam Finish Ecological acrylic resin base black paint Rigging (optional) Black painted steel PA208A.Ver 1.0 May 09...
- Page 26 • Avoid intertwining between mains supply cables or proximity to transformers or Electromagnetic (EMI) emitting devices. • Check there is no light intensity regulator in the same AC circuit as the unit. ALWAYS connect the sound and light circuits in different phases. PA208A.Ver 1.0 May 09...
Need help?
Do you have a question about the PA208A and is the answer not in the manual?
Questions and answers