Table of Contents
Advertisement
Advertisement
Table of Contents

Related Manuals for DataDirect Networks StorageScaler 8460

Summary of Contents for DataDirect Networks StorageScaler 8460
- Page 1 StorageScaler 8460 User Guide SS8460 Document No.: 96-30052-001 Revision: A4...
- Page 2 Information in this document is subject to change without notice and does not represent a commitment on the part of DataDirect Networks, Inc. No part of this manual may be reproduced or transmitted in any form or by any means, electronic or mechanical, including photocopying and recording, for any purpose other than the purchaser’s personal use without the written permission of DataDirect Networks, Inc.
- Page 3 1. The DataDirect Networks products must be returned to (a) an Authorized DataDirect Networks Servicing Reseller in the country of original purchase, or (b) a DataDirect Networks facility which performs Warranty service in the country of original purchase, or (c) an Authorized DataDirect Networks Third Party Service Provider in the country of original purchase.
-
Page 4: Preface
What is in this guide This user guide contains information regarding features and functions of the DataDirect Networks StorageScaler 8460. It also gives you step-by-step instructions on how to install the disk enclosure and how to maintain the enclosure. Potential for Radio Frequency Interference... -
Page 5: Safety
• A safe electrical earth connection must be provided to the power cord. • Provide a suitable power source with electrical overload protection to meet the requirements given in the product specifications. 96-30052-001 Rev. A4 DataDirect Networks StorageScaler 8460 User Guide | 5... -
Page 6: Recycling Of Waste Electrical And Electronic Equipment (Weee)
• Ensure that all disk drives are removed from the enclosure before attempting to move the rack installation. • Do not abandon your backup routines. No system is completely foolproof. 96-30052-001 Rev. A4 DataDirect Networks StorageScaler 8460 User Guide | 6... -
Page 7: Table Of Contents
Power and Cooling Module LEDs ........96-30052-001 Rev. A4 DataDirect Networks StorageScaler 8460 User Guide | 7... - Page 8 ................57 96-30052-001 Rev. A4 DataDirect Networks StorageScaler 8460 User Guide | 8...
-
Page 9: Introduction
Chapter 1 Introduction 96-30052-001 Rev. A4 DataDirect Networks StorageScaler 8460 User Guide | 9... -
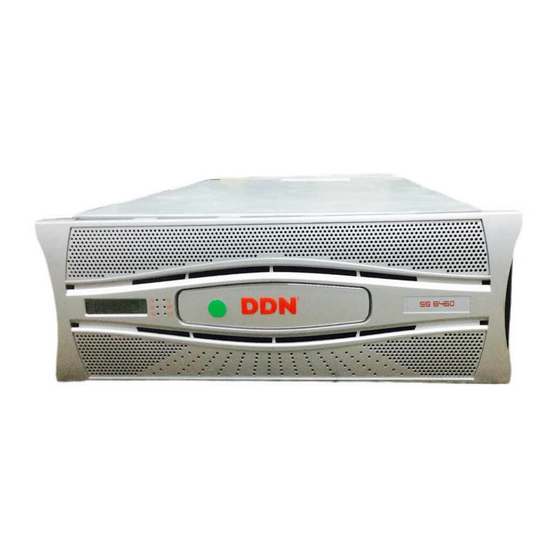
Page 10: The Storagescaler 8460 System Overview
NOTE : Plug-in modules are part of the enclosure and must only be removed when a replacement can be immediately installed. The system must not be run without all modules in place. Figure 1. The SS8460 96-30052-001 Rev. A4 DataDirect Networks StorageScaler 8460 User Guide | 10... -
Page 11: Enclosure Chassis
"Enclosure Status LEDs" for description of the displayed data and the color and status of the LEDs. Figure 3. SS8460 Front with Bezel Enclosure Status LEDs Disk Activity LEDs 96-30052-001 Rev. A4 DataDirect Networks StorageScaler 8460 User Guide | 11... -
Page 12: I/O Module
Figure 5. An I/O Module (DO NOT USE) Fault LED Mini SAS HD Host/Expansion Ports Power LED Link Established LED Module OK LED Locate Beacon LED Link Fault LED 96-30052-001 Rev. A4 DataDirect Networks StorageScaler 8460 User Guide | 12... -
Page 13: Power And Cooling Module
There are three LEDs mounted on the 5V regulator to indicate the status of the module . Refer to Section 3.1.6 "5V Regulator LEDs" for description of the color and status (Figure 9) of the LEDs. Figure 9. 5V Regulator LEDs 96-30052-001 Rev. A4 DataDirect Networks StorageScaler 8460 User Guide | 13... -
Page 14: Disk Modules
SATA HDDs. Figure 10. Disk Modules Handle Open Release Latch Figure 11. Light Pipes on Disk Modules Light Pipes 96-30052-001 Rev. A4 DataDirect Networks StorageScaler 8460 User Guide | 14... - Page 15 Chapter 2 Installation 96-30052-001 Rev. A4 DataDirect Networks StorageScaler 8460 User Guide | 15...
-
Page 16: Installation Overview
• When installing disk modules, allow them to acclimate to room temperature prior to installation. Disks should be stored at room temperature for at least two hours prior to use. 96-30052-001 Rev. A4 DataDirect Networks StorageScaler 8460 User Guide | 16... -
Page 17: Unpacking The Ss8460
Before you unpack your SS8460, inspect the shipping containers for damage. If you detect damage, report it to your carrier. Retain all boxes and packing materials in case you need to store or ship the system in the future. 96-30052-001 Rev. A4 DataDirect Networks StorageScaler 8460 User Guide | 17... - Page 18 Remove all the components from the packaging, inspect the SS8460 chassis and all components for signs of damage. Then place the components on an anti-static surface until you are ready to use them. If you detect any problems, contact DataDirect Networks Customer Service as soon as possible.
-
Page 19: Installing The Ss8460 In A Rack
Note that if your rail kit includes long and short screws, use the long screws at the rear section by the power supplies and the short screws by the disk module section. Figure 15. Attach Enclosure Rails to Chassis Enclosure Rail Long Screw Short Screw 96-30052-001 Rev. A4 DataDirect Networks StorageScaler 8460 User Guide | 19... - Page 20 Attach the shelf locking brackets to the rails using #8-32 " panhead screws. Do not tighten screws. Figure 16. Prepare Rack Rails Shelf Locking Bracket #8-32 x 1/2" Screw Loosen Screw Loosen Screws on Clamp Plate 96-30052-001 Rev. A4 DataDirect Networks StorageScaler 8460 User Guide | 20...
- Page 21 - At the rear, use one screw plate and five #10-32 " flat head screws for each rail. Figure 17. Attach Rack Rails to Rack Front of Rack Rear of Rack 96-30052-001 Rev. A4 DataDirect Networks StorageScaler 8460 User Guide | 21...
- Page 22 - Tighten all #8-32 screws to 16.5 - 17.8 IN-LBS (1.86 - 2.01 Nm) - Tighten all #10-32 screws to 28.0 - 29.7 IN-LBS (3.16 - 3.36 Nm) Figure 18. Tighten all Screws Front of Rack Rear of Rack 96-30052-001 Rev. A4 DataDirect Networks StorageScaler 8460 User Guide | 22...
- Page 23 “click” into place. The SS8460 enclosure is now mounted in the rack. Figure 20. Rest Guide Blocks on Rail Assemblies Rest Guide Block on Top Lip of Bracket Front of Rack 96-30052-001 Rev. A4 DataDirect Networks StorageScaler 8460 User Guide | 23...
- Page 24 To push the enclosure back into the rack: Press the rail locking tabs on either side of the enclosure rails and push back into the rack until the front release tabs re-engage. Figure 22. Release Tab on Enclosure Front Push Tab Inward 96-30052-001 Rev. A4 DataDirect Networks StorageScaler 8460 User Guide | 24...
-
Page 25: Installing Cable Management Assembly
9.5" to 11.0" (241mm to 280mm) from last link of basket as shown Figure 24. Ensure that the cable is securely held inside the lips if it is at the top of the basket. 96-30052-001 Rev. A4 DataDirect Networks StorageScaler 8460 User Guide | 25... -
Page 26: Attach Cmas To Rack Rails
Hold the left CMA close to the left rack rail and route the long end of the cables through the hole in the rack rail (Figure 26) Figure 26. Put Cables through Hole on Rack Rail 96-30052-001 Rev. A4 DataDirect Networks StorageScaler 8460 User Guide | 26... - Page 27 CMA to the rack rail and rear panel of the enclosure. Depress the locking tab on the enclosure rails and carefully push the unit back into place until the front release tabs engage. 96-30052-001 Rev. A4 DataDirect Networks StorageScaler 8460 User Guide | 27...
-
Page 28: Cable Connections
Apply a velcro strap through the hole in the CMA cross bar and wrap around the SAS cables . Repeat for the other side. (Figure 31) Figure 31. Apply Velcro Strap around SAS Cables 96-30052-001 Rev. A4 DataDirect Networks StorageScaler 8460 User Guide | 28... -
Page 29: Disk Module Installation
If a mixture of disk technologies will be populated into one enclosure, for optimal cooling, the best loading order from front to back will be: - SAS disks, SATA disks, then SSD - 3.5" HDD, then 2.5" HDD or smaller 96-30052-001 Rev. A4 DataDirect Networks StorageScaler 8460 User Guide | 29... -
Page 30: Blank Module Requirement
The cover is equipped with constant torque hinges which allow the door to remain in place at any open position and prevent it from being dropped. Figure 34. Cover Release Handles 96-30052-001 Rev. A4 DataDirect Networks StorageScaler 8460 User Guide | 30... -
Page 31: Powering Up The Ss8460
“ready”. In most cases, waiting approximately one minute from power-on will ensure that all disks are ready and available to the host operating system. 96-30052-001 Rev. A4 DataDirect Networks StorageScaler 8460 User Guide | 31... -
Page 32: Power Connections
For systems with expansion enclosures attached, the enclosure last in the chain should be powered up first, followed by the other enclosures with the master unit being turned on last. 96-30052-001 Rev. A4 DataDirect Networks StorageScaler 8460 User Guide | 32... -
Page 33: Power Down Procedure
Do an orderly shutdown of the storage controllers. Power down the master SS8460 by turning off the switches on the PCMs. Power down the remaining expansion enclosures by turning off the switches on their PCMs. 96-30052-001 Rev. A4 DataDirect Networks StorageScaler 8460 User Guide | 33... -
Page 34: Maintenance
Chapter 3 Maintenance 96-30052-001 Rev. A4 DataDirect Networks StorageScaler 8460 User Guide | 34... -
Page 35: Monitoring The Ss8460
DHCP IP Address of Ethernet Ports (only used for advanced diagnostics) (0.0.0.0 means port is not connected to a network) FW Version of Enclosure Logical ID or WWN of Enclosure 96-30052-001 Rev. A4 DataDirect Networks StorageScaler 8460 User Guide | 35... -
Page 36: Enclosure Status Leds
System Fault Amber own amber fault LED lit. OFF - no detectable faults ON - one or more HDDs are failed Disk Fault Amber OFF - no detectable disk faults 96-30052-001 Rev. A4 DataDirect Networks StorageScaler 8460 User Guide | 36... -
Page 37: Disk Locate And Status Leds
For SATA disk, the LED turns green when a disk is present and busy. It flashes when there are disk activities. It turns off when the disk is idle or not present. Figure 43. Disk Activity LEDs on Enclosure Front 96-30052-001 Rev. A4 DataDirect Networks StorageScaler 8460 User Guide | 37... -
Page 38: I/O Module Leds
OFF - the module has detected an internal fault ON - an I/O module fault has been detected Fault Amber OFF - no detectable I/O module fault is present 96-30052-001 Rev. A4 DataDirect Networks StorageScaler 8460 User Guide | 38... -
Page 39: Power And Cooling Module Leds
OFF - PCM failed ON - receiving Locate command PCM ID Blue OFF - NOT receiving Locate command ON - PCM fault detected PCM Fault Amber OFF - no detected PCM faults 96-30052-001 Rev. A4 DataDirect Networks StorageScaler 8460 User Guide | 39... -
Page 40: V Regulator Leds
20% duty cycle in a 5-second period (1s ON, 4s OFF pattern) Cover open 3-second beep Cover closed 3 beeps Cover still open 1-second beep in each 20-second period 96-30052-001 Rev. A4 DataDirect Networks StorageScaler 8460 User Guide | 40... -
Page 41: Temperature Sensor Locations
Low warning Low critical Other temperature sensors: High critical - 2 x PCM High warning - 2 x 5V regulator - 2 x I/O module Low warning Low critical 96-30052-001 Rev. A4 DataDirect Networks StorageScaler 8460 User Guide | 41... -
Page 42: Component Failure Recovery
SS8460, this action be completed within 5 minutes to maintain proper cooling. Observe all conventional ESD precautions when handling the SS8460 modules and components. Avoid contact with backplane components and module connectors. Warning 96-30052-001 Rev. A4 DataDirect Networks StorageScaler 8460 User Guide | 42... -
Page 43: Replacing A Power And Cooling Module
After a few moments, the SS8460 will detect the replacement PCM. At this time, the alarm will go off (along with any failure LEDs), and the cooling fans will return to normal speed. 96-30052-001 Rev. A4 DataDirect Networks StorageScaler 8460 User Guide | 43... -
Page 44: Replacing An I/O Module
Reconnect the I/O cables to their original port connectors. After a few moments, the SS8460 will detect the replacement module. At this time, the cooling fans will return to normal operation. 96-30052-001 Rev. A4 DataDirect Networks StorageScaler 8460 User Guide | 44... -
Page 45: Replacing A Disk Module
Lift handle and pull the module up, just enough to disconnect the module from the backplane. 10. Wait for 30 seconds for the disk to completely spin down. 11. Pull the module gently out of the disk bay. 96-30052-001 Rev. A4 DataDirect Networks StorageScaler 8460 User Guide | 45... -
Page 46: Replacing A 5V Regulator
Ensure that both handles are completely closed. After a few moments, the SS8460 will detect the replacement module. At this time, the cooling fans will return to normal operation. 96-30052-001 Rev. A4 DataDirect Networks StorageScaler 8460 User Guide | 46... -
Page 47: Replacing A Lcd Module
Place the new module on the front panel, replace the cover, and use the four screws to secure them. Connect the new module’s cable to the system. Replace the bezel. 96-30052-001 Rev. A4 DataDirect Networks StorageScaler 8460 User Guide | 47... -
Page 48: Product Specifications
Appendix A Product Specifications 96-30052-001 Rev. A4 DataDirect Networks StorageScaler 8460 User Guide | 48... -
Page 49: General Specifications
76 lbs (34.5 kg) without disks 244 lbs (110.9 kg) with disks Power & Cooling Module AC Input Specifications NOTE : The PCM for the StorageScaler 8460 is an 1865W power supply. Input Parameter Value Input voltage 190 - 264 VAC... -
Page 50: Power & Cooling Module Dc Output Specifications
PCM. RoHS Compliance The enclosure and all of its sub-components are compliant to the European Union RoHS (Restriction of Hazardous Substance) Directive (Directive 2002/95/EC), with no exceptions or exemptions. 96-30052-001 Rev. A4 DataDirect Networks StorageScaler 8460 User Guide | 50... -
Page 51: Temperature, Humidity, And Altitude
10 G, 0 - peak 3 positive shocks shock 11 msec 3 negative shocks half sine Rotational Vibration Disks will not exceed the manufacturer’s rotational vibration guidelines during typical enclosure operation. 96-30052-001 Rev. A4 DataDirect Networks StorageScaler 8460 User Guide | 51... -
Page 52: Packaging And Transportation
Netherlands CE Portugal CE Norway CE Finland CE Sweden CE Russia GOST Poland PCBC Slovenia SIQ Slovakia EVPU Hungary MEEI Czech Republic EZU Germany TÜV-GS, CB CE South Africa SABS 96-30052-001 Rev. A4 DataDirect Networks StorageScaler 8460 User Guide | 52... -
Page 53: Appendix B Zoning
Appendix B Zoning 96-30052-001 Rev. A4 DataDirect Networks StorageScaler 8460 User Guide | 53... -
Page 54: Zoning Configuration 0
2 is connected, the devices in drive group 1 are reported. If host port 3 or host port 4 is used, the devices in drive group 2 are reported. In this configuration, host port 5 is not used and will be turned off. 96-30052-001 Rev. A4 DataDirect Networks StorageScaler 8460 User Guide | 54... - Page 55 HOST 2 HOST 3 HOST 4 HOST 5 Group 1 Group 2 Group 1 Group 2 Dual Ported Dual Ported Dual Ported Dual Ported I/O Module A I/O Module B 96-30052-001 Rev. A4 DataDirect Networks StorageScaler 8460 User Guide | 55...
-
Page 56: Index
I/O module zoning replace Numerics 5V regulator disk replace 96-30052-001 Rev. A4 DataDirect Networks StorageScaler 8460 User Guide | 56... -
Page 57: Contacting Technical Support
If you are shipping the product to another location, always use the original packaging provided with your unit(s). If you are sending a product to DataDirect Networks for warranty or out of warranty repair, you must obtain a Return of Materials Authorization (RMA) number from DataDirect Networks Technical Support. - Page 58 World Headquarters 9351 Deering Avenue, Chatsworth, CA 91311 ddn.com Phone: +1.818.700.7600 Fax: +1.818.700.7601...
Need help?
Do you have a question about the StorageScaler 8460 and is the answer not in the manual?
Questions and answers