Table of Contents
Advertisement
Quick Links
Advertisement
Table of Contents

Related Manuals for Cyberoam Home


Summary of Contents for Cyberoam Home
-
Page 1: User Guide
User Guide User Guide Version 1.0 – 25/01/2014 1000728-20140113-NG11EH... -
Page 2: Netgenie - Read It First
The most complex questions have the simplest answers. NetGenie is an embodiment of such a design philosophy. At home, our family is the most cherished part of our life and their security is our prime concern. They access the Internet for almost anything. From booking movie tickets, accessing Facebook to emailing, the Internet is woven into the fabric of day-to-day lives;... - Page 3 The logs and reports will also show you what kinds of threats are lurking over the Internet, trying to get into your home. NetGenie – Secure your Family, Simply NetGenie is the name of a quest, a journey to achieve ease of use and simplified security for home users. It is the beginning of a thrilling journey.
-
Page 4: Table Of Contents
Can I use my existing Cyberoam Customer Account credentials for NetGenie Customer Portal? ............................28 Internet Access ..........................28 Is it mandatory to create a user in NetGenie in order to access Internet? ......28 How can I access and configure my NetGenie appliance? ..........28 ... - Page 5 How can I view details of Intrusion attempts detected by NetGenie? ........ 64 I have set time as per my local time zone but why is NetGenie still not showing it? ..64 Remote Management ........................65 ...
- Page 6 Is there any single page from where I can get the complete network overview? ..... 77 I want to change the default IP address of my NetGenie appliance, can I do it? ..... 77 Why do I need to clone the MAC address of my router? ............. 78 ...
-
Page 7: Preface
This guide is intended for home users with basic Internet knowledge. Guide Organization This guide gives you information about the administration of Cyberoam NetGenie Home appliance while helping you manage and customize NetGenie to meet your personalized Internet safety requirements. - Page 8 User Guide Typographic Conventions All contents in this guide including text or screenshots follow the given list of conventions Item Convention Example Part titles Bold and Family Protection shaded font typeface Topic titles Shaded font Introduction typeface Subtitles Bold & Black Notation conventions typeface Family Protection ...
-
Page 9: Part 1: Deploy Your Netgenie
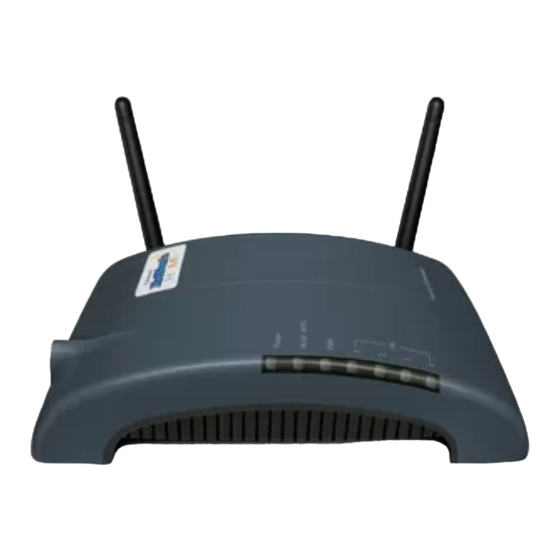
Internet time and experience. Get time and usage reports on your family’s web activities. NetGenie also gives you the flexibility to perform the Administrator role using any Internet access device at home! After unboxing your NetGenie, ensure that you have all these components available: 1. -
Page 10: Defaults
SSID and a pass key specific for your appliance. 4. Plug one end of the power adapter into the socket on the back of the NetGenie Base Unit. 5. Plug the other end of the power adapter into the nearest main socket. - Page 11 Configuring PPPoE section. 4. Switch on the NetGenie appliance. Wait till the “Power” LED and “WAN” LED turns green. 5. Switch on your computer now. NetGenie's “LAN” LED will turn green and remain steady. 6. Open your browser and start surfing the Internet. Your computer is now secured from online threats and malware with the Quick Security feature automatically turned on.
- Page 12 User Guide 1. Unplug the Internet cable that connects to your computer and plug it into the “WAN” NetGenie socket. 2. Use the RJ-45 Ethernet cable provided with the NetGenie appliance to connect your computer to any of the “LAN” NetGenie sockets.
- Page 13 1. Use the cable that comes with your NetGenie appliance to connect it to the ADSL Router/ Cable Modem. 2. Insert one end of the cable in the “WAN” NetGenie socket and the other end in your modem “LAN”. 3. In case of Direct Cable Internet, please connect it straight to the NetGenie “WAN” socket. If you are dialing the Internet from your computer, refer to the section.
- Page 14 User Guide Configuring PPPoE PPPoE (Point-to-Point Protocol over Ethernet) is used when you dial up to connect to the Internet through a broadband connection. This section is only relevant to you if need to dial up the Internet from your machine. (You will need your Username and Password for connecting to the Internet.
- Page 15 User Guide Screen Elements Description Internet PPPoE Connection Type Link Type Select Internet link type. Possible options: Active Backup Disabled PPPoE Information Username Specify username provided by your ISP. Password Specify password. Access Specify the name of Access Concentrator Concentrator Name Service Name...
- Page 16 User Guide Screen- Configure USB Modem Screen Elements Description Wireless Modem Information Link Type Select Internet link type. Possible options: Active Backup Disabled Network Select your USB Network Connection type. Possible options: Modem Status of USB modem. Possible status: ...
- Page 17 User Guide Modem Signal strength of plugged USB modem. Signal Strength Country Select the Country. Service Provider Select the service provider name Service Name Specify name of the service if required. Dial Number Dial number of the selected service provider. Authentication Select the checkbox if you want to enable authentication for your USB modem.
-
Page 18: Access Internet
Table- Configure Static Internet Connection Screen Elements Access Internet Congratulations!!! If you are reading this, it means you have installed NetGenie successfully. Now simply open a new browser window and enter any website URL, you want to visit in the... - Page 19 User Guide Screen- Splash Page This introductory splash screen gives an overview of NetGenie features along with multiple options. The user can Click Learn more about NetGenie's Security button to read detailed information regarding security features offered by NetGenie.
-
Page 20: Part 2: Family Protection
Log in button Click to log in into NetGenie Table – Login screen elements Note: It is recommended to change admin password of NetGenie as soon as you log in. This is a preventive measure to avoid unauthorized use of NetGenie. -
Page 21: Set System Time
User Guide Log out procedure To avoid unauthorized users from accessing NetGenie, log out after you have finished working. This will end your session and mark your exit from NetGenie Set System Time You need to update your local time zone in order to prepare time schedules for accessing the Internet and generating time-based reports. - Page 22 Enter one or more websites to be allowed or blocked for the user and click OK to save the changes. This section is used to customize NetGenie Web protection for the specific user. E.g. Your 15-year old daughter shows interest in visiting a particular computer security forum, which is blocked as per her age-appropriate Internet access settings.
- Page 23 User Guide Screen – Website List Note: For family members under 8 years of age, only select websites are allowed. Website Category List As and when the need arises, you can customize the list of websites allowed and denied to a specific user.
-
Page 24: User Internet Access
User Guide Screen – Application List User Internet Access Open a new browser window and enter any website URL in the address bar. It will lead to an authentication screen. Click the given image icon to log in and specify your password to proceed further. Screen –... - Page 25 Password is mandatory for family member(s) above 8 years of age. Screen – Successful User Login Click the link “Do you want to Whitelist this device?” if you do not want NetGenie to apply parental controls or ask for login every time you access Internet using this device.
- Page 26 User Guide Screen – Device Whitelist Note: Administrator credentials are required to Whitelist the device. Screen – Successful Device Whitelist...
-
Page 27: Part 3: What Can Netgenie Do For You
NetGenie registration is required to avail support subscriptions offered by NetGenie. Why do I need to register my appliance and how do I do it? You need to register your NetGenie appliance in order to avail of the following facilities and subscriptions offered by NetGenie: ... -
Page 28: Can I Use My Existing Cyberoam Customer Account Credentials For Netgenie Customer Portal
This section depicts various Internet access scenarios through NetGenie. Is it mandatory to create a user in NetGenie in order to access Internet? No, you do not need to create user(s) in NetGenie unless you want to implement age-appropriate Internet access and parental controls for individual(s). ... -
Page 29: Is Password Mandatory For Family Members Of All Age Groups
Yes, if a user has been created for any of your family members, they will be required to authenticate every time they try to access the Internet using NetGenie. It is however possible to Whitelist the device(s) in order to skip the authentication page but that would mean you would not... -
Page 30: Do I Need To Manually Add Each Website, Which I Want To Be Allowed For My Kid
Do I need to manually add each website, which I want to be allowed for my kid? No, NetGenie’s Web categorization has been purpose-built to serve the Internet security needs of users belonging to different age groups. You only have to configure age-appropriate Internet access for your child in order to ensure safe Internet surfing. - Page 31 User Guide Screen- Block Website Category 5. Click to configure time-based Internet access. Screen- Schedule Website Category Access...
-
Page 32: Access Other Social Networking Websites. Is It Possible
Website Category. 5. Click Apply to save over all access changes. I want to allow my son accessing game sites in my presence only i.e. when I am at home in the evening. What should I do? ... -
Page 33: Authentication Page
I’m receiving “Blocked Website” message when I try to access www.google.com through NetGenie. Is there any way one can allow access to the blocked website(s) from the authentication page? NetGenie displays a “Block Website” message if it finds any content of specified websites inappropriate for your age group, or the website or the Web Category to which that website belongs has been blocked. -
Page 34: I Want To Know The Categorization For A Website. Is There Any Way To Know The Same Using Netgenie
I want to know the categorization for a Website. Is there any way to know the same using NetGenie? Yes, NetGenie’s Search Category feature allows you to find out the categorization for any given website URL. 1. Log in to NetGenie with administrator credentials. -
Page 35: I Want To Allow Only Yahoo Messenger To My 10- Year- Old Daughter That Too In The Evening Between 6 And 9. I Also Want To Block Any Other Chat Messengers, What Should I Do
6 and 9. I also want to block any other chat messengers, what should I do? You can customize application access for your daughter. Please follow the steps given below: 1. Log in to NetGenie with administrator credentials. or Edit the user that has been created for your daughter. - Page 36 User Guide Screen- Allow Application 6. Click against Yahoo Messenger to apply time-based access and select the time slot when you want her to access Yahoo messenger. Screen- Schedule based Application Access 7. Click OK to save the changes.
-
Page 37: I Am Not Able To Access The Internet Using My Smart Phone, Why
WPS is ON in your NetGenie appliance. 3. Correct Pass Key Please make sure that you have entered correct pass key to access the NetGenie network. Look for a sticker at the bottom of the appliance for pass key specific to your appliance. -
Page 38: I Want To Allow Or Block Some Websites For All Users; Do I Need To Individually Configure This Setting For Each And Every User
How can I block users from accessing the websites which are not categorized by NetGenie? By default, NetGenie allows access to those Websites, which are not categorized under NetGenie’s Web filtering database. To block access to uncategorized Websites, 1. Login to NetGenie with administrator credentials. -
Page 39: What If One Of My Family Members Forgets Their Password
Does NetGenie support 4G Network Connection? Yes, NetGenie supports 4G network connection. My ISP has given me an IP address, where do I need to specify the same in NetGenie? Please refer to Configure Static Internet Connection section. - Page 40 User Guide Screen – Submit Feedback 4. Click “Submit feedback to NetGenie” link to suggest a category for the uncategorized website. Screen – Suggest Category 5. Enter the appropriate website category in the textbox given or click “Refer existing category...
-
Page 41: I Want To Ensure That Internet Is Accessible To My Daughter Only Between 10 Am And 7 Pm. How Do I Do That
Click the appropriate category if you are referring to the Category List. 6. Enter your suggestions in the “Add feedback” field (optional). 7. Click Submit. The suggestions are analysed by NetGenie Team and, if appropriate, added to the upcoming version of the NetGenie Web Categorization database. ... - Page 42 User Guide Screen – Set Time Controls 3. Click “Set Time Controls” link to set Internet access timing for that user. Select the time interval that is to be allowed as shown in the figure below. 4. Click OK to set time interval and Apply on the edit user page to save changes for the user.
-
Page 43: Device Whitelisting
I do not want to authenticate every time I try to access the Internet using NetGenie. What should I do? You need to Whitelist your laptop or other web device in order to avoid the authentication page each and every time. -
Page 44: System
System How do I change my NetGenie administrator password? It is recommended to change NetGenie administrator password as soon as you log in for first time. 1. Log in to NetGenie with administrator credentials. 2. Go to System Admin Password. -
Page 45: Networking
Internet connectivity can be checked by observing the WAN LEDs of NetGenie appliance. If it blinks green, it means your NetGenie appliance is able to connect to the Internet. To further confirm that NetGenie is connected with the Internet, you can use inbuilt diagnostics tools. -
Page 46: How Can I Verify That My Netgenie Appliance Is Wi-Fi Enabled
How can I verify that my NetGenie appliance is Wi-Fi enabled? By default, NetGenie appliance(s) are wireless enabled. Check WLAN/WPS LED of your NetGenie appliance. If it blinks green, it means Wi-Fi is enabled in your NetGenie appliance. If it does not, then follow the given steps: 1. -
Page 47: How Can I Wirelessly Connect My Laptop To Netgenie
“NetGenie”. Click the network icon in your machine's system tray (bottom-right of your screen) and select “NetGenie”. After selecting “NetGenie”, you will be asked to enter the exact Security/Pass Key printed on the sticker at the bottom of your appliance. This will connect you to the NetGenie appliance over Wi-Fi. -
Page 48: Can I Change The Name Of My Network
Can I change the name of my Network? Yes, you can change the name and password of your network. 1. Log in to NetGenie with administrator credentials. 2. Go to Network Settings Wireless. 3. Specify new name of your network in SSID field. -
Page 49: Does Netgenie Support Multiple Internet Connections (Multilink Management)
Screen- Enable Intrusion Prevention Does NetGenie provide protection over both HTTP and HTTPS? Yes, NetGenie provides protection over both HTTP and HTTPS. By default, scanning for both HTTP and HTTPS is enabled. Although, scanning for HTTPS can be disabled (not recommended). -
Page 50: What Is The Frequency Of Malware Signature Updates? Can I Customize It
Screen- Signature Updates Can I manually update malware signature database? Yes, you can manually update NetGenie malware signature database if you do not want to wait 6 hours to get the updated signatures. 1. Log in to NetGenie with administrator credentials. -
Page 51: How Can I Upgrade My Netgenie Appliance With Malware Signature Updates If I Am Not Connected To Internet
User Guide Screen- Manual Signature Update How can I upgrade my NetGenie appliance with malware signature updates if I am not connected to Internet? NetGenie provides the option to manually upload malware signatures. You can download them from download.netgenie.net when you have Internet connectivity and store them in your machine for later use. -
Page 52: What Is The Use Of Diagnostic Tools
Diagnostic tools can be used to identify appliance related problems and aid the administrator to take corrective action. To use NetGenie diagnostic tools: 1. Login to NetGenie using administrator credentials. 2. Go to Network Settings Diagnostics page. Screen - Diagnostics 3. - Page 53 User Guide Screen - Ping Screen – Ping Result Name Lookup: Use to query the Domain Name Service for information about domain names and IP addresses. To use Name Lookup, select the Interface to use, enter the IP Address or Host name in the Name Lookup Section and click “Name Lookup”.
-
Page 54: Upgrade, Back-Up, Restore
How can I check availability of upgrade(s) available for my NetGenie appliance? NetGenie notifies the administrator regarding availability of new firmware at the time of login. Administrator can choose either to upgrade the firmware or skip the notification pop-up. If the administrator skips it then NetGenie keeps notifying the administrator till either the upgrade is done or ‘Check for firmware upgrades upon Login’... -
Page 55: How Can I Upgrade My Netgenie Firmware Version
Upgrade: Here, upgrade is to be done manually. Note: Before upgrading, it is recommended to take back-up of your current NetGenie configuration so that it can be restored in case of mishaps. To know how to take backup of NetGenie configuration, click here. Automatic Upgrade To upgrade NetGenie to the latest firmware follow the steps given below. - Page 56 This takes a few minutes. It is advisable to not interrupt the upgrade process by closing the window. From GUI To Upgrade NetGenie to the latest firmware manually, follow the steps given below. 1. Log in to NetGenie with administrator credentials. 2. Go to System Firmware Upgrade.
- Page 57 This takes a few minutes. It is advisable to not interrupt the upgrade process by closing the window. Manual Upgrade To upgrade NetGenie to the latest firmware manually, follow the steps given below. 1. Download the latest available firmware from: ...
-
Page 58: Can I Save My Current Netgenie Configuration For Future Use I.e. In Case Of System Crash Or Change In Settings
Can I save my current NetGenie configuration for future use i.e. in case of system crash or change in settings? Yes, you can take the back-up of your current NetGenie configuration and restore it at a later stage. -
Page 59: How Can I Restore Factory Default Configuration
Screen- Restore Factory Default Configuration How many configuration snapshots can I store on NetGenie appliance? You can create and store a maximum of 3 (three) configuration snapshots on NetGenie appliance. 1. Log in to NetGenie with administrator credentials. 2. Go to System Config Manager. -
Page 60: Logs And Reports
I want to find out which websites are being accessed by my son in my absence. How can I check it? NetGenie provides a wide range of logs and reports – user-specific web activity reports, malware and intrusion prevention reports, application usage reports and a lot more. -
Page 61: From Where Can I See Overall Internet Traffic Passing Through My Netgenie Appliance
Screen – Web Activity Report From where can I see overall Internet traffic passing through my NetGenie appliance? You can get required information from Logs and Reports Statistics page. This page displays Internet traffic statistics for different security modules of NetGenie. -
Page 62: From Where Can I View Details Of Viruses Detected By Netgenie
Screen – Application Activity From where can I view details of viruses detected by NetGenie? If a virus is detected by NetGenie, then the user is immediately alerted by showing an alert message on the user authentication screen. Screen – Virus Detected... -
Page 63: Can I Have Visibility Of Users Who Are Accessing Internet Through Netgenie
Screen – Virus Details Alternately, go to Logs and Reports Anti Virus to view the list of all viruses detected and blocked by NetGenie. This page provides information of detected viruses based on protocols used to transmit them. Anti Virus logs display names of malware and malware files along with sources, destinations, dates, time, users and actions taken by the NetGenie antivirus engine. -
Page 64: How Can I View Details Of Intrusion Attempts Detected By Netgenie
Screen – Intrusion Prevention Web Protection Screen – Web Protection I have set time as per my local time zone but why is NetGenie still not showing it? NetGenie communicates with NTP servers over Internet to update system time. If NetGenie does... -
Page 65: Remote Management
WAN port is blinking green. If you are sure that NetGenie appliance is able to connect to the Internet, please click Sync Now to synchronize NetGenie appliance system time with NTP server otherwise you can manually set date and time. -
Page 66: Can I Make Changes To My Netgenie Appliance From Ncms
Can I make changes to my NetGenie appliance from NCMS? Yes, you can make changes to your NetGenie appliance(s) using NCMS, even when you are away from your office. This way, NCMS enables secure remote management of your NetGenie appliances. -
Page 67: Some Advanced Configuration
2. Open a new tab and type http://<NetGenie IP Address>/tweb/pages/conf.php in the Address Bar to go to the System Configuration page. For example, if your NetGenie IP Address is 192.168.2.1, then you need to type http://192.168.2.1/tweb/pages/conf.php to go to the System Configuration page. -
Page 68: Certain Applications Of Mine, Like Crashplan And Logmein Are Not Being Able To Connect To The Internet. What Do I Do
2. Open a new tab and type http://<NetGenie IP Address>/tweb/pages/conf.php in the Address Bar to go to the System Configuration page. For example, if your NetGenie IP Address is 192.168.2.1, then you need to type http://192.168.2.1/tweb/pages/conf.php to go to the System Configuration page. -
Page 69: Does Netgenie Prevent My Network From Web As Well Email-Based Viruses? What Happens When Netgenie Encounters Any Virus
Yes, NetGenie ensures clean Web and Email traffic. NetGenie scans all incoming and outgoing traffic over Web and Email. In case of malware occurrence, NetGenie logs the malware and cleans it. However, you can change the course of action to be taken to deal with malware (though it is not recommended). - Page 70 User Guide Screen- Anti Virus Action Configuration 4. Click Apply to save changes.
-
Page 71: The Parental Controls That I Have Applied Are Not Working Properly. What Can Be The Reason
If the time zone configured in user-device(s) is different than that of NetGenie, the access-control schedules you set do not work according to expectation. Solution: You can synchronize the time in NetGenie with that of user-devices. To know how to set system time, click here. Scenario 2: Your NetGenie is not connected with the Parental Control Server. -
Page 72: What Does Netgenie Offer Under Intrusion Prevention System
Screen- Advanced Anti Virus Settings 4. Click Apply to save changes. What does NetGenie offer under Intrusion Prevention System? NetGenie’s Intrusion Prevention System is a signature-based system, which performs following security checks to prevent your network from malicious traffic. Protocol Anomaly Detection ... -
Page 73: Can I Customize Netgenie's Intrusion Prevention Signatures
Yes, you can change Action to be taken and Logging status of any intrusion prevention signature. Please follow below steps to customize intrusion prevention signatures: 1. Log in to NetGenie with administrator credentials. 2. Go to Security Intrusion Prevention. -
Page 74: What Is Port Forwarding? How Can I Configure Port Forwarding In Netgenie
6. Click Apply to save changes. What is Port Forwarding? How can I configure port forwarding in NetGenie? Port forwarding is useful when you want to keep unwanted traffic away from your network. It allows you to use one IP address for all external Internet communications and hosting multiple servers (Web, FTP and Gaming) with different IPs and ports internally. -
Page 75: How To Port-Forward Http Traffic To An Internally Hosted Web-Server
User Guide Screen - Port Forwarding Screen- Port Forwarding Rule 7. Select the checkbox “application name” if you want to delete the application and click Apply. How to port-forward HTTP traffic to an internally hosted web-server? Port-forwarding of HTTP traffic is done in a slightly different manner than other Internet traffic. This is done in 2 steps: 1. -
Page 76: Can I Access Netgenie Over Internet
4. Click Apply to save changes. Screen- NetGenie Access 5. Use your Internet IP address (public IP address provided by your ISP) to access NetGenie over Internet. Please remember that if your Internet connection type is set to DHCP from Network Settings ... -
Page 77: Is There Any Single Page From Where I Can Get The Complete Network Overview
PPPoE USB Modem IP Address – WAN IP address of NetGenie appliance with Renew button (in case of DHCP Internet connection type). Network Mask – Network mask IP address Gateway – IP address of NetGenie gateway ... -
Page 78: Why Do I Need To Clone The Mac Address Of My Router
5. Click Apply to save changes. Screen- MAC Cloning My son has a gaming device running on UDP over a specific port; I want NetGenie to block this service, can I do so? Yes, you can block the traffic generated by specified devices. - Page 79 User Guide 5. Specify service name to block along with port number and protocol and click Apply. Screen- Add Service 6. Specify action item as ‘Block’. 7. Click Apply to save changes. Screen- Firewall Rule The newly created custom service(s) will be added in the list of Custom Service List. Click to remove created service(s).
Need help?
Do you have a question about the Home and is the answer not in the manual?
Questions and answers