JVC KD-G502 Instructions Manual
Jvc cd receiver instructions
Hide thumbs
Also See for KD-G502:
- Instructions manual (195 pages) ,
- Service manual (32 pages) ,
- Installation & connection manual (4 pages)

Related Manuals for JVC KD-G502


Summary of Contents for JVC KD-G502
- Page 1 CD RECEIVER KD-G502 This unit is equipped with the display demonstration. To cancel it, see page 6. INSTRUCTIONS GET0193-011A...
-
Page 2: Important For Laser Products
IMPORTANT FOR LASER PRODUCTS 1. CLASS 1 LASER PRODUCT 2. CAUTION: Do not open the top cover. There are no user serviceable parts inside the unit; leave all servicing to qualified service personnel. 3. CAUTION: Visible and invisible laser radiation when open and interlock failed or defeated. Avoid direct exposure to beam. -
Page 3: Table Of Contents
Thank you for purchasing a JVC product. Please read all instructions carefully before operation, to ensure your complete understanding and to obtain the best possible performance from the unit. CONTENTS How to reset your unit ... How to use the MODE button ... -
Page 4: Location Of The Buttons
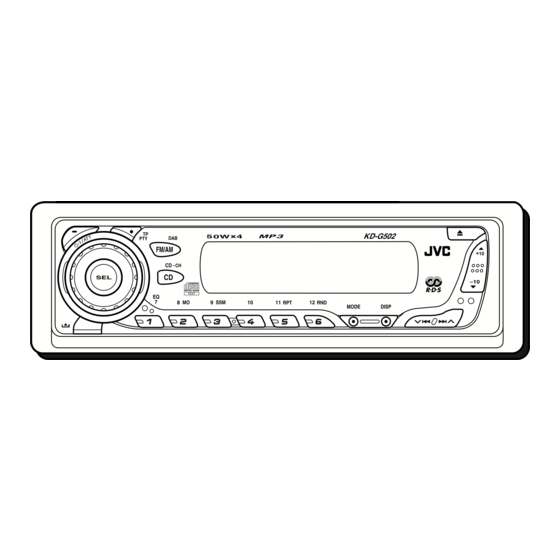
LOCATION OF THE BUTTONS Control panel Display window (standby/on/attenuator) button 2 SEL (select) button 3 TP PTY (traffic programme/programme type) button 4 FM/AM DAB button 5 CD CD-CH (CD changer) button 6 Display window 7 0 (eject) button 8 5 (up) button +10 button (control panel release) button p Control dial... -
Page 5: Basic Operations
Turning on the power Turn on the power. Note on One-Touch Operation: When you select a source in step 2 below, the power automatically comes on. You do not have to press this button to turn on the power. Select the source. To operate the tuner (FM or AM), see pages 8 –... -
Page 6: Canceling The Display Demonstration
Canceling the display demonstration When shipped from the factory, display demonstration has been activated, and starts automatically when no operations are done for about 20 seconds. • It is recommended to cancel the display demonstration before you use the unit for the first time. -
Page 7: Setting The Clock
Setting the clock You can also set the clock system to either 24 hours or 12 hours. Press and hold SEL (select) for more than 2 seconds so that one of the PSM items appears on the display. (PSM: see pages 29 and 30.) Set the hour. -
Page 8: Radio Operations
RADIO OPERATIONS Listening to the radio You can use either automatic searching or manual searching to tune in to a particular station. Searching for a station automatically: Auto search Select the band (FM1 – 3, AM). Each time you press the button, the band changes as follows: Selected band appears. -
Page 9: Storing Stations In Memory
Tune in to a station you want while “M” (manual) is still flashing. To tune in to stations of higher frequencies To tune in to stations of lower frequencies • If you release your finger from the button, the manual mode will automatically turns off after 5 seconds. -
Page 10: Manual Preset
Manual preset You can preset up to 6 stations in each band (FM1, FM2, FM3, and AM) manually. Ex.: Storing FM station of 92.5 MHz into the preset number 1 of the FM1 band. Select the band (FM1 – 3, AM) you want to store stations into (in this example, FM1). -
Page 11: Tracing Same Programme Automatically
What you can do with RDS RDS (Radio Data System) allows FM stations to send an additional signal along with their regular programme signals. For example, the stations send their station names, as well as information about what type of programme they broadcast, such as sports or music, etc. -
Page 12: Using Ta Standby Reception
Press and hold SEL (select) for more than 2 seconds so that one of the PSM items appears on the display. (PSM: see pages 29 and 30.) Select “AF-REG” (alternative frequency/regionalization reception) if not shown on the display. Select the desired mode—“AF,” “AF REG,”... - Page 13 Using PTY Standby Reception PTY Standby Reception allows the unit to switch temporarily to your favorite programme (PTY: Programme Type) from the current source (another FM station, CD, or other connected components). • PTY Standby Reception will not work if you are listening to an AM station.
- Page 14 Searching your favorite programme You can search any one of the PTY codes. In addition, you can store your 6 favorite programme types in the number buttons. When shipped from the factory, the following 6 programme types have been stored in the number buttons (1 to 6).
- Page 15 To search your favorite programme type Press and hold TP PTY for more than 2 seconds while listening to an FM station. The last selected PTY code appears. To select one of your favorite programme type To select any one of the twenty-nine PTY codes Ex.: When “ROCK M”...
-
Page 16: Other Convenient Rds Functions And Adjustments
Other convenient RDS functions and adjustments Automatic selection of the station when using the number buttons Usually when you press the number button, the preset station is tuned in. However, when the preset station is an RDS station, something different will happen. If the signals from that preset station are not sufficient for good reception, this unit, using the AF data, tunes in to another frequency broadcasting the... - Page 17 PTY codes NEWS: News AFFAIRS: Topical programmes expanding on current news or affairs INFO: Programmes which impart advice on a wide variety of topics SPORT: Sport events EDUCATE: Educational programmes DRAMA: Radio plays CULTURE: Programmes on national or regional culture SCIENCE: Programmes on natural science and technology...
-
Page 18: Cd Operations
CD OPERATIONS Refer “MP3 OPERATIONS” on pages 23 to 26 for operating MP3 discs. Playing a CD Open the control panel. Note on One-Touch Operation: When a CD is already in the loading slot, pressing CD CD-CH turns on the unit and starts playback automatically. -
Page 19: Locating A Track Or A Particular Portion On A Cd
To stop play and eject the CD Press 0. CD play stops and the control panel flips down. The CD automatically ejects from the loading slot. The source changes to the previously selected source. • If you change the source, CD play also stops (without ejecting the CD). -
Page 20: Selecting Cd Playback Modes
How to use the +10 and –10 buttons • Ex. 1: To select track number 32 while playing track number 6 (Three times) \ 10 \ 20 \ 30 Track 6 • Ex. 2 : To select track number 8 while playing track number 36 (Three times) Track 36 \ 30 \ 20 \ 10... -
Page 21: Playing A Cd Text
Playing a CD Text In a CD Text, some information about the disc (its disc title, performer, and track title) is recorded. This CD Text information will be shown automatically when you play a CD Text. To change the CD Text information manually, select text display mode while playing a CD Text. -
Page 22: Mp3 Introduction
MP3 INTRODUCTION What is MP3? MP3 is an abbreviation of Motion Picture Experts Group (or MPEG) Audio Layer 3. MP3 is simply a file format with a data compression ratio of 1:10 (128 Kbps*). * Bit rate is the average number of bits that one second of audio data will consume. -
Page 23: Mp3 Operations
• If you change the source or turn the power off, disc playback stops (without ejecting the disc). Next time you select the CD player as the source or turn the power on, disc play starts from where playback has been stopped previously. -
Page 24: Locating A File Or A Particular Portion On A Disc
To stop play and eject the disc Press 0. Playback stops and the control panel flips down. The disc automatically ejects from the loading slot. To change the display information While playing back an MP3 file, you can change the MP3 disc information shown on the display. Press DISP (display) repeatedly. - Page 25 To go to a particular file quickly within the current folder (+10 and –10 buttons) Press MODE to enter the functions mode while playing a disc. Press +10 or –10. To skip 10 files* forwards to the last file To skip 10 files* backwards to the first file * First time you press +10 or –10 button, the file skips to the nearest higher or lower file...
-
Page 26: Selecting Mp3 Playback Modes
To skip to the next or previous folder Press 5 (up) while playing an MP3 disc to skip to the next folder. Each time you press the button consecutively, the next folder is located (and the first file in the folder starts playing, if recorded). -
Page 27: Sound Adjustments
Selecting preset sound modes (C-EQ: custom equalizer) You can select a preset sound mode (C-EQ: custom equalizer) suitable to the music genre. • There is a time limit in doing the following procedure. If the setting is canceled before you finish, start from step 1 again. -
Page 28: Adjusting The Sound
Adjusting the sound You can adjust the sound characteristics to your preference. Select the item you want to adjust. Each time you press the button, the adjustable items change as follows: (bass) (treble) LOUD (volume) (loudness) Indication To do: Adjust the bass. Adjust the treble. -
Page 29: Other Main Functions
Changing the general settings (PSM) You can change the items listed in the table below and on page 30 by using the PSM (Preferred Setting Mode) control. Basic Procedure Press and hold SEL (select) for more than 2 seconds so that one of the PSM items appears on the display. - Page 30 Indications PTY STBY PTY standby TA VOL Traffic announcement volume P-SEARCH Programme search DAB AF Alternative frequency search DAB VOL DAB volume adjustment LEVEL Level display DIMMER Dimmer mode Telephone muting SCROLL Scroll mode EXT IN External component TAG DISP Tag display AMP GAIN Amplifier gain control...
- Page 31 To select the level meter—LEVEL You can activate or deactivate the level meter according to your preference. When shipped from the factory, level meter is activated. • ON: Shows the audio level indicator. • OFF: Cancels the audio level indicator; sound mode indicator is shown.
- Page 32 To select the external component to use —EXT IN You can connect the external component to the CD changer jack on the rear using the Line Input Adapter KS-U57 (not supplied). To use the external component as the playback source through this unit, you need to select which component—CD changer or external component—to use.
-
Page 33: Detaching The Control Panel
Detaching the control panel You can detach the control panel when leaving the car. When detaching or attaching the control panel, be careful not to damage the connectors on the back of the control panel and on the panel holder. Detaching the control panel Before detaching the control panel, be sure to turn off the power. -
Page 34: Cd Changer Operations
CD CHANGER OPERATIONS We recommend that you use the JVC MP3- compatible CD changer with your unit. By using this CD changer, you can play back your original CD-Rs (Recordable) and CD-RWs (Rewritable) recorded either in audio CD format or in MP3 format. - Page 35 • When the current disc is a CD: Playback starts from the first track of the current disc. Selected disc number Elapsed playing Current track time number Notes: • When you press CD CD-CH, the power automatically comes on. You do not have to press to turn on the power.
- Page 36 To show the disc information for CD Text and MP3 discs This is possible only when connecting a JVC CD changer equipped with CD Text and/or MP3 disc information reading capability. Select text display mode while playing a CD Text or an MP3 disc.
-
Page 37: Selecting The Playback Modes
Selecting the playback modes To play back tracks/files at random (Folder Random/Disc Random/Magazine Random Play) Press MODE to enter the functions mode during play. Press RND (random), while “MODE” is still flashing on the display. Each time you press the button, the random play mode changes as follows: For MP3 discs:... -
Page 38: External Component Operations
EXTERNAL COMPONENT OPERATIONS Playing an external component You can connect the external component to the CD changer jack on the rear using the Line Input Adapter KS-U57 (not supplied). Preparations: • For connecting the Line Input Adapter KS-U57 and the external component, refer to the Installation/ Connection Manual (separate volume). -
Page 39: Dab Tuner Operations
We recommend that you use DAB (Digital Audio Broadcasting) tuner KT-DB1500 or KT-DB1000 with your unit. If you have another DAB tuner, consult your JVC IN-CAR ENTERTAINMENT dealer. • Refer also to the Instructions supplied for your DAB tuner. What is DAB system? DAB is one of the digital radio broadcasting systems available today. -
Page 40: Storing Dab Services In Memory
Start searching for an ensemble. To search for ensembles of higher frequency To search for ensembles of lower frequency When an ensemble is received, searching stops. To stop searching before an ensemble is received, press the same button you have pressed for searching. -
Page 41: Tuning In To A Preset Dab Service
Tune in to an ensemble you want. Select a service of the ensemble you want to listen to. To select the next service To select the previous service Press and hold the number button (in this example, 1) for more than 2 seconds to store the selected service into the preset number you want. -
Page 42: What You Can Do More With Dab
What you can do more with Tracing the same programme automatically (Alternative Reception) You can keep listening to the same programme. • While receiving a DAB service: When driving in an area where a service cannot be received, this unit automatically tunes in to another ensemble or FM RDS station, broadcasting the same programme. -
Page 43: Using The Remote Controller
DO NOT leave the remote controller in a place (such as dashboards) exposed to direct sunlight for a long time. Otherwise, it may be damaged. KD-G502 is equipped with the steering wheel remote control function. If your car is equipped with the steering wheel remote controller, you can operate the unit using the controller. -
Page 44: Location Of The Buttons
Location of the buttons RM-RK60 1 • Turns on the unit if pressed when the unit is turned off. • Turns off the unit if pressed and held until “SEE YOU” appears on the display. • Drops the volume level in a moment if pressed briefly. -
Page 45: Troubleshooting
What appears to be trouble is not always serious. Check the following points before calling a service center. Symptoms • Sound cannot be heard from the speakers. • This unit does not work at all. • SSM (Strong-station Sequential Memory) automatic preset does not work. - Page 46 Symptoms • Disc cannot be played back. • Noise is generated. • A longer readout time is required (“CHECK” keeps flashing on the display). • Files cannot be played back as you have intended them to play. • Elapsed playing time is not correct.
- Page 47 Symptoms • “NO DISC” appears on the display. • “NO MAG” appears on the display. • “RESET 8” appears on the display. • “RESET 1” – “RESET 7” appears on the display. • The CD changer does not work at all. About mistracking: Mistracking may result from driving on extremely rough roads.
-
Page 48: Maintenance
• After starting the heater in the car. • If it becomes very humid inside the car. Should this occur, the CD player may malfunction. In this case, eject the disc and leave the unit turned on for a few hours until the moisture evaporates. -
Page 49: Audio Amplifier Section
[MW Tuner] Sensitivity: 20 µV Selectivity: 35 dB [LW Tuner] Sensitivity: 50 µV SPECIFICATIONS CD PLAYER SECTION Type: Compact disc player Signal Detection System: Non-contact optical pickup (semiconductor laser) Number of channels: 2 channels (stereo) Frequency Response: 5 Hz to 20 000 Hz... - Page 50 Having TROUBLE with operation? Please reset your unit Refer to page of How to reset your unit 0604KKSMDTJEIN © 2004 Victor Company of Japan, Limited...
Need help?
Do you have a question about the KD-G502 and is the answer not in the manual?
Questions and answers