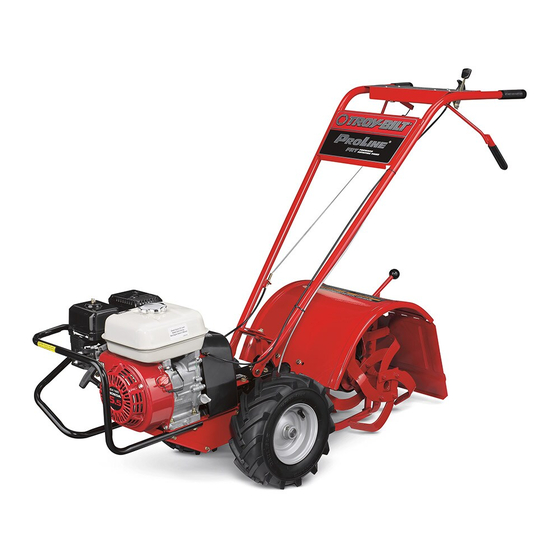
Troy-Bilt Pony ES Operator's Manual
Garden tiller
Hide thumbs
Also See for Pony ES:
- Operator's manual (48 pages) ,
- Operator's manual (40 pages) ,
- Operator's manual (28 pages)
Advertisement
Safe Operation Practices • Set-Up • Operation • Maintenance • Service • Troubleshooting • Warranty
O
'
M
peratOr
s
anual
Pony, Pony ES & Pro-Line FRT Tiller
WARNING
READ AND FOLLOW ALL SAFETY RULES AND INSTRUCTIONS IN THIS MANUAL
BEFORE ATTEMPTING TO OPERATE THIS MACHINE.
FAILURE TO COMPLY WITH THESE INSTRUCTIONS MAY RESULT IN PERSONAL INJURY.
TROY-BILT LLC, P.O. BOX 361131 CLEVELAND, OHIO 44136-0019
Printed In USA
Form No. 769-08714
(January 9, 2013)
Advertisement
Table of Contents

Related Manuals for Troy-Bilt Pony ES


Summary of Contents for Troy-Bilt Pony ES
- Page 1 Safe Operation Practices • Set-Up • Operation • Maintenance • Service • Troubleshooting • Warranty ’ peratOr anual Pony, Pony ES & Pro-Line FRT Tiller WARNING READ AND FOLLOW ALL SAFETY RULES AND INSTRUCTIONS IN THIS MANUAL BEFORE ATTEMPTING TO OPERATE THIS MACHINE.
-
Page 2: Table Of Contents
Visit us on the web at www.troybilt.com See How-to Maintenance and Parts Installation Videos at www.troybilt.com/tutorials ◊ Call a Customer Support Representative at (800) 828-5500 or (330) 558-7220 ◊ Write to Troy-Bilt LLC • P.O. Box 361131 • Cleveland, OH • 44136-0019... -
Page 3: Important Safe Operation Practices
Important Safe Operation Practices WARNING! This symbol points out important safety instructions which, if not followed, could endanger the personal safety and/or property of yourself and others. Read and follow all instructions in this manual before attempting to operate this machine. Failure to comply with these instructions may result in personal injury. - Page 4 When practical, remove gas-powered equipment After striking a foreign object, stop the engine, disconnect from the truck or trailer and refuel it on the ground. the spark plug wire and ground against the engine. If this is not possible, then refuel such equipment on Thoroughly inspect the machine for any damage.
- Page 5 Spark Arrestor If the fuel tank has to be drained, do this outdoors. Observe proper disposal laws and regulations for gas, oil, WARNING! This machine is equipped with an etc. to protect the environment. internal combustion engine and should not be used According to the Consumer Products Safety Commission on or near any unimproved forest-covered, (CPSC) and the U.S.
- Page 6 Safety Symbols This page depicts and describes safety symbols that may appear on this product. Read, understand, and follow all instructions on the machine before attempting to assemble and operate. Symbol Description READ THE OPERATOR’S MANUAL(S) Read, understand, and follow all instructions in the manual(s) before attempting to assemble and operate WARNING—...
-
Page 7: Assembly & Set-Up
Assembly & Set-Up Contents of Carton • One Tiller • One Handlebar Support • One Handlebar Assembly • One Hardware Pack • One Operator’s Manual • One Engine Operator’s Manual WARNING! The hardware bag is inside the literature envelope. Check To prevent personal injury or property the contents with the list above. - Page 8 Gently lift the handlebar (do not overstretch the attached On electric start machines, reattach the height adjustment cable) and place the handlebar cross-brace in front of the bracket. Tighten both screws securely. Make sure the curved height adjustment bracket. See Figure 3-2. handlebar cross-brace is under the bracket.
- Page 9 Reverse Clutch Control Forward Clutch Cable Carefully unwrap the reverse clutch control cable from its Remove any fasteners (rubber bands, tape, etc.) that may shipping position and route it up along the inside edge of secure the Forward Clutch Control levers to the handlebar. the left side handlebar.
- Page 10 Attach the cable adjuster to the bracket on the right-side Insert two #10-32 x 1⁄2” round head screws down through handlebar. See Figure 3-8. Use the two 1⁄2” wrenches to the “+” marks on the control panel decal and securely loosen the two jam nuts just enough to slide the cable attach the wheel gear mounting bracket using two #10 adjuster onto the bracket.
-
Page 11: Controls & Features
Controls & Features Reverse Clutch Control Wheel Gear Lever Forward Clutch Control Lever Forward Clutch Control Lever Handlebar Height Adjustment Screw Depth Regulator Lever Depth Regulator NOTE: For detailed information on all engine controls, refer to the separate Engine Operator’s Manual. The Depth Regulator lever controls the tilling depth of the tines. -
Page 12: Operation
Operation Starting the Engine For electric starting models: Turn the engine ignition key to the “START” setting Pre-Start Checklist and allow the starter motor to crank the engine for several seconds. Avoid cranking the engine longer With the spark plug wire disconnected from the spark plug, make than 15 seconds at a time as doing so could damage the following checks and perform the following services before the starter motor. - Page 13 Engaging the Drive & Tines For reverse motion of the wheels and tines: Look behind and exercise caution when operating in For forward motion of the wheels and tines: reverse. Do not till while in reverse. Pull one or both of the Forward Clutch Control Stop all forward motion before reversing.
- Page 14 Let the Tiller Do the Work With the tiller balanced, push sideways on the handlebar to move the tiller in the direction of the turn. See Figure • While tilling, relax and let the wheels pull the tiller along 5-4. After completing the turn, slowly lower the tines into while the tines do the digging.
- Page 15 Suggested tilling patterns • If the garden size will not permit lengthwise and then crosswise tilling, then overlap the first passes by one-half • When preparing a seedbed, go over the same path twice in a tiller width, followed by successive passes at one-quarter the first row, then overlap one-half the tiller width on the width See Figure 5-7.
- Page 16 Tilling on slopes • To create a terrace, start at the top of the slope and work down. Go back and forth across the first row as shown in If you must garden on a moderate slope, please follow two very Figure 5-9.
- Page 17 Loading & Unloading the Tiller Power Composting • Power composting simply means tilling under and WARNING! Loading and unloading the tiller into a burying in the soil all manner of organic matter such as vehicle is potentially hazardous and doing so is not crop residues, leaves, grass clippings and cover crops.
-
Page 18: Maintenance & Adjustments
Maintenance & Adjustments Maintenance Schedule After 2-hour Before Each Use Every 5 Hours Every 10 Hours Every 30 Hours break-in Clean Engine Check Drive Belt Tension Check Nuts and Bolts Lubricate Tiller Check Transmission Gear Oil Check Tines for Wear Check Air Pressure in Tires WARNING! With the tiller on level ground, pull the Depth Regulator... - Page 19 Adjustments If oil does not flow from the check hole, add oil as follows: NOTE: Do not use automatic transmission fluid or motor oil Wheel Gear Cable in the transmission. When the Wheel Gear Lever is in DISENGAGE, the wheels will roll Clean the area around the fill hole and unscrew the freely (freewheel).
- Page 20 Tension on a new forward clutch belt should be checked after Belt adjustments are done with the forward clutch cable the first two (2) hours of operation and after every ten (10) hours adjuster. Use two 1⁄2”, open-end wrenches to loosen the two of operation after that.
- Page 21 Off-Season Storage Before adjusting the belt, shut off the engine, allow the engine and muffler to cool down, disconnect the spark plug When the tiller won’t be used for extended periods, prepare it for wire and remove the ignition key on electric start models. storage as follows: Remove the two lock nuts and remove the belt cover.
-
Page 22: Service
Service Belt Replacement Disconnect the forward clutch cable from the forward clutch idler arm bracket . See Figure 7-2. Note the hole from Forward Clutch Belt which you disconnect the cable. It is important that you reconnect the cable to the same hole. Stop the engine, allow it to cool and disconnect the spark plug wire before working near the belts. - Page 23 Slip the belt off the front of the transmission pulley. See Reinstall the reverse clutch belt. Insert the bottom of the Figure 7-4. belt into the frame, then pull down on the belt and roll it onto the large, forward-most groove of the transmission pulley.
- Page 24 Tines Insert the belt down into the front of the transmission housing. Slip the top half of the belt onto the reverse idler The tines will wear with use and should be inspected at the arm pulley. beginning of each tilling season and after every 30 operating Pull the belt downward and loop the bottom half of the hours.
- Page 25 Replacing a Single Tine Removing a Tine Assembly Remove the two screws and nuts that attach a single tine If removing both tine assemblies, mark them “left” and to the tine holder. If needed, use penetrating oil to help “right” before removal. Doing so will help ensure that the free the nuts.
-
Page 26: Troubleshooting
Troubleshooting Problem Cause Remedy Wheels and Tines will not 1. Improper use of controls. 1. Review Controls & Features Section. turn 2. Misadjusted forward clutch control cable. 2. Adjust cable tension 3. Misadjusted reverse clutch control cable. 3. Adjust cable tension 4. -
Page 27: Replacement Parts
Replacement Parts Component Part Number and Description 954-04094 Forward Drive Belt, 4L x 23.80 954-04095 Reverse Drive belt, 3L x 27.440 742-04223 Bolo Tine (LH), 12” 742-04224 Bolo Tine (RH), 12” 934-04232 Wheel, 13 x 5 x 6 1916784P Reverse Clutch Cable 946-04027 Forward Clutch Cable Phone (800) 828-5500 to order replacement parts or a complete Parts Manual (have your full model number and serial number ready). - Page 28 MANUFACTURER’S LIMITED WARRANTY FOR The limited warranty set forth below is given by Troy-Bilt LLC with Log splitter pumps, valves, and cylinders have a separate one- year warranty. respect to new merchandise purchased and used in the United States and/or its territories and possessions, and by MTD Products...
Need help?
Do you have a question about the Pony ES and is the answer not in the manual?
Questions and answers