Table of Contents
Advertisement
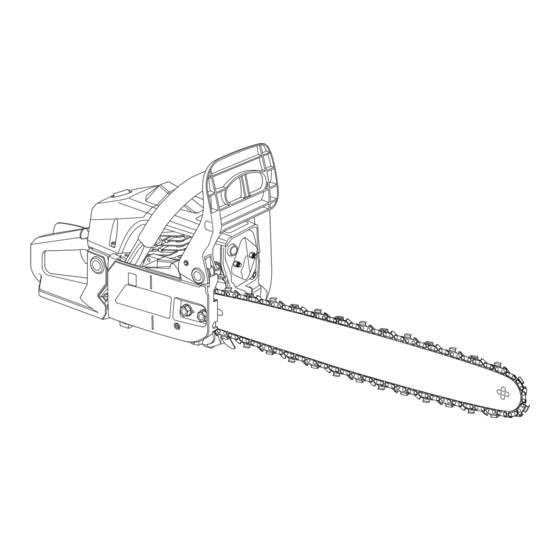
AQG-PC 4645
Petrol Chain Saw
Komponenten / Ersatzteile
Position
Artikel-Nr.
1
450166001001
3
450166001003
4
450166001004
5
450166001005
6
450166001006
7
450166001007
10
450166001010
13
450166001013
Artikel-Nr.: 4501662
Ident-Nr.:
Beschreibung
oil tank
safty trigger lever
rear handle cover
trigger
trigger spring ›0.9
pin
special screw ST4.8x15
vacuum hose spring ›6
11011
Position
Artikel-Nr.
14
450166001014
16
450166001016
18
450166001018
19
450166001019
21
450166001021
22
450166001022
23
450166001023
24
450166001024
Beschreibung
fuel pipe
oil filter
oil cap
oil cap gasket
screw ST4.8x16
right rubber gasket for handle
bottom rubber gasket for handl e
handle
Advertisement
Table of Contents
Troubleshooting

Related Manuals for Qualcast 46 cc Petrol Chainsaw


Summary of Contents for Qualcast 46 cc Petrol Chainsaw
- Page 1 AQG-PC 4645 Artikel-Nr.: 4501662 Petrol Chain Saw Ident-Nr.: 11011 Komponenten / Ersatzteile Position Artikel-Nr. Beschreibung Position Artikel-Nr. Beschreibung 450166001001 oil tank 450166001014 fuel pipe 450166001003 safty trigger lever 450166001016 oil filter 450166001004 rear handle cover 450166001018 oil cap 450166001005 trigger 450166001019 oil cap gasket 450166001006...
-
Page 2: Position Artikel-Nr 1
Komponenten / Ersatzteile Position Artikel-Nr. Beschreibung Position Artikel-Nr. Beschreibung 450166001028 heat insulation plate 450166001108 muffler cover 450166001029 flange inlet 450166001109 muffler gasket 450166001030 carburetor 450166001111 cyliner 450166001031 carburetor gasket 450166001116 toothed plate 450166001037 air filter washer ›1.5x›22 450166001122 oil fiter 450166001038 air filter 450166001123... - Page 3 Qualcast 46 cc Petrol Chainsaw Original Operating Instructions Operation and Maintenance Manual After Sales Support UK/Ireland 0151 649 1500 Republic of Ireland 1890 946 244 www.einhell.co.uk Important - Please read these instructions fully before starting assembly These instructions contain important information that will help you get the best from your chainsaw, ensuring it is assembled correctly and safely.
-
Page 4: Table Of Contents
Contents Components List ............................4-5 Safety Information ............................6 Warnings Symbols ............................6 Explanation of the Symbols and Warning signs on the machine labels ..........7-8 General Safety .............................9 Personal Safety ............................9 Operating and Maintenance Safety ......................10 Handling Safety ............................11 Proper Use ............................12-13 Kickback Safety ............................13 Pinching Safety ............................14 Preparing to Operate the Chainsaw ......................15... - Page 5 Contents Storing the Chainsaw ............................33 Step 1 - Storing the Chainsaw for Short Periods ..................33 Step 2 - Storing the Chainsaw for Extended Periods ..............33-35 Step 3 - Preparing the Chainsaw for Use Following Storage ..............35 Maintenance ..............................36 Maintenance Schedule ..........................36 Step 1 - Operational Chain Brake Test ....................37 Step 2 - Clean / Replace the Air Filter ....................
-
Page 6: Components List
Components List Saw chain Air filter cover Throttle lever Chain catch Chain bar Safety lock Chain Stop claw tensioning screw Chain brake lever/ Rear handle/ Chain guard front hand guard bootstrap Bar fastening nut Customer Helpline 0151 649 1500... - Page 7 Components List Choke/ Starter handle Fan housing (carburettor setting) Front handle Fuel tank cap Spark plug Oil tank cap Stop switch (under the air filter cover) Customer Helpline 0151 649 1500...
-
Page 8: Safety Information
Safety Information Important - Please read these instructions fully before operating or maintaining Warnings Symbols The following warning symbols appear throughout this assembly manual and indicate the appropriate safety measures you should take when assembly and operating the chainsaw. This symbol indicates there is a danger of serious personal injury or death if you do not observe the warning. -
Page 9: Explanation Of The Symbols And Warning Signs On The Machine Labels
Safety Information Important - Please read these instructions fully before operating or maintaining Explanation of the Symbols and Warning signs on the machine Explanation of the symbols on the warning label on the machine. Read the user manual before using the machine. On all jobs performed with the saw you must always wear safety goggles to guard your eyes from flying materials/objects and ear defenders to protect your hearing. - Page 10 Safety Information Important - Please read these instructions fully before operating or maintaining Explanation of the Symbols and Warning signs on the machine continued Explanation of the symbols for the brake function label on the machine. Push the handle back to disengage the brake. Push the handle forward to engage the brake, and stop the chain.
-
Page 11: General Safety
Safety Information Important - Please read these instructions fully before operating or maintaining General Safety WARNING! Read and follow the operating instructions and safety information before using for the first time. Keep this operating and maintenance manual in a safe place for reference at a later date. WARNING! Always ensure anyone intending to operate this chainsaw is fully conversant with the contents of this manual prior to maintaining or operating the chainsaw. -
Page 12: Operating And Maintenance Safety
Safety Information Important - Please read these instructions fully before operating or maintaining Operating and Maintenance Safety WARNING! Under no circumstances should the chainsaw be filled or refilled with the fuel mixture or oil while the engine is running. Failure to observe this notice may present a risk of explosion. WARNING! Under no circumstances should you attempt to lubricate any part of the chainsaw while the engine is running. -
Page 13: Handling Safety
Safety Information Important - Please read these instructions fully before operating or maintaining Handling Safety WARNING! Always hold the chainsaw with two hands while operating. This chainsaw is not designed for single-handed operation. Failure to observe this warning may lead to loss of control and may present a serious threat of personal injury or death to yourself and others. -
Page 14: Proper Use
Safety Information Important - Please read these instructions fully before operating or maintaining Proper Use The chain is designed exclusively for sawing wood. You may only fell trees if you have received the appropriate training. The manufacturer cannot be held liable for damage caused by improper or incorrect usage. -
Page 15: Kickback Safety
Safety Information Safety Information Important - Please read these instructions fully before operating or maintaining Proper Use (continued) Follow these instructions in order to reduce the dangers: Keep your body and in particular your hands warm when working in the cold. Take regular breaks and move your hands to stimulate the blood circulation during the breaks. -
Page 16: Pinching Safety
Safety Information Safety Information Important - Please read these instructions fully before operating or maintaining Important - Please read these instructions fully before operating or maintaining Pinching Safety Pinching is the term used to describe the reaction of the chainsaw when the BOTTOM or TOP of the guide bar is pinched in the object being cut or sawn. -
Page 17: Preparing To Operate The Chainsaw
Preparing to Operate the Chainsaw Step 1 - Assembly of the Chain Saw Please refer to the Assembly Instructions booklet for details of how to assemble the chainsaw. Please refer to the Assembly Instructions booklet for details of how to adjust the tension of the Chain bar and Chain on the chain saw Main Body Assembly. -
Page 18: Step 2 - Check The Chain Brake
Preparing to Operate the Chainsaw Step 2 - Check the Chain Brake (continued) WARNING! The chain brake must not be tested with the chainsaw running unless strictly instructed to do so in this manual. Failure to observe this warning may lead to serious personal injury. WARNING! The chain brake can only reduce the possibility of serious personal injury if it is fitted in accordance with the instructions detailed in the Assembly Manual. -
Page 19: Step 3 - Fuel And Lubrication
Preparing to Operate the Chainsaw Step 3 - Fuel and Lubrication 2-cycle engine oil Regular unleaded fuel x 30 seconds Customer Helpline 0151 649 1500... -
Page 20: Step 3 - Fuel And Lubrication
Preparing to Operate the Chainsaw Step 3 - Fuel and Lubrication (continued) It essential for the smooth operation of the chainsaw to use the correct type of fuel and oil. The chainsaw utilises a 2-stroke engine which runs on a mixture of regular unleaded fuel and 2-cycle engine oil mixed at a ratio of 40:1. -
Page 21: Step 4 - Filling The Fuel Tank
Preparing to Operate the Chainsaw Step 4 - Filling the Fuel Tank 4a. Fill the Fuel Tank WARNING! Before attempting to fill the fuel tank, always ensure all sources of ignition are removed i.e. naked flames. Remove the fuel tank cap by unscrewing anti-clockwise. -
Page 22: Step 5 - Filling The Chain Lubrication Oil Tank
Preparing to Operate the Chainsaw Step 5 - Filling the Chain Lubrication Oil Tank 5a. Fill the Oil Tank WARNING! Before attempting to fill the oil tank, always ensure all sources of ignition are removed i.e. naked flames. Remove the oil tank cap by unscrewing anti-clockwise. -
Page 23: Operating The Chainsaw
Operating the Chainsaw Step 1 - Starting the Engine 1a . Set the Ignition Switch to STOP Move the ignition switch to the lower STOP (OFF, “0”) position. 1b. Ensure the Choke is Fully Out Pull the choke lever fully out until it clicks into position. Customer Helpline 0151 649 1500... -
Page 24: Step 1 - Starting The Engine
Operating the Chainsaw Step 1 - Starting the Engine (continued) 1c. Priming the Chainsaw WARNING! Before attempting to start and operate the chainsaw, ensure the saw chain is not in contact with the ground or any other object. Failure to observe this warning may lead to kickback or objects being propelled towards you and others in the area. - Page 25 Operating the Chainsaw Step 1 - Starting the Engine (continued) Place the chainsaw on a firm level surface clear of debris or any objects which may come into contact with the saw chain while it is moving. Place your right foot on the trigger plate to keep the chainsaw stable while starting.
- Page 26 Operating the Chainsaw Step 1 - Starting the Engine (continued) 1d. Ensure the Choke is Fully In Push the choke lever fully in. 1e. Set the Ignition Switch to ON Move the ignition switch to the upper ON (“1”) position. Customer Helpline 0151 649 1500...
- Page 27 Operating the Chainsaw Step 1 - Starting the Engine (continued) 1f. Start the Chainsaw WARNING! To stop the chainsaw in an emergency, apply rapid pressure to the chain brake. Place the chainsaw on a firm level surface clear of debris or any objects which may come into contact with the saw chain while it is moving.
- Page 28 Operating the Chainsaw Step 1 - Starting the Engine (continued) 1g. Accelerate the Engine WARNING! To stop the chainsaw in an emergency, rapidly strike the chain brake. Before attempting to saw anything with the chainsaw, the engine must be accelerated to operating speed.
-
Page 29: Step 2 - Restarting The Chainsaw When Warmed Up
Operating the Chainsaw Step 2 - Restarting the Chainsaw When Warmed Up 2a. Restarting the Chainsaw When Warmed Up NOTE! Once the chainsaw is warmed up there is no need to ‘prime the chainsaw’ as described in step 1c. Place the chainsaw on a firm level surface clear of debris or any objects which may come into contact with the saw chain while it is moving. -
Page 30: How To Use The Chainsaw
How to Use the Chainsaw Introduction WARNING! Before attempting to use the chainsaw, it is imperative that you undertake professional training by an accredited body. This will provide full instruction on the type of sawing and cutting operations that can be performed complete with relevant safety training. Cutting and sawing with a chainsaw can be very dangerous if undertaken without proper training. -
Page 31: Felling
How to Use the Chainsaw Felling Direction of Fall Notching Cut Felling Cut Felling is the type of cut used to cut down trees. Whereas it may be possible to cut down small trees (6-7 inches in diameter) with a single straight through cut, larger trees require a felling cut. If this type of cut is made it is performed in two stages. -
Page 32: Felling
How to Use the Chainsaw Felling (continued) WARNING! Do not cut down a tree during high or changing winds or if there is a danger to property. Consult a tree professional. Do not cut down a tree if there is danger of striking utility wires;... -
Page 33: Limbing
How to Use the Chainsaw Limbing This type of cut is used to remove small branches from a felled or fallen tree. Cuts can be made horizontally or vertically to the bottom of a branch. Usually limbing cuts are performed when a tree trunk has been cut into small manageable lengths using a bucking cut. -
Page 34: Bucking
How to Use the Chainsaw Bucking Saw Horse A bucking cut is used to cut a fallen or felled tree into small manageable lengths or logs. Usually the tree trunk will be supported at one end, both ends or along its entire length. Often this type of cut is performed using a sawhorse which provides all the required support to keep the trunk stable. -
Page 35: Storing The Chainsaw
Storing the Chainsaw Step 1 - Storing the Chainsaw for Short Periods The chainsaw can be stored for short periods of time (less than 30 days) without performing any storage maintenance. If the chainsaw is to be stored for longer than 30 days, carry out the storage maintenance instructions as described in the following section. -
Page 36: Step 2 - Storing The Chainsaw For Extended Periods
Storing the Chainsaw Step 2 - Storing the Chainsaw for Extended Periods (continued) 2b. Drain the Fuel Tank WARNING! Always store excess fuel/oil mixtures drained from the fuel tank in a suitable sealed container designed for the storage of flammable liquids. WARNING! Before attempting to mix fuel and oil, always ensure all sources of ignition are removed i.e. -
Page 37: Step 3 - Preparing The Chainsaw For Use Following Storage
Storing the Chainsaw Step 2 - Storing the Chainsaw for Extended Periods (continued) 2c. Start the Chainsaw Start the chainsaw as described on page 23 and allow it to run until it stops. This will ensure any fuel in the carburettor is used. 2d. -
Page 38: Maintenance
Maintenance Maintenance Schedule Performing routine maintenance correctly on your chainsaw will ensure you get years of trouble free use. Please keep this manual safe for future reference. It is recommended that the following maintenance schedule is adhered to. This will ensure the chainsaw operates correctly and is safe to use. -
Page 39: Step 1 - Operational Chain Brake Test
Maintenance Step 1 - Operational Chain Brake Test 1a. Check the Chain Brake WARNING! The chain brake can only reduce the possibility of serious personal injury if it is fitted in accordance with the instructions detailed in the Assembly Manual. If the chain brake is tampered with or the chainsaw is not used in accordance with these operating instructions i.e. -
Page 40: Step 2 - Clean / Replace The Air Filter
Maintenance Step 2 - Clean / Replace the Air Filter 2a. Remove the Air Filter Cover Unscrew the retaining cap anti-clockwise. NOTE! It is not possible to remove the retaining cap from the air filter cover. This is a captive component. -
Page 41: Step 2 - Clean / Replace The Air Filter
Maintenance Step 2 - Clean / Replace the Air Filter (continued) 2c. Clean the Air Filter NOTE! If the air filter is being replaced, there is no need to perform this step. Clean the air filter using clean, warm soapy water. The air filter must be thoroughly rinsed and air dried before refitting it to the chainsaw. -
Page 42: Step 3 - Change / Replace The Fuel Filter
Maintenance Step 3 - Change / Replace the Fuel Filter 3a. Access the Fuel Tank Remove the fuel tank cap by unscrewing anti-clockwise. Drain the fuel tank as described in step 2b on page 29. 3b. Remove the Fuel Filter Using a piece of wire, for example a paper clip, form a long hook. - Page 43 Maintenance Step 3 - Change / Replace the Fuel Filter (continued) 3c. Separate the Fuel Filter Carefully pull the fuel filter off the fuel pipe using a twisting action. 3d. Clean the Fuel Filter NOTE! If the fuel filter is being replaced, there is no need to perform this step. Clean the fuel filter using clean, warm soapy water.
-
Page 44: Step 4 - Clean / Replace The Spark Plug
Maintenance Step 3 - Change / Replace the Fuel Filter (continued) 3e. Refit the Fuel Filter Carefully fit the cleaned or replacement fuel filter to the fuel pipe Position the fuel filter in the lower corner of the fuel tank. You may need to use a screwdriver to position the fuel filter correctly. - Page 45 Maintenance Step 4 - Clean / Replace the Spark Plug (continued) 4b. Remove the Air Filter Cover Unscrew the retaining cap anti-clockwise. NOTE! It is not possible to remove the retaining cap from the air filter cover. This is a captive component.
- Page 46 Maintenance Step 4 - Clean / Replace the Spark Plug (continued) 4c. Remove the Air Filter Carefully lift the air filter off the locating pin 4d. Disconnect the Ignition Cable Remove the ignition cable from the spark plug by pulling backwards using a twisting action. Customer Helpline 0151 649 1500...
- Page 47 Maintenance Step 4 - Clean / Replace the Spark Plug (continued) 4e. Remove the Spark Plug CAUTION! Only use the large end of the supplied multitool to remove the spark plug. Using any other tool may damage the spark plug and/or the chainsaw engine. Remove the spark plug from the chainsaw engine using the large end of the supplied multitool.
- Page 48 Maintenance Step 4 - Clean / Replace the Spark Plug (continued) 4f. Refit the Spark Plug CAUTION! Only use the large end of the supplied multitool to remove the spark plug. Using any other tool may damage the spark plug and/or the chainsaw engine. NOTE! If the spark plug is not being replaced, clean the existing spark plug with a copper wire brush and check the electrode gap using suitable feeler gauges.
-
Page 49: Step 5 - Carburettor Settings
Maintenance Step 5 - Carburettor Settings The carburettor is factory set to the ideal setting for the chainsaw to operate efficiently. If the carburettor requires adjustment after extensive use, contact a suitably qualified service technician to inspect the chainsaw and make the necessary adjustments. Step 6 - Lubricating the Sprocket Tips 6a - Set the Ignition Switch to STOP Move the ignition switch... - Page 50 Maintenance Step 6 - Lubricating the Sprocket Tips (continued) 6b. Lubricating the Sprocket Tips WARNING! Always wear suitable gloves when operating chainsaw to protect your hands from flying debris and/ or sharp objects. It is particularly important to wear protective gloves when assembling or maintaining the saw chain.
-
Page 51: Step 7 - Reversing The Guide Bar
Maintenance Step 7 - Reversing the Guide Bar 7a. Remove the Guide Bar The guide bar must be completely removed from the chainsaw. To do this, reverse the procedures described in the assembly manual. 7b. Clean the Guide Bar NOTE! To clean the guide bar, you will need a bar scraper. This is not supplied with the chainsaw and must be sourced from a suitable supplier. -
Page 52: Step 9 - Check The Saw Chain Tension
Maintenance Step 9 - Check the Saw Chain Tension 9a. Check the Saw Chain Tension CAUTION! It is essential that the correct saw chain tension is maintained. This will ensure that the saw chain , drive sprocket, guide bar and engine do not wear prematurely. WARNING! Always wear suitable gloves when operating chainsaw to protect your hands from flying debris and/or sharp objects. -
Page 53: Step 10 - Sharpening The Saw Chain
Maintenance Step 10 - Sharpening the Saw Chain If the cutting performance of the chainsaw deteriorates, the saw chain may need sharpening or replacing. Please contact the customer helpline for support. General Troubleshooting Check the Ignition If yes, check there is Pull the Starter Switch is in the sufficient fuel in the... -
Page 54: Troubleshooting
Troubleshooting General Troubleshooting (continued) The following table provides solutions to common problems encountered with the chainsaw. Fault Possible Cause Solution Chainsaw will not start or starts but The chainsaw has not been Start the chainsaw as will not run. started correctly. described on page 21. -
Page 55: Useful Information
Troubleshooting General Troubleshooting (continued) Fault Possible Cause Solution The chainsaw fails to The saw chain is blunt. Please contact the cut or saw correctly. Customer Helpline on 0151 649 1500 The saw chain is loose. Adjust the saw chain tension as described on page 50. -
Page 56: Technical Data
Technical Data Technical Data Table Property Value Engine displacement 46 cm Maximum engine capacity 2 kW Bar length 43 cm Cutter rail length (18”) 45 cm Chain pitch (0.325”) 8.255 mm Chain thickness (0.0584”) 1.47 mm Idling speed 3500 rpm Maximum speed with cutting equipment 10,000 rpm Tank capacity... -
Page 57: Guarantee
Guarantee Dear Customer, In the unlikely event that your device develops a fault, please contact our Customer service department on the telephone number shown below. 1. These guarantee terms cover additional guarantee rights and do not affect your statutory warranty rights. -
Page 58: Declaration Of Conformity
Declaration of Conformity Customer Helpline 0151 649 1500...
Need help?
Do you have a question about the 46 cc Petrol Chainsaw and is the answer not in the manual?
Questions and answers
reassembling brake
To reassemble the brake on a Qualcast 46 cc Petrol Chainsaw, you must follow the instructions in the Assembly Instructions booklet. The chain brake must be fitted exactly as described in the manual to ensure safety. It should not be tampered with, and improper assembly or careless use can still result in serious injury even if the brake is installed.
NO detailed step-by-step procedure for brake reassembly is provided in the available context.
This answer is automatically generated