Table of Contents
Advertisement
Advertisement
Table of Contents

Related Manuals for Contec CMS-08A


Summary of Contents for Contec CMS-08A
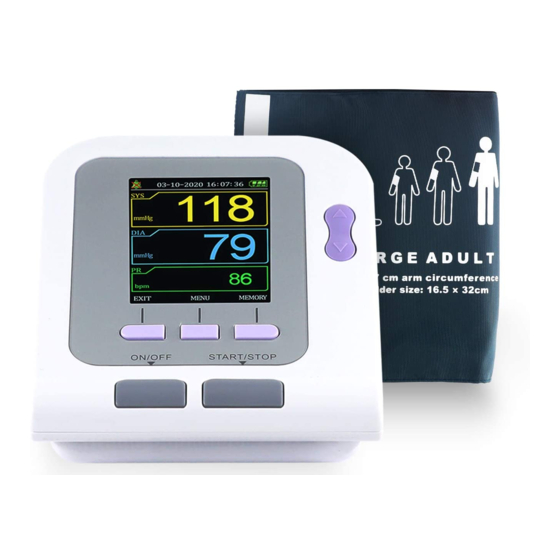
- Page 1 Contec CMS-08A Blood Pressure Monitor Electronic Sphygmomanometer ■ To assure the correct use of the product safety measures, please carefully read user manual before using. ■ After reading, please validly keeping to refer and consult at any moment. Medical Test Supply...
-
Page 2: Table Of Contents
Contents Chapter1 Safety Precautions: ....................... 1 Chapter2 Main Unit ........................3 Chapter3 Button Functions ......................4 Chapter4 External Interfaces ......................4 Chapter5 Dry Battery/AC Adapter Installation ................5 5.1 Dry Battery Installation ..................... 5 5.2 Using The AC Adapter ...................... 5 Chapter6 Setting The Date And Time .................. -
Page 3: Chapter1 Safety Precautions
Chapter1 Safety Precautions: Before use, carefully read "Safety Precautions" for a correct use. To prevent users suffered hurt or dandification due to improper use, see "Safety Precautions", and use this product properly. For safety reasons, be sure to comply with safety precautions. Note If not to use correctly, it exists that a potentially hazardous situation which may result in injury to the user or patient or damage to the equipment or other property. - Page 4 Operation for battery Note Please use 4 "AA" size manganese or alkaline batteries, do not use batteries of other types. Otherwise it may cause fire. New and old batteries, different kinds batteries cannot be confusion. Otherwise it may cause battery leakage, heat, rupture, and damage to Electronic Sphygmomanometer.
-
Page 5: Chapter2 Main Unit
Chapter2 Main Unit The product is in the package. Open the package and confirm whether the product is whole. Display Cuff Plug Cuff Air Plug UP/DOWN Button MEMORY Button AC Adapter Jack MENU Button USB Plug Jack USER SWITCH Button ON/OFF Button Accessories:... -
Page 6: Chapter3 Button Functions
Chapter3 Button Functions All the operations to the Electronic Sphygmomanometer are through the buttons. The names of the buttons are above them. They are: 【 【 【 【 ON/OFF】 】 】 】 Hold the button to start or close the device. 【... -
Page 7: Chapter5 Dry Battery/Ac Adapter Installation
Chapter5 Dry Battery/AC Adapter Installation The product can use dry battery or AC adapter as power source. 5.1 Dry Battery Installation ① Press the▲indicator on the battery cover and slide the cover off in the direction of the arrow. ② Install 4 "AA" size dry batteries so the +(positive) and 一(negative) polarities match the polarities of the battery compartment as indicated. -
Page 8: Chapter6 Setting The Date And Time
You'd better take off batteries when use the AC adapter as power source. If there is any damage to the AC adapter, you should use batteries to run the device. When adapter and batteries are both used at the same time, the battery power will not be consumed. -
Page 9: Chapter7 Unit
Note Please choose the computer which should be ensured compliance with the requirements of IEC60950, or else it may damage the device. Chapter7 Unit There are two units: "mmHg" and "kPa". The default is: "mmHg". To switch "mmHg" and "kPa" units, enter the 【SYSTEM SETUP】 submenu in 【SYSTEM MENU】, and complete switching in 【UNIT】... - Page 10 Carry out the operation in a room with comfortable temperature. When measuring, take the thick clothes off instead of rolling up the sleeves. In order to measure accurately, pay attention to applying the cuff properly (left arm). ① Make sure the air plug is securely inserted in the main unit. ②...
-
Page 11: Chapter10 Bp Measurement
Chapter10 BP Measurement 10.1 Accurate Measurement Way Measurement in quiet and relaxing state. 1. Place your arm on a table. 2. The cuff is level with your heart. 3. The palm of the hand is up, and the body relax. Try to measure your blood pressure at the same time each day with the same arm and the same pose for consistency. -
Page 12: Chapter11 Memory Function
Note Wait 4-5 minutes between measurements The arm may have congestion following a measurement which may cause incorrect blood pressure readings. After the blood flow is re-established, take a measurement once again. When some factors affect the measurement results in measurement process, error messages hints will appear on the screen, you can obviate the malfunction and restart a measurement. -
Page 13: Delete Memory Values
3. Press 【LIST】 button to switch to data table interface. 4. Press 【TREND】 button to display trend interface. 5.Finish displaying the measurement values Press 【EXIT】 to return the main interface or hold 【ON/OFF】 button to turn the power off. *The device will automatically turn off after two minutes in which there is no operation to the device, even if you forget to turn the power off. -
Page 14: Chapter12 Alarm Function
*The device will automatically turn off after two minutes in which there is no operation to the device, even if you forget to turn the power off. Chapter12 Alarm Function Alarms are classified into two categories: technical alarm and physiological alarm. Physiological Alarm User can press 【MENU】... - Page 15 Note ◎ Make sure the nail covers the light window. ◎ The wire should be on the backside of the hand. ◎ SpO value is always displayed in the fixed place. Medical Test Supply www.medicaltestsupply.com...
-
Page 16: Chapter14 Monitoring Procedure
Warning ◎ Check if the sensor cable is in normal condition before monitoring. After unplugging the probe cable from the socket, the interface will return. ◎ Do not use the SpO probe once the package or the sensor is found damaged. Instead, you shall return it to the vendor. -
Page 17: Chapter15 Maintenance And Cleaning
Measurement Limitations During operation, the accuracy of oximeter readings can be affected by: High-frequency electrical noise, including noise created by the host system, or noise from external sources, such as electrosurgical apparatus connected to the system. Intravascular dye injections. Excessive patient movement. External light radiation. -
Page 18: Chapter16 Installation Of The Software
Chapter16 Installation Of The Software 16.1 Host Requirements Pentium IV 1.8G or more Operation System:Windows XP EMS memory: 256M or more Hard Disk: 40G or more Display: 17 inch or more CD-ROM USB: 2 or more Resolution of printer: 600 DPI 16.2 Installation of Software 1.Place the CD-ROM in the CD-ROM compartment located on your computer. -
Page 19: Chapter17 Keys And Symbols
Chapter17 Keys And Symbols Signal Description Warning – See User Manual Systolic pressure MAP pressure Diastolic pressure Pulse rate (bpm) Adult Pediatric Neonatal INFO Information Open the alarm sound indication Close the alarm sound indication Low-power Full-power 1.no NIBP data to review 2.no finger inserted to SpO probe 3.An indicator of signal inadequacy... -
Page 20: Chapter18 Error Message
Chapter18 Error Message Error message will be displayed in the screen if there is something wrong when measuring. The causes and solutions are shown as follows: Error Message Causes Solutions Self-test failure Function abnormal Please contact us System failure Cuff is not connected Loose cuff Correctly connect cuff (refer to 8 page) correctly. -
Page 21: Chapter19 Troubleshooting
Chapter19 TROUBLESHOOTING Abnormal Causes Solutions Phenomenon’s Correctly connect cuff (refer to 8 Cuff is not connected correctly. page) measurement Talk or move arms when values too high or Keep quiet and restart a measurement measuring too low. The turned up clothing presses Take off the clothing which presses the arm the arm, and restart a measurement... - Page 22 Switch on the power once again and restart an operation. Other phenomenon Replace the batteries. If no, please contact us. Medical Test Supply www.medicaltestsupply.com...
-
Page 23: Chapter20 Clean And Maintenance
Chapter20 Clean And Maintenance *Please follow the instructions in the user manual. If you do not comply, our company will not assume responsibilities for the products quality. Frequently clean the Electronic Sphygmomanometer. If there is something dirty on the device, clean it with a soft dry cloth. If the unit is particularly dirty, you can clean it with a soft cloth dampened with water or neutral detergent after the cloth can be full twisted. - Page 24 In addition, the overall check of the Sphygmomanometer, including the NIBP calibration and safety check such as the leakage current, should be only performed by qualified personnel once every 12 months. Warning The disposal of scrap instrument and its accessories and packing (including batteries, plastic bags, foams and paper boxes) should follow the local laws and regulations.
-
Page 25: Chapter21 Nibp Specification
Chapter21 NIBP Specification Name Electronic Sphygmomanometer Display 2.8'' color LCD Display NIBP Specifications Measurement Method Oscillometric method Working modes Automatic adult 0~290mmHg(0~38.6kPa) pediatric 0~235mmHg(0~31.3kPa) Pressure Measurement Range neonatal 0~140mmHg(0~18.6kPa) Pulse: 40~240/min adult 160mmHg Inflation pediatric 120mmHg neonatal 70mmHg SYS ALM: 40~270 mmHg adult mode DIA ALM: 10~215 mmHg SYS ALM: 40~200 mmHg... - Page 26 Standard Configure: Accessories Adult Cuff: limb circumference 22-32cm (middle of upper arm ) Software CD, User Manual, USB data line, four "AA" alkaline batteries Separate Sale: Pediatric Cuff: limb circumference 10-19cm (middle of upper arm ) Neonatal Cuff: limb circumference 6-11cm (middle of upper arm ) AC Adapter Input: AC 100-240V 50-60Hz...
-
Page 27: Chapter22 Spo2 Specification
Chapter22 SpO Specification Name Probe (Accessory Separate Sale) Model Y10UCH150 Measuring Range: 0%~100%; Measurement Range Pulse Rate Measuring Range: 30bpm~250bpm; Resolution 1bpm Measurement Accuracy 70%~100% ±2% 0%~69% undefined ±2bpm or ±2% (select larger) Measurement Performance In Weak Filling Condition pulse-filling ratio error ±4%,...
Need help?
Do you have a question about the CMS-08A and is the answer not in the manual?
Questions and answers