JVC KD-AR870 Instruction Manual
Jvc cd receiver instructions
Hide thumbs
Also See for KD-AR870:
- Instructions manual (352 pages) ,
- Installation & connection manual (4 pages) ,
- Instructions manual (135 pages)
Table of Contents
Advertisement
Available languages
Available languages
CD RECEIVER
RECEPTOR CON CD
RECEPTEUR CD
For canceling the display demonstration, see page 8.
Para cancelar la demostración en pantalla, consulte la página 8.
Pour annuler la démonstration des affichages, référez-vous à la page 8.
For installation and connections, refer to the separate manual.
Para la instalación y las conexiones, refiérase al manual separado.
Pour l'installation et les raccordements, se référer au manuel séparé.
INSTRUCTIONS
MANUAL DE INSTRUCCIONES
MANUEL D'INSTRUCTIONS
KD-AR870/KD-G820
KD-AR870/KD-G820
KD-AR870/KD-G820
For customer Use:
Enter below the Model
No. and Serial No. which
are located on the top or
bottom of the cabinet.
Retain this information
for future reference.
Model No.
Serial No.
GET0359-001A
[J]
Advertisement
Table of Contents

Related Manuals for JVC KD-AR870


Summary of Contents for JVC KD-AR870
- Page 1 Para la instalación y las conexiones, refiérase al manual separado. Pour l’installation et les raccordements, se référer au manuel séparé. INSTRUCTIONS MANUAL DE INSTRUCCIONES MANUEL D’INSTRUCTIONS KD-AR870/KD-G820 KD-AR870/KD-G820 KD-AR870/KD-G820 For customer Use: Enter below the Model No. and Serial No. which are located on the top or bottom of the cabinet.
- Page 2 INFORMATION (For U.S.A.) IMPORTANT FOR LASER PRODUCTS CAUTION: CAUTION: How to reset your unit Your preset adjustments will also be erased. Caution: How to forcibly eject a disc • If this does not work, reset your unit. • Be careful not to drop the disc when it ejects.
- Page 3 If you use MODE or SEL (select), the display and some controls (such as the number buttons, 4/¢ buttons, 5/∞ buttons, and the control dial) enter the corresponding control mode. Ex.: When you press number button 1 after pressing MODE, to operate the FM tuner.
-
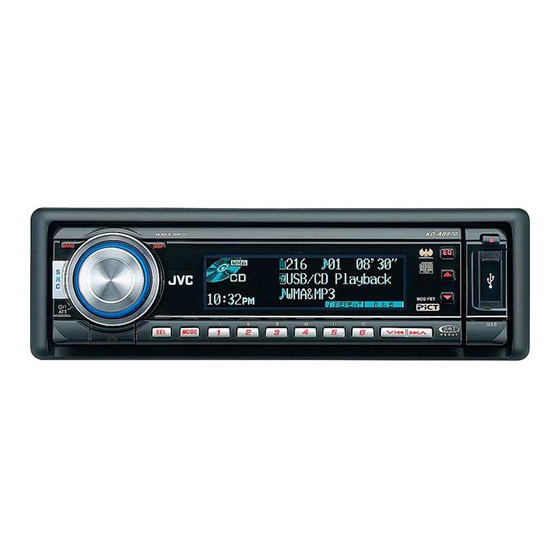
Page 5: Control Panel
Control panel — KD-AR870 and KD-G820 DO NOT expose the remote sensor to strong light (direct sunlight or artificial lighting). ∞ Lever 4 ¢ Detaching... CAUTION: Attaching... -
Page 6: Remote Controller
Remote controller — Aim the remote controller directly at the remote sensor on the unit. Make sure there is no obstacle in between. RM-RK50 ∞ ∞... -
Page 7: Getting Started
Returns to the previous menu. ∞ Confirms the selection. Getting started Turn on the power. Ÿ * Only for KD-AR870. * You cannot select these sources if they are not ready or not connected. For FM/AM tuner For SIRIUS tuner For XM tuner ⁄... -
Page 8: Changing The Display Pattern
To drop the volume in a moment (ATT) To restore the sound, press it again. To turn off the power Basic settings • See also “General settings — PSM” on pages 18 – 21. Canceling the display demonstrations Turn the control dial to set “Demo/Link” to “Off.”... -
Page 9: Radio Operations
Radio operations Ÿ Start searching for a station. To stop searching, 2 Select a desired station frequency. 3 Exit from the setting. To restore the stereo effect, Select the FM band (FM1 – FM3) you want to store into. - Page 10 Select “SSM.” Follow steps 1 and 2 on left column. 5 ∞ Display the Preset Station List. Select the preset number you want to store into. Store the station.
-
Page 11: Disc/Usb Memory Operations
Select the preset station (1 – 6) you want to listen to. Display the Preset Station List, then select the preset station you want to listen to. Change to the selected station. Disc/USB memory operations Ÿ Select a disc. - Page 12 Ÿ If a USB memory has been attached... To detach the USB memory,...
- Page 14 “CD-CH.” * Selectable only when the media is MP3, WMA, or USB. Select an item. EX.: When “File” is selected in step 3 Change to the selected item. Skipping tracks quickly during play Only possible on JVC MP3-compatible CD changer...
- Page 15 Prohibiting disc ejection To cancel the prohibition, Selecting the playback modes Select your desired playback mode. 7 Intro play Mode Plays beginning 15 seconds of... Track Folder* Disc* 7 Repeat play Mode Plays repeatedly Track Folder* Disc* 7 Random play Mode Plays at random Folder*...
-
Page 16: Sound Adjustments
Sound adjustments Adjusting the sound • For “EQ” setting, see the following. Adjust the selected setting item. A Fad/Bal (Fader/Balance) 5 ∞ 4 ¢ B Subwoofer 4 ¢ C VolAdjust • D Loudness Exit from the setting. Selecting preset sound modes (i-EQ: intelligent equalizer) Available sound modes FLAT... - Page 17 Storing your own sound modes Follow steps 1 and 2 on page 16. Select a sound mode. To display the rest Select a frequency range. Adjust the sound elements of the selected frequency range. 5 ∞ Range/selectable items Sound elements Repeat steps 3 and 4 to adjust other frequency ranges.
-
Page 18: General Settings - Psm
Sound modes Level FREQ (Frequency) General settings — PSM Basic procedure Select a PSM category. To display the rest Preset values Q (Band Level FREQ width) (Frequency) Select a PSM item. Adjust the selected PSM item. Repeat steps 2 to 4 to adjust other PSM items if necessary. - Page 19 Category Indications Demo/Link LevelMeter Pict Clock Hr Clock Min 24H/12H Clock Adj* Time Zone* * DST* * Scroll * Displayed only when SIRIUS Satellite radio or XM Satellite radio is connected. * Adjustable only when “Clock Adj” is set to “Auto.” Press number button 1 ( setting display.
- Page 21 Category Indications Ext Input* Beep Telephone* Amp Gain Color Sel Color Set Green Blue Selectable settings, [reference page] Changer: Ext In: Off: Muting1/Muting2: Off: High PWR: Low PWR: Off* : Day Color: NightColor: +00 +11 +00 +11 +00 +11...
- Page 22 Graphic displays Before starting the following procedure, Basic procedure Insert a CD-R or the supplied CD-ROM. Follow steps 1 to 3 on page 18. Select an item. Select a picture size. IMPORTANT: jtl: jtm: jta: jtb: jtw: * If you do so, the file download or deletion will not be done correctly.
- Page 23 Select a folder. Display the File List. Select a file. Confirm the selection. EX.: When “File1 Na” is selected Download the file. • To download more pictures from the same folder, repeat steps 5 to 7. • To download more pictures from another folder, press number button ).
- Page 24 Deleting the stored pictures Follow steps 2 to 4 on page 22. • To delete one of the stored pictures 5 ∞ EX.: When “File1 Na” is selected • To delete all the stored pictures EX.: When “LARGE” is selected in step 4 on page Exit from the setting.
- Page 25 Activating the downloaded files Follow steps 2 to 4 on page 22. Select the display type. EX.: When “LARGE” is selected in step 4 on page 22 and “Movie” is selected Movie Picture Slideshow Select a file. * If no still image or no animation is stored, you can only select “Default.”...
- Page 26 Setting the display color Follow steps 1 to 3 on page 18. Select a source. Select a color. Repeat steps 3 and 4 to select the color for each source (except when selecting “All Source” in step 3). Exit from the setting. Creating your own color—User Color Follow steps 1 to 3 on page 18.
-
Page 27: Title Assignment
Title assignment 4 ¢... -
Page 28: Satellite Radio Operations
Satellite radio operations Activate your SIRIUS subscription after connection: Listening to the satellite radio... - Page 29 Activate your XM subscription after connection: Listening to the SIRIUS Satellite radio Signal strength bar increases as the receiving signal improves. If no signal is received, no bars are displayed. Listening to the XM Satellite radio...
- Page 30 Select a channel for listening. Searching for category/channel In Category Search, In Channel Search, Select a category (Category Search). Select a channel for listening. EX.: When “Country” is selected for the Category Search Checking the XM Satellite radio ID While selecting “XM1,” “XM2,” or “XM3,”...
- Page 31 Select “List.” Select “Preset.” Select a preset number you want to store into. Store the channel. Listening to a user channel Display the Preset Channel list, then select the preset number you want to listen to. Change to the selected channel. Selecting a category/channel on the list •...
-
Page 32: Ipod®/D. Player Operations
To change the display information while listening to a channel iPod®/D. player operations Preparations: Ÿ ⁄ Caution:... - Page 33 To pause (only for iPod) or stop (only for D. player) playback To fast-forward or reverse the track To go to the next or previous tracks Selecting a track from the menu Enter the main menu. 4 ¢ Select the desired menu. For iPod: For D.
-
Page 34: Other External Component Operations
Song Album* * For iPod: Only if you select “All Albums” in “Albums” of the main “MENU.” Other external component operations For KD-AR870: For KD-AR870/KD-G820: For KD-AR870 For KD-G820 Ÿ Turn on the connected component and start playing the source. -
Page 35: More About This Unit
More about this unit Basic operations Turning on the power Turning off the power Tuner operations Storing stations in memory Disc operations Caution for DualDisc playback General Inserting a disc ") Playing a disc Playing a CD-R or CD-RW Continued on next page... - Page 36 Playing an MP3/WMA disc Playing MP3/WMA track from a USB memory ") * The parenthetic figure is the maximum number of characters for file/folder names in case the total number of files and folders is 313 or more.
- Page 37 Image Link Ejecting a disc Sound adjustment General Graphic display General Downloading (or deleting) files Continued on next page...
-
Page 38: General Settings-Psm
General settings—PSM Title assignment Available characters on the display Capital letters Small letters Numbers and symbols Satellite radio operations iPod or D. player operations Notice: For iPod users: For D. player users:... -
Page 39: Maintenance
Maintenance Connector Do not use the following discs: Warped disc Sticker Sticker residue Stick-on label When removing a disc from Center holder its case, When storing a disc into its case,... -
Page 40: Troubleshooting
Troubleshooting Symptoms Remedies/Causes... - Page 41 Continued on next page...
- Page 43 Symptoms Remedies/Causes * Changes every 20% of update is completion, (ex. 20%, 40%, 60%). Continued on next page...
- Page 44 Symptoms Remedies/Causes...
-
Page 45: Specifications
Specifications AUDIO AMPLIFIER SECTION Ω ≤ Ω Ω Ω Ω Ω Ω Ω TUNER SECTION [FM Tuner] Ω [AM Tuner] CD PLAYER/USB MEMORY SECTION Ω Ω GENERAL Ω Design and specifications are subject to change without notice. " " " "... - Page 46 PRECAUCIÓN: PRECAUCIÓN: También se borrarán los ajustes preestablecidos por usted. • Si esto no funciona, intente reposicionar su receptor. • Tenga cuidado de no dejar caer el disco al ser expulsado.
- Page 47 4 ¢ 5 ∞ Funciona como indicador de cuenta atrás del tiempo. Para volver a utilizar estos controles para sus funciones originales, CONTENIDO Operaciones básicas ... 7 Para reproducir un disco en el receptor ... 11 Para reproducir discos en el cambiador de CD ... 11 Reproducción de una memoria USB ...
-
Page 49: Panel De Control
Panel de control — NO exponga el sensor remoto a una luz potente (luz solar directa o iluminación artificial). ∞ Desmontando... Palanca KD-AR870 y KD-G820 PRECAUCIÓN: 4 ¢ Montando... -
Page 50: Control Remoto
Control remoto — Apunte el control remoto directamente hacia el sensor remoto del receptor. Asegúrese de que no hayan obstáculos entremedio. RM-RK50 ∞ ∞... -
Page 51: Procedimientos Iniciales
Vuelve al menú anterior. ∞ Confirma la selección. Procedimientos iniciales ∞ Encienda la unidad. Ÿ * Sólo para KD-AR870. * No podrá seleccionar estas fuentes si no están preparadas o conectadas. Para el sintonizador FM/AM Para el sintonizador SIRIUS ∞... - Page 52 ¢ ¢...
-
Page 53: Operaciones De La Radio
Operaciones de la radio Ÿ... - Page 54 5 ∞...
- Page 55 Operaciones del disco/ memoria USB Ÿ...
- Page 56 Ÿ...
- Page 59 Track Folder* Disc* Track Folder* Disc* Folder* Disco* All*...
-
Page 60: Ajustes Del Sonido
Ajustes del sonido • 5 ∞ 4 ¢ 4 ¢ •... - Page 61 Para visualizar el resto 5 ∞...
-
Page 62: Configuraciones Generales - Psm
Configuraciones generales — PSM Para visualizar el resto... - Page 63 Categoría Indicaciones Demo/Link LevelMeter Pict Clock Hr Clock Min 24H/12H Clock Adj* Time Zone* * DST* * Scroll * Sólo aparece cuando está conectada la radio satelital SIRIUS o XM. * Solamente se puede ajustar cuando “Clock Adj” está ajustado a “Auto”. Pulse el botón numérico 1 ) para mostrar la pantalla de ajuste.
- Page 67 EJ.: Cuando se selecciona “File1 Na” EJ.: Cuando se selecciona “LARGE” en el paso de la página 22...
- Page 68 5 ∞ EJ.: Cuando se selecciona “File1 Na” EJ.: Cuando se selecciona “LARGE” en el paso de la página 22 EJ.: Cuando se selecciona “LARGE” en el paso de la página 22...
- Page 69 EJ.: Cuando se selecciona “LARGE” en el paso de la página 22 y se selecciona “Movie” ¢...
-
Page 71: Asignación De Título
Asignación de título 4 ¢... - Page 72 Operaciones de la radio satelital...
- Page 73 La barra de intensidad de la señal aumenta a medida que mejora la señal de recepción. Si no se recibe ninguna señal, no aparecerá ninguna barra.
- Page 74 Seleccione el canal de audición. Búsqueda de categoría/canal En la búsqueda por categoría En la búsqueda por canal Seleccione una categoría (búsqueda por categoría). Seleccione el canal de audición. EJ.: Si se ha seleccionado “Country” para la búsqueda de categorías Para consultar el número de identificación de la radio satelital XM Mientras selecciona “XM1”, “XM2”...
- Page 75 5 ∞...
-
Page 76: Operaciones Del Ipod®/ Reproductor D
Operaciones del iPod®/ reproductor D. Preparativos: Ÿ ⁄... - Page 77 4 ¢ 4 ¢...
-
Page 78: Operaciones Del Otro Componente Externo
Song Album* Operaciones del otro componente externo Ÿ ⁄... -
Page 79: Más Sobre Este Receptor
Más sobre este receptor... - Page 80 * La cifra entre paréntesis corresponde al número máximo de caracteres para los nombres de archivo/carpeta en el caso de que el número total de archivos y carpetas sea de 313 o más.
- Page 81 Sigue en la página siguiente...
- Page 82 Letras mayúsculas Letras minúsculas Números y símbolos Nota: Para usuarios de iPod: Para los usuarios del reproductor D.:...
-
Page 83: Mantenimiento
Mantenimiento Conector No utilice los siguientes discos: Disco alabeado Pegatina Restos de pegatina Cuando saque el disco Sujetador central de su estuche, Rótulo autoadhesivo Cuando guarde un disco en su estuche,... -
Page 84: Localización De Averías
Localización de averías... - Page 85 Sigue en la página siguiente...
- Page 87 * Cambia cada vez que finaliza 20% de actualización, (p.ej. 20%, 40%, 60%). Sigue en la página siguiente...
-
Page 89: Especificaciones
Especificaciones ≤ Ω Ω Ω Ω Ω Ω Ω Ω Ω Ω Ω Ω El diseño y las especificaciones se encuentran sujetos a cambios sin previo aviso. - Page 90 ATTENTION: ATTENTION:...
- Page 91 TABLE DES MATIERES 4 ¢ 5 ∞ Opérations de base ... 7 Lecture d’un disque dans l’autoradio ... 11 Lecture de disques dans le changeur de CD ... 11 Lecture d’une mémoire USB ... 12 Fonctionne comme indicateur de compte à rebours.
-
Page 93: Panneau De Commande
Panneau de commande — ∞ Levier KD-AR870 et KD-G820 4 ¢ ATTENTION:... - Page 94 Télécommande — RM-RK50 ∞ ∞...
-
Page 95: Pour Commencer
∞ ∞ 2 ∞ ∞ Pour commencer Ÿ ⁄... - Page 96 ¢ ¢...
-
Page 97: Fonctionnement De La Radio
Fonctionnement de la radio Ÿ... - Page 98 5 ∞...
- Page 99 Utilisation d’un disque/ mémoire USB Ÿ...
- Page 100 Ÿ...
- Page 103 Track Folder* Disc* Track Folder* Disc* Folder* Disque* All*...
-
Page 104: Ajustements Sonores
Ajustements sonores • 5 ∞ 4 ¢ 4 ¢ •... - Page 105 Pour afficher le reste 5 ∞...
-
Page 106: Réglages Généraux - Psm
Réglages généraux — PSM Pour afficher le reste... - Page 107 Catégorie Indications Demo/Link LevelMeter Pict Clock Hr Clock Min 24H/12H Clock Adj* Time zone* * DST* * Scroll Réglages pouvant être choisis, [page de référence] Demo: Image Link: Off: O Meter 2 Meter 1 Download: Set: Delete: 1 – 12AM 1 – 12PM 0 – 23) 00 –...
- Page 108 –...
- Page 110 Affichages graphiques Avant de démarrer la procédure suivante, Procédure de base Insérez un CD-R ou le CD-ROM fourni. Suivez les étapes 1 à 3 de la page 18. Choisissez un élément. Choisissez une taille d’image. IMPORTANT: jtl: jtm: jta: jtb: jtw: * Sinon, le transfert ou la suppression du fichier ne sera pas faite correctement.
- Page 111 EX.: Quand “File1 Na” est choisi EX.: Si “LARGE” est choisi à l’étape de la page 22...
- Page 112 5 ∞ EX.: Quand “File1 Na” est choisi EX.: Si “LARGE” est choisi à l’étape de la page EX.: Si “LARGE” est choisi à l’étape de la page 22...
- Page 113 EX.: Si “LARGE” est choisi à l’étape de la page 22 et “Movie” est choisi ¢...
-
Page 115: Affectation D'un Titre
Affectation d’un titre 4 ¢... -
Page 116: Utilisation De La Radio Satellite
Utilisation de la radio satellite... - Page 117 La barre indiquant la force du signal augmente quand la réception du signal s’améliore. Si aucun signal n’est reçu, aucune barre n’est affichée.
- Page 118 EX.: Quand “Country” est choisi pour la recherche de catégorie...
- Page 119 5 ∞...
-
Page 120: Utilisation De Ipod®/ Lecteur D
Utilisation de iPod®/ lecteur D. Préparations: Ÿ ⁄... - Page 121 ¢ 4 ¢...
-
Page 122: Utilisation D'un Autre Appareil Extérieur
Song Album* Utilisation d’un autre appareil extérieur Ÿ ⁄... -
Page 123: Pour En Savoir Plus À Propos De Cet Autoradio
Pour en savoir plus à propos de cet autoradio... - Page 124 * Le nombre entre parenthèse indique le nombre de caractères maximum pour les noms de fichier/dossier dans le cas ou le nombre total de fichiers et de dossier est supérieur ou égal à 313.
- Page 125 Suite à la page suivante...
- Page 126 Lettres majuscules Lettre minuscules Chiffres et symboles Avis: Pour les utilisateurs de iPod: Pour les utilisateurs d’un lecteur D.:...
-
Page 127: Entretien
Entretien Connecteur Pour retirer un disque de sa boîte, Pour remettre un disque dans sa boîte, N’utilisez pas les disques suivants: Disque gondolé Autocollant Support central Reste d’étiquette Étiquette autocollante... -
Page 128: Guide De Dépannage
Guide de dépannage... - Page 129 Suite à la page suivante...
- Page 131 * Change chaque fois que 20% de la mise à jour est terminée, (ex. 20%, 40%, 60%). Suite à la page suivante...
-
Page 133: Spécifications
Spécifications ≤ Ω Ω Ω Ω Ω Ω Ω Ω Ω Ω Ω La conception et les spécifications sont sujettes à Ω changement sans notification. - Page 134 Having TROUBLE with operation? Please reset your unit Refer to page of How to reset your unit Still having trouble?? USA ONLY Call 1-800-252-5722 http://www.jvc.com We can help you! EN, SP, FR © 2006 Victor Company of Japan, Limited 0106DTSMDTJEIN...
Need help?
Do you have a question about the KD-AR870 and is the answer not in the manual?
Questions and answers