Table of Contents
Advertisement
Advertisement
Table of Contents

Subscribe to Our Youtube Channel
Related Manuals for TNG Venice 49cc (VN492)


Summary of Contents for TNG Venice 49cc (VN492)
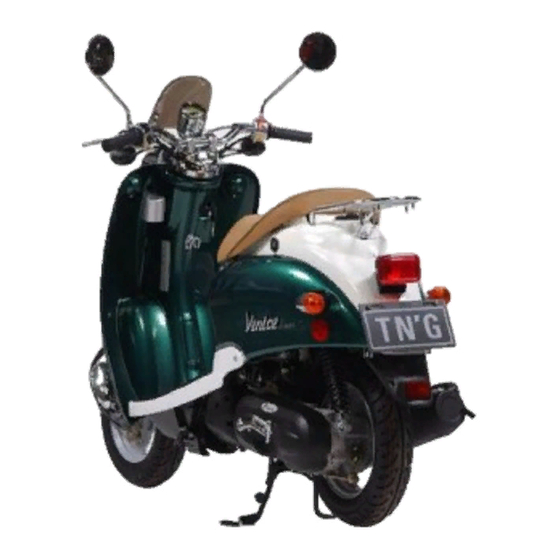
- Page 1 Owner’s Manual Venice 49cc (VN492) Revised 11/08...
- Page 2 LOCATING YOUR VIN# The serial numbers of the frame and engine are used for vehicle registration. The frame VIN# and label are on the leg shield Then engine # is located on the back of the engine. Frame # Engine #...
-
Page 3: A: Introduction
TNG Scooter should carefully read and understand the contents of this manual before use. TNG Scooters are street legal vehicles in all 50 states. You need to check with your state requirements on license and registration to ride this scooter legally on public roads. Do not operate the scooter in off-road... - Page 4 This Owner’s Manual contains the most current product information at the time of approval for printing. TNG Scooters reserves the right to make changes at any time without notice and without incurring any obligation. If you have any questions about the manual, please consult your TNG dealers, or our web site www.tngscooters.com.
-
Page 5: Table Of Contents
B: TABLE OF CONTENTS INTRODUCTION Page 3 TABLE OF CONTENTS Page 5 WARRANTY INFORMATION Page 6 SAFETY INSTRUCTIONS Page 7 SPECIFICATIONS Page 13 COMPONENT DESCRIPTIONS & FUNCTIONS Page 14 PRE-RIDE CHECKLIST Page 20 PROPER OPERATION Page 23 SERVICE MAINTENANCE SCHEDULE Page 28 WINTERIZING Page 36... -
Page 6: C: Warranty Information
NOTE: For the best performance from your TNG scooter have a TNG dealer perform all service maintenance. Failure to follow the service maintenance schedule may void your warranty coverage. -
Page 7: D: Safety Instructions
D: SAFETY INSTRUCTIONS RIDING SCOOTERS IS FUN ONLY IF YOU PUT SAFETY AS YOUR TOP PRIORITY. ! WARNING: Before you start operating your scooter: • Be sure you read this owner manual completely and understand all operating features. • Take sufficient time training with safe and proper riding technique. •... - Page 8 • Meet U.S. Department of Transportation (DOT) and state standards. In addition with labels from the Safety Helmet Council of America, the American National Standard Institute (ANSI), or the Snell Memorial Foundation to assure the integrity of the product. • Fits snugly on your head.
- Page 9 SAFE RIDING • Keep enough distance from the other vehicles around you as this gives you time to react. • Ensure that you have a driver’s license with correct classification to ride this scooter in your state. • Always observe the rules of the road. Observe the posted speed limit, and signal your turns well in advance.
- Page 10 • Always use turn signals when you are planning to turn or merge to main road and turn it off after you have made your turn. • Flash brake lights whenever you are going to slow down more quickly or where others may not expect you are going to slow down.
- Page 11 If you spill gasoline on your clothes, change and wash the affected area immediately with soap. MODIFICATION Any modifications to this scooter or removal of original equipment without approval from TNG Scooters may cause it to be unsafe for use and may trigger severe accident. Modifications may also make your scooter illegal to use and will void any and all warranty coverage.
-
Page 12: E: Specifications
E: SPECIFICATIONS Model VN 49cc Tire Size (Front) 3.50 x 10 Model Number VN492 Tire Size (Rear) 3.50 x 10 Length 64.7 inches Tire Pressure (Front) 29 psi Width 24.4 inches Tire Pressure (Rear) 33 psi Height 41 inches Idle RPM 1500 Dry Weight (no fuel) 154 lbs. -
Page 13: F: Component Descriptions & Functions
F: COMPONENT DESCRIPTIONS & FUNCTIONS 1. Battery 5. Handle Bars 9. Air box & Filter 13. Ignition Switch 2. Injector Oil Access Cover 6. Rear View Mirror 10. Kick Starter 14. Fuel Cap 3. Under seat Storage 7. Turn Signals 11. - Page 14 1. Horn Button 6. Fuel Gauge/Warning Lights 2. Turn Signal Switch 7. Front Brake Lever 3. Rear Brake 8. Throttle 4. Hi / Lo Beam Switch 9. Engine Stop Switch 5. Speedometer 10. Electric Starter Button...
- Page 15 Ignition Switch / Steering & Seat lock TABLE 1.1 Power to Electric Storage Key Position Ignition Steering Key Removable Circuits Compartment Unlocked Locked Unlocked Locked Lock Unlocked Unlocked Clockwise Unlocked (seat lock) Counter Clockwise Locked (seat lock) NOTE: Steering can only lock when the handle bar is turned left. CAUTION: Make sure key is in ‘OFF’...
- Page 16 ! WARNING Do NoT CHANGe THe KeY PoSITIoN WHIle THe SCooTeR IS IN MoTIoN. IT MAY RESULT IN LOSS OF CONTROL OR AN ACCIDENT. INSTRUMENT PANEL 1. Turn Signal Indicator 2. Hi Beam Indicator 3. Speedometer 4. Odometer 5. Gas Gauge 6.
- Page 17 TURN SIGNAL NDICATOR • Shows turn signals are activated. • See page 14 for location. lo / HI BeAM SWITCH AND HI BeAM INDICAToR • When illuminated high beam is selected. • See page 14 for Lo/Hi beam switch location. •...
- Page 18 THRoTTle CoNTRol (see page 14) • Control speed by rotating the throttle. (Right Grip) • To accelerate speed, rotate the throttle towards you. • To decelerate speed, rotate the throttle away from you. ELECTRIC STARTER (see page 14) • Starts Engine using battery power. •...
-
Page 19: Luggage Rack
STORAGE COMPARTMENT • To unlock the under seat storage compartment, see TABLE 1.1 (page 15) under ignition switch. • Once the seat is unlocked, raise the seat pad to access the storage compartment. • Press the seat pad down to lock it. ! WARNING: •... -
Page 20: G: Pre-Ride Checklist
and turn ¼ counterclockwise. The fuel tank cap is released and can be removed. • To install the fuel tank cap, insert the fuel tank cap to the tank, turn the key ¼ clockwise to the original position and removed the key. Slide back the lock cover. ! WARNING: •... - Page 21 NOTE: Always turn the engine off prior to refueling the scooter. Always use 90 octane or higher gasoline to refuel the scooter. Do not use E85 or fuel containing more than 10% ethanol. 2. CHeCK THe INJeCToR oIl level • The low oil warning light will indicated low level •...
- Page 22 • Look for partial or abnormal tread wear. The middle of the tread should have: Front Tire 1.5 mm minimum tread depth Rear Tire 2 mm minimum tread depth CAUTION: This Scooter uses tube tires on the front and rear wheels. These tires must always be replaced with tires of the same type.
-
Page 23: H: Proper Operation
CAUTION: Allow the engine to cool down before attempting to replace the spark plug (For replacement instructions see pages 30) 8. CHeCK THe TRANSMISSIoN oIl Page 31 H: PRoPeR oPeRATIoNS & TeCHNIQueS ! WARNING: • Be sure you have read this owner manual completely and understand all operating features. •... - Page 24 NOTE: • It is recommended to always “prime” the fuel system by kick-starter when starting the scooter in the following situation (Do NoT ADvANCe THe THRoTTle WHIle KICK STARTING): • Cold or wet weather . • If the fuel has run dry . •...
- Page 25 ReTRACTING THe STAND • Center Stand – Holding the left handle with your left hand and grasping the rear rack with your right hand, push the scooter forward and move the stand back with your foot until the stand retracts under the scooter.
- Page 26 ! WARNING: • Do not apply the brakes too quickly or while in a turn as this may result in loss of traction and control. • Wet conditions will affect braking. Give twice the normal braking distance in wet or slippery conditions. Take extra care while riding in these conditions.
- Page 27 Do not overload the scooter or carry a passenger during this period. • Change oil at 300 km (use Opti-2 to maintain engine warranty). CAUTION: Have your TNG Scooter dealer check the vehicle, if any engine trouble occurs during this period.
-
Page 28: I: Service Maintenance Schedule
I: SeRvICe MAINTeNANCe SCHeDule Item Initial 300 km 1000 km 4000 km or every 6 Months Fuel Line Fuel Filter Air Filter Spark Plug Oil Filter Carburetor Drive Belt REPLACE EVERY TWELVE MONTHS Transmission Oil Braking System Wheels Wheel Bearings Steering Bearings Rear Shock Absorber... - Page 29 R: Replace or Service/Adjustment Due I: Inspect and Replace as Necessary NoTe: For the best performance from your TNG scooter have a TNG dealer perform all service maintenance. Failure to follow the service maintenance schedule may void your warranty coverage.
-
Page 30: Brake Adjustment
CAUTION: This scooter uses tube tires on the front and rear wheels, always replaced with tires of the same type. BRAKe ADJuSTMeNT Fig. 1 Fig. 2 Total free play for brake lever should not exceed 30 mm. To firm up brake, turn nut clockwise See Fig. - Page 31 Replacing the spark plug, • Remove the plug cover and remove the spark plug using the spark plug wrench in the tool kit. • After setting the gap of the new plug, insert it into the cylinder & tighten firmly by hand, then by using provided wrench tighten another ½...
- Page 32 NoTe: MuST uSe oPTI-4 10W/40 oIl IN TRANSMISSIoN To MAINTAIN WARRANTY Place the scooter on its center stand on a level surface. Let the engine warm up for three minutes and then shut the engine off. Remove the oil fill plug and the oil drain plug and allow the oil to drain completely. Inspect the sealing washer on the drain plug, and if it’s OK reinstall the drain plug.
- Page 33 • Clean the screen and cartridge with compressed air. • Reassemble the air filter components and back end of the scooter. CAUTION: • If riding in an excessively dusty location, the air filter should be inspected more often than the recommended.
-
Page 34: Battery Maintenance
Your Scooter uses a calcium sealed, maintenance free, VRLA battery and you should not remove the sealing strip once the battery has been installed and prepped by a TNG dealer. NOTE: To protect your battery against failure it is important to keep your battery fully charged. This applies primarily if you are not riding your scooter on a regular basis or are traveling only short distances while you ride. - Page 35 Do not use a fuse of higher amperage than recommended; this will cause extensive damage to the electrical system and possibly a fire. NOTE: If the new fuse burns out immediately, have a TNG dealer check scooters complete electrical system.
-
Page 36: Winterizing
Proper preparation of your scooter for winter storage will make it more likely that you will be able to get out and enjoy that first spring ride. There are five basic areas that should be considered when preparing to put your TNG Scooter into storage. The five areas of focus are: Battery... - Page 37 At this time you should also use a baking soda and water solution to clean the battery compartment of the vehicle to help neutralize any electrolyte that may be present. Rinse with clean water and dry thoroughly. You may return the battery to the battery compartment, or you may store it separately. If it is put back into the battery compartment for storage it is best that you do not hook up the battery cables until you are ready to take the scooter out of storage.
- Page 38 Purchase fuel stabilizer and add it to a nearly full tank of gasoline in the concentration indicated on the label for long-term storage. opti-Mizer Fuel Stabilizer is the recommended additive. opti-Mizer is available through your local TNG Dealer.
- Page 39 With nearly all TNG Scooters, when the bike is on the center stand the front wheel is on the ground while the rear wheel is slightly off the ground. You may simply be able to lift he front wheel of the scooter off the ground and place something under the frame of the scooter and have both wheels off the ground.
- Page 40 With the spark plug still out, turn the engine over a few times. • Reinstall the spark plug. COVER TNG Scooters come standard with a nylon weather cover. Placing the cover over the scooter while it is in storage will reduce the dirt and dust, which would naturally accumulate on the scooter.
-
Page 41: Troubleshooting
K. TROUBLESHOOTING ENGINE WON’T START Check For Fuel Ignition Key Must be to the Right Check Kill Switch is in the Run Position Depress Either Brake Lever Push Start Button on the Right Handle Bar If the Engine Doesn’t Turn Over Charge or Replace the Battery ENGINE IS DIFFICULT TO START 1. - Page 42 3. Check Compression Have TNG Dealer Inspect the No Compression Scooter With Compression Check Spark Plug 4. Spark Plug No Spark Remove Plug & Prime Kick the Spark Plug Wet or Fouled Start Pedal without Fuel & Ignition. Re-install Spark Plug...
- Page 43 5. Carburetor Carburetor Defective Blocked Idle Jet Clean Jet Dirty Float Bowl Clean Bowl Low Fuel in Bowl Adjust Bowl Carburetor OK Engine Overheated Check & Replace Lubricating Oil Air Inlet System Blocked or Remove Blockage or Leak Leaky KNoCKING SouND IN CYlINDeR Causes Solutions 1.
- Page 44 LOW POWER OUTPUT FROM ENGINE Causes Solutions Clean Air Filter 1. Air Cleaner Blocked 2. Fuel Line in Carburetor Blocked Remove Residue 3. Excessive Carbon Deposit on Piston in Cylinder & Remove Carbon Build-up Exhaust System 4. Piston & Cylinder Excessively Warn Replace Piston &...
- Page 45 POOR FUEL ECONOMY Causes Solutions 1. Fuel System Leaks Repair Leak 2. Spark Plug Worn Replace Spark Plug 3. Air Cleaner Blocked Clean Air Filter 4. Idle Speed Too High Adjust Idle Speed 5. Riding at Excessive Speeds Ride at More Economical Speeds 6.
- Page 46 WARRANTY 2008 and 2009 Models CMSI, Inc., warrants to the first retail purchaser of all TNG vehicles from an Authorized CMSI Dealer and each subsequent owner that the vehicle is free from defects in materials and workmanship for the period stated in this warranty section.
- Page 47 WARRANTY RESPONSIBILITY THE MANUFACTURER CMSI Inc. To repair or replace , at its option, any part which is proven to be defective in material or factory workmanship under normal use for the applicable warranty period. • The repair or replacement of defective parts under this limited warranty must be made by an Authorized CMSI Dealer or service center.
- Page 48 • You are responsible for paying all maintenance costs, including service interval costs. • Failures which occur due to improper maintenance as determined by TNG are not covered under this warranty. • The engine warranty requires the owner to purchase and use the Interlube Opti engine lubricant at the time of purchase of the new scooter and use only that lubricant during the entire warranty period.
- Page 49 WARRANTY COVERAGE TABLE COVERAGE BEGINS The date the motorcycle is delivered to the first retail purchaser WARRANTY 2008/2009 MODEL YEAR CMSI shall repair 2008/2009 Warranty Information Engine Parts Labor replace, at its option, any 50cc and below* 24 months 24 months part (including parts of the 51cc and above* 24 months...
- Page 50 WARRANTY DISCLAIMERS, LIMITATIONS & EXCLUSIONS Disclaimer of Consequential Damage & Limitation of Implied Warranties CMSI INC. DISCLAIMS ANY RESPONSIBILITY FOR: • Loss of time • Loss of use of vehicle • Transportation expenses (rental and /or towing) • Any other incidental or consequential damage •...
- Page 51 YOUR LEGAL RIGHTS These warranties give you specific legal rights. You may also have other rights which vary from state to state. It is the responsibility of the owner to be aware of state laws which pertain to this issue in your particular state. THESE WARRANTIES DO NOT COVER Failures which are not due to a defect in material or factory workmanship.
- Page 52 Replacement of expendable maintenance item including, but not limited to: Spark Plug Gaskets Coolant Belts Filters Hoses Lubricants Fuses Tires Light Bulbs (See Owner’s Manual) Battery Hand Grips ...
- Page 53 Replacement parts refer to Distributors Limited Warranties – Replacement Parts DISTRIBUTORS LIMITED WARRANTY – NEW MOTORCYCLE CMSI warrants to the first retail purchaser and subsequent purchasers of this vehicle that the motorcycle is free from defects in materials and workmanship for the period stated in “Warranty Time Table.”...
-
Page 54: Warranty Coverage
COVERAGE BEGINS • Original tire on motorcycle - date of delivery • Tire purchased as replacement - date of purchase WARRANTY COVERAGE • Tires distributed and sold by CMSI which are either • Original equipment on CMSI vehicles, or • Specified by CMSI for the model the tire is installed on and purchased from an Authorized Dealer for replacement use. - Page 55 YOUR OBLIGATION To practice proper tire care and prudent motorcycle operation. You must maintain tire inflation pressure and load in accordance with information in the manual, the tire information label on the motorcycle, and restrictions molded into the tire sidewalls. The replacement of a defective tire under this warranty must be made by an Authorized CMSI Inc Dealer.
- Page 56 • Tires rendered unserviceable by road hazard damage, such as impact breaks, punctures, cuts, or snags. • Tires rendered unserviceable by running while flat, spinning, improper inflation, overloading, misalignment, improper mounting during replacement of after repair, or installation on unsuitable rims. •...
- Page 57 WARRANTY COVERAGE • CMSI Inc will repair or replace, at its option, any genuine CMSI part that is defective in material or workmanship under normal use. • Proof of date of purchase is required. Parts installed by an Authorized CMSI Dealer: Parts &...
- Page 58 REPORTING SAFETY DEFECTS If you believe that your vehicle has a defect which could cause an accident or could cause injury or death, you should immediately inform the National Highway Traffic Safety Administration (NHTSA) in addition to notifying CMSI Inc. If NHTSA receives similar complaints, it may open an investigation, and if it finds that a safety defect exists in a group of vehicles, it may order a recall and remedy campaign.
- Page 59 YOUR WARRANTY RIGHTS AND OBLIGATIONS The California Air Resources Board, the U.S. Environmental Protection Agency, and CMSI Inc. (Hereinafter CMSI) are pleased to explain the emission control system warranty on your 2008/2009 motorcycle. New on-road motorcycles must be designed, built and equipped to meet U.S. EPA Federal and California anti-smog standards.
- Page 60 NOTICE! Use of any CMSI vehicle in any type of competitive event completely and absolutely voids this and all other warranties offered by CMSI. OWNER’S WARRANTY RESPONSIBILITIES As the vehicle owner, you are responsible for the performance of the required maintenance listed in your owner’s manual.
- Page 61 If you have any questions regarding your warranty rights and responsibilities, you should contact CMSI Inc., PO Box 969, Preston, WA 98050, Phone 425-222-7738. CMSI warrants that each new 2008 and later TNG Brand vehicle: Is designed, built and equipped so as to conform at the time of initial retail purchase with all applicable regulations of the United States Environmental Protection Agency, and the California Air Resources Board;...
- Page 62 Limitations. This Emission Control System Warranty shall not cover any of the following: Repair or replacement as a result of: Accident, Misuse, Repairs improperly performed or replacements improperly installed, Use of replacement parts or accessories not conforming to CMSI specifications which adversely affect performance and/or, Use in competitive racing or related events.
- Page 63 the remedying of defects in material or workmanship by an authorized CMSI dealer at its place of business during customary business hours. This warranty does not cover inconvenience or loss of use of the vehicle or transportation of the vehicle to or from the CMSI dealer. CMSI SHALL NOT BE LIABLE FOR ANY OTHER EXPENSES, LOSS OR DAMAGE, WHETHER DIRECT, INCIDENTAL, CONSEQUENTIAL OR EXEMPLARY ARISING IN CONNECTION WITH THE SALE OR USE OF OR INABILITY TO USE THE VEHICLE FOR ANY PURPOSE.
- Page 64 No dealer is authorized to modify this CMSI Limited Emission Control System Warranty. LEGAL RIGHTS. THIS WARRANTY GIVES YOU SPECIFIC LEGAL RIGHTS, AND YOU MAY ALSO HAVE OTHER RIGHTS WHICH VARY FROM STATE TO STATE. THIS WARRANTY IS IN ADDITION TO THE CMSI LIMITED MOTORCYCLE WARRANTY.
- Page 65 Inc. Motorsports CMSI Inc., Motorsports 8146 304th Ave. SE, P .O. B ox 969 Preston, WA 98050, USA Phone: 425-222-7738 Fax: 425-222-7739...
Need help?
Do you have a question about the Venice 49cc (VN492) and is the answer not in the manual?
Questions and answers