BMW Z4 Installation Instructions Manual
Alpine cd changer for z4 (e85) with / without navigation (sa609)
Hide thumbs
Also See for Z4:
- Owner's manual (352 pages) ,
- Product catalog (27 pages) ,
- Technical data manual (9 pages)
Advertisement
Quick Links
SUBJECT
Alpine CD Changer Installation
MODEL
Z4 (E85) with / without Navigation (SA609)
These instructions were developed especially for BMW vehicles and are not to be compared to any
existing instructions for vehicles other than BMW. No methods other than those specified in this
document are to be used to install Alpine CD Changer in Z4.
PARTS INFORMATION
Reference Number
1
2
Installation Kit Contents:
Part Description
Installation Instructions
CDC bracket
CD Changer Screw (M4x6)
CDC Bushing
Bushing Screw (M4x10)
Mounting Bolt (M5x14)
Clip Nut (M5)
Oddments Box Small*
LH Bracket*
RH Bracket*
Mounting Bolt (M6x10)*
Navi Bracket*
Storage Insert Navi*
* - Not used for vehicles with Navigation
Average Installation Time:
Required Tools
#2 Phillips Driver
T20 Torx Driver
T30 Torx Driver
8mm Nut Driver
Navigation Module Removal Tool (BMW P/N 90 88 6 655 400) (Navi Only)
Please initial and route to the following for information before filing
X
Service Manager
X
Service Advisor
X
Service Advisor
X
Shop Foreman
FIX IT RIGHT THE FIRST TIME, ON TIME, EVERY TIME
2002 BMW of North America, LLC
Installation Instructions
Group Description
Description
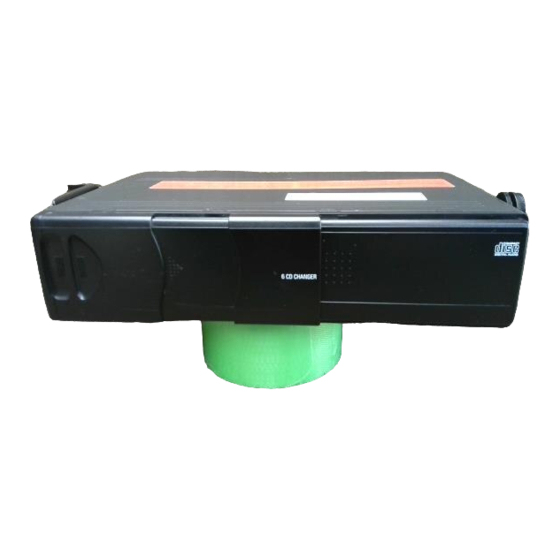
Alpine CD Changer
Installation Kit
Qty
1
1
2
2
2
6
6
1
1
1
4
1
1
2.0 Hours (Without Navigation)
1.5 Hours (With Navigation)
X
Warranty
Parts Mgr.
Body Shop
PDI Dept.
Bulletin Number
Qty
1
1
Part Number
01 29 0 152 828
65 12 8 370 925
07 11 9 901 061
65 12 8 363 548
07 11 9 903 568
07 11 9 902 007
61 13 1 372 033
51 46 7 043 817
65 10 6 910 719
65 10 6 910 720
07 11 9 913 981
65 90 8 370 933
51 46 7 043 819
X
Service Technicians - Initial Below
Page 1 of 12
July 31, 2002
Product
Development
BMW Part Number
82 11 0 028 760
65 12 0 152 827
by:
Advertisement

Related Manuals for BMW Z4


Summary of Contents for BMW Z4
-
Page 1: Installation Instructions
These instructions were developed especially for BMW vehicles and are not to be compared to any existing instructions for vehicles other than BMW. No methods other than those specified in this document are to be used to install Alpine CD Changer in Z4. PARTS INFORMATION... - Page 2 PROCEDURE: CD Changer Preparation 1. Remove the three shipping transport screws (1) from CD changer. 2. Cover the holes where the shipping screws were installed with the 3 adhesive seals (1) supplied with the unit. 3. Adjust the CD changer mechanism pins for proper settings.
- Page 3 CD changer chassis to firmly secure the pins (1) in place. For Z4 without Navigation continue below. For Z4 with Navigation continue on Page 9. Vehicle Preparation (Z4 Without Navigation) 5. Lower Soft Top. 6. Disengage Front Panel (1) from mounting...
- Page 4 9. Unscrew 2 Phillips-head plastic rivets (1) and remove clips from vehicle. 10. Remove 2 T20 Torx screws (2). 11. Unplug electrical connector attached to microswitch (3). Note: To complete the following steps it will first be necessary to disengage and lift the soft top (1) from its locked position by at least 3 inches.
- Page 5 18. Remove Left Speaker Grille (1) by carefully pushing outwards (from the rear) or with a non-marring pry tool. Remove 5 T20 Torx screws from left panel (2). 19. Remove Right Speaker Grille (1) by carefully pushing outwards (from the rear) or with a non-marring pry tool.
- Page 6 22. Carefully pull rearwards on rear panel cover (1) and remove from vehicle. Note: Begin to pull rear panel cover from its clip locations nearest to the center of the vehicle. It may be helpful to raise the convertible top to maneuver the cover from its location.
- Page 7 26. Remove electrical connector (1) from lamp module. 27. Carefully unthread manual override cable from plastic loop (2). 28. Remove 2 upper T20 mounting screws (3). Remove 2 rubber caps (4), then remove 2 lower T20 mounting screws (5). 29. Carefully pull back on Right panel and maneuver the ABS storage unit out of the vehicle.
- Page 8 35. Maneuver CD Changer into place, then insert bushings (1) into slots in left bracket assembly. 36. Insert and tighten 2 M5x14 bolts (2) provided in parts kit through Right Hand bracket into clip nuts. 37. Test CD Changer for functionality. 38.
- Page 9 Vehicle Preparation (Z4 With Navigation) 5. Lower convertible top. 6. Disengage Front Panel (1) from mounting points (indicated by black arrows) by carefully pulling panel towards front of vehicle while in the lowered position. 7. Slide seats forward. Remove left and right lower panel covers (1) and mounting screws (2).
- Page 10 Note: To complete the following steps it will first be necessary to engage the manual release (1) and lift the convertible top (2) from its locked position by at least 3 inches. 12. Pull lower half of Upper Panel Cover (3) until it disengages from the lower mounting clips.
- Page 11 22. Using appropriate tools (1) (BMW P/N 90 88 6 655 400 or equivalent) remove Navigation Module (2) from mounting bracket. Disconnect cables from Navigation Module and remove module from vehicle. 23. Remove plastic bracket assembly (3) from vehicle. Caution: Be careful not to damage manual override cable! 24.
- Page 12 29. Insert 2 M5 Clip Nuts (1) as indicated. 30. Locate CD Changer Power and Audio leads (2). Connect CD Changer power and Audio leads to CD Changer. 31. Carefully pull back Left rear panel. Maneuver CD Changer into place, then insert bushings (1) into slots in left bracket assembly.
Need help?
Do you have a question about the Z4 and is the answer not in the manual?
Questions and answers